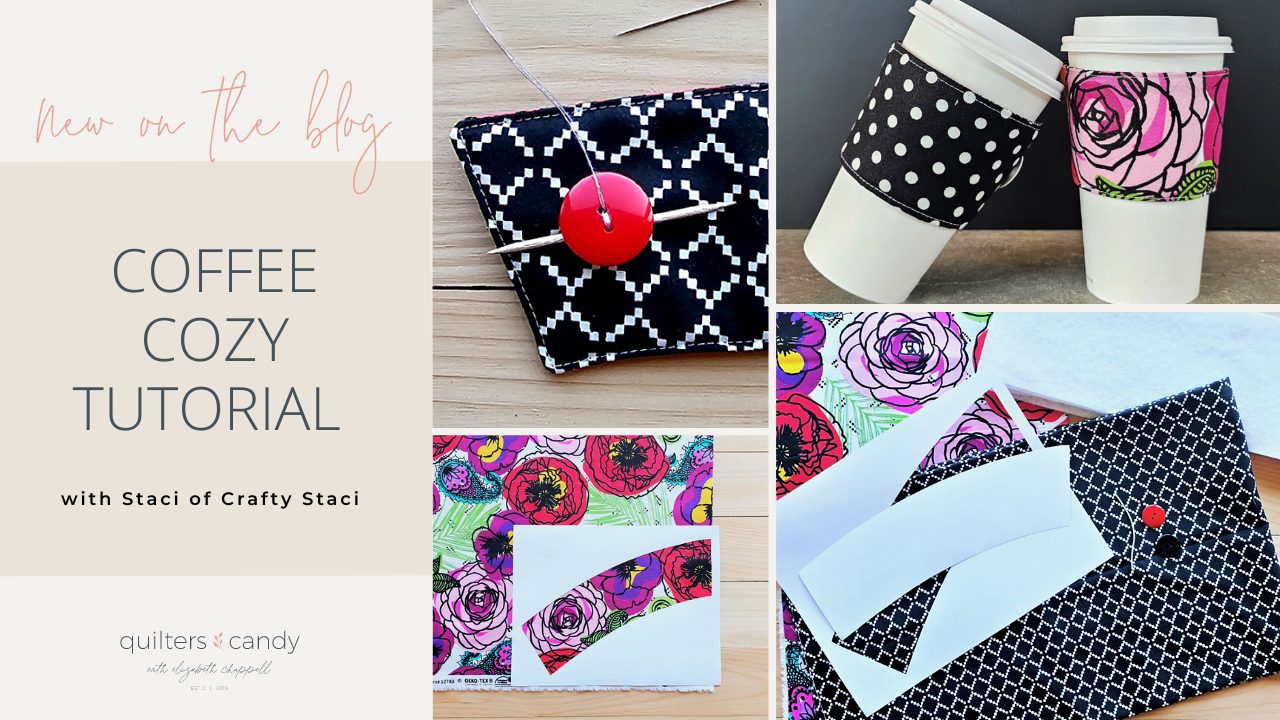
Coffee Cozy Tutorial
May 30, 2023

Coffee Cozy

My name is Staci and I am excited to share my coffee cozy tutorial on today’s blog. I’ve been sharing patterns and tutorials at Crafty Staci since 2010. I live in beautiful Montana with my husband, and my kids and sweet grandbabies are just a few minutes away!

I like to focus on projects that can be made by someone who’s just learning how to use their sewing machine or a more experienced sewist looking for a quick finish. This coffee cozy was one of the first things I shared back when I was just starting out on my blog, and it’s been one of the most popular ever since.

Coffee Cozy Template

This coffee cozy tutorial is now a pattern I have available in my shop, but I’m happy to share it with Quilter’s Candy readers today at no charge! Click here for access to the entire pattern, complete with step-by-step photos.

To make one of these you’ll need:

  •         (2) cotton prints measuring at least 12 ½” x 4 ½”. Fat quarters or scraps work well.
  •         (2)  buttons, 1/2” to 1” in diameter
  •         Elastic cord, 3” in length
  •         Thin cotton, wool, or bamboo batting
  •         (2) toothpicks

Prepare the Loop

1. Sew or tie the two cut ends of the 3length of elastic cord together to create a loop. 

Assembling the Cozy

2. Lay out the batting, cut side up. Add the Fabric A piece on top, right side up. 

Place the elastic loop on the right. The ends should be even with the edge of the fabric and centered top to bottom. 

Assembly

3. Lay the Fabric B piece over the elastic and Fabric A piece, right side down. Pin the layers together, including the elastic loop. 

Stitch around the cozy 1/4” from the edge. Backstitch over the elastic and at beginning and end of the seam. Leave 2 ½open at the bottom for turning. 

Stitching the Cozy

4. Clip the corners. Turn the cozy right side out through the opening. Press, turning the edges of the opening inside ¼. 

5. Topstitch 1/8” from the edge all the way around the cozy. 

Adding the Buttons

6. Lay the cozy out flat with the Fabric B side facing up. Fold both ends in until they meet in the middle. The elastic loop should be on top. 

7. Place the tip of a fabric marking pen inside the elastic loop. Make a small dot on the cozy at the farthest point the elastic will reach without stretching. 

Adding Buttons


8. Place (1) button on the mark. Slide a toothpick underneath to create space between the button and cozy. Using a needle and thread, stitch through the button and cozy twice. 

Sewing Button


9. Place (1) button on the opposite side from the first. Slide a second toothpick underneath the button. Using the needle and thread, sew through both buttons simultaneously several times. Knot the thread underneath one of the buttons and clip. 


10. Wrap the cozy around a cup and loop the elastic around the button to hold. 


I hope you have as much fun making these as I do. If you share your version, please tag me @craftystaci and use the hashtag #craftycoffeecozy. I’d love to see what you come up with!

Download the FREE coffee cozy tutorial here:

MORE BLOG POSTS LIKE THIS ONE


or SEARCH THESE

Popular categories

Craft to Career
Digital Downloads
Patterns
Podcast
Quilt Alongs
Quilt Questions
Tutorials
back to the top

Copyright 2024 Quilters Candy  |  Terms & Conditions