Scrappy Mug Rug Tutorial

March 29, 2022

Scrappy Mug Tutorial 2

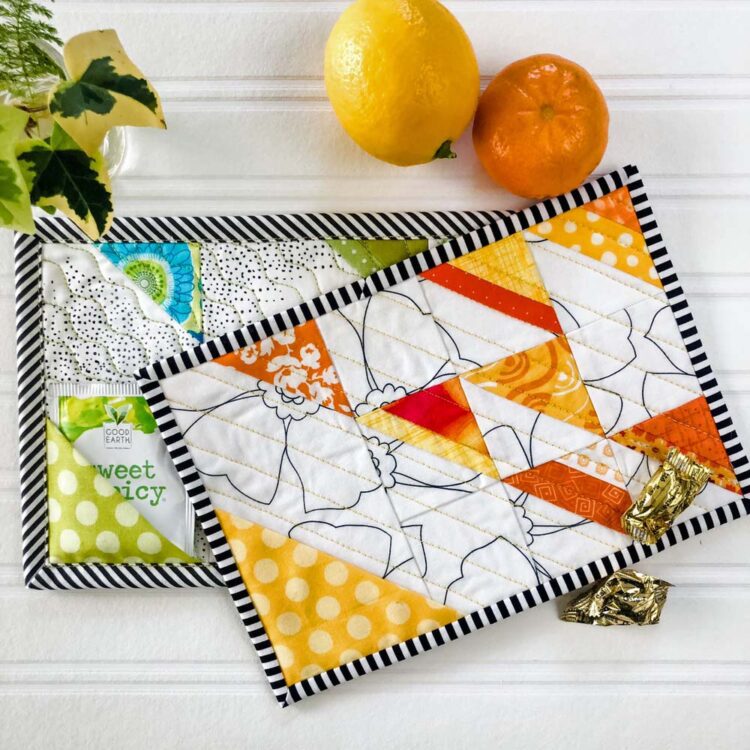
Hey everyone!  I’m Julie Cefalu, and I’m so happy to be a guest blogger on Quilter’s Candy.  Today, I have a fun Scrappy Mug Rug Tutorial to share with you!  Mug rugs are one of my favorite things to make and gift to others.  They have all the components of a quilt, but in miniature form!

Photo 1

I’ve been designing quilt patterns for several years, but with the help of Elizabeth’s Pattern Writing Class, the quality is better, and they have a professional look to them. I’ve been quilting for 24 years, and I work and teach at my local quilt shop.  I also have a blog, The Crafty Quilter, where I share tips, tutorials, and inspiration for all things crafty, but mostly quilt-y!  

I live in the beautiful Bay Area of California, and I’m married with four children and three grandchildren (I still can’t believe I’m a grandma). When I’m not spending time with family, you’ll find me in my sewing room (or on the computer writing about my adventures in the sewing room).

Scrappy Mug Rug Tutorial

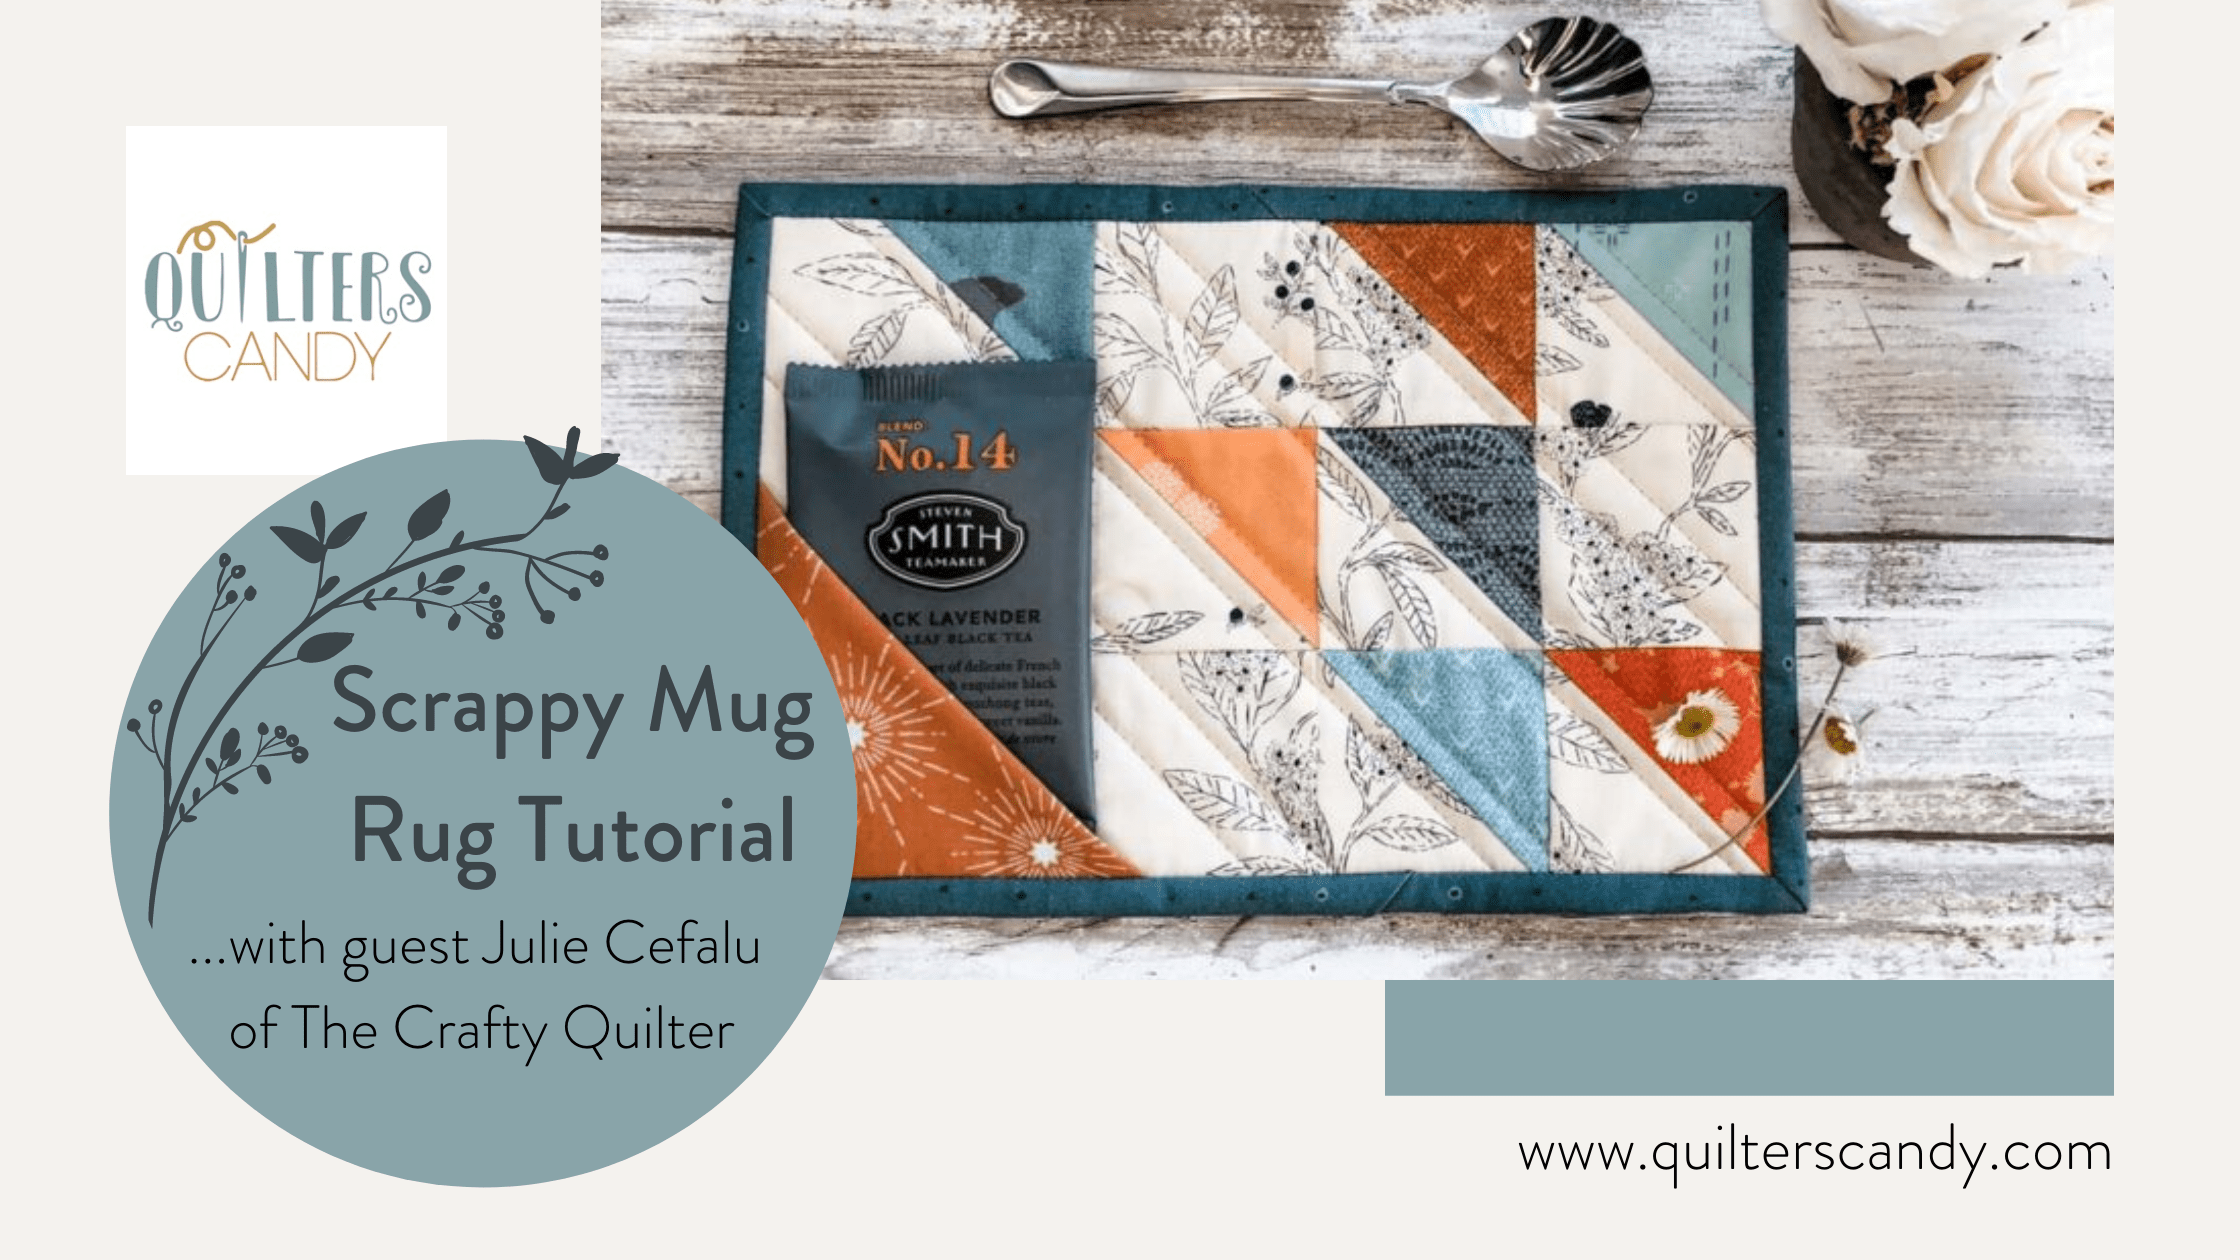
My Scrappy Mug Rug is made up of mostly half-square triangles (HST’s) and it’s so easy to put together.  It measures 6 1/2″ x 9 1/2″, and it has a corner pocket where you can put a tea bag, a napkin, a small candy, or a gift card if it’s a present for someone. This is a great opportunity to enjoy the process of making something small and pretty in a short amount of time.  

If you’re interested in a free mug rug poem that you can download and print to include with gifts, click here!

photo 2

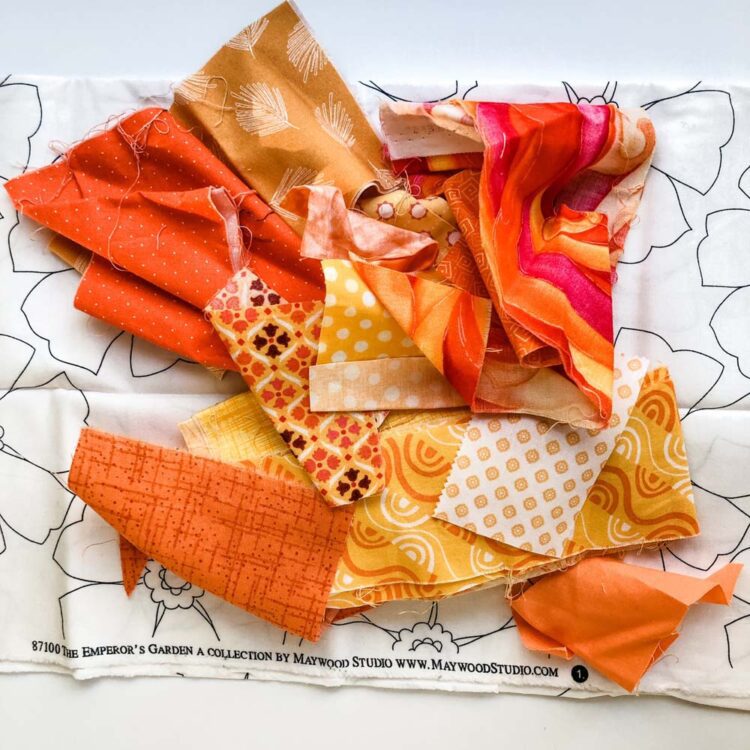
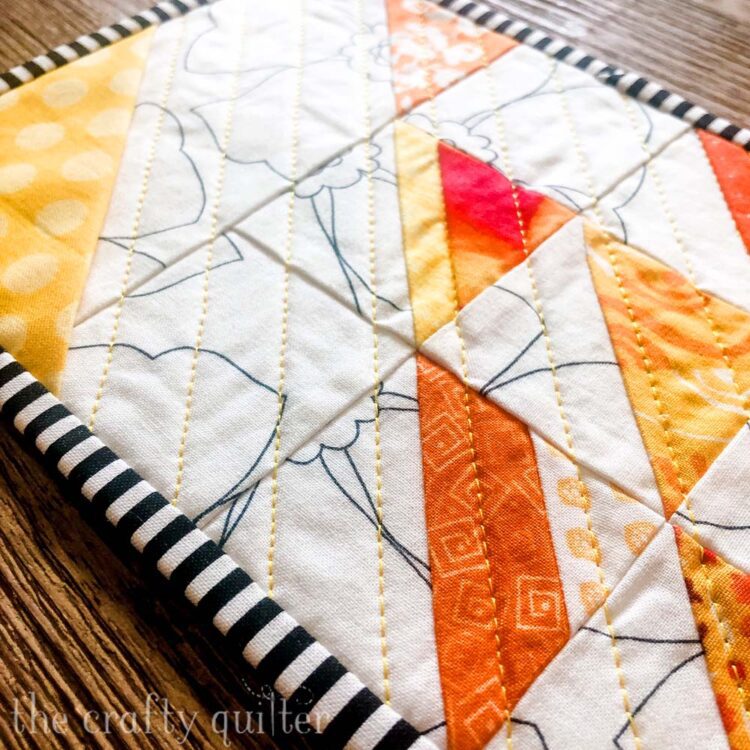
As the name suggests, this is a perfect project for using up small scraps.  You can pick any combination of colors for this; for my example, I’ve chosen happy colors in a range of yellow to orange.  I’m using a white and black fabric for all my background pieces, but you could use a variety of different scraps for this as well.

Scrappy Mug Rug Tutorial

Here’s what you need to cut for one Scrappy Mug Rug:

Background pieces

  • (1) 3 1/2” x 6 1/2” rectangle
  • (6) 3” x 3” squares
  • (3) 2 1/2” x 2 1/2” squares

Color Pieces

  • (6) 3” x 3” squares
  • (1) 4” x 4” square
  • (1) 2 1/2” x 2 1/2” square
  • (3) 2” x 2” squares
  • (2) 1 1/2” x 1 1/2” squares

Backing & Batting

  • (1) 9” x 12” rectangle of each

Binding

  • (1) 1 1/4” x 38” strip (for single-fold binding – optional)

Instructions

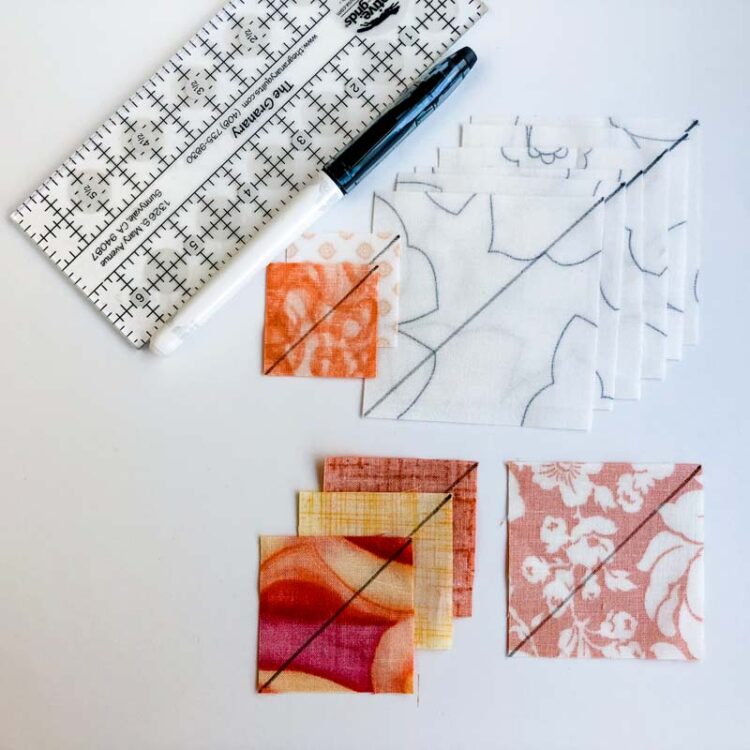
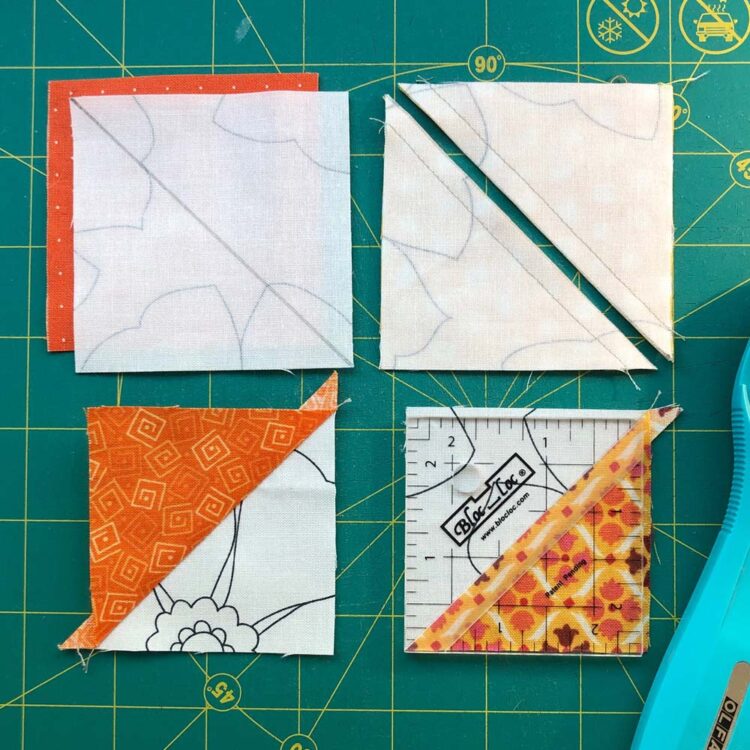
STEP 1 – Draw a diagonal line on the wrong side of each 3” background square and each of the following color squares: 2 1/2”, 2” and 1 1/2”.

photo 4

STEP 2 – Make half-square triangle units (HST’s) as follows.  With right sides together, pair up a marked 3” background square with a 3” color square.  Working with each pair, stitch 1/4” on each side of the diagonal line.  Cut apart on the diagonal line and press towards the darker fabric.  Trim each HST to 2 1/2” square.  You will only need ONE HST from each pair.  Save the others for your next mug rug!

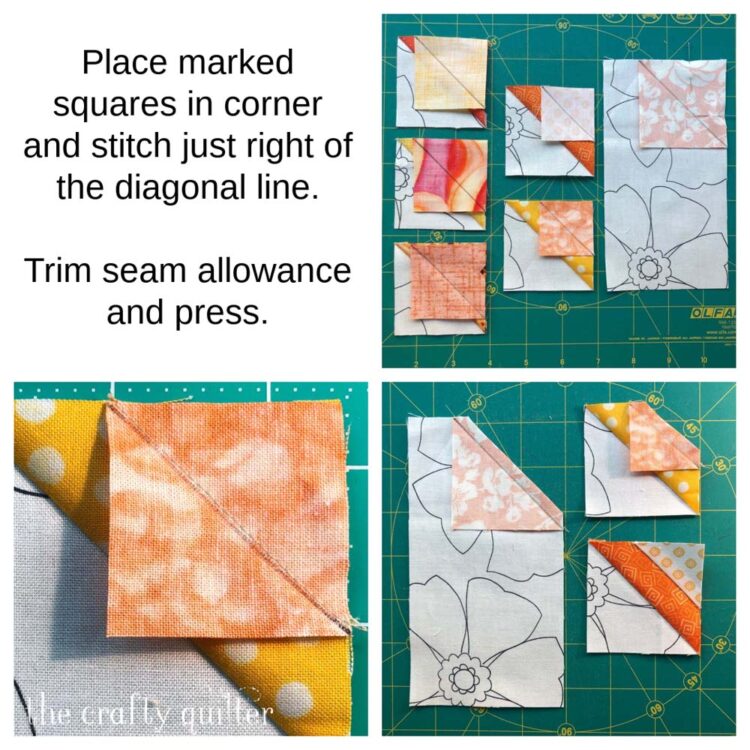
STEP 3 – With RST, place each 2″ and 1 1/2″ marked color square onto the corner of a trimmed HST unit. (There will be one HST unit left for later). Stitch just to the right of the diagonal line. Trim the seam allowance and press to the corner. Repeat with the 2 1/2″ marked color square and the 3 1/2″ x 6 1/2″ background rectangle.

photo 6

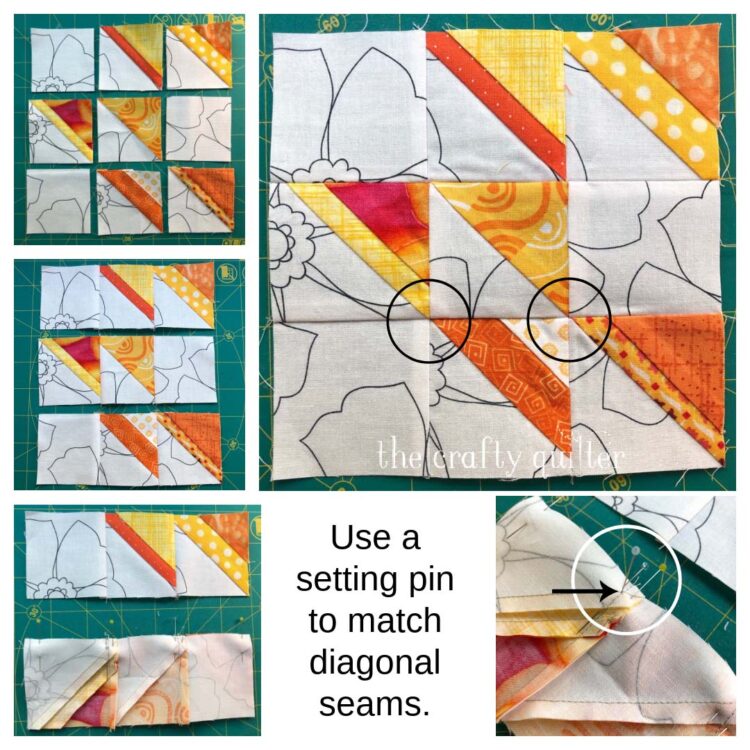
STEP 4 – Make a 9-patch unit as follows. Place the HST units and 2 1/2″ background squares into 3 rows by 3 columns as shown below. Stitch rows together and press, alternating pressing direction of rows. Stitch rows together, matching seams. The 9-patch should measure 6 1/2″ square. TIP: Use a setting pin to match diagonal seams between rows (marked by circles below). The setting pin should go straight down through the “X” of the top seam and into the “X” of the bottom seam. Pin on each side of the setting pin and then remove it before stitching the seam.

photo 7

STEP 5 – Stitch the 3 1/2″ x 6 1/2″ rectangle to the 9-patch unit. Press towards the rectangle.

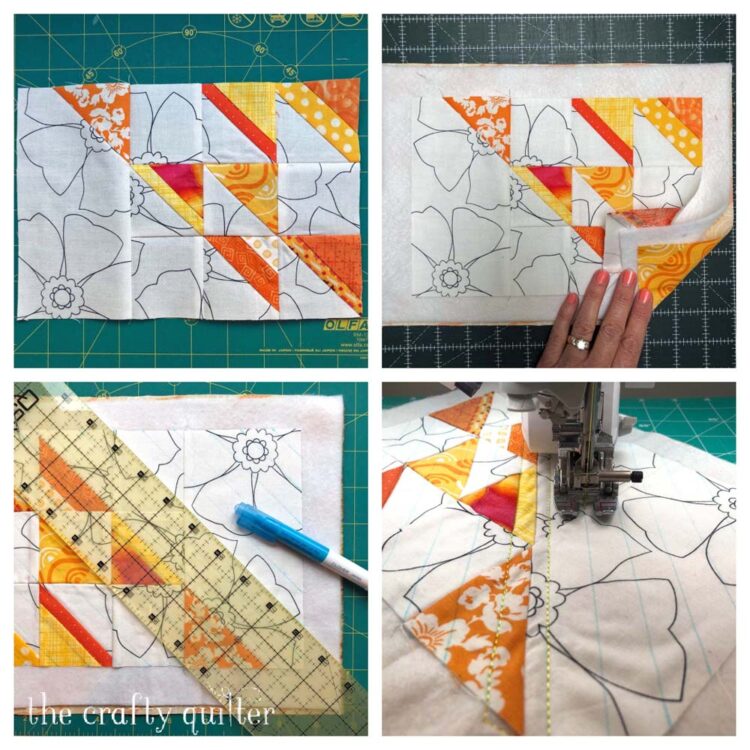
STEP 6 – Layer the top, batting and backing and baste together. Use any kind of batting scrap that you have. I often use Pellon Thermolam Plus (TP970) because it doesn’t shrink and it absorbs heat well. I also like to use a little bit of basting spray instead of safety pins to hold the layers together.

For the quilting, I marked diagonal lines approximately 5/8″ apart (it just worked out mathematically that way). I always use a walking foot for straight line quilting. Of course, you can quilt this any way you want!

photo 8

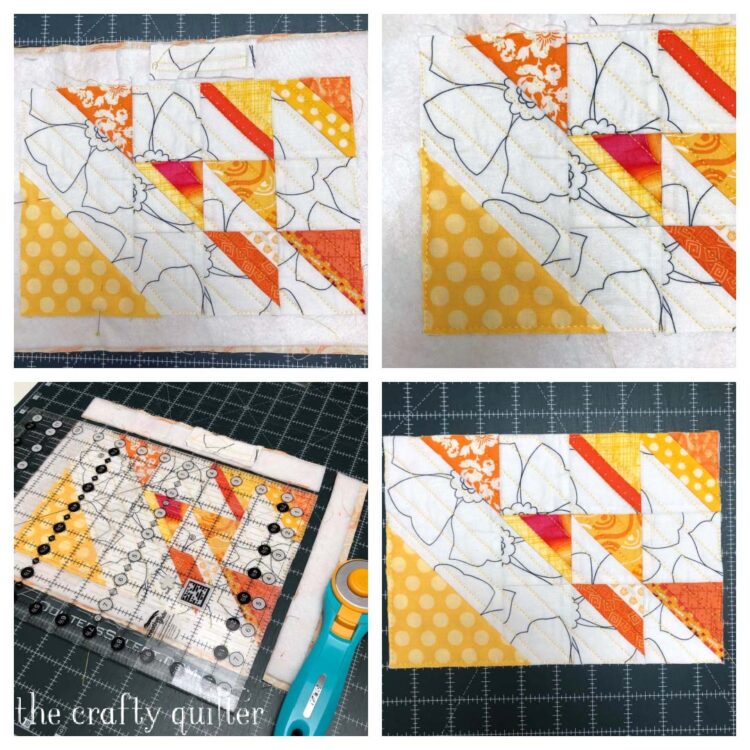
STEP 7 – Add the corner pocket and trim. Fold the 4″ color square in half, diagonally, wrong sides together. Place along the raw edges of the quilted bottom-left corner. Baste in place. Trim the mug rug even with the quilted edges. It should measure approximately 6 1/2″ x 9 1/2″.

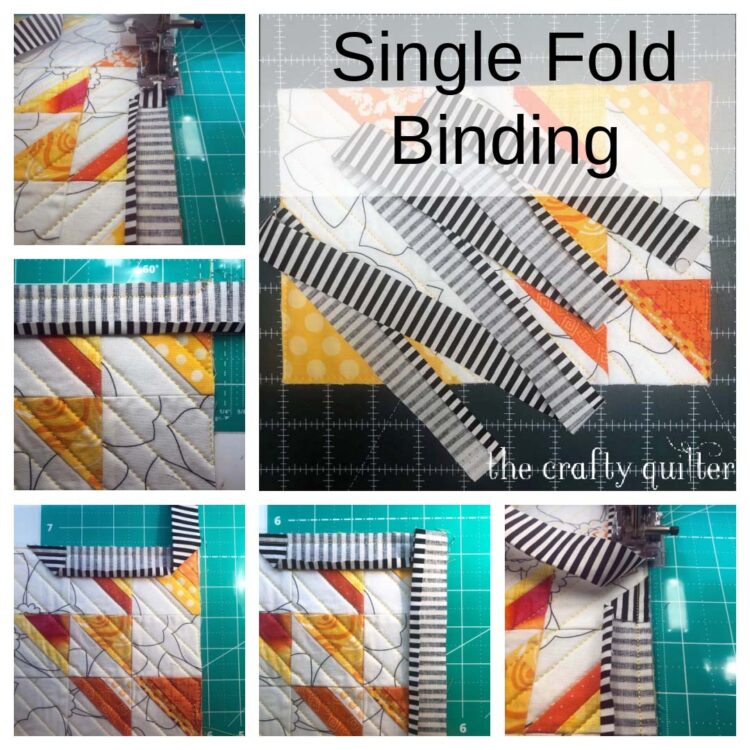
STEP 8 – Add the binding. Because mug rugs are petite little things, I like to use single-fold binding. It reduces the bulk in the corners and it’s flatter around the edges. If you prefer, you can use whatever binding method you’re most comfortable with. Here are the steps for single-fold binding.

  • Using the 1 1/4″ wide binding strip, fold under 1/4″ along one long edge and press.
  • Fold one short end at a diagonal, forming a triangle, and press. This will create a pocket to join the binding ends.
  • Starting on a long side, place the raw edge of the binding along the front of the mug rug, RST.
  • Stitch with 1/4″ seam. (Check to make sure the binding will wrap around and cover the stiches on the back.
  • Stop 1/4″ before the corner, pivot and stitch out to the corner.
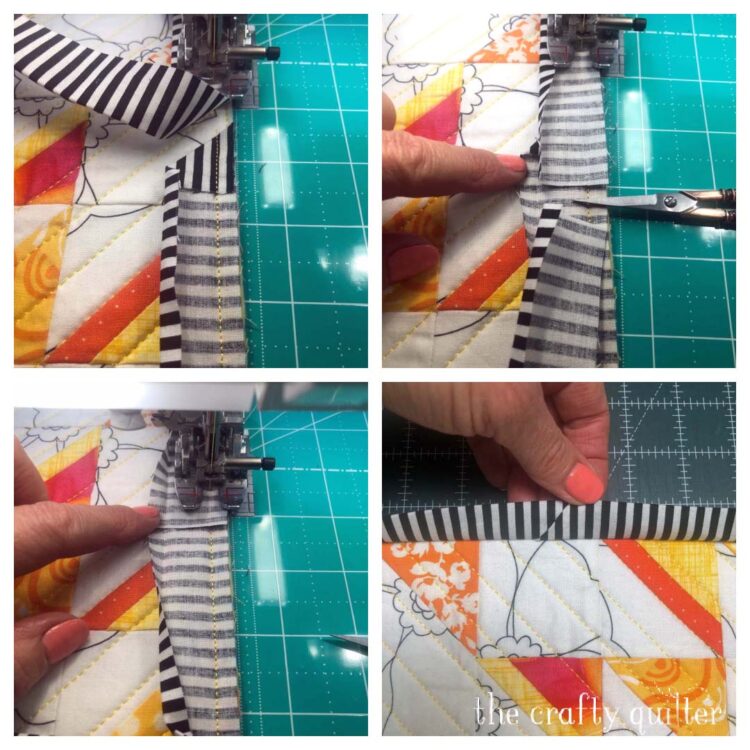
  • Fold the binding up at a 90-degree angle and then back down along the next edge so that the top folded edge of the binding is even with the top edge of the mug rug.
  • Continue sewing until you get to the next corner and repeat.
  • When you return to the starting point, trim the binding end 1/2″ past the folded triangle.
  • Continue stitching to the end.
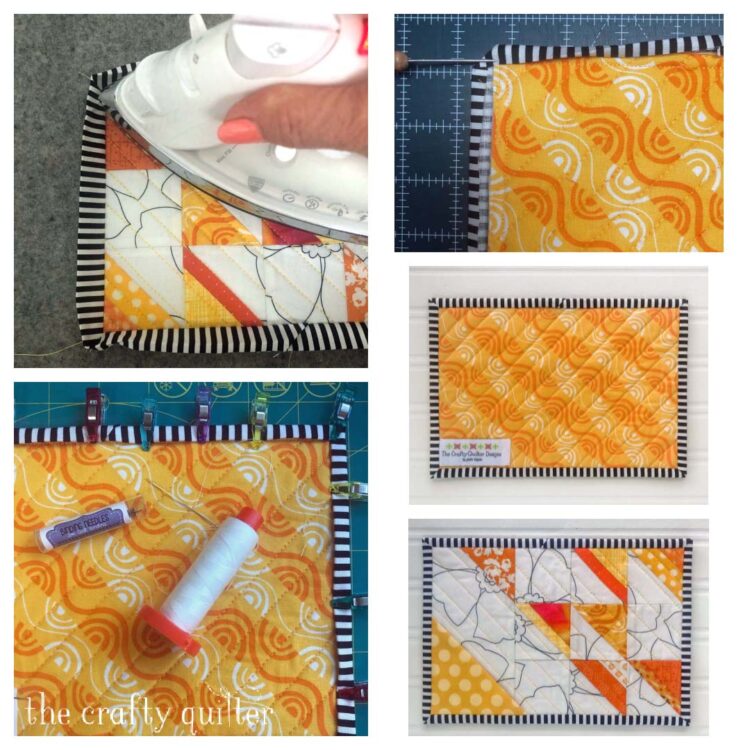
  • Wrap the binding to the back of the mug rug and hand stitch in place. I like to press the binding from the front first, and I love the Mini Clover Wonder Clips to hold everything in place.
photo 11
Photo 12

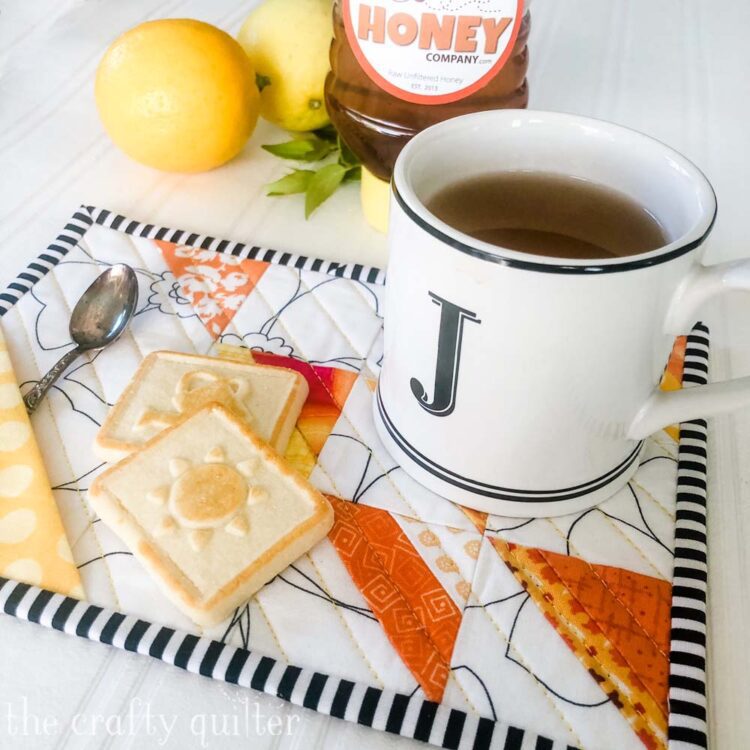
If you’ve never made a mug rug before, I think you’ll be hooked! I use them daily for my afternoon snack and tea; they keep things clean and surfaces safe from the heat of my cup. Mug rugs are very customizable, so they make the best gifts! You can also make one for every season, holiday, and room. Plus, you can use them for more than just a cup of coffee or tea. You can set a pretty vase on them or arrange your favorite perfumes on top.

photo 13

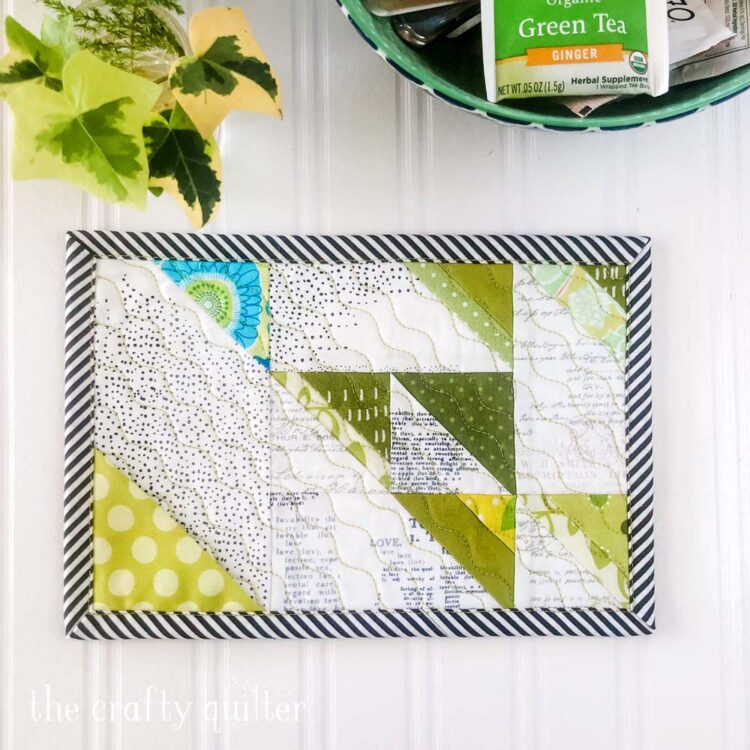
If you happen to be in Elizabeth’s Quilters Candy Membership, you might have six extra HST’s from the March Sampler blocks that would be perfect for this Scrappy Mug Rug. I used mine and I think I might like this one the most! You’ll notice that I used the HST’s “as is” – no extra corner squares, which really sped up the process. It took me a total of 1 1/2 hours to make (excluding hand-stitching the binding).

photo 14

If you make a Scrappy Mug Rug, please tag me @thecraftyquilter and use the hashtag #scrappymugrug so we all can see. If you want more inspiration, I have lots of free tutorials on my blog, The Crafty Quilter.

Don’t forget to download your free Mug Rug Poem here!

Thanks for having me as a guest, Elizabeth!  It has been a pleasure creating this tutorial for your readers.

Julie

MORE BLOG POSTS LIKE THIS ONE

Did you enjoy this tutorial? Be sure to check out these free tutorials: 

or SEARCH THESE

Popular categories

Craft to Career
Digital Downloads
Patterns
Podcast
Quilt Alongs
Quilt Questions
Tutorials
back to the top

Copyright 2023 Quilters Candy  |  Terms & Conditions