
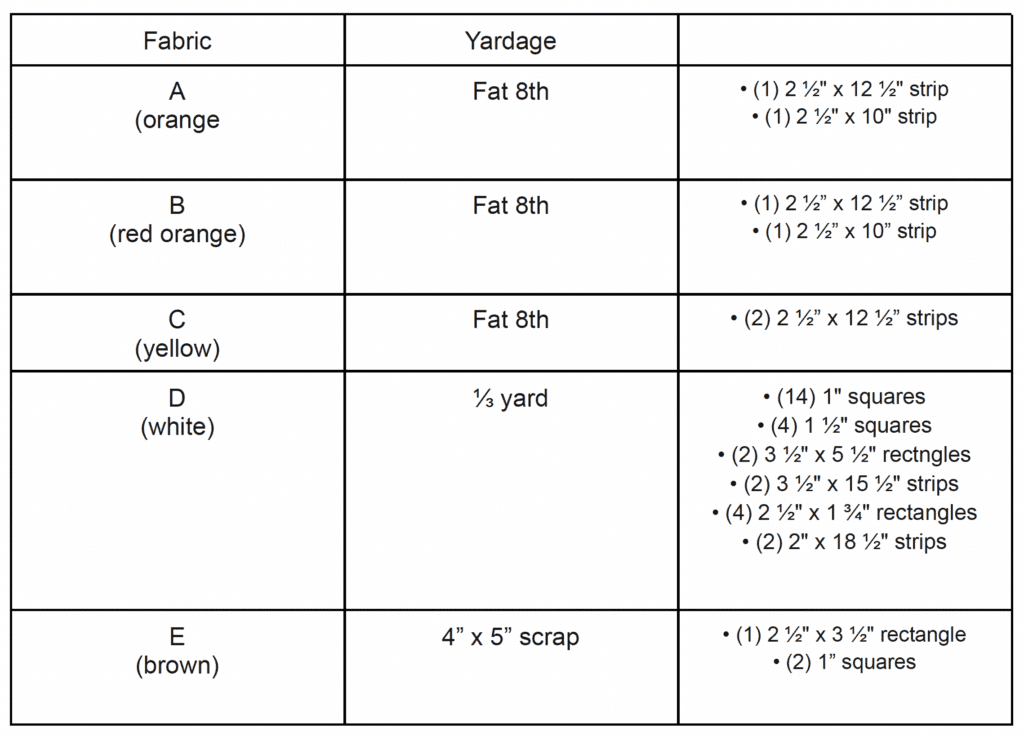
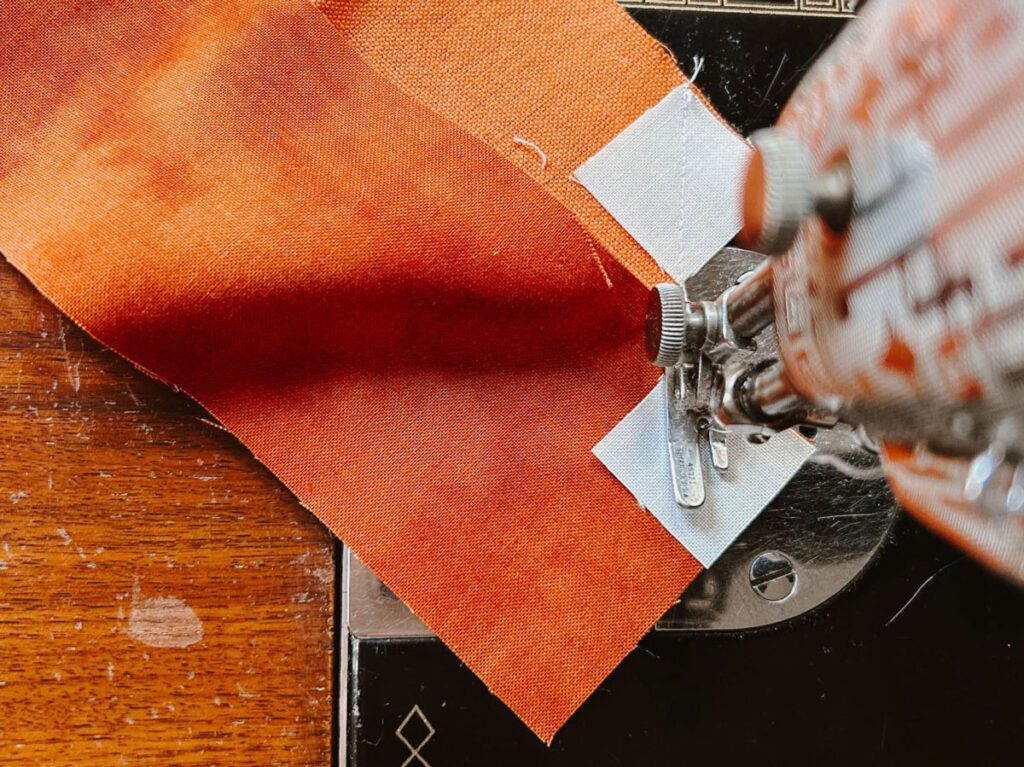
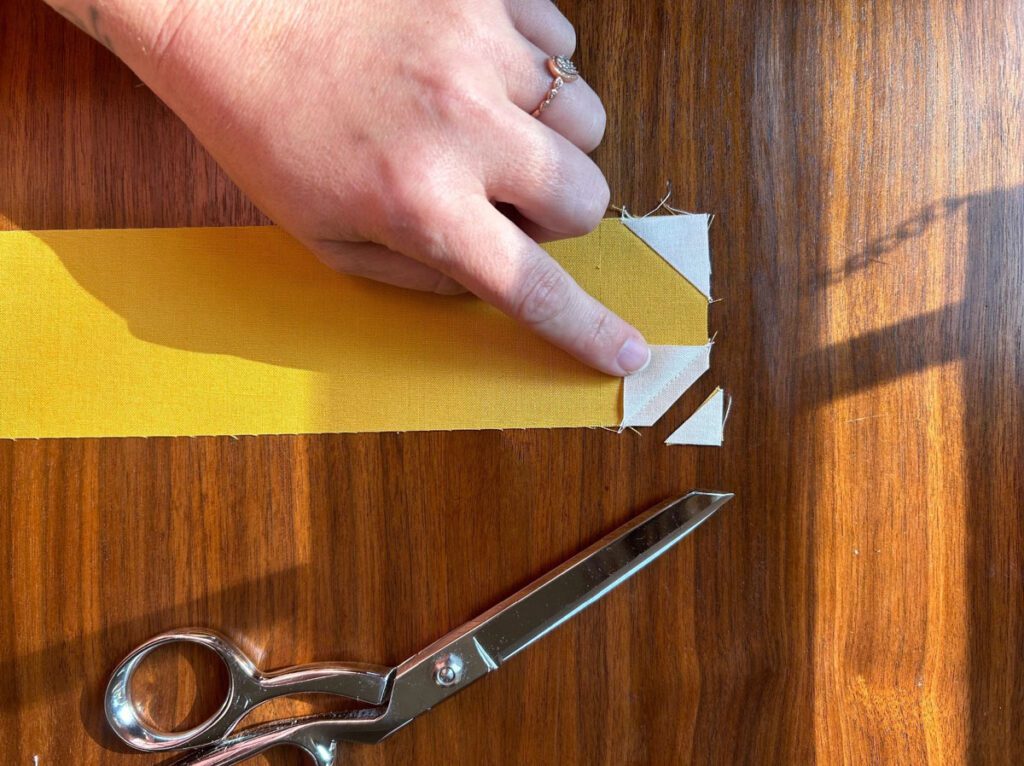
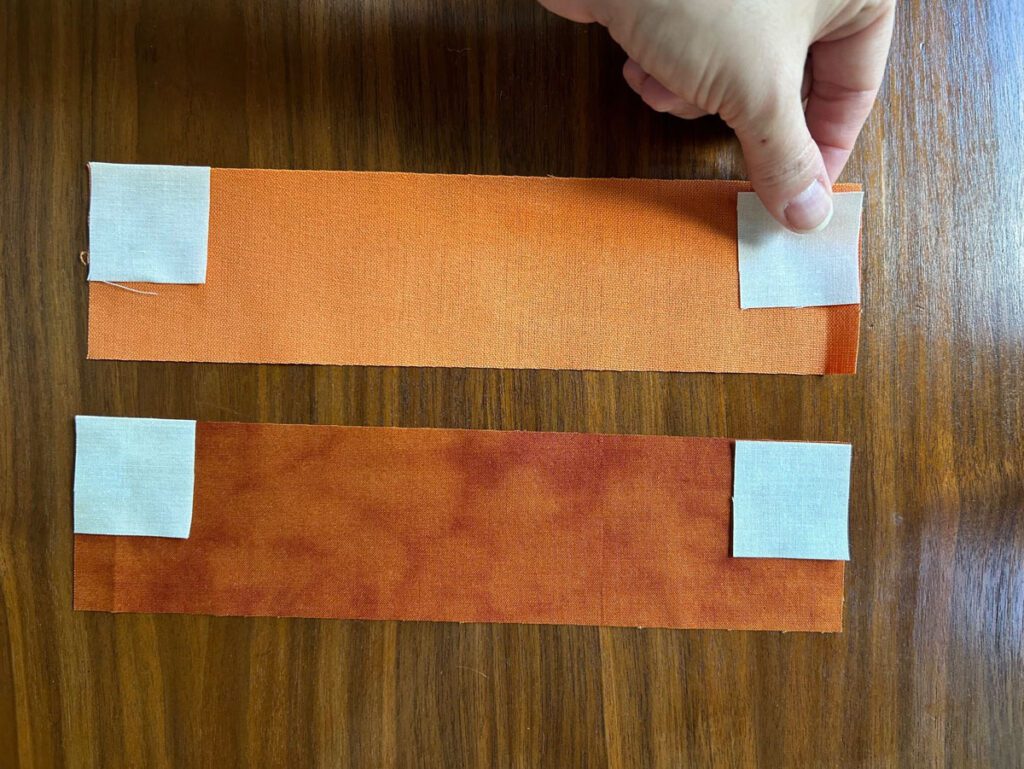
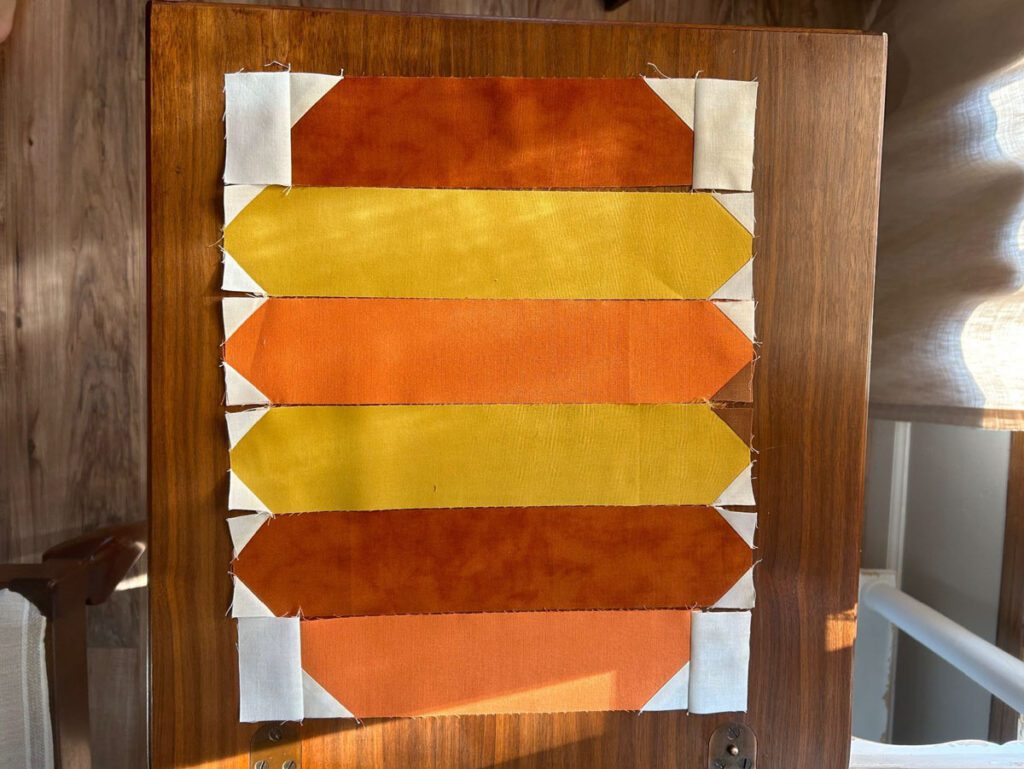
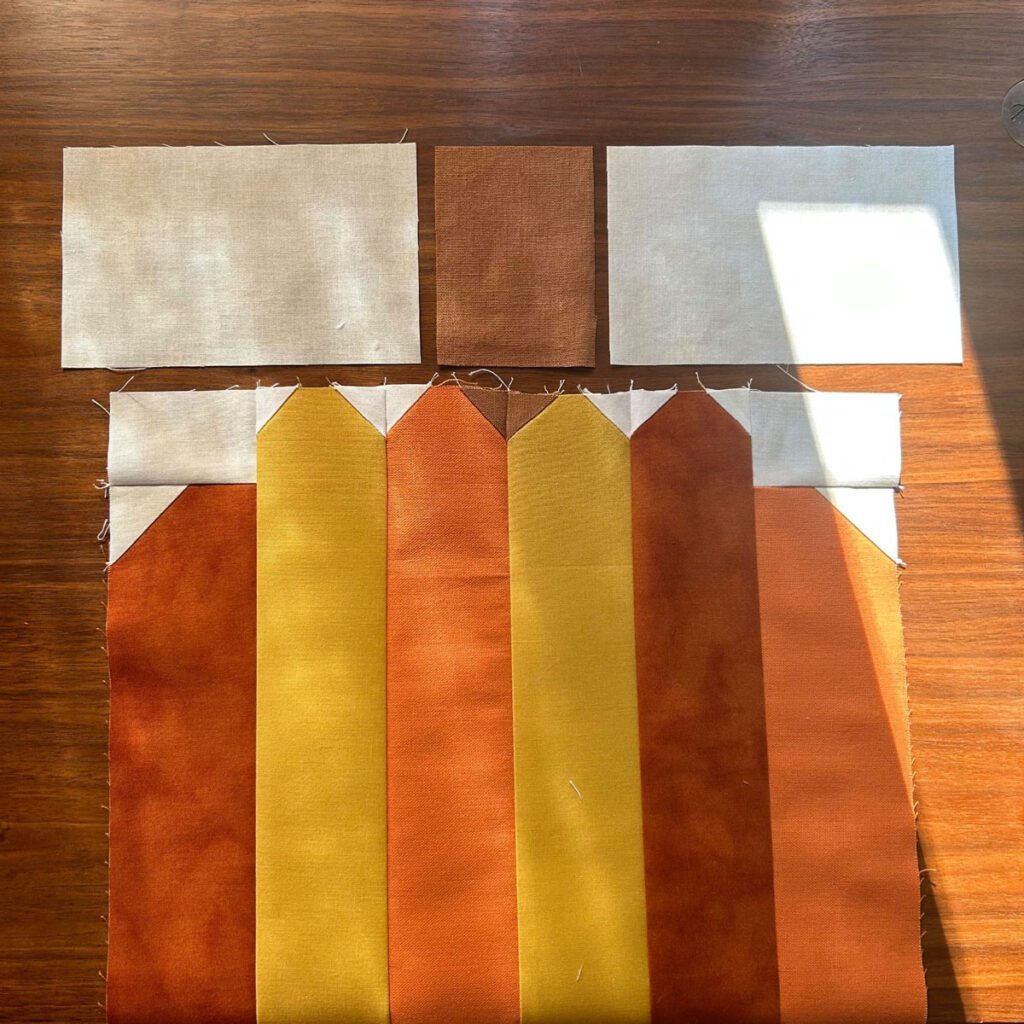
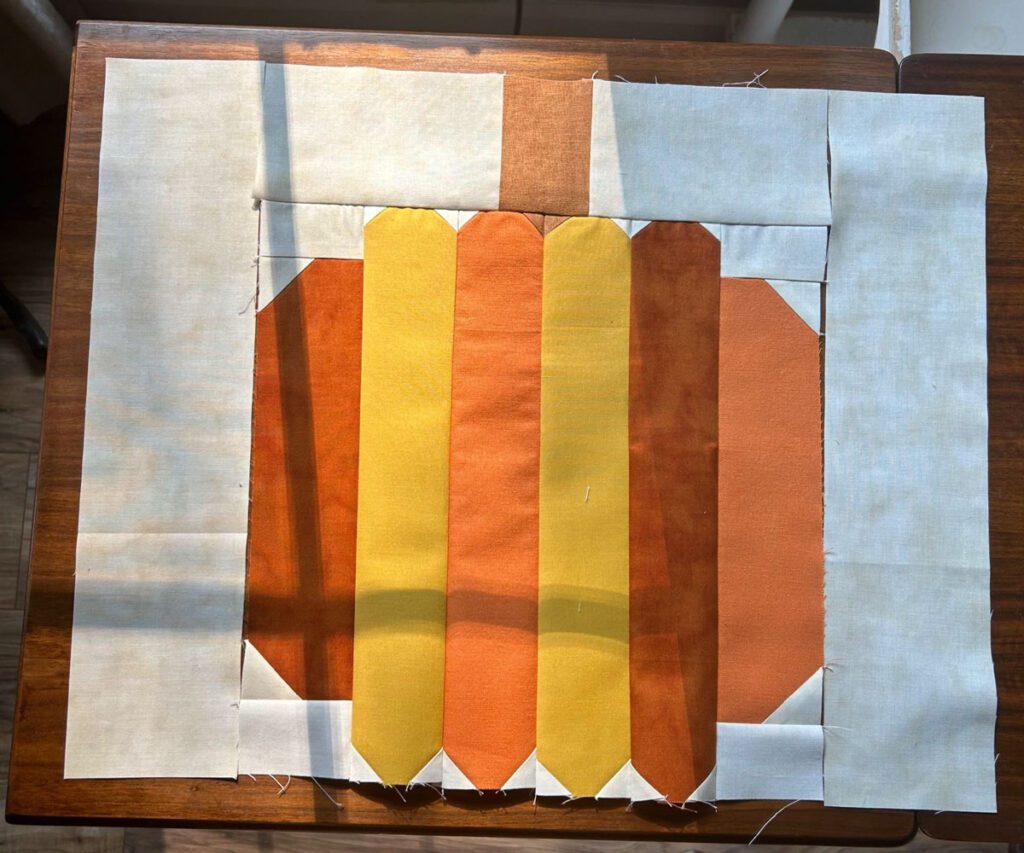
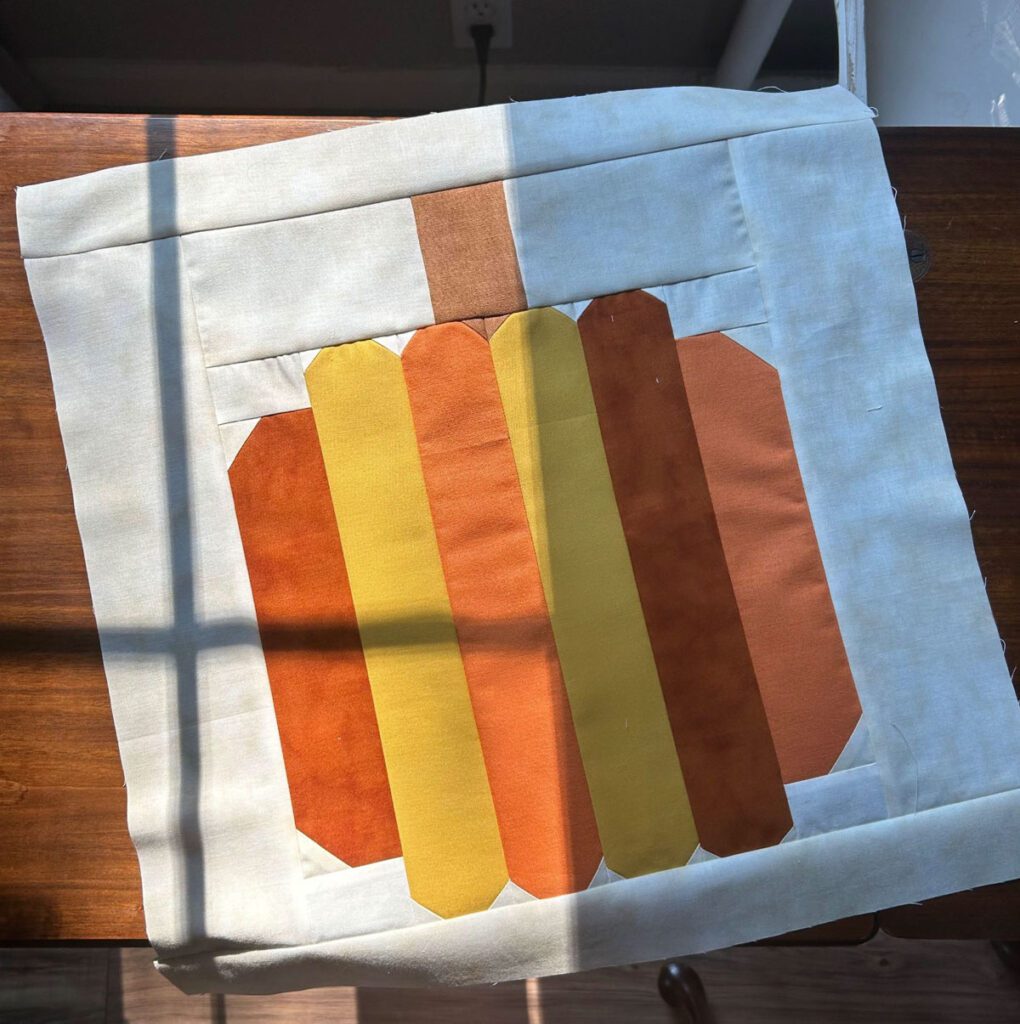
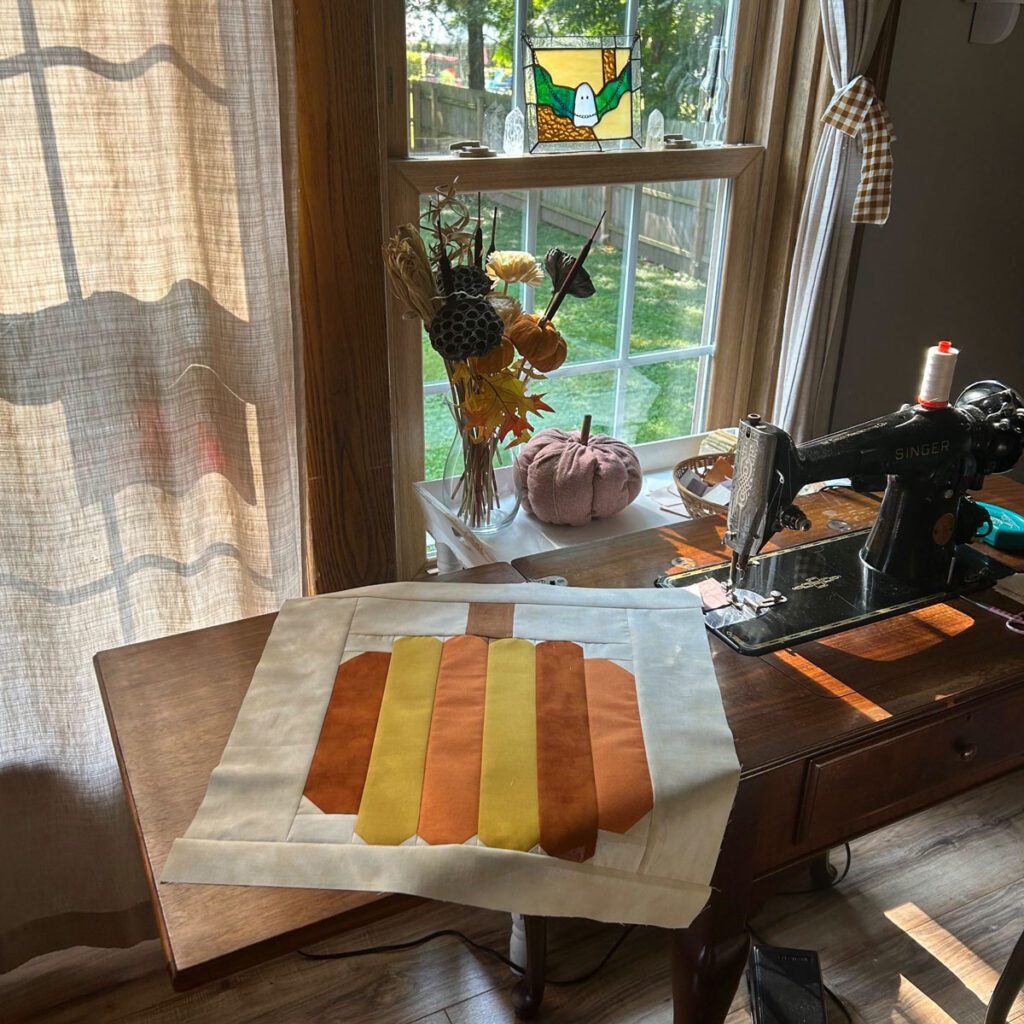
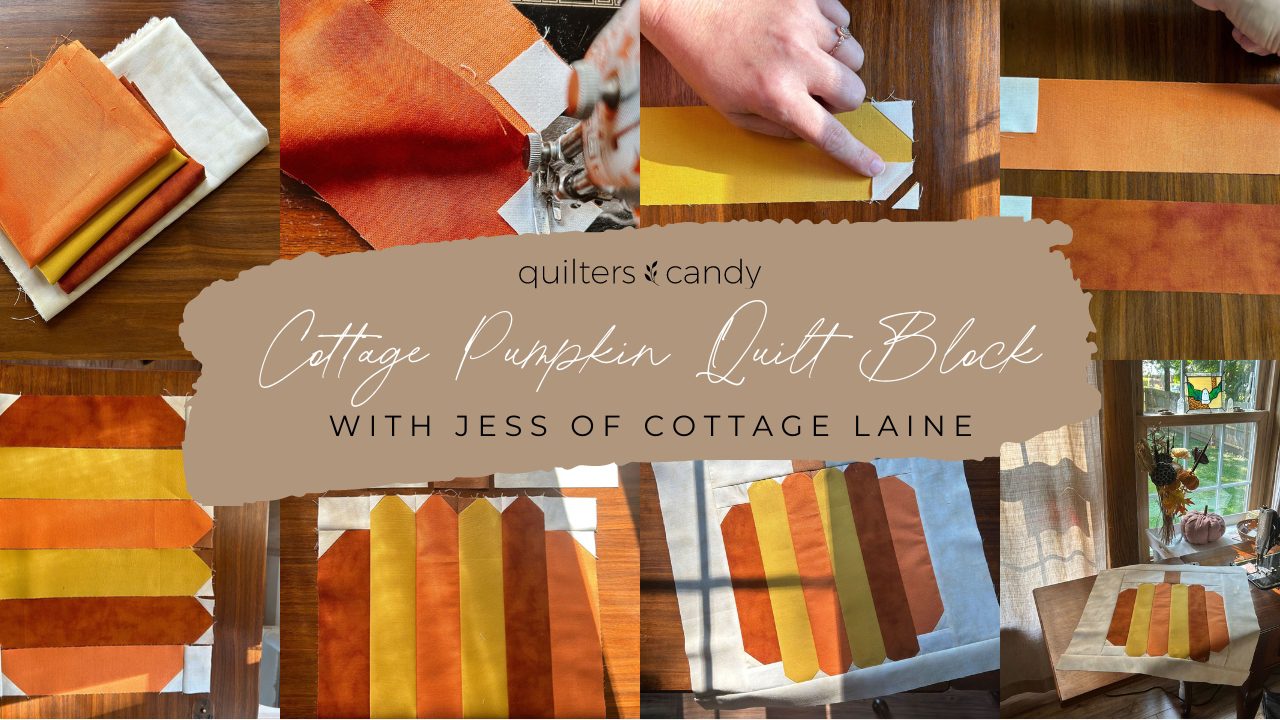
Cottage Pumpkin Quilt Block

SEE THE MOST
RECENT BLOG entries
Cottage Pumpkin Quilt Block
Cottage Pumpkin Quilt Block
Cottage Pumpkin Quilt Block
Cottage Pumpkin Quilt Block
Cottage Pumpkin Quilt Block
Cottage Pumpkin Quilt Block

the latest
May 2, 2024
Secret To Success: with Joe Hudson Joe Hudson is the owner of Art of Accomplishment. He has been a venture capitalist, coaches CEOS, and successful business owners and teams. He joins us on the Craft To Career podcast to discuss some hidden secrets of success. After working with top earners in the business world, he […]
tune in
tune into the
Craft to Career
Podcast
Each week get insights on how to turn your craft into a successful career. With both guest speakers and tips from myself, you get valuable, free education on the Craft to Career podcast!
or SEARCH THESE
Popular categories
Craft to Career
Digital Downloads
Patterns
Podcast
Quilt Alongs
Quilt Questions
Tutorials


