• Home
  • Membership
    • Login
    • Learn More
  • Courses
    • Login
    • Quilt Pattern Writing Course
    • Craft To Career
    • FREE Mini Course – Pattern Writing
    • FREE Mini Course – Using Canva
  • Shop
    • My Book
    • Quilt Patterns
    • Templates for Quilt Patterns
    • Weekly Planner
    • Wholesale
    • Pattern Corrections
  • Blog
  • Podcast

Quilters Candy

Blog banner
Patterns, Tutorials
/
July 21, 2022

My First Sashiko Project
When Elizabeth offered to let me use her Baby Lock Sashiko I was so excited! I’ve heard her talk about it and I’ve seen the projects she and others have made using their Sashiko machine and I was excited for the opportunity to give it a try. 

Sashiko machine

(Photo from Babylock.com)

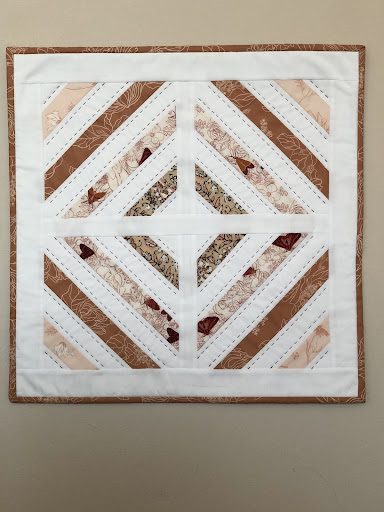
I decided to make a wall hanging that I could quilt using the Sashiko. I pieced the Modern Prism wall hanging (pattern by Cotton & Joy for Quilters Candy Membership) using the Baby Lock Crescendo.  See more about that here:  Piecing on the Baby Lock Crescendo

I love my finished wall hanging, but there are a few things to keep in mind to achieve an amazing finished quilted project.

THreading the Sashiko

The Sashiko is unlike any other machine I’ve used.  There is no top thread – only a bobbin!  The sewing machine uses the bobbin thread to create the unique Sashiko style top stitch.  Because there isn’t a top spool of thread, threading the Sashiko can be a little tricky at first.  But if you follow the instructions carefully, it works great!

Quilting with the Shashiko - Getting Started

Once the machine is properly threaded, quilting is actually pretty easy.  Some things to note before you start sewing:

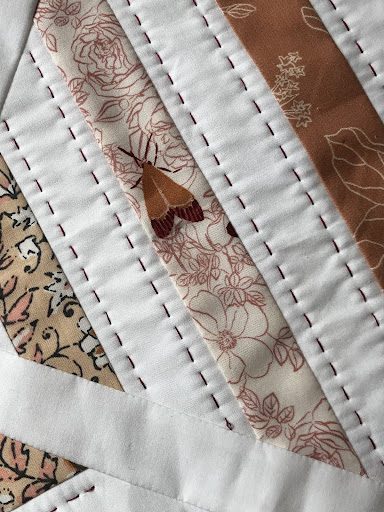
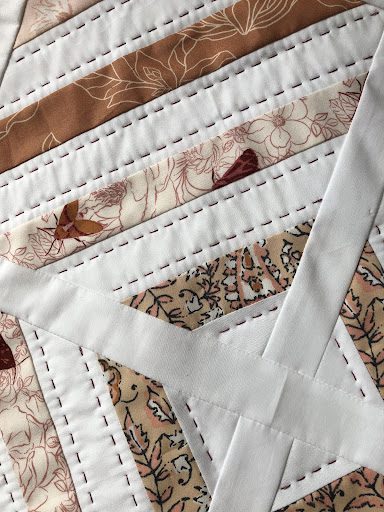
  1. Set the desired stitch length and gap between stitches.  Play around on a scrap of fabric to determine your favorite combination.  I set them both at “5” to achieve a hand-quilted look.

(Photo from Babylock.com)

2. The markings on the presser foot make it super easy to see exactly where the needle is coming down to start quilting.  This is a great feature since I wasn’t starting and finishing at the edge of my quilt. 

3. Go slow! Take your time and go slowly – you will end up with a much better quilted project. 

4. Leave a fairly long thread tail to start.  I’d recommend 2-3 inches at least.  Make sure the tail is pulled back behind the needle so it doesn’t create a nest of tangled threads on the back of your project. 

up close of stitches

Quilting with the Sashiko - Finishing Up

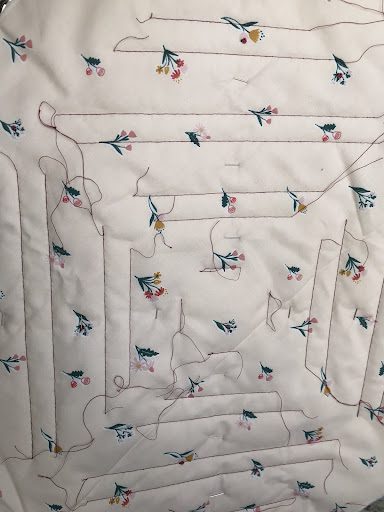
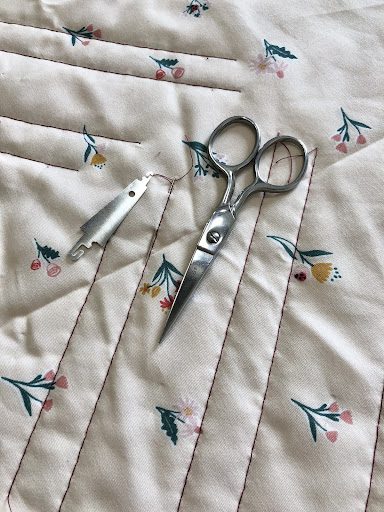
Once your project is quilted, you need to figure out what to do with all the thread tails on the back. The tails from each starting and ending point need to be buried and trimmed.  This would be similar to burying threads if quilting on a domestic machine. (This step is not necessary if you start and end quilting at the edge of your quilt top.)

thread tails

(So many thread tails to bury!!!)

The Sashiko manual had a few suggestions on how to take care of the threads.  I decided to use a needle to bury them in the back of the quilt.  This is why longer thread tails are important! If you trim them too short, it is more difficult to bury them (as I figured out!).

I’ll admit this process was super tedious. It took me about 45 minutes to bury all the tails for this small wall hanging.  (It took me about 40 minutes to complete all the quilting – so burying the threads doubled the time spent on this project!)

Finished!!

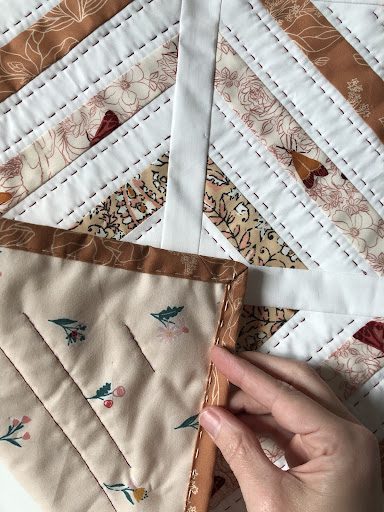
I love how my finished Mystic Path wall hanging turned out.  Using the Babylock Sashiko for the quilting gave it a beautiful finish.  I’d definitely use it again for smaller projects!

If you want to see more of what I’m working on, you can find me on Instagram @jamiesquiltstudio 

MORE POSTS LIKE THIS


Did you enjoy this free tutorial? Find more posts like this here:

  • 3 Ways to Finish a Quilt by Hand 
  • Baby Lock Sashiko 
  • How to Use Bias Binding 
0 Comments
Share

You May Also Like

August 9, 2022

How to Make the Crazy Curves Block

October 18, 2021

Front Porch QAL Week 3

October 1, 2019

Cool Creations with Art Gallery Fabrics

Leave a Reply Cancel reply

This site uses Akismet to reduce spam. Learn how your comment data is processed.

Previous Post
Making and Adding Binding on the Baby Lock Crescendo
Next Post
A Quilty Career with Emily Dennis
Hi there, I’m

Hi there, I’m

elizabeth

I am a Minnesota born girl living in Texas with my husband and 3 kids. If I could tell my 13 year old self I was a quilter, I would have laughed in disbelief.  However, a few years ago I discovered how cool quilting really is!  I want to share how cool quilting is with others.  Join me in my online modern Quilters Candy Membership, or check out my quilt patterns.  I even offer a course once a year teaching you how to write and sell your own quilt patterns. I am excited to be quilty friends!

Join the Membership

Shop Quilt Patterns

Check out the Courses

Quilting Tutorial Videos

Categories

  • Craft to Career
  • Digital Downloads
  • Patterns
  • Podcast
  • Quilt Alongs
  • Quilt Questions
  • Tutorials
  • Uncategorized

Recent Posts

  • blog banner

    How to Make the Crazy Curves Block

    August 9, 2022
  • Blog banner

    How to Make Chemistry Fabric Pins

    August 2, 2022
  • How To Make A Charm Pack Tote

    July 26, 2022

Latest Video

Latest Video Latest Video

Subscribe to My Channel

Follow Quilters Candy on Instagram

Learn how to grow your email list faster, what my Learn how to grow your email list faster, what my best growth opt-ins have been, AND try an idea I share that is bound to grow your list! Listen to this week’s @crafttocareer podcast by clicking the link in my bio.
.
.
.
.
.
#quilterscandy #crafttocareerpodcast #emaillistbuilding #emaillistgrowth
I’m going to @artgalleryfabrics this October wit I’m going to @artgalleryfabrics this October with some of my alumni! We’re can’t wait to tell you more about it! Here’s who will be joining me:
@thewannabegrandma 
@becca.plymale.creative 
@jenlevin 
@cloverandviolet 
@juliawachs.designs 
@kileysquiltroom 
@marygoroundquilts 
@ritualquiltcompany 
@sewhookedontreasures 
@thaicharmllc 
@theretroquilter 
@seams_sew_me
.
.
.
.
#quilterscandy #quiltersretreat
What are you doing today? I am getting brand new c What are you doing today? I am getting brand new course content ready for the Quilt Pattern Writing course! A brand new workbook, a surprise bonus package for students, and more! I can’t wait for doors to open September 6th. Click the link in my bio to join the waitlist!
.
.
.
#quilterscandy #quiltpatterncourse #patternwriting
Ready for curves? Today on the blog Ann of @cozyco Ready for curves? Today on the blog Ann of @cozycolorquilts walks us through her Crazy Curves Block! Ann is an alum of my Pattern Course and donates many of her quilts to a charity for kids! Make sure the click the link in my bio to learn more.
.
.
.
.
#quilterscandy #cozycolorquilts #sewingcurves #quiltsforkids
This #aftertherainquilt stole my heart! @abbymaed This #aftertherainquilt stole my heart! @abbymaed made this version and styled it, and now I want an exact quilt in a pink room with a string of pom-poms on the wall! Double tap if you love this version of the quilt as much as I do! ❤️ Pattern is available in my shop, link in my bio.
Free Fabric Pin Tutorial from @kreativekymona on t Free Fabric Pin Tutorial from @kreativekymona on the blog! These cute pins are made from the periodic table using fabric from @robertkaufman - but you can make any kind of fabric pin! Click the link in my bio to read the free tutorial on my blog.
  • About
  • Contact
  • Pattern Corrections
  • Terms And Conditions

Copyright © 2022 | Quilters Candy Site Powered by Pix & Hue.