
Fabric Holiday Appliqué Sweatshirt Tutorial
Looking for a fun and festive holiday project? This Fabric Holiday appliqué sweatshirt is quick, beginner-friendly, and the perfect way to use up your fabric scraps. Whether you wear it to a holiday party, gift it to a friend, or cozy up at home, this project adds handmade charm to your winter wardrobe.
Let’s walk through how to make your own custom appliqué sweatshirt, no embroidery machine required!
Supplies You’ll Need
Letter template (click here for your free template)
Cardstock paper
Printer
Four fabric scraps in different colors
I used Art Gallery Fabrics: Butter, Flamingo, Blushing, and White Linen
OPTIONAL: Thread to match each fabric color
Sweatshirt (click here for the one I used)
Sewing machine
Presser foot with good visibility of your needle
Glue stick
Scissors
Batting (I used 80/20 cotton/poly—choose batting that is flat, not fluffy) – Here is a link for batting I recommend.
OPTIONAL: 24 ½” quilting ruler
How to Make a Fabric Holiday Appliqué Sweatshirt
Follow the steps below to create beautifully layered, dimensional letters using fabric and batting.
Step 1: Print Your Letters
Download and print the Free Fa LA letter templates on cardstock. This gives you sturdy shapes that are easy to trace and sew around.
Step 2: Cut Out Each Letter

Cut out each cardstock letter carefully. These will become your sewing templates.
Step 3: Layer Fabric + Batting

Layer your fabric, batting, and letter template in this order:
Fabric (doesn’t matter which side since it is double-sided).
Batting
Cardstock letter on top (wrong side touching the batting). This ensures the letter will be right-side when done.
This sandwich gives your appliqué letters thickness and the correct shape.
Step 4: Match Your Bobbin Thread
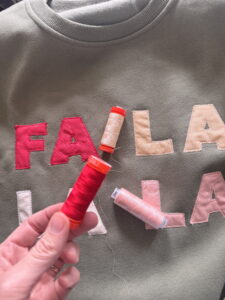
Fill your bobbin with thread that matches your fabric color. (I tried using just the top thread and it didn’t turn out as well.)
Your top thread can be white or the same color as your bobbin—either works.
Step 5: Sew Around Each Letter
With your fabric on the bottom, batting in the middle, and template on top, stitch around the letter as closely as you can.
This sewing line becomes the cutting guide for your appliqué.
Step 6: Remove the Template
Unpin and remove the cardstock letter from the top.
Step 7: Cut Out the Fabric Letter
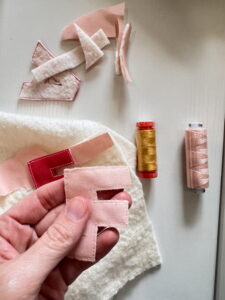
Trim closely around the stitched outline, being careful not to cut your stitches.
You’ll have a beautifully clean, dimensional fabric letter.
Step 8: Arrange the Letters
Once all letters are sewn and cut out, lay out your sweatshirt flat and begin arranging the letters.
Step 9: Use a Ruler for Straight Placement
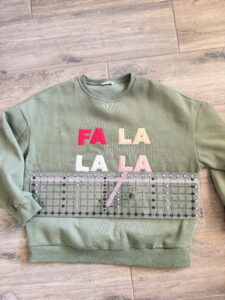
A 24 ½” ruler helps ensure your letters are straight both horizontally and vertically.
Step 10: Glue Letters in Place
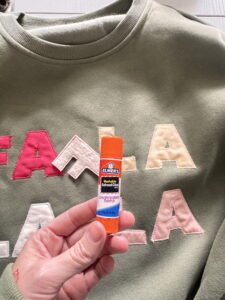
Use a glue stick to lightly adhere each letter to the sweatshirt. Press with an iron for extra hold. If the glue doesn’t feel secure, add a few pins.
This step makes it much easier to sew without shifting.
Step 11: Topstitch the Letters
With coordinating thread, topstitch each letter onto the sweatshirt.
I used a zig-zag stitch, but a straight stitch also works.
Step 12: Enjoy Your DIY Holiday Sweatshirt!
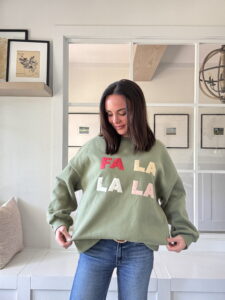
Your custom appliqué sweatshirt is ready to wear! It’s festive, cozy, and full of handmade charm—perfect for the holiday season.
Final Thoughts
This DIY appliqué technique is simple, addicting, and great for more than just holiday lettering. Try it with names, shapes, or other seasonal words, and use up your scrap stash in a fun, creative way. If you make one, be sure to tag me—I can’t wait to see your festive FA LA LA creations!
More Christmas & Holiday Tutorials from Quilters Candy
Looking for more festive sewing inspiration? Quilters Candy has a growing collection of Christmas and holiday projects that are perfect for gifting, decorating, or adding handmade cheer to your home. Here are some of the most-loved seasonal tutorials to try next:
RECENT BLOG entries
Fabric Holiday Appliqué Sweatshirt Tutorial

Fabric Holiday Appliqué Sweatshirt Tutorial
Fabric Holiday Appliqué Sweatshirt Tutorial
Fabric Holiday Appliqué Sweatshirt Tutorial
Fabric Holiday Appliqué Sweatshirt Tutorial
Fabric Holiday Appliqué Sweatshirt Tutorial

the latest
March 5, 2026
When I asked, “Which quilt shop owners do you want to hear from?” Cheryl Sleboda’s name was at the top of the list—and after this conversation, you’ll understand why. Cheryl is the owner of Muppins Emporium in Paducah, Kentucky, and she’s built a brick-and-mortar shop that stands out in a crowded industry. In this episode, […]
tune into the
Craft to Career
Podcast
Each week get insights on how to turn your craft into a successful career. With both guest speakers and tips from myself, you get valuable, free education on the Craft to Career podcast!


