
Free Beginner Quilt Pattern, ‘Playtime’
Learn to make this ‘Playtime’ Quilt with a Free Tutorial
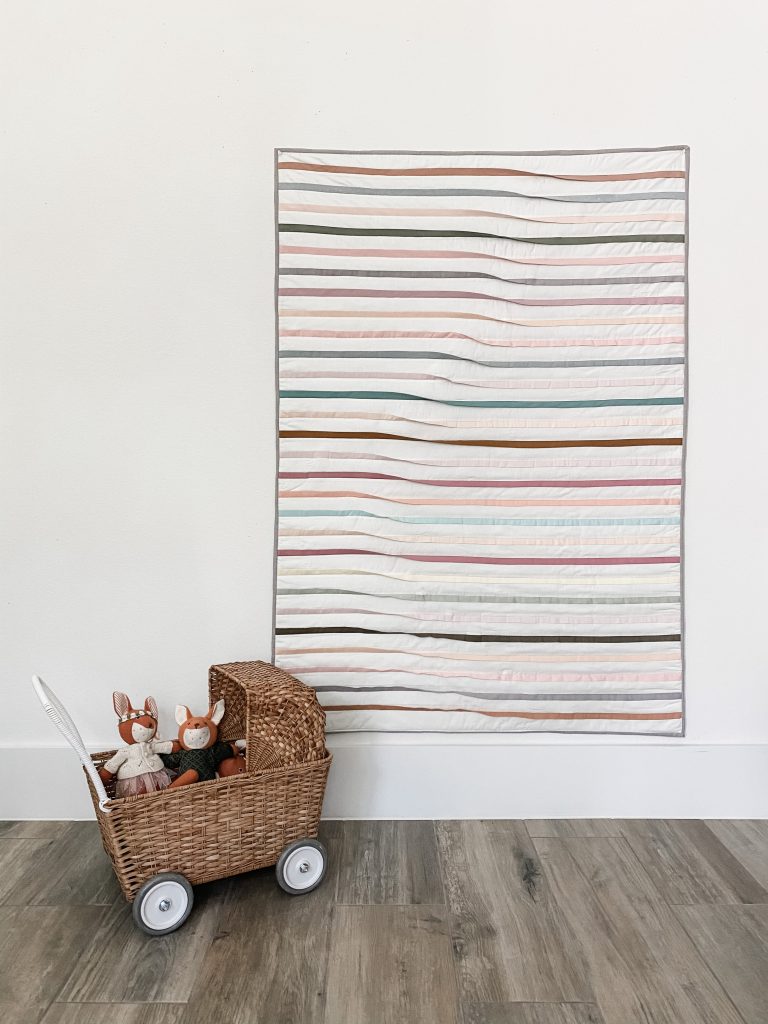
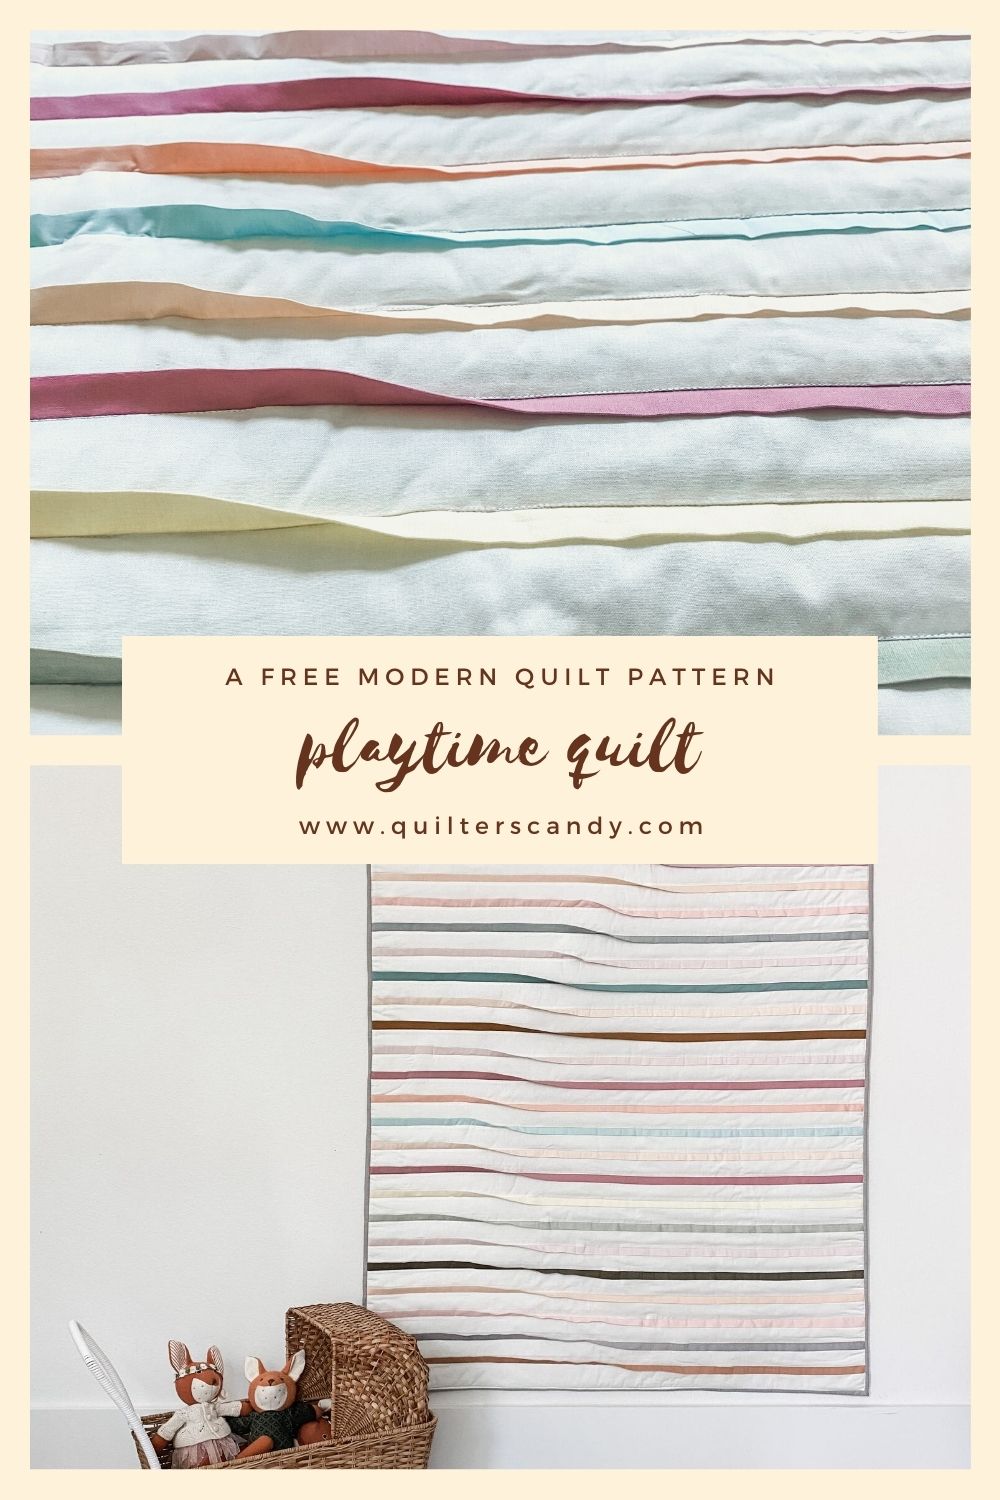
I’m excited to share this free ‘Playtime’ Beginner Quilt Pattern + Tutorial. The ‘Playtime’ quilt is a beautiful and simple modern quilt that you’ll love.
Needed Fabric to make Playtime Quilt
The overall finished quilt size is 37″ x 53″. Here are the fabrics you’ll need to make your own beginner Quilt:
- (1) Jelly Roll, or (30) 2 ½” x 42″ strips of fabric. I used a jelly roll because it is already cut and ready to go. Talk about convenient!
- (29) 1 ¾” x 42″ strips of fabric in various colors. These will make the colorful strips you see in the quilt.
- Backing – (1) 60″ x 42″ piece of fabric for the backing.
- Batting – at least 60″ x 42″ batting. I used Dream Puff Batting, because I like how puffy and soft it makes the finished quilt. But you can use whatever kind you prefer.
- Binding – (5) 2 ½” x 42″ strips of fabric for binding.
How to Make Your Free Beginner Quilt
This free beginner quilt pattern is SUPER fun and easy to put together. If there’s one area you can save time, it’s in making your colorful strips of fabric. You can find some pre-made strips and save a LOT of time HERE.
Making Colorful Strips
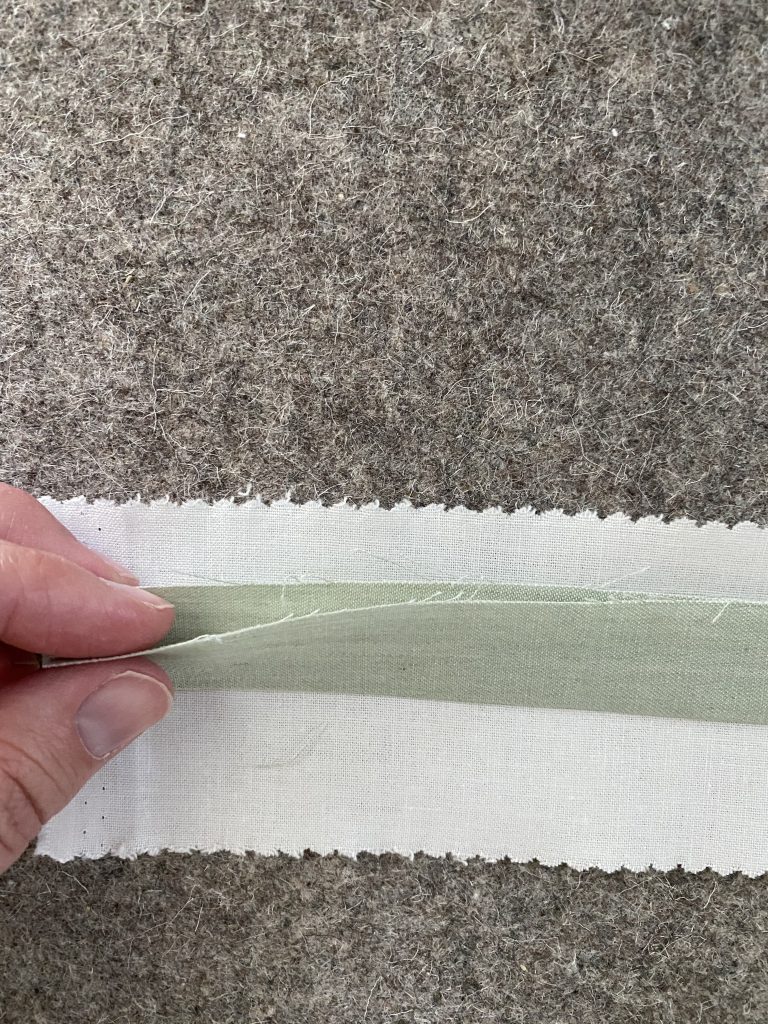
- Take (1) 1 ¾” x 42″ strip. Lay it out on a flat surface and starting at one end, fold in half. As you fold in half, place your iron on your strip to set your crease.

- If you want a shortcut, you can buy pre-made binding. NOTE: MOST quilt binding is made from 2 ½” strips. If you buy pre-made binding, make sure the strips are cut at 1 ¾” wide.
- You can find a bundle of strips pre-made just for this quilt from Bessie Pearl Textiles. This is where I got the binding strips to make my quilt, and I LOVED that they were already made. It saved a TON of time!

The fabrics Bessie Pearl is using for pre-made strips to make your ‘Playtime’ Quilt
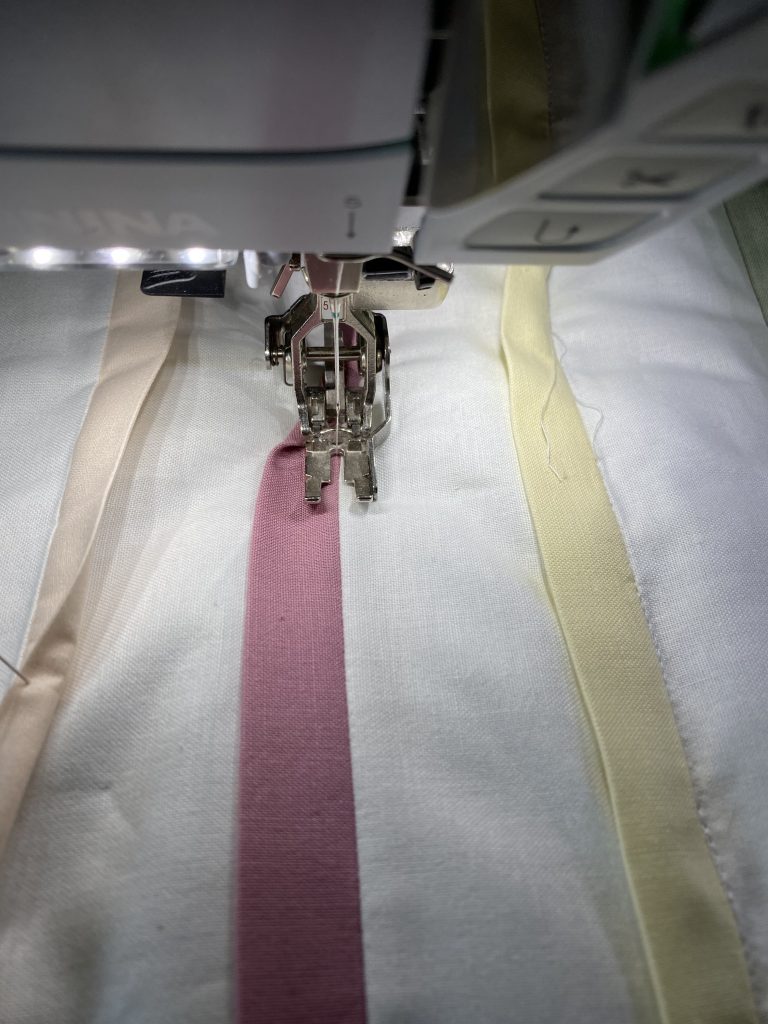
Sewing Strips Together
Now that you have your binding strips, you are ready to sew your fabrics together.
- Take (1) jelly roll piece, or 2 ½” x 42″ strip of fabric. Lay it out on a flat surface. Iron it to make sure its totally flat.
- Place one of your binding strips, raw edge to raw edge, along that top of your jelly roll strip.
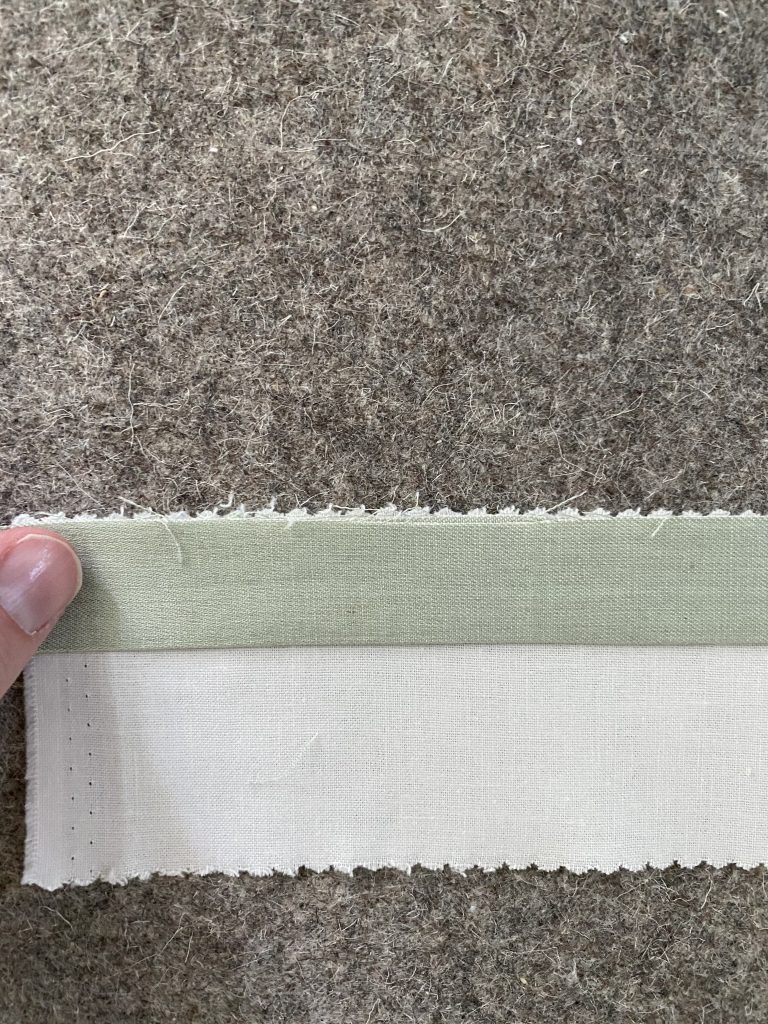
- Place a second jelly roll strip on top, to make a sandwich. Be sure that all raw edges line up. I place pins as layer the top jelly roll strip. Note in the photo below how I place my pins. This placement makes it easy to take the pins out as I sew.
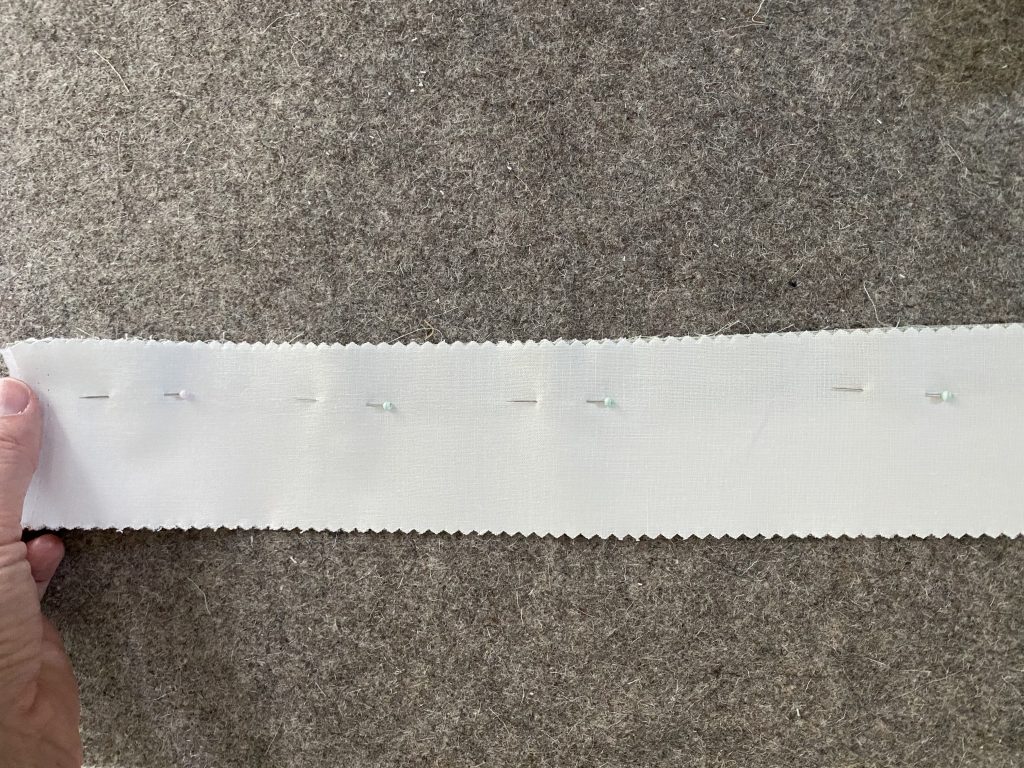
- Double check both front and back of your pieced sandwich. Make sure all the edges are evenly lined and pinned together.
- Sew your fabric strips together, pulling out pins as you go.
- Keep adding one binding strip at a time following the steps above.
- You can press seams as you go, or wait until the end and press them all at once.
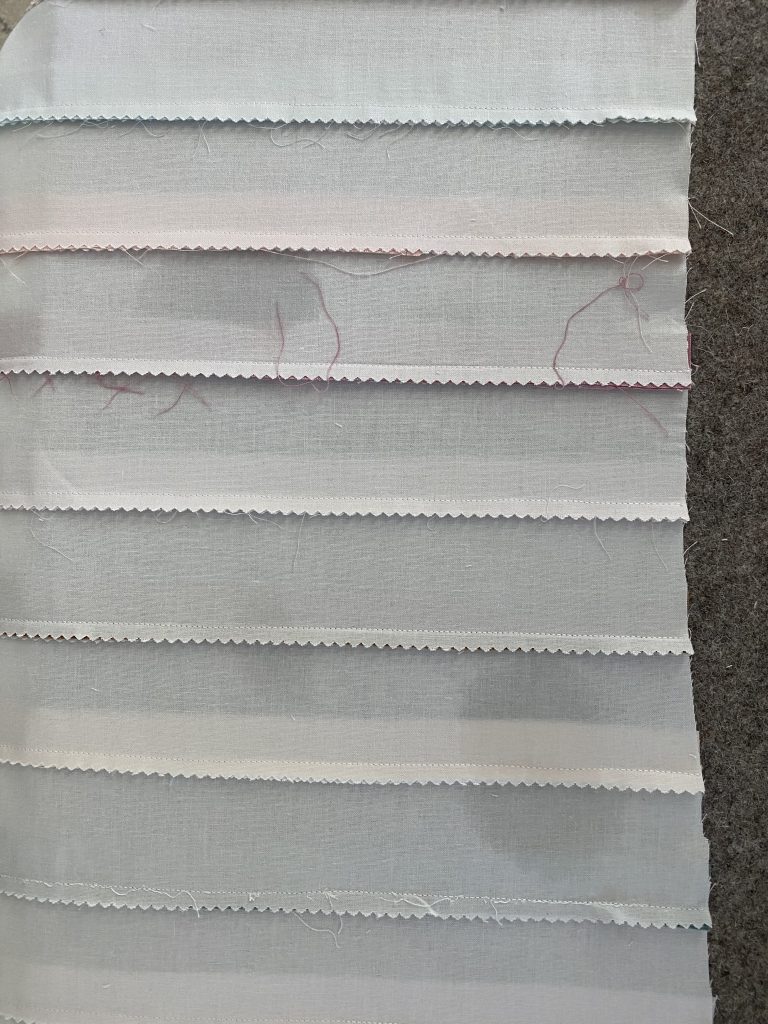
Your quilt will look like this from the back as you add rows and press your seams: (You can see where I sprayed water in this photo if you look closely. I found that spraying water helped the seams lay flat).
Quilting Your Playtime Quilt
Ideas for quilting:
- Hand quilt a straight line on each of the jelly rolls, either with one color of thread or changing up the colors of thread.
- Quilt right along the seam of the color strips of fabric and the jelly roll to hide the quilting. (What I did).
- Do a fun wave or design on the jelly roll with a machine.
I’ll share with you how I quilted my quilt top, but there are so many fun ways you could quilt this.
How I Quilted my Playtime Quilt
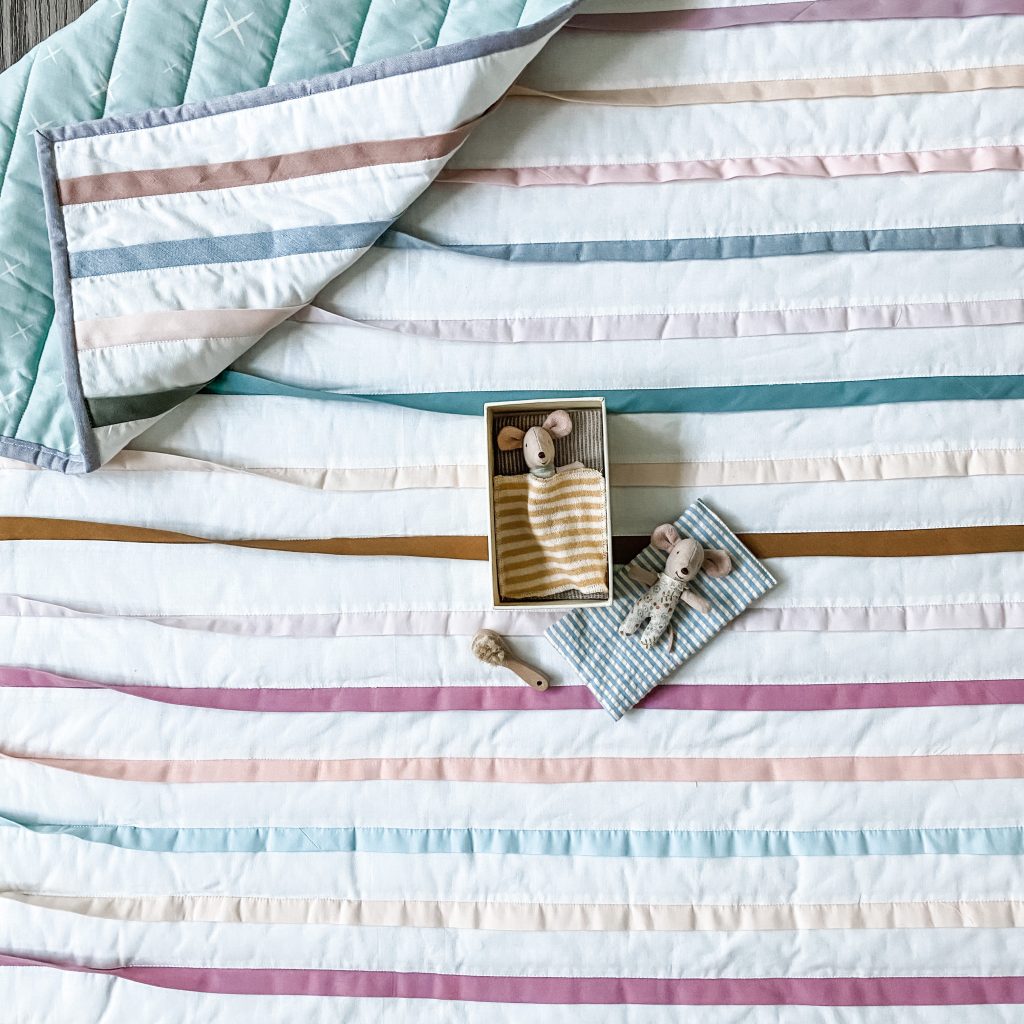
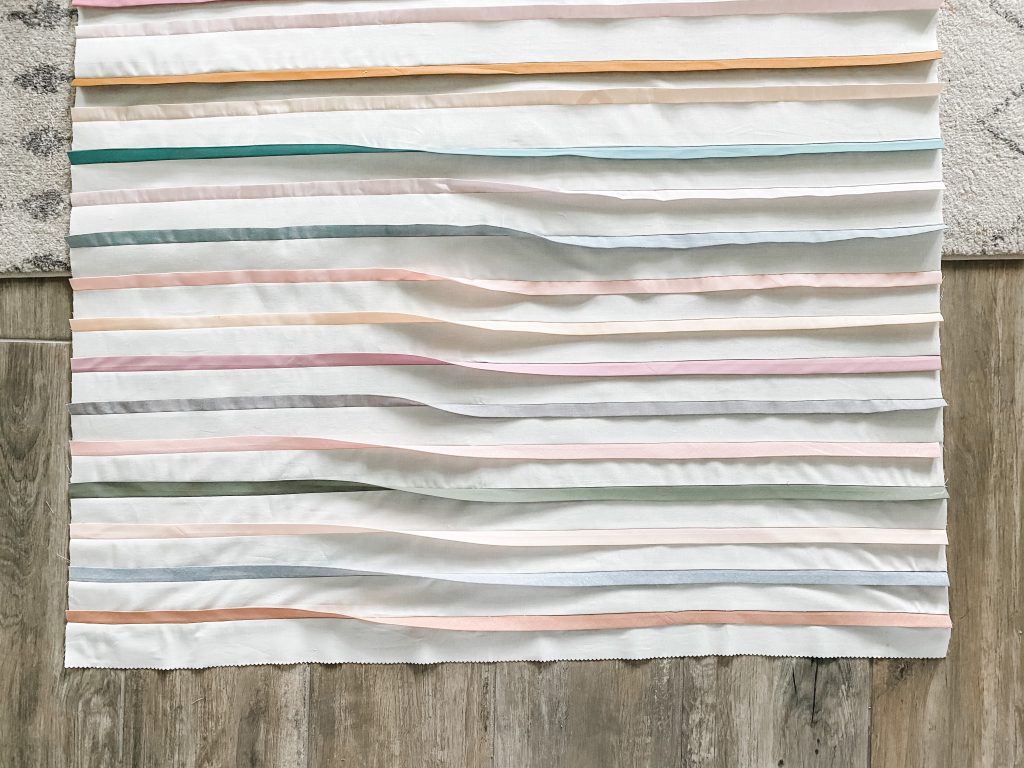
I wanted all the seams on one side of my quilt to go one direction, and the seams on the opposite side of my quilt to go the other direction. I love that this quilt is a 3D quilt, and I wanted to strips of fabric to really pop.
I also wanted the place where the seams change direction to be in a certain place, to give the affect of a ripple or wave.
To make sure that the seam direction stayed in the place where I wanted it, I placed a pin on each strip of binding / color fabric where the seam changed direction.
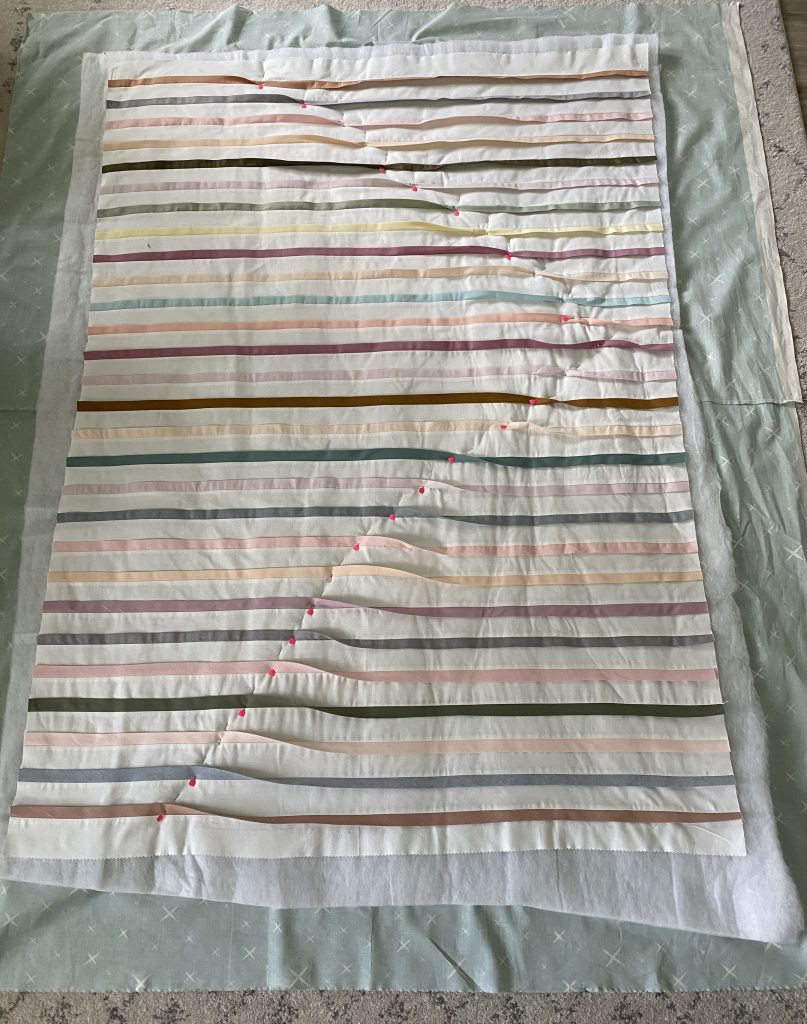
I sewed along the seam in a straight line.

When the seam changed direction, I stopped sewing, then started sewing on the other side of the color strip / binding piece.
Finishing Your Quilt
When the quilting was done, it was easy to trim the backing and batting and add binding as normal. I wondered how thick the quilt would be with so many layers of fabric. I wondered if sewing the binding on might be difficult, but my needle had NO problem going through the layers of fabric and adding my binding as normal.
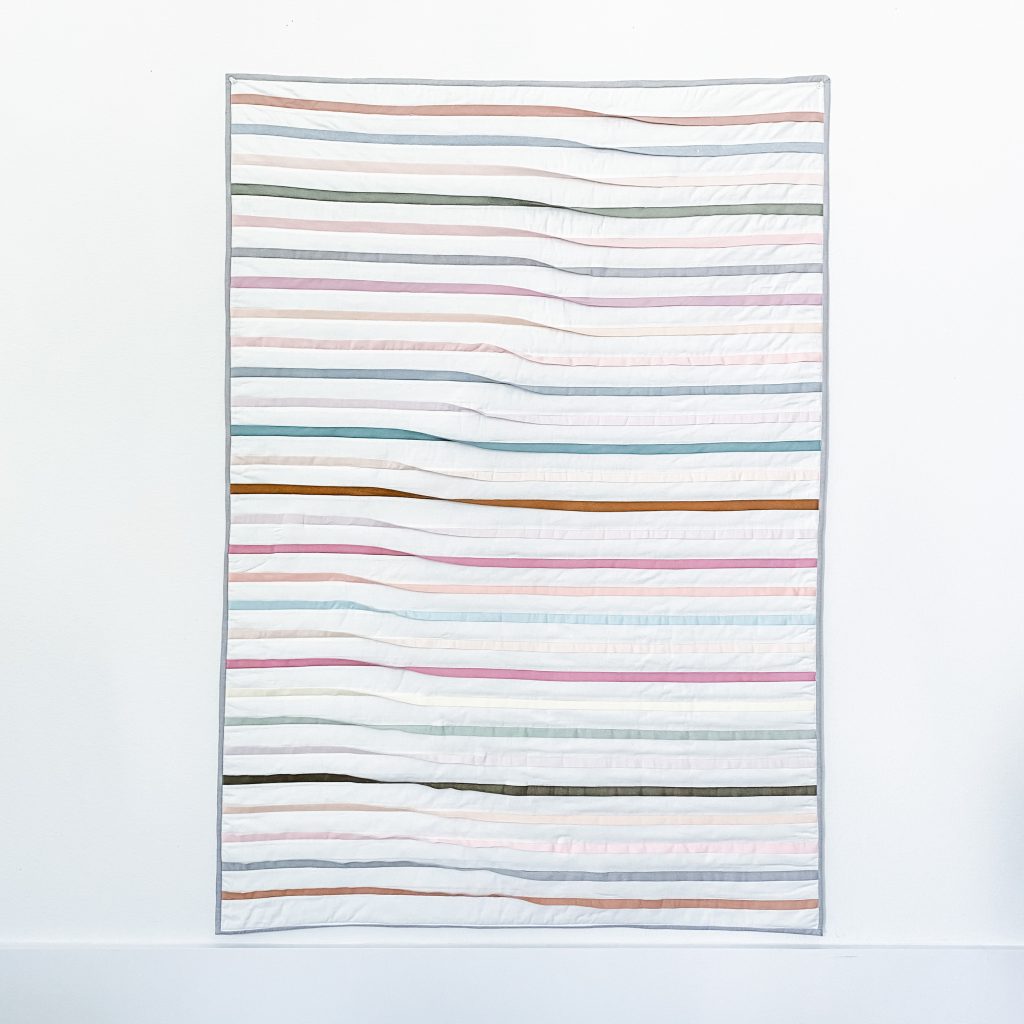
The End Product
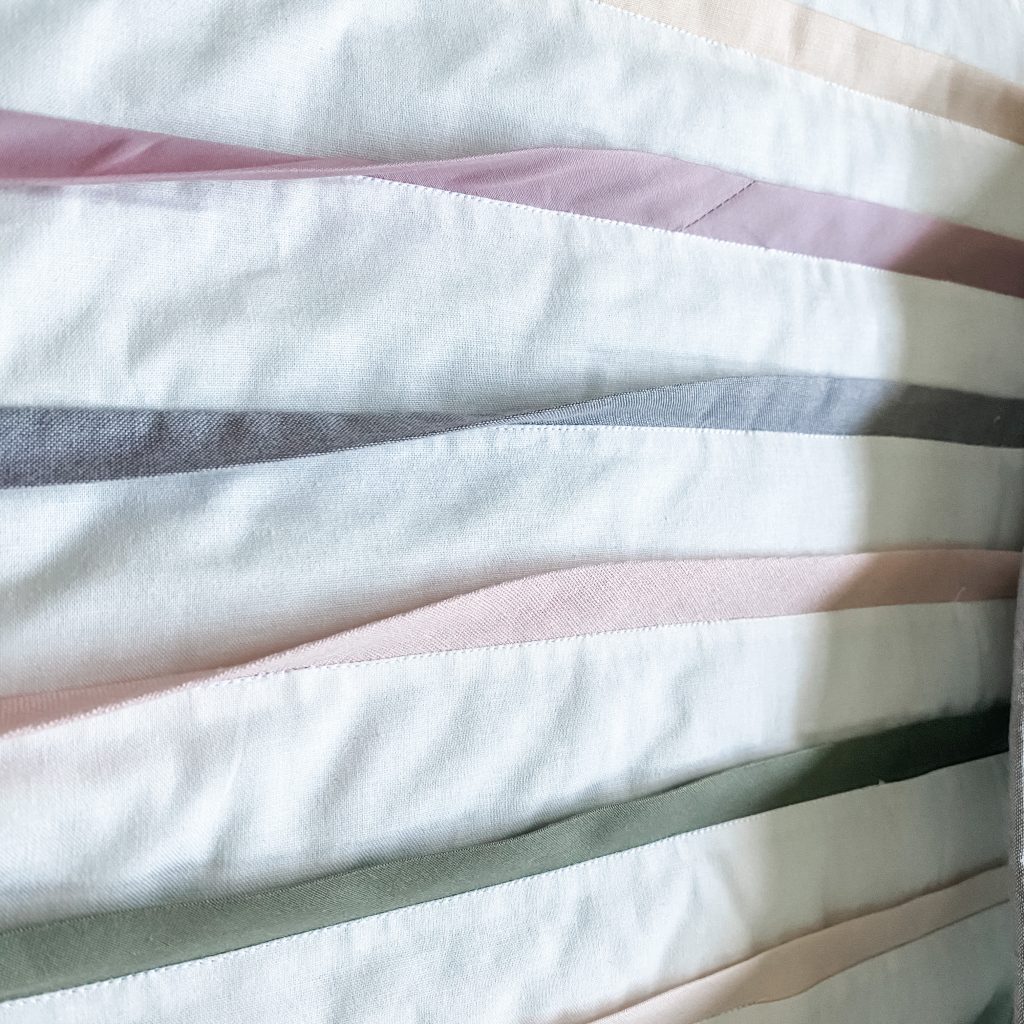
Here is a look at the quilt all finished. I will admit that the cool affect of the wave was lost a little after washing the quilt. But the colorful fabric binding pieces looked beautiful and like ruffly ribbon after washing and drying the quilt. I am a MAJOR fan of this quilt design, and fully plan to make a larger size for myself.
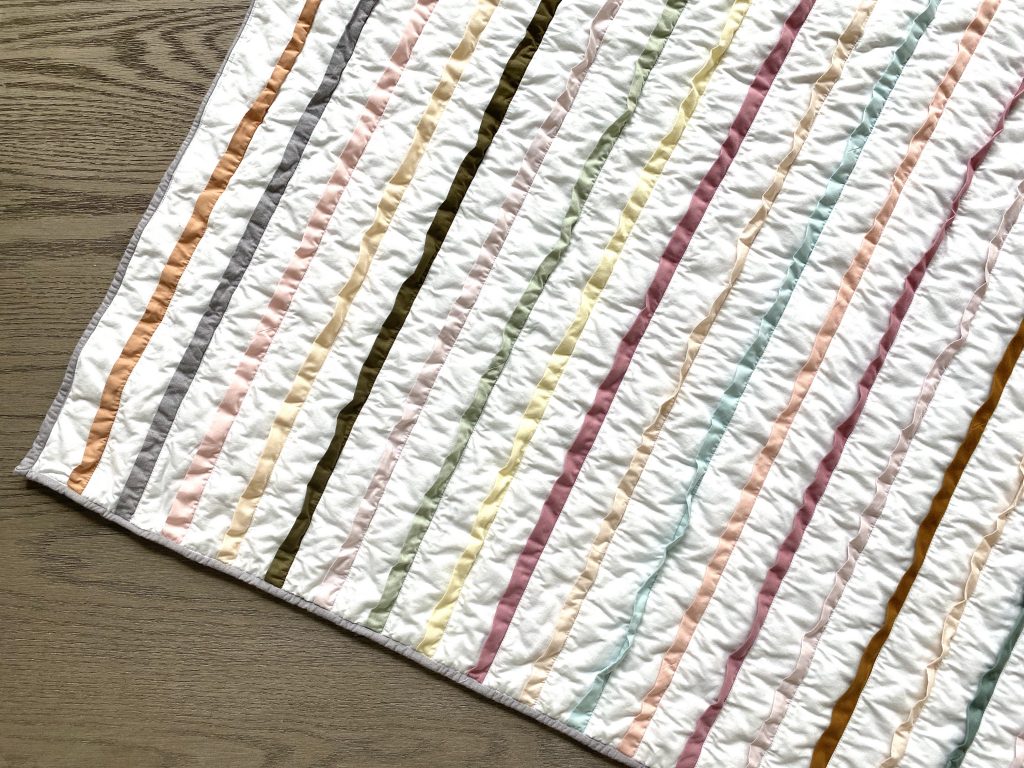 Here is the Quilt Top after washing and drying it. You can see how the fabric becomes more ribbon / lace-like.
Other Tutorials
If you enjoyed this Free Beginner Quilt Pattern, you will love these others that I share:
RECENT BLOG entries
Free Beginner Quilt Pattern, ‘Playtime’
Free Beginner Quilt Pattern, ‘Playtime’
Free Beginner Quilt Pattern, ‘Playtime’
Free Beginner Quilt Pattern, ‘Playtime’
Free Beginner Quilt Pattern, ‘Playtime’
Free Beginner Quilt Pattern, ‘Playtime’
the latest
April 10, 2026
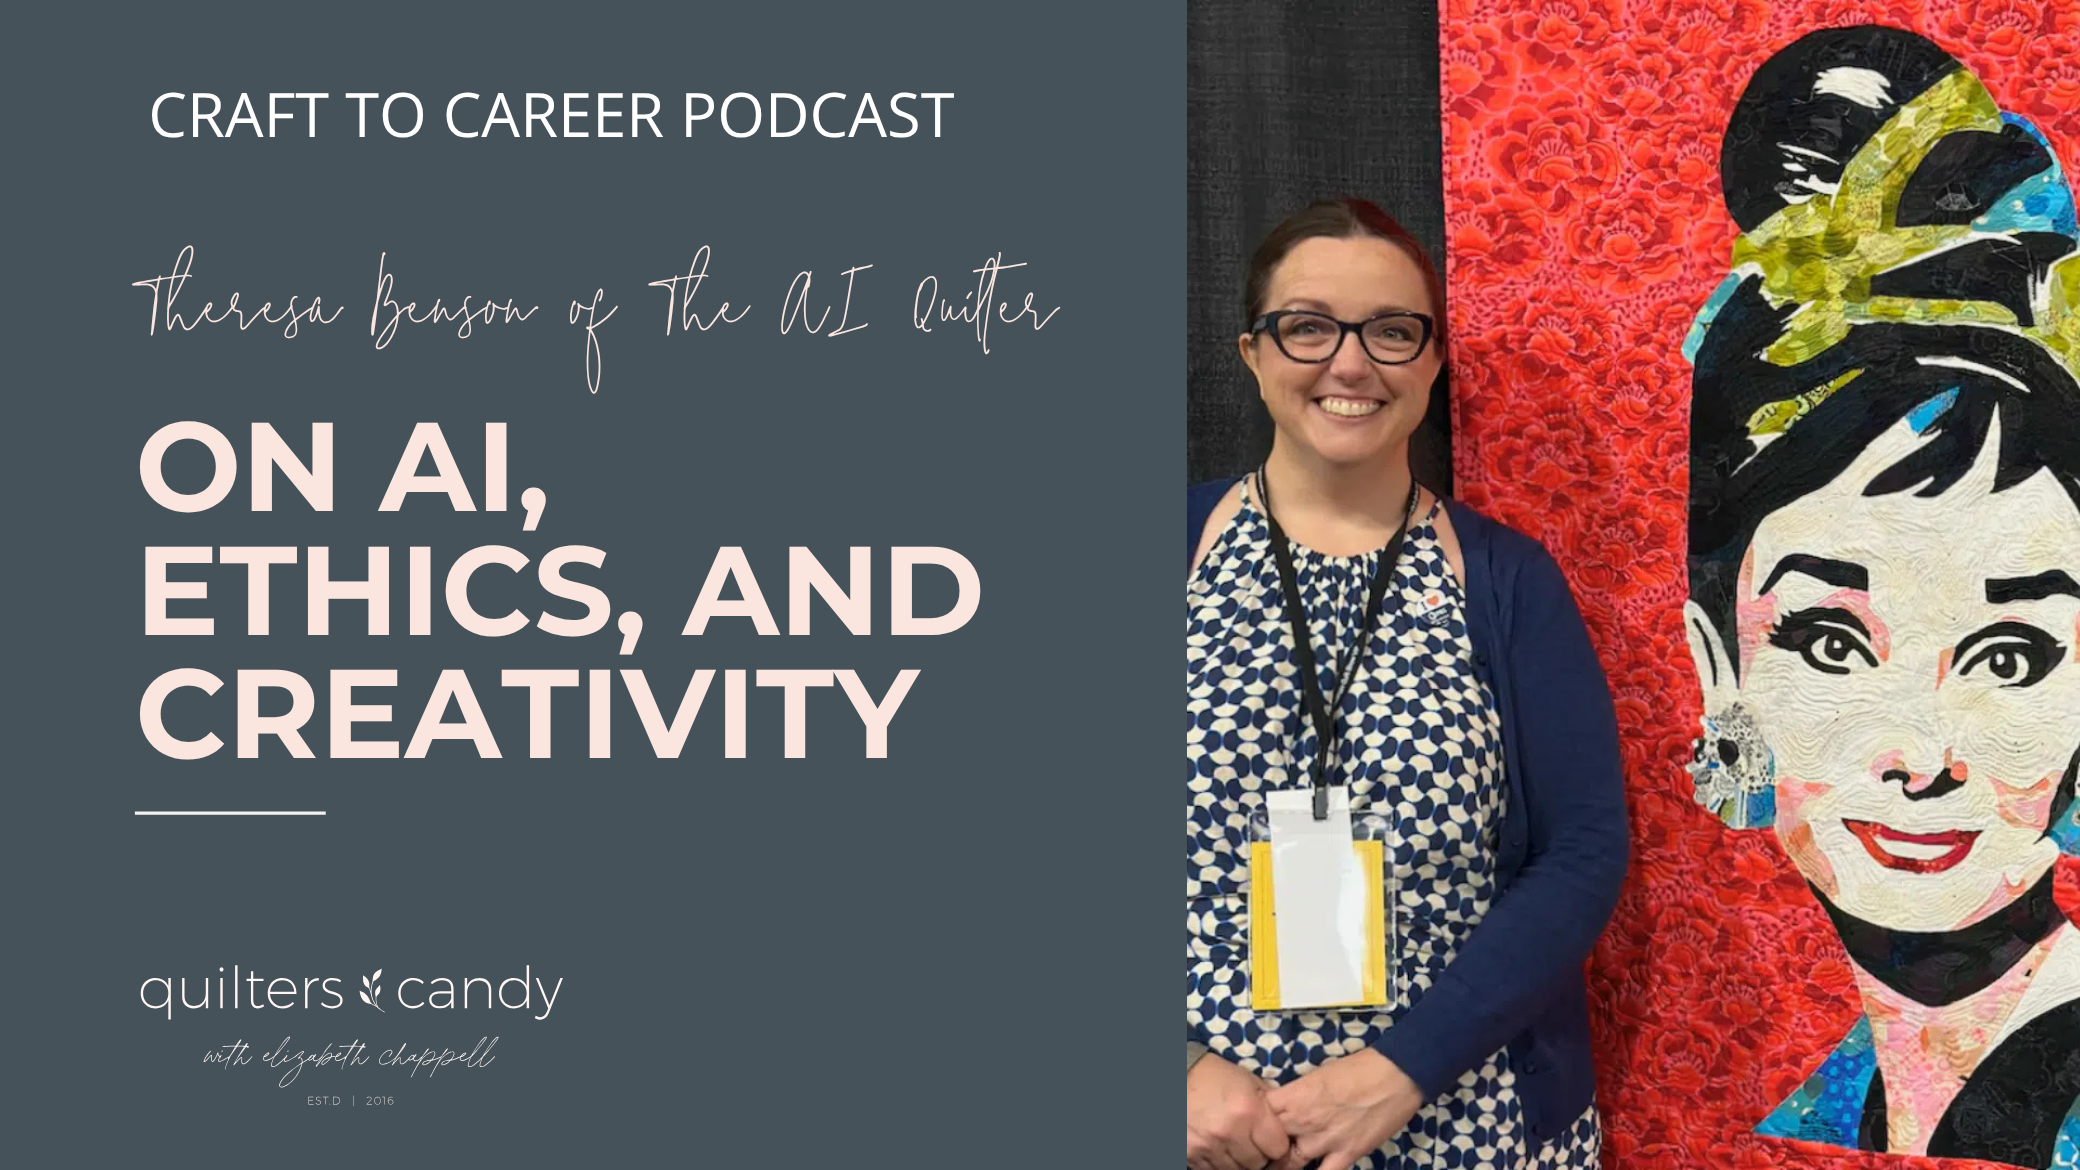
Artificial Intelligence is one of the biggest conversations happening in the creative world right now, and in this episode of The Craft to Career Podcast, I sat down with Theresa Benson of The AI Quilter to talk about it all. Theresa gives a thoughtful look into the use of Artificial Intelligence as a quilter, artist, […]
tune into the
Craft to Career
Podcast
Each week get insights on how to turn your craft into a successful career. With both guest speakers and tips from myself, you get valuable, free education on the Craft to Career podcast!


