
Scraps of Fabric
I cannot be the only one who has a big ‘ol bucket of fabric scraps . . . or two. I diligently fill my bucket with every last fabric scrap, certain that I will turn them into something beautiful. I have a long list of scrap projects in mind. Yet, my bucket is full and not much is made. That is until I created these DIY Fabric Bookmarks! This project is perfect because it requires only 4″ × 4″ pieces of fabric, you can use all scraps. They make the perfect gift. The only extra materials you need are a little interfacing and thread. Did I mention they are super fast to make?
Making Fabric Bookmarks
CUT:
- (3) 4×4” squares of fabric. Your fabric can be all matching, different, or a mix. There is no right way to do it.
- (2) 4×4” squares of interfacing. Note: For interfacing, I prefer Pellon 911FF featherweight. It gives your bookmark a little flex, but enough stability to protect the pages of the books. I would not recommend getting anything lighter. If you want to use a stiffer interfacing it wouldn’t hurt the final product, it is just preference. You can always experiment with these if you have different types available at home.
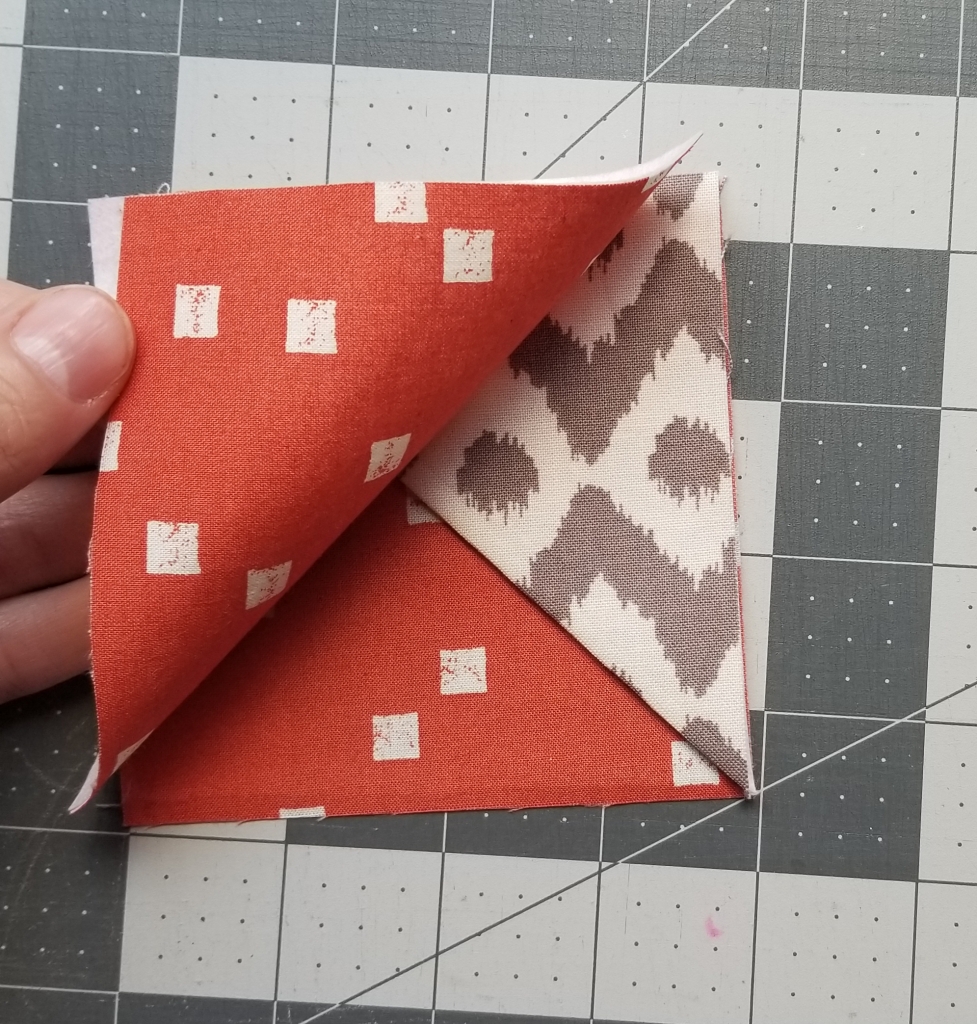
i. Cut one square of interfacing in half diagonally to make a triangle. See photo below for reference. Note: You will only use one half of the triangle.

IRON:
After you have cut all your pieces, it is time to start ironing the interfacing to your fabric.
- Using the fabric that you want to hang over the pages of the book, Iron the half triangle interfacing onto the wrong side of the fabric.
- Then iron the square in half over the interfacing. This will create a triangle of fabric with interfacing in the center, with right sides having an open seam.
- Using the fabric square that you want to be the back of the bookmark, iron the full square of interfacing to the wrong side of that fabric square.

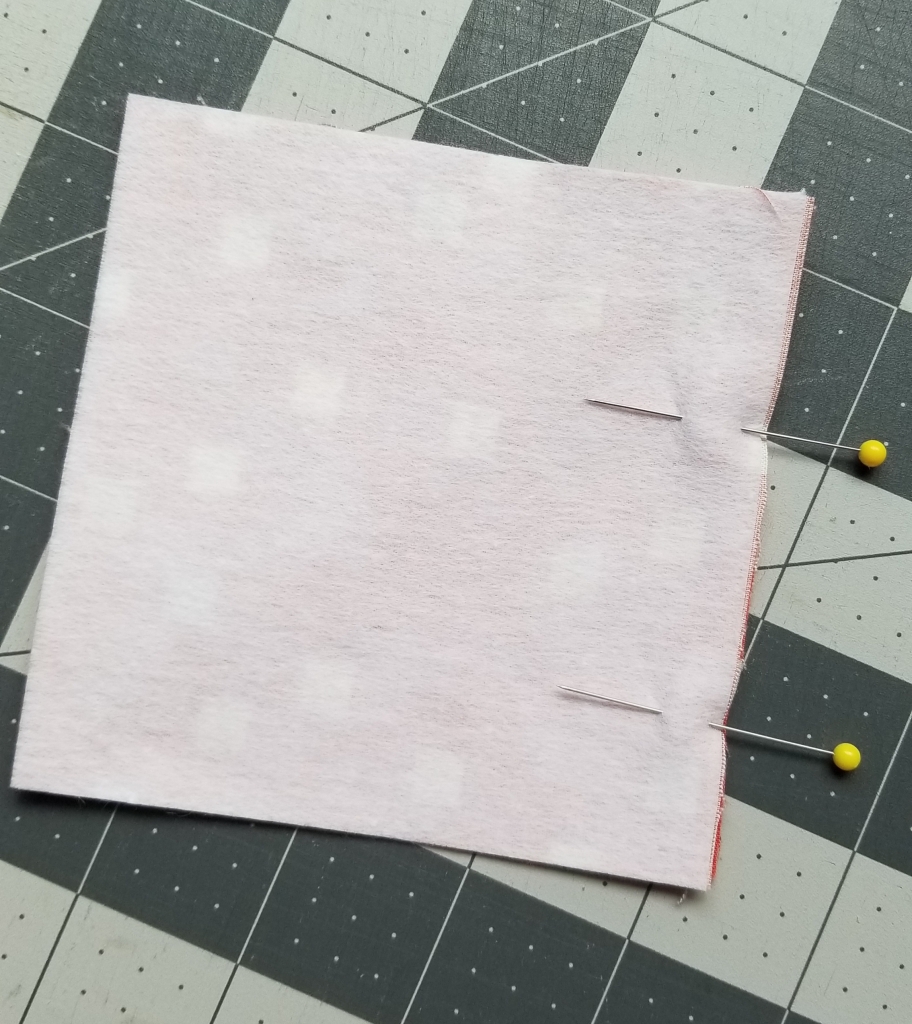
4. Layer your squares like the photo below, right sides together. The bottom layer is your NON-interfaced full square right side up. Your triangle is in the middle. Make sure the open corner with open seams is facing the top right. Last, place your interfaced square, right side down.
5. Pin your layers together and sew with a 1/8″ seam allowance around the entire edge leaving a 1.25-inch opening so you can turn it right side out later. (Make sure this opening is on one of the 2 sides with only 2 layers, opposite the triangle. It makes it easier to close the opening after turning the bookmark right-side-out).

6. Carefully trim the corners, and turn right side out.
7. Top stitch around the entire edge at 1/8″ seam allowance to close the opening.
8. That’s it! You’re done! You have a quick, fun, useful project to use up all those little bits of fabric.

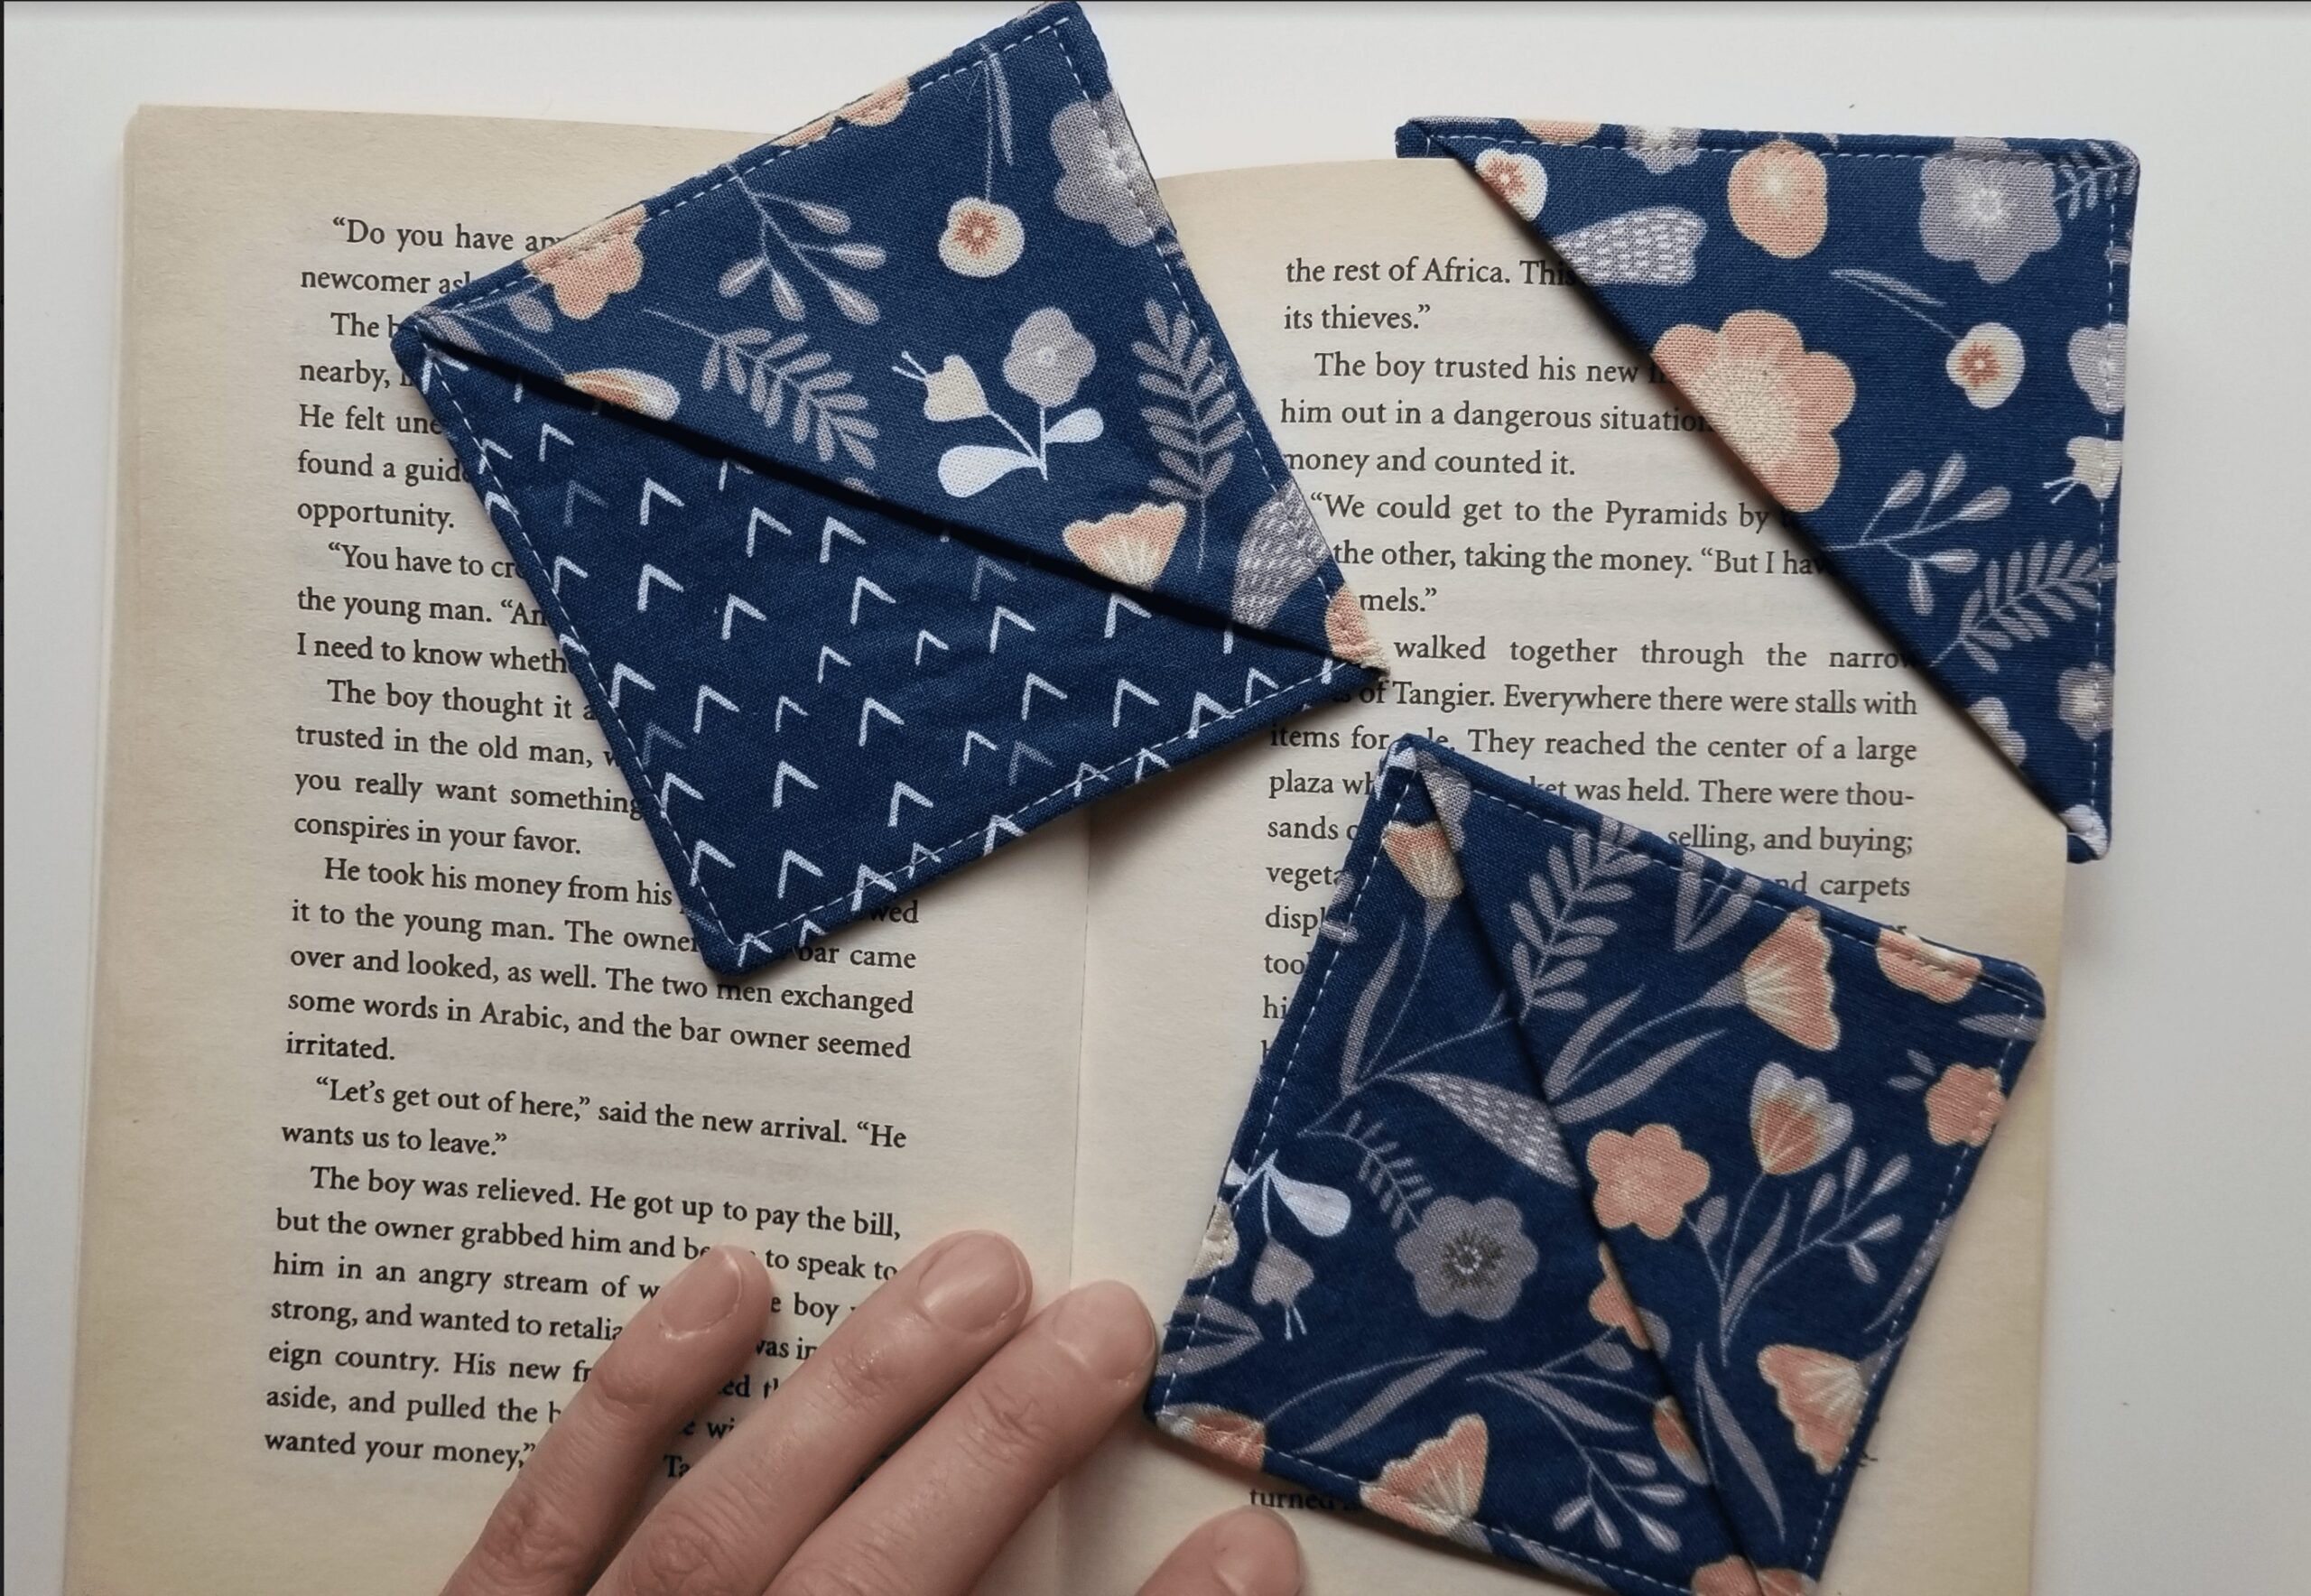
FINISHED BOOKMARK
Enjoy your new fabric bookmark. Thank you, Mara, for this fun and fast tutorial. I am looking through my scraps now so I can make one. Be sure to check out my other free tutorials, like THIS POST on Quilt Care Cards, or THIS BLOG POST on turning quilts to wall hangings.
Leave a comment sharing what you liked most about this tutorial, and what fabrics you want to use to make your DIY Fabric Bookmark!