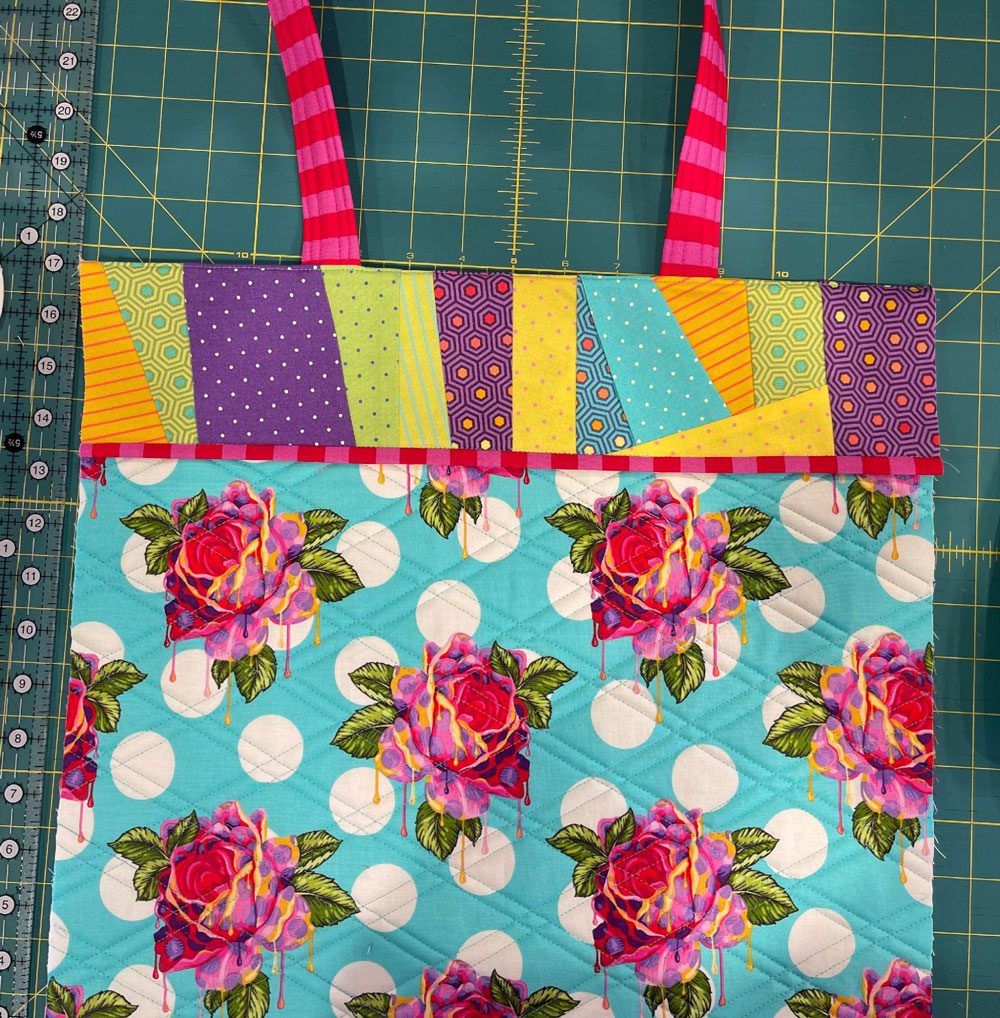
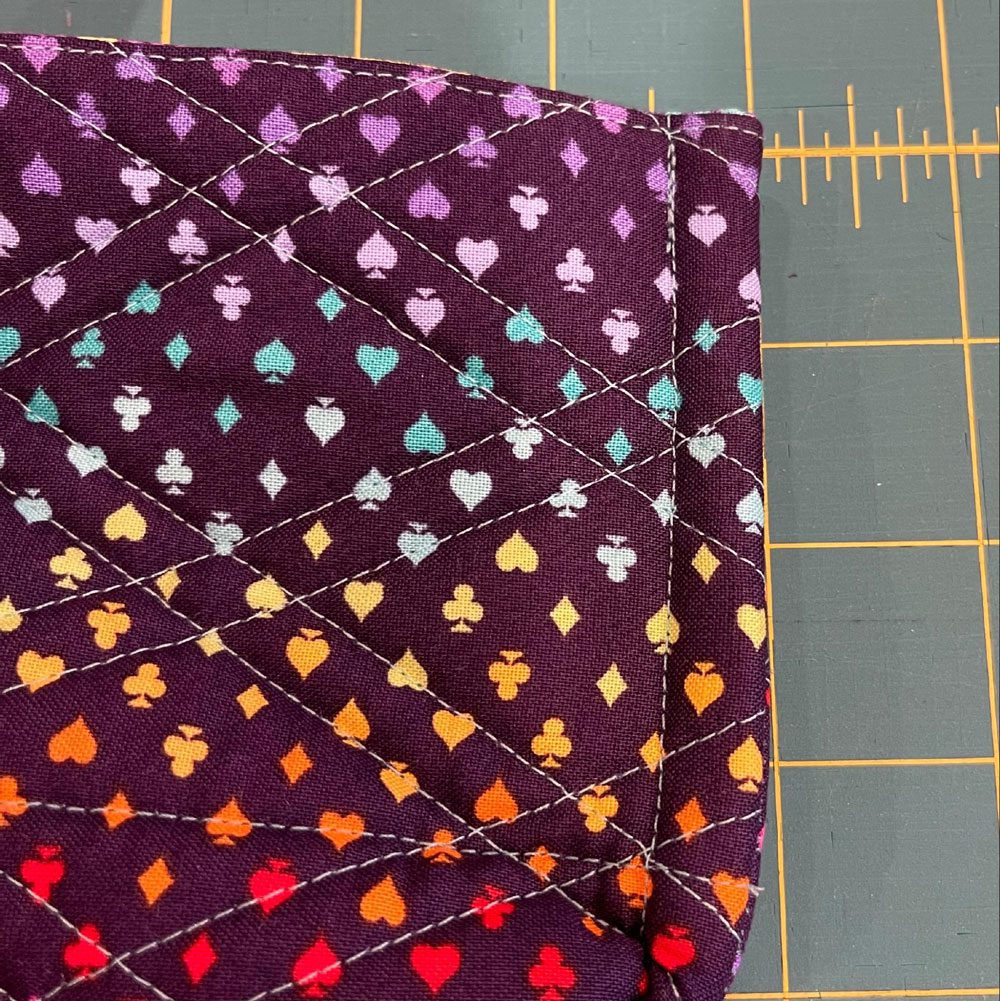
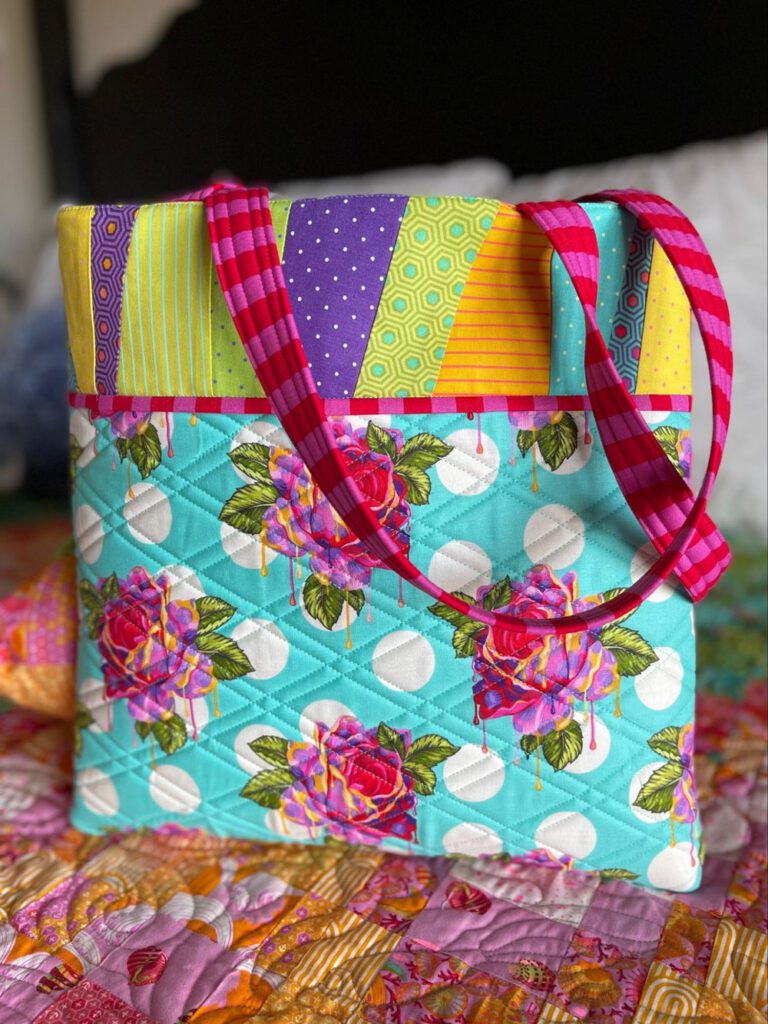
Easy Tote Bag Tutorial

October 18, 2023

Easy Tote Bag

Susan from Studio708 shares a FREE pattern and tutorial on how to make an easy tote bag on the Quilters Candy blog.

I’m Susan from Studio708. After 35 years in the fashion industry, my greatest joy is helping quilters take their piecing skills into creative and new places!

Don’t get me wrong. 

I love a good quilt block and a colorful quilt as much as the next quilter. But when you live in a place that’s 1,000 degrees, aka Texas, you don’t use quilts all that often. That’s why I have gotten creative with using my fabric.

One of the ways I use my fabric is making The Easy Tote Bag.

Easy Tote Bag Fabric Requirements:

  • Main Fabric – 1 Yard for directional or ½ Yard for non directional
  • Contrast Fabric – ½ Yard non directional
  • Lining Fabric – ½ Yard non directional
  • ByAnnie Soft and Stable (or Batting) – 1 Yard There will be enough left over for another bag.
  • Various Scraps for creating a pieced borders 
  • Interfacing – ⅛ Yard

Easy Tote Bag Cutting Instructions:

All measurements are listed as Width(crosswise grain) x Height(lengthwise grain).

  • From Main fabric cut: Quilting Block – 32″ x 18″ 
  • From Contrast fabric cut: Handles – (2) 4″ x 27″
  • From Lining fabric cut: Quilting Block – 32” x 18” 
  • From ByAnnie Soft & Stable (or batting): Quilting Block – 18” x 32” and Handles – (2) 27” x 2”
  • From interfacing cut the following: Border – (2) 16″ x 4″
  • Pieced Border measurements: Your choice of piecing: Pieced Fabric – (2) 4″ x 16″

Easy Tote Bag Quilting Instructions:

BAG:

  1. Make a quilt sandwich from the Main fabric, Lining fabric, and the Soft and Stable. Quilt as desired.
quilted fabric

2. From the Quilted Piece cut the following:

  • Bag Body – (2)16″ x 15″ This will be the front and back.

HANDLES: 

  1. Fold each Fabric handle in half with long edges together.

2. Open and then bring edges into the pressed center line.

tote strap

3. Place a Soft and Stable piece inside.

strap insert

4. Fold in half lengthwise, enclosing raw edges.

strap assembly
folded strap

5. Edgestich

⅛” from the outside edges

6. Topstitch 

¼” from previous stitch lines toward
center

strap stitches

7. Attaching the handle to the lining side of the body.  Mark in 4″ from sides.  

8. Line the outside edge of the handle to the inside of the line. Clip.  Baste in place.  

9. Repeat on the other body piece. Set aside.

BORDER:

  1. Fuse the interfacing to the wrong side of fabric according to the manufacturer’s instructions.
  2. Using ¼” seam allowance, sew a binding strip to the bottom (long) edge of a pieced border.

3. Press the binding toward the seam allowance.

4. Flip the border over and press the binding over the seam allowance.  The seam allowance will not turn.

binding

This will leave you a contrast trim on the right side of the border pieces.

ironing

6. With lining side of the body up, clip the unfinished border edge to the top of the bag. Stitch using a ¼” seam allowance.

clips

7. Press border up and seam allowance toward the body of the bag.

construction

8. Press border toward the body of the bag keeping seam allowance slightly to the back.

strap placement

9. Edge stitch the border at the top of the bag, stitching through all of the layers.

attaching straps
  1. Stitch in the ditch right above the binding, stitching through all the layers, making sure to keep the border laying flat.

  2. With lining sides together stitch the sides and bottom of the bag with ¼” seam allowance.  Using a zigzag will help reduce the bulk.

12. Turn bag with right sides together.  Stitch the sides and bottom of the bag with ⅜” seam allowance enclosing the raw edges.

finishings

13. Turn the bag right side out. Give it a good press. You made it. Enjoy!

quilted tote bag

The best part of making your Easy Tote Bag is bringing it out and about and having people ask, “Where did you get that bag? I need one!” If anyone wants one, you can point them here and share how fun it is to make their very own Easy Tote Bag.

I’d love to see your finished bag. Once you make your bag, share a photo with me on Instagram @studio708quilt, and use the hashtag #EasyToteBag.

MORE BLOG POSTS LIKE THIS ONE

Did you enjoy this tutorial? Be sure to check out these free tutorials: 

Framing Your Quilts

Cottage Pumpkin Quilt Block

Easy Notebook Pencil Pouch

or SEARCH THESE

Popular categories

Craft to Career
Digital Downloads
Patterns
Podcast
Quilt Alongs
Quilt Questions
Tutorials
back to the top

Copyright 2024 Quilters Candy  |  Terms & Conditions