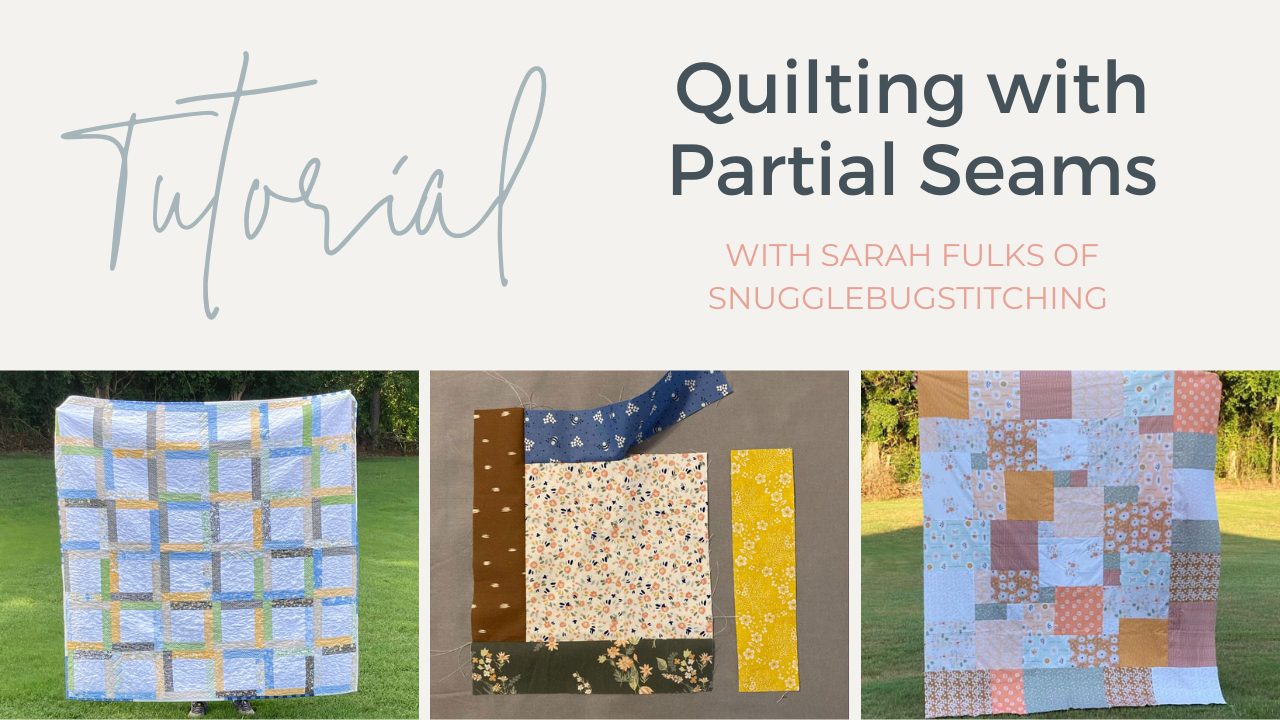
Quilting with Partial Seams

August 15, 2023

Quilting with Partial Seams

Sarah Fulks, the quilter behind SnuggleBugStitching shares quilting with partial seams. 

I’m Sarah Fulks, the quilter behind SnuggleBugStitching. I live in Alabama with my husband, two kiddos, and my favorite quilt model (a Jack Russell named Cleo). I’m SEW excited and thankful for the opportunity to share this with you! If you’ve ever scrolled my Instagram you know that I make a lot of T-Shirt quilts. I get a lot of quilters asking me about how I piece them. Making T-Shirt quilts is definitely a process, but the key point is that you can’t make the style I make without some partial seams. I like to call this style T-Shirt quilt Collage Style, but you’re probably more likely to see them called Mosaic or Puzzle Style.

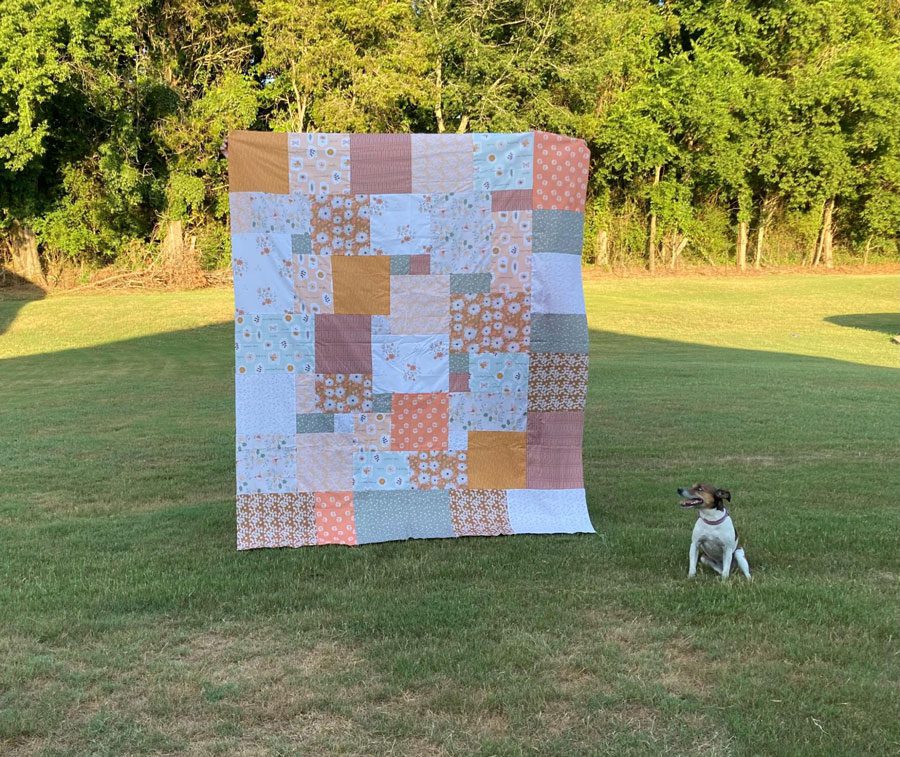
This is one of those things that makes a lot more sense if I show you. Check out the quilt below that the lovely Cleo is modeling. It’s the cover quilt for my Sarah Elizabeth Quilt pattern. I actually wrote that pattern to go together the same way my T-Shirt quilts do. At first it looks easy with so many big pieces, but keep looking and you notice a lot of places where you may not know how to go about piecing it. Find the small green square near the top left corner of the quilt. You can’t fully sew it to any of the pieces around it without making it so that you can’t sew it to the other pieces. Keep looking, and you’ll find multiple spots like this throughout the quilt top. So, how did I get this one together with all those tricky spots? This is where the partial seams come in.

Partial Seams Quilt

That pattern is a little intimidating for beginners, mostly because it takes A LOT of diagrams to explain how to piece it with so many tricky seams. They aren’t hard to do, but partial seams can be intimidating even for more experienced quilters if you’ve never used them before. Most of my experience with partial seams is from making T-Shirt quilts, but T-Shirt quilts probably aren’t the best thing to practice your partial seams on. T-Shirt quilts are scary enough anyway. T-Shirts are stretchy, uncooperative beasts that aren’t exactly designed for quilting; they definitely need a little extra motivation to cooperate. If you quilt them yourself on a domestic machine, they are heavier and more difficult to maneuver than a regular quilt. Oh, and then there’s the pressure from being trusted with someone else’s memories, and you’ve only got one shot with each shirt. You can’t just head to the store for more fabric if you make a mistake. Add partial seams into the mix, and it’s even more complicated. Practicing partial seams for the first time on a T-Shirt quilt is like learning to swim by cliff diving into the ocean… Let’s just say I don’t recommend it. Don’t set yourself up for frustration by starting on the hardest level.

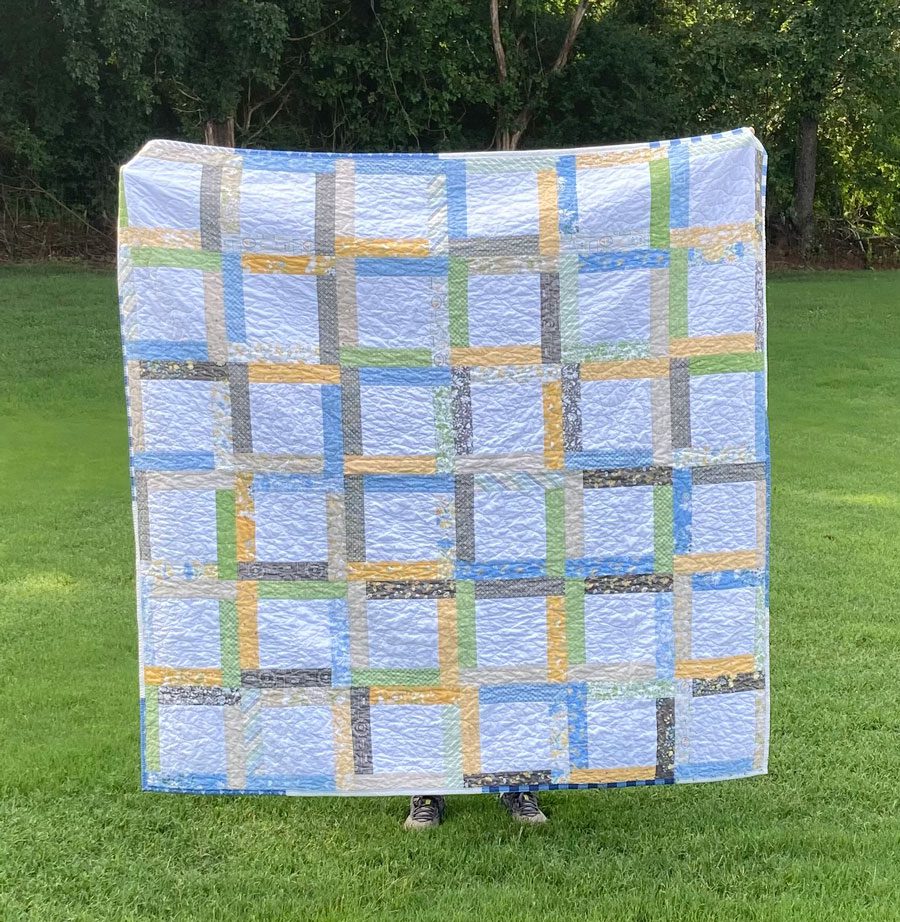
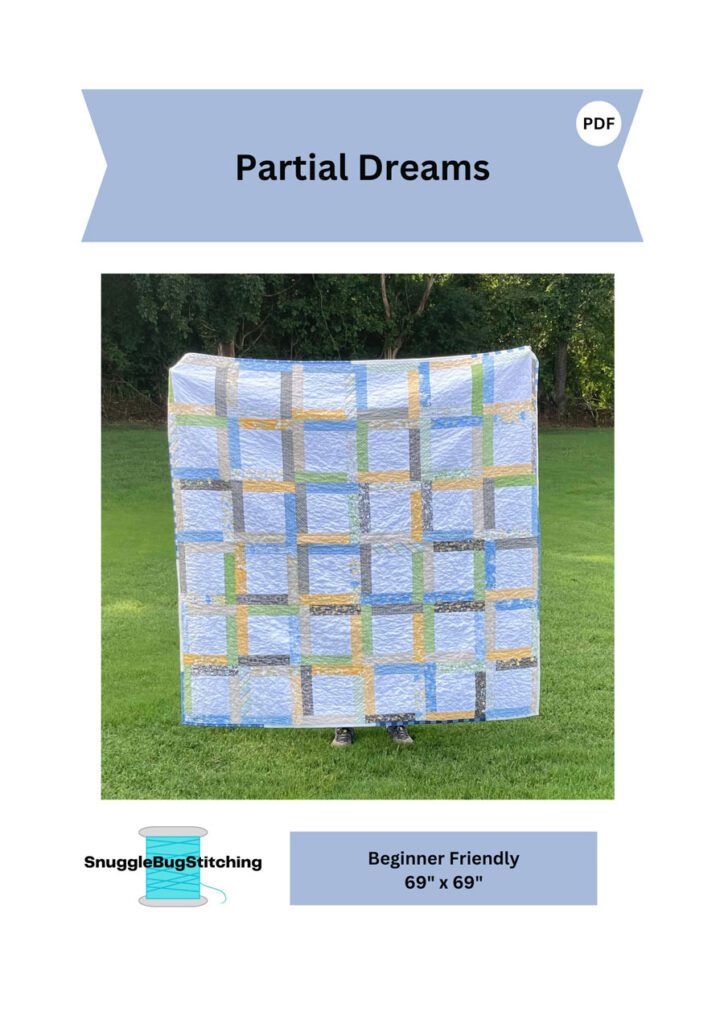
Partial Dreams Quilt

So, I decided to write another partial seams pattern, a beginner friendly way to practice partial seams before moving on to something harder like a T-Shirt quilt or my Sarah Elizabeth Quilt. This quilt is my Partial Dreams pattern. It has instructions for using a jelly roll or fat quarters for the foreground. If you’re a new quilter or you’ve just never tried partial seams before, this pattern is a good place to start. (Spoiler Alert: it’s a FREE pattern!) For this tutorial, I am going to walk you through the block construction step by step. The concept of partial seams will make a lot more sense once you see how the blocks go together.

Let’s make a block using a partial seam

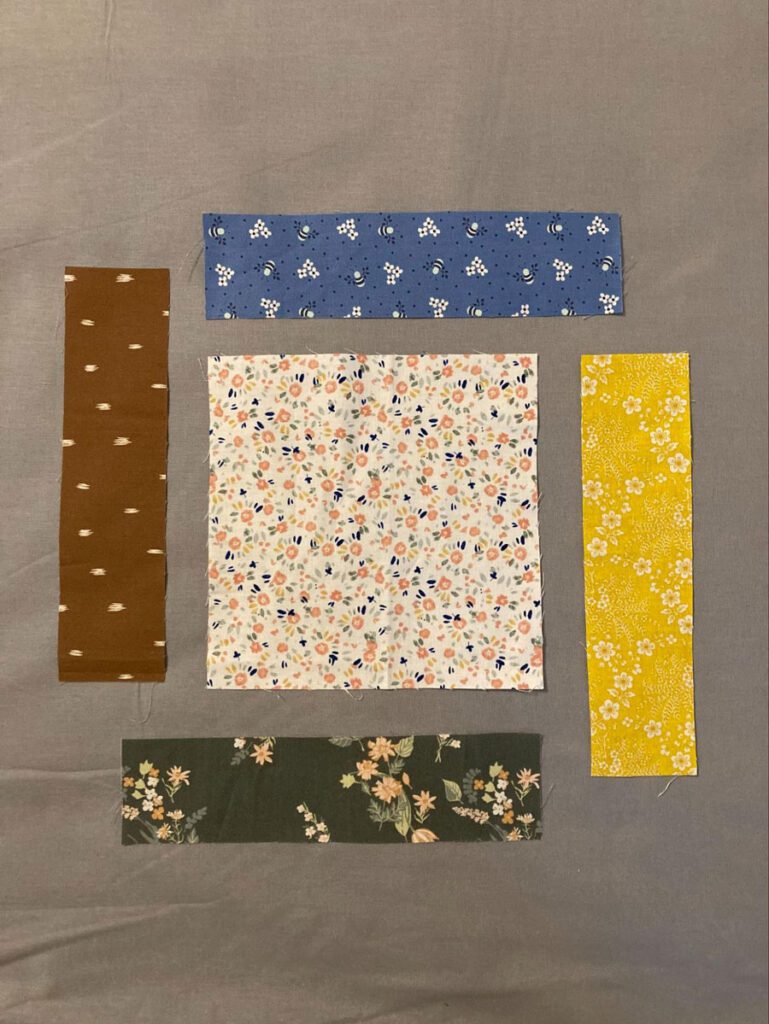
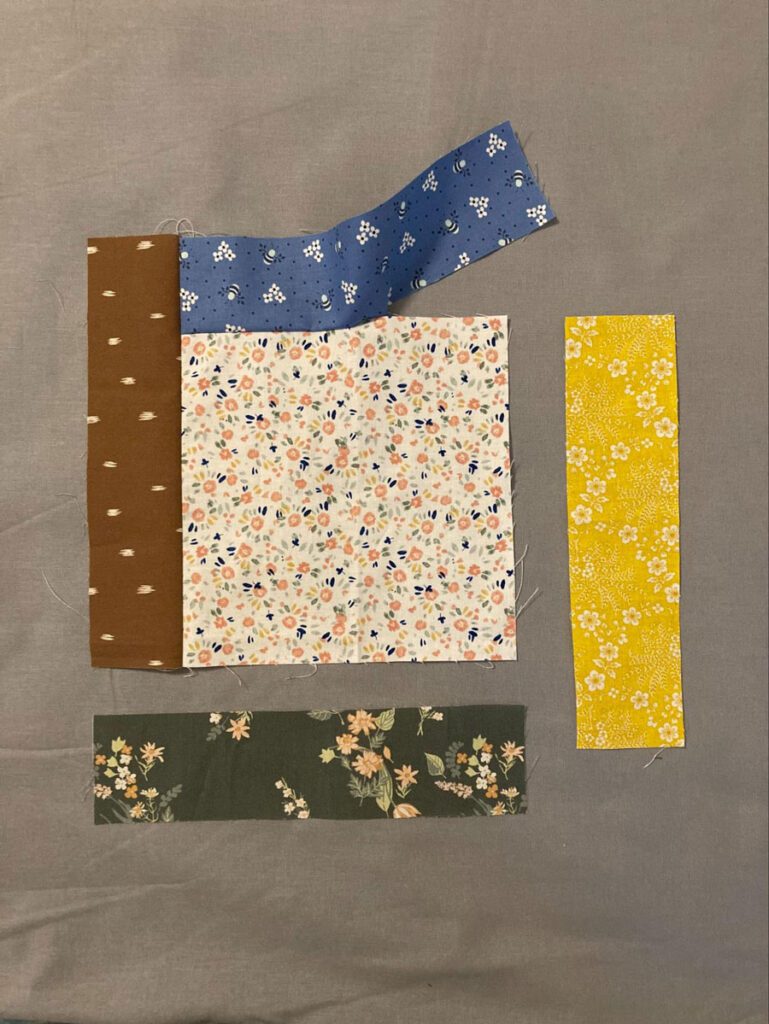
1. Lay out your strips around the block as shown in the picture below.

Step 1

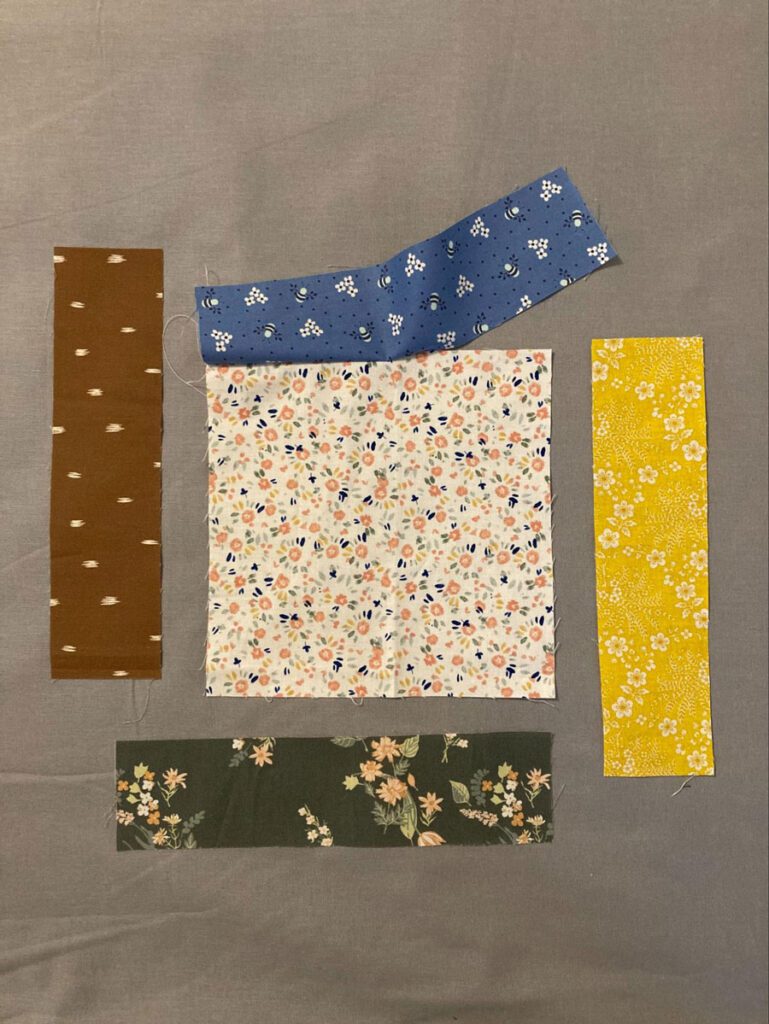
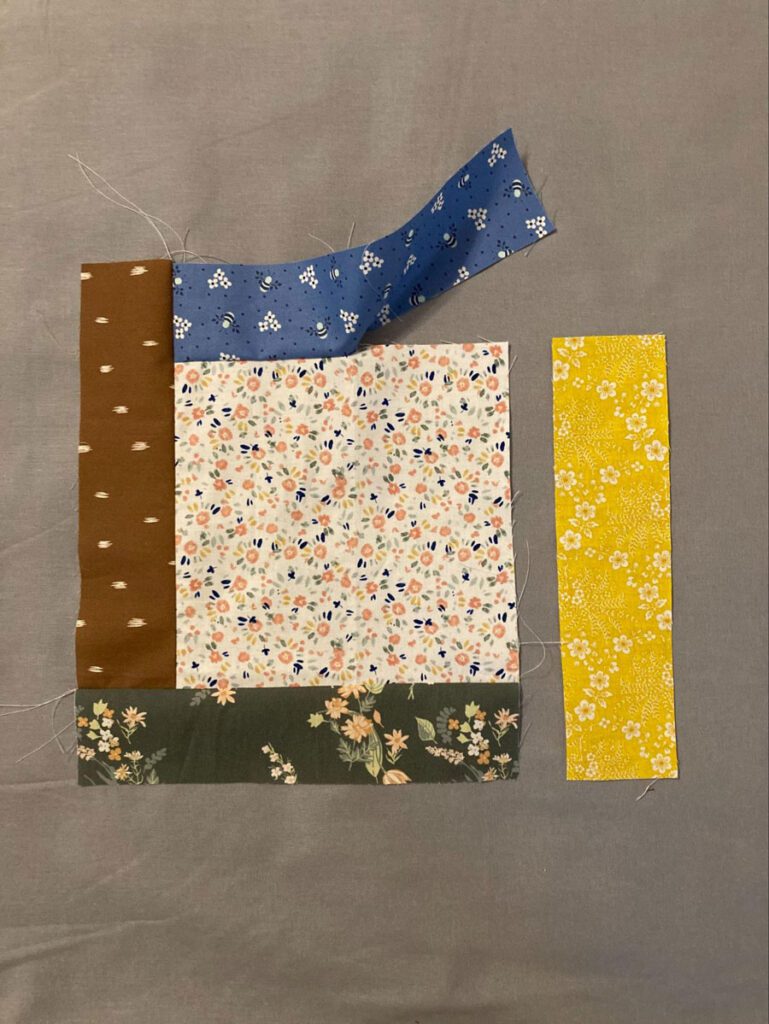
2. First we’ll sew that blue strip on the top to the square, but only sew a partial seam. So, only sew about half down the square. No need to measure exactly; eyeballing it is fine. You just want to be sure and leave enough room so that the blue piece can be flipped back out of your way later when you go to sew the yellow piece on. If you’re worried about that seam unraveling, a few backstitches should do the trick. The picture below shows what your progress should look like at this point. You can see how the blue strip is only partially attached.

Step 2

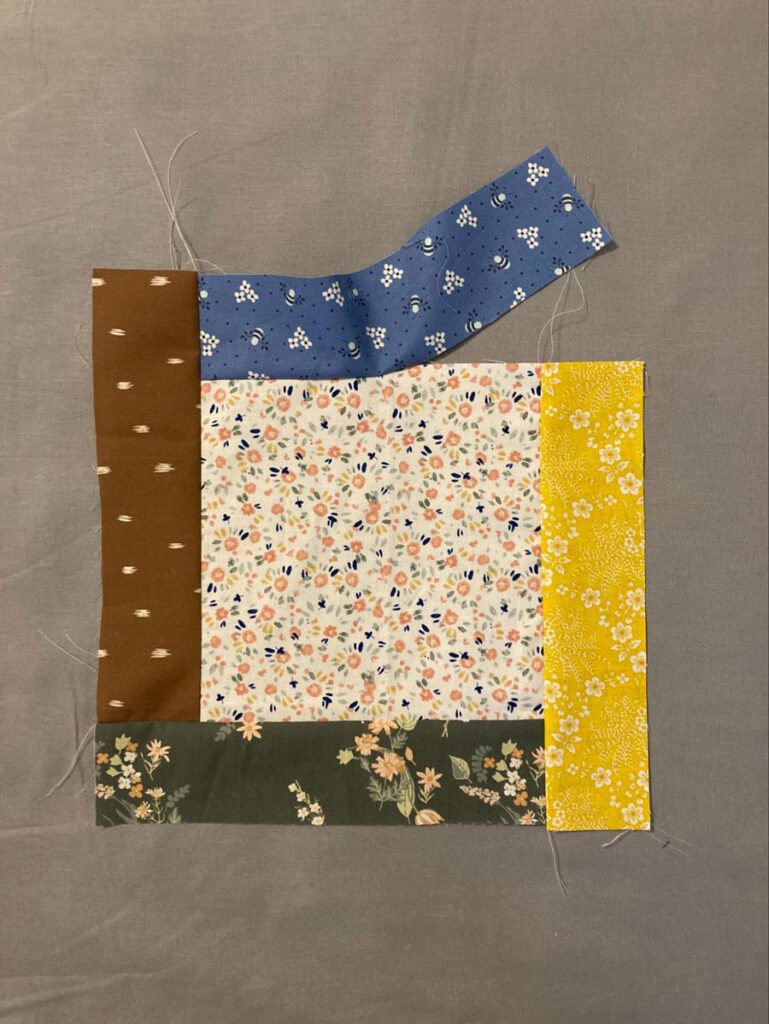
3. Now the width of the square plus the blue strip is the perfect fit for you to sew on your brown piece to the left with a full seam. We will keep going around the block attaching pieces with full seams until we get the yellow piece attached. You’ll leave that blue piece partially attached until the last step. Check out the pictures as we progress through sewing that block together.

Step 3
Step 4
step 5

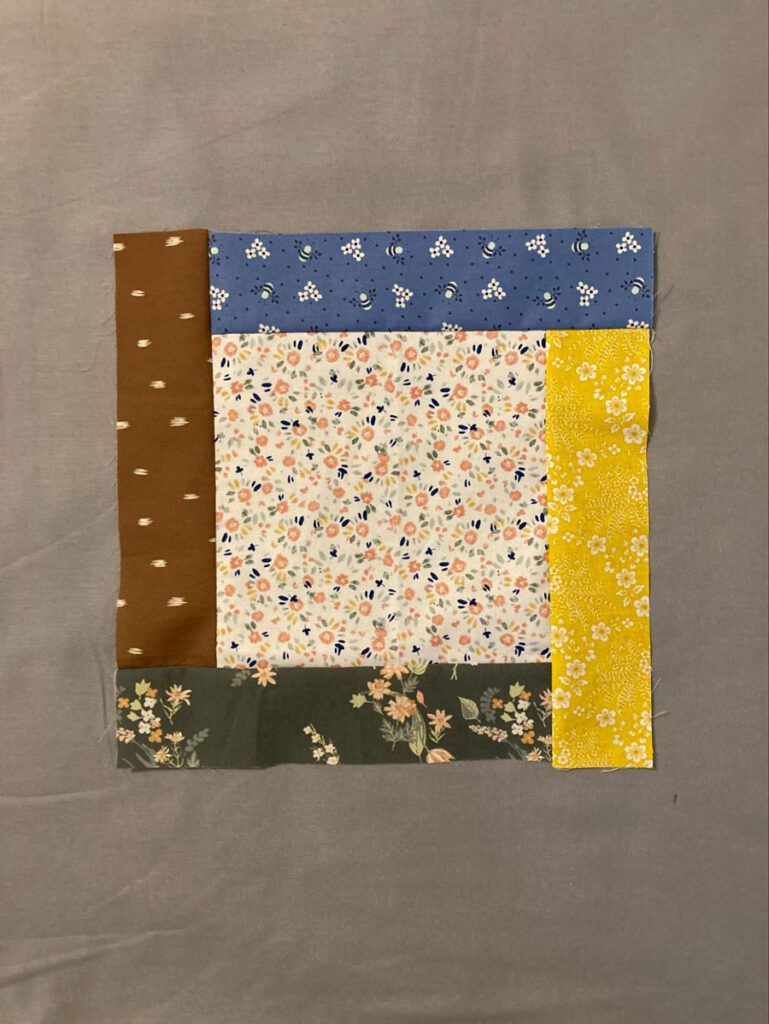
4. Now we’re ready to complete that partial seam. Flip that blue piece over onto the square, start sewing where you left off, and complete that seam. And just like that your block is complete. You just defeated that partial seam! Once you have a little practice with partial seams, a Collage Style T-Shirt quilt won’t seem so scary anymore.

Partial Seams Quilt Block

Want to make the Partial Dreams quilt yourself?

Partial Dreams Quilt Pattern


The pattern for my Partial Dreams quilt is FREE, but it’s only available to my subscribers.

If you feel like you want to try a little cliff diving, I do have a tutorial for how I use partial seams in T-Shirt quilts here on my blog. I’d love to have you visit it.

If you have any questions for me, I’m over at snugglebugstitching.com.  If you want to make my FREE pattern, I’d love to see your quilt. Post pictures on Instagram and tag me @snugglebugstitching.

MORE BLOG POSTS LIKE THIS ONE

Did you enjoy this tutorial? Be sure to check out these free tutorials: 

5 Methods For Hand Tying Your Quilt

Sew Your Own Sunglass Case

Coffee Cozy Tutorial

or SEARCH THESE

Popular categories

Craft to Career
Digital Downloads
Patterns
Podcast
Quilt Alongs
Quilt Questions
Tutorials
back to the top

Copyright 2024 Quilters Candy  |  Terms & Conditions