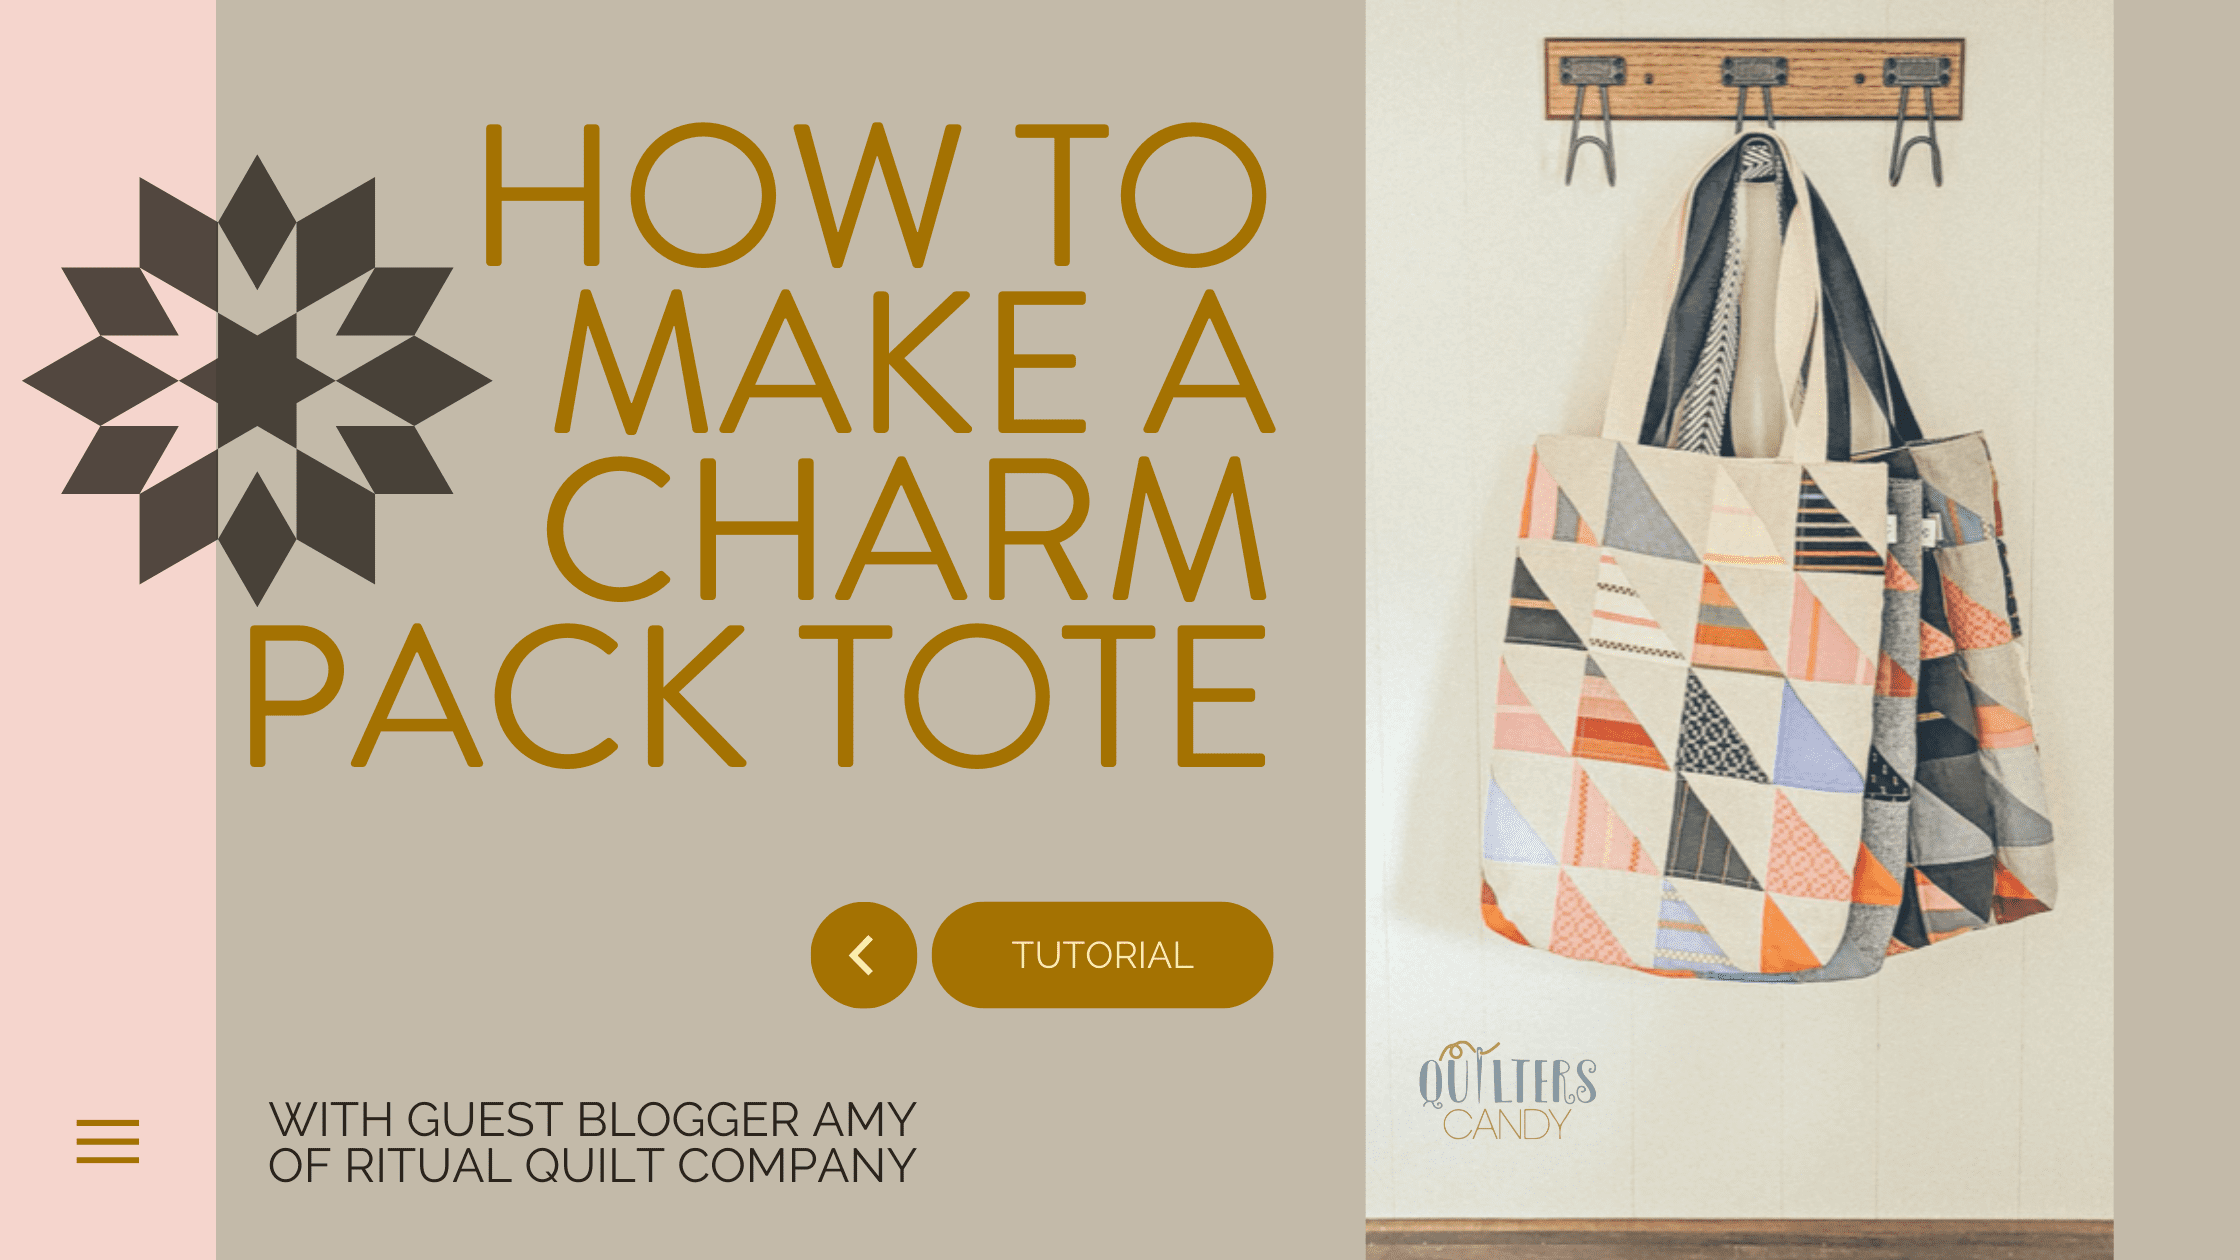
How To Make A Charm Pack Tote

July 26, 2022

how to make a charm pack tote

Let’s make a Charm Pack Tote Bag!

Hello! My name is Amy, and I’m the designer behind Ritual Quilt Company.

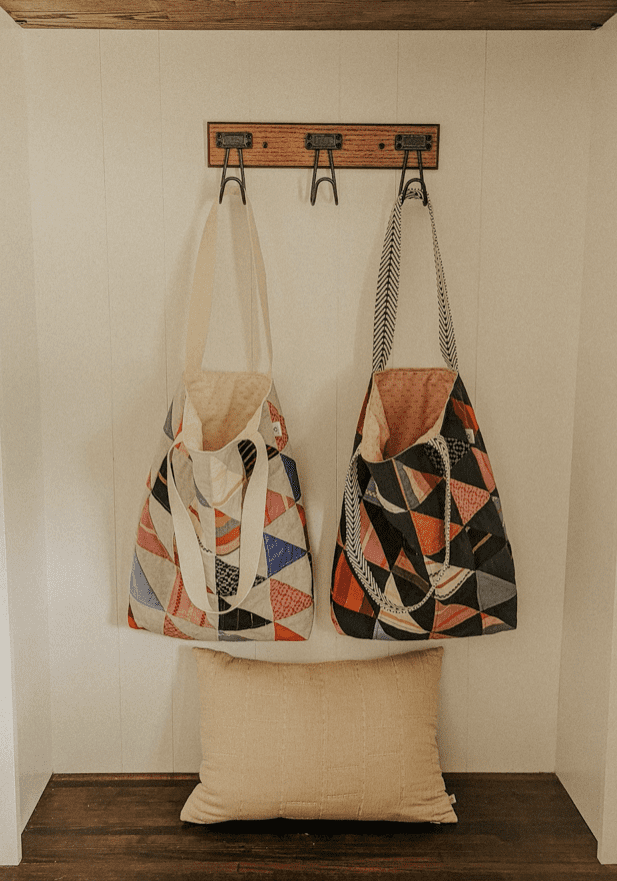
I’m excited to share this FREE tote bag tutorial with you. Before I started quilting, I was inching my way into the sewing world by sewing up bags. Never made a tote bag before? I hope you’ll give this one a try. If you can make a quilt, you can definitely make this tote! I first whipped a few of these charm pack totes up back in May as some end of the year teacher gifts. This tote finishes at about 16” x 20”. The size is generous enough to fit a few binders, a laptop, and some books. With fall right around the corner, the charm pack tote would make a great back to school gift for your favorite teachers or students.

PS – BE SURE TO GRAB ME FREE QUILT PATTERN HERE!

Amy of Ritual Quilt Company with tote bag
two totes hanging

Charm Pack Tote BAG Materials

  • Basic quilting supplies
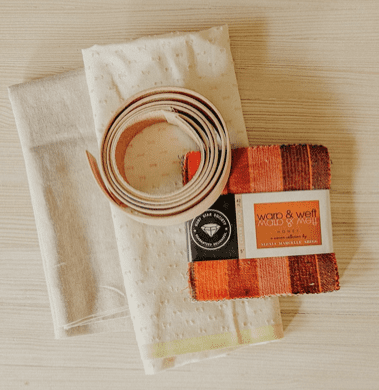
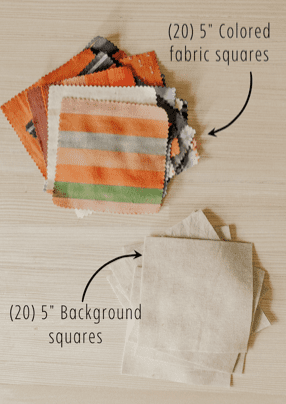
  • 1 Charm Pack or (20) 5” squares of assorted fabrics (scraps are great for this)
  • Next, 1/2 yard background fabric
  • ½ yard tote lining fabric
  • (2) 28” lengths of webbing or leather straps 
      • Webbing can be found at most craft or sewing supply stores. 
      • If sewing with leather, consider using a leather needle for the handle seam. If you’d like to use rivets, sew4home.com has a great tutorial.
      • 28” is a standard handle length, but feel free to shorten or lengthen your straps. 
    • (1) package craft size quilt batting OR batting scraps (you will need 2 pieces of batting, measuring approximately 18 ½” x 22 ½”)
  • Walking foot (optional)
fabric and supplies

Charm Pack Book Tote Instructions

  • All seams are ¼” unless otherwise noted. 

Make the HSTs

  • If using a charm pack as your assorted fabric, choose the (20) squares that you’d like to use.
  • Cut your background fabric into (3) 5” x WOF, then subcut (20) 5” squares.
cut fabric squares
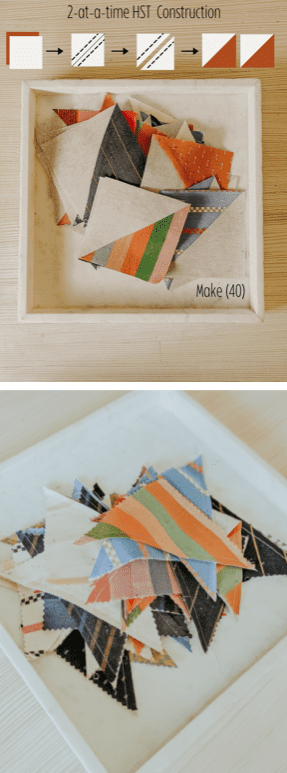
  • Combine each assorted fabric square with one background fabric square, and make half square triangles (HSTs) using the 2-at-a-time method. You will have a total of (40) HSTs. 
  • Press the HSTs and trim to 4 ½”. 
2 at a time method
ruler and fabric

Make the CHARM PACK Tote BAG Exterior

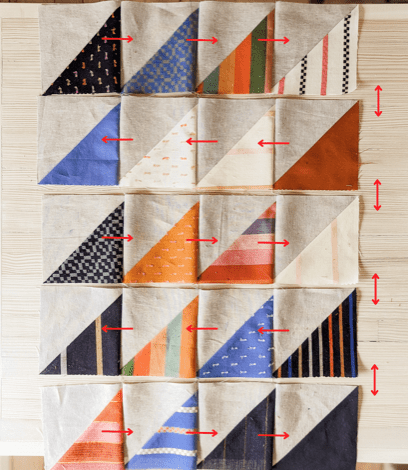
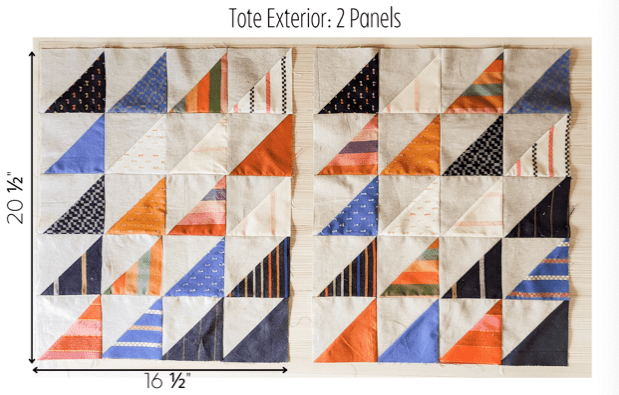
  • You will make (2) exterior tote panels; each panel will use (20) HSTs. Place (4) HSTs across and (5) HSTs down. Get creative here if you’d like; you don’t have to stick with the orientation I’ve chosen! 
  • Sew the HSTs into rows, pressing the seams in each row in alternating directions. Then, sew the rows together, nesting seams. Press seams open between rows. The diagram below shows pressing arrows for further reference.
pieaces of fabric placed 4 hst across and 5 hst down
exterior panels of bag
  • Baste each exterior panel to your quilt batting using your desired basting method. 
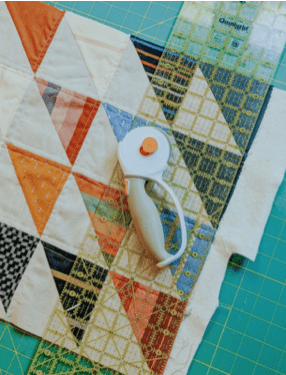
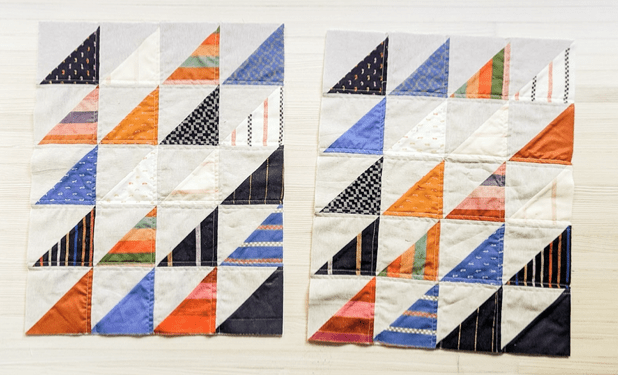
  • You can use muslin or scrap fabric to line the back of your panels, but I usually just use batting without backing. Quilt as desired and trim excess batting away. Each panel should measure 16 ½” x 20 ½”.
rotary cutter, fabric and ruler
trimmed panels
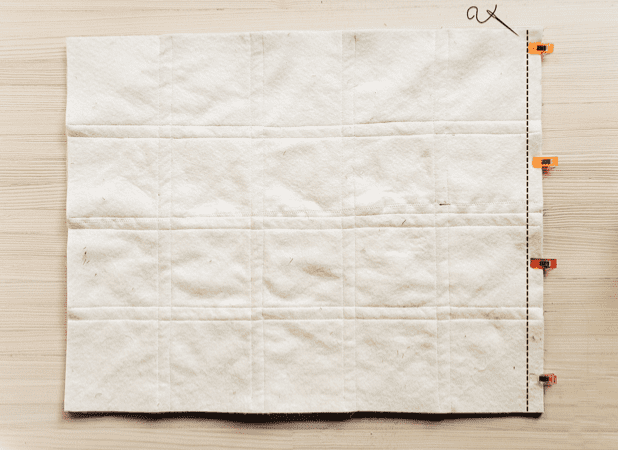
  • Place the two exterior panels right sides together. Pin or clip along one of the 16 ½” edges, and sew together. Press seam open.
clipping the bag exteriors
Tote Exterior

Make The Tote Lining

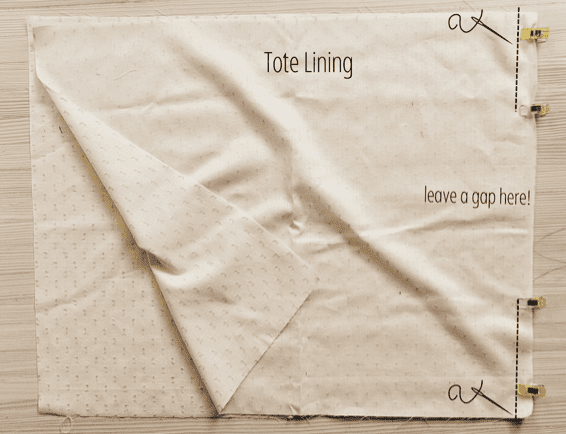
  • Cut your tote lining fabric into (2) 16 ½” x 20 ½” pieces. *Place the two tote lining panels right sides together. Pin or clip along the 16 ½” edges. **Sew together, but leave an 8” gap in the middle of the seam for turning the tote right side out later.**
two lining panels
tote lining patterned side facing each other
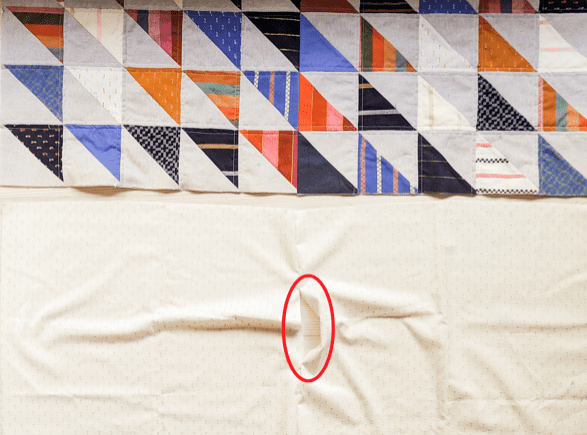
outside and inside fabric of tote

Attach the Tote Handles

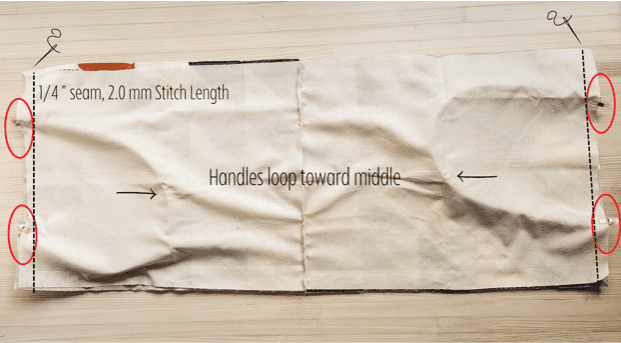
  • Gather your tote handles and pin or clip in place along the 16 ½” edge. Position each handle end about 4 ½” in from each panel side. 
  • Align the raw edge of the handles with the raw edge of the tote panel, or extend the ends of the handles slightly beyond the panel edge for added stability. 
  • Ensure that the handles are not twisted. The loop of the handles should point toward the tote panels. 
  •  Place the tote lining right side down on top of the tote exterior panels. There is now a “sandwich” with the tote handles in the middle.
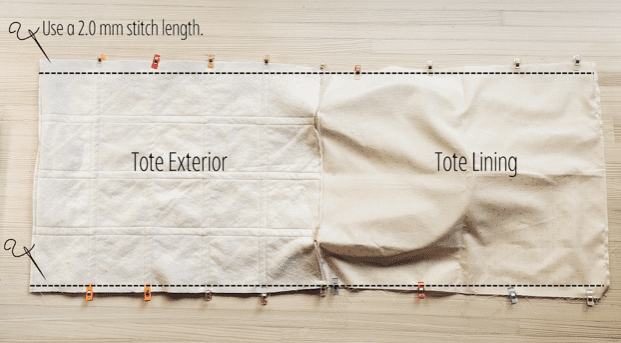
  • Sew the tote exterior, handles, and tote lining together along the 16 ½” edge. Use a 2.0 mm stitch length.
tote example
handle placement
sewing together example of seams and handle placement

Sew It All Together

  • Fold the tote so that the two exterior panels lie RST, and the lining panels lie RST. Pin or clip in place. The seams where the handles are attached should lie in the middle. Sew the panels together along the right and left sides. 
Example two of stitching

Create Depth

Now we’re going to create depth in the tote by boxing the corners. 

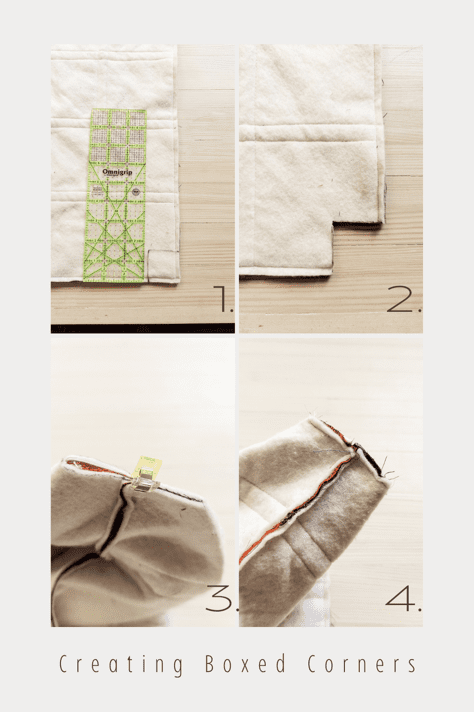
  • Use a ruler to mark 1 ½” squares on all four corners. Cut out the marked squares. I like to use fabric scissors to ensure that I don’t accidentally cut too much. Fold each corner so that the seam is in the middle by pinching the opening together. Pin or clip together and sew the opening closed.
Creating boxed corners

Finish The CHARM BAG Tote BAG

  • Turn the bag right side out through the opening in the lining and press. Be sure to push out the corners in all four boxed corners. 
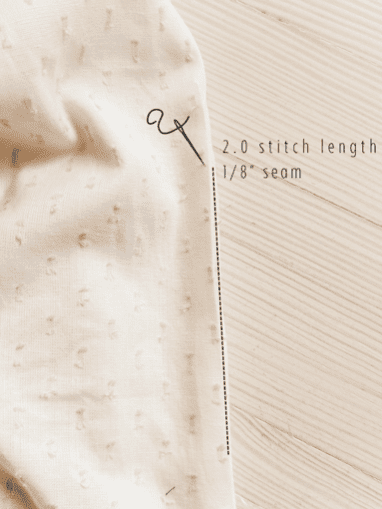
  • Sew the opening in the lining closed with a â…›” seam by turning the raw edges of the opening towards the inside.
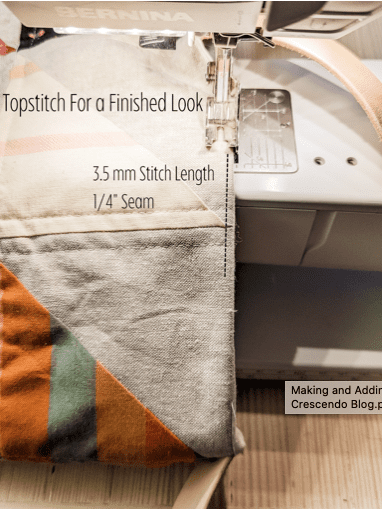
  • Push the lining into the tote, and press around the top edge of the tote. Topstitch around the top of the tote ÂĽ” in from the edge; use a 3.5 mm stitch length. This keeps the inner panels in place, reinforces the handles, and gives the tote a finished look.
Tote with inside pulled out
Stitch length
topstitch for a finished look

CONGRATULATIONS, you did it!

Finished Totes hanging on hook

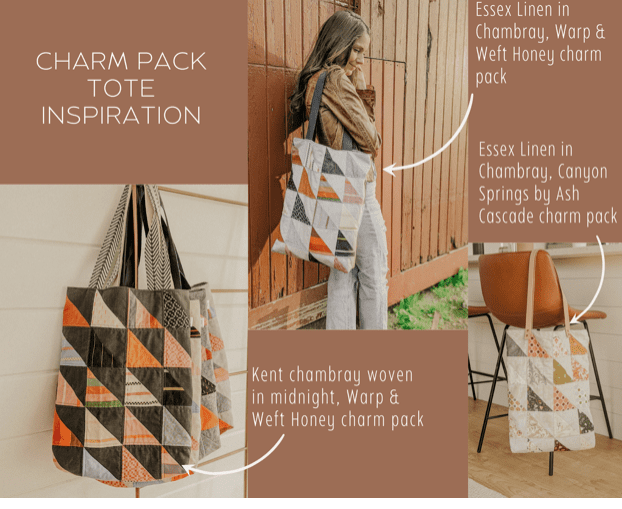
Charm Pack Tote Inspiration

If you’d like to make a tote like the one in the tutorial, the fabrics used are Essex Linen in Natural and Warp & Weft Honey by Alexia Marcelle Abegg for Ruby Star Society. The leather straps used were purchased locally, but there are tons of online retailers out there. Width used is 1”.

Here are some more examples of the charm pack tote for inspiration!

Charm Pack Tote Inspiration

If you enjoyed this tutorial, check out the reversible Riley Tote and zipper pouch pattern, which you can find in my shop at ritualquiltcompany.com.  Want to be friends on Instagram? You can find me at @ritualquiltcompany. And finally, if you love freebies, you’re welcome to download my newest free quilt pattern, Tahoe Sun, here: Free Quilt Pattern

More Tutorials Like this one

or SEARCH THESE

Popular categories

Craft to Career
Digital Downloads
Patterns
Podcast
Quilt Alongs
Quilt Questions
Tutorials
back to the top

Copyright 2024 Quilters Candy  |  Terms & Conditions