DIY Convertible Cut & Press Table
July 1, 2024

DIY Cut and Press Table Blog

This blog post contains affiliate links. If you make a purchase after clicking, I may receive a small commission at no additional cost to you. I only recommend products that I personally use. Thanks for your support!

Hi! I’m Casey Chatham of Sew Worthy Mama. I create quilt patterns designed with motherhood in mind — simple, yet beautiful patterns that help nurture your creativity. You’ll want to read this post if you have a small sewing space or if you could use a little more storage and organization in your large sewing room.


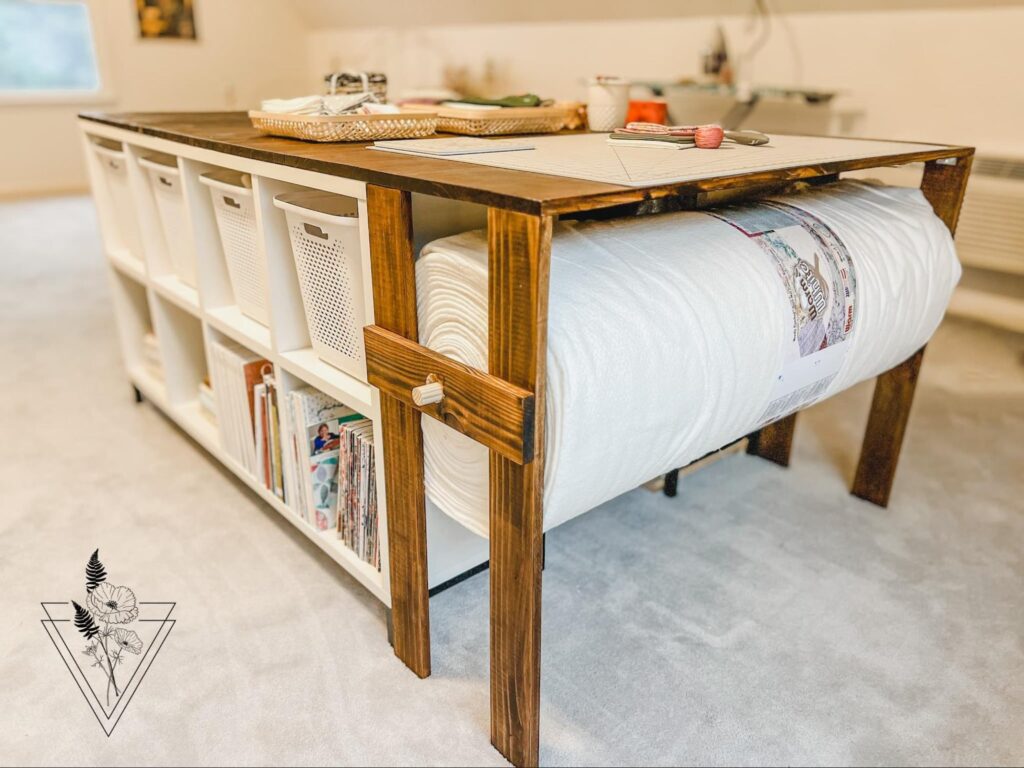
Last year, I designed a DIY Cutting Table with Batting Roll Storage. I have enjoyed the ergonomic height and the large work surface so much. The extra storage and organization has increased my creativity and productivity many times over. It’s really the best thing I’ve ever done for my creative self!

original table

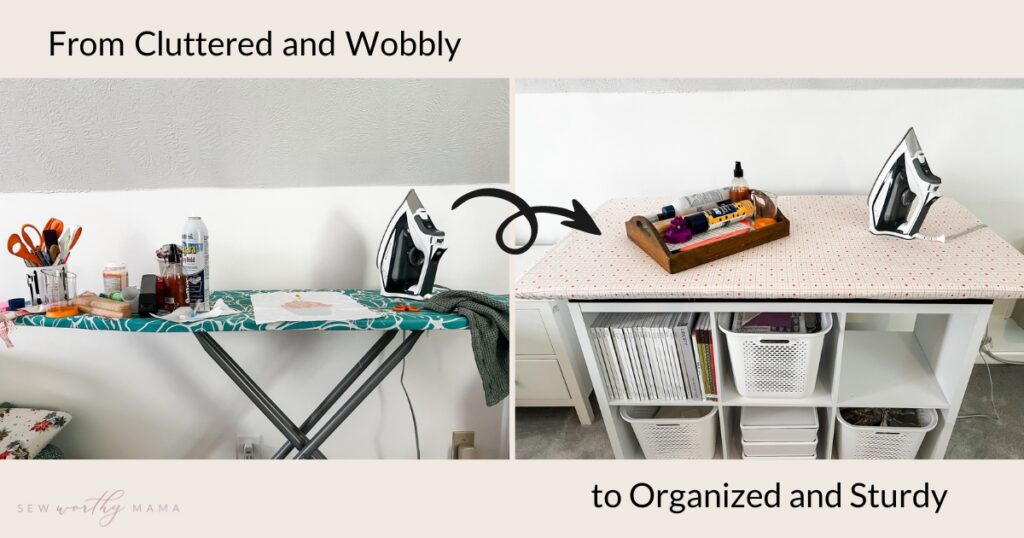
Ever since building my big table, I’ve had my eye on my little old ironing board. It’s rickety, narrow, tapered, stained, and cluttered. I end up piling stuff on the ends and having very little space to actually press my quilting work.

Also, over the last year, I’ve heard from lots of quilters who love the design of my large cutting table, but just don’t have enough space for it. 

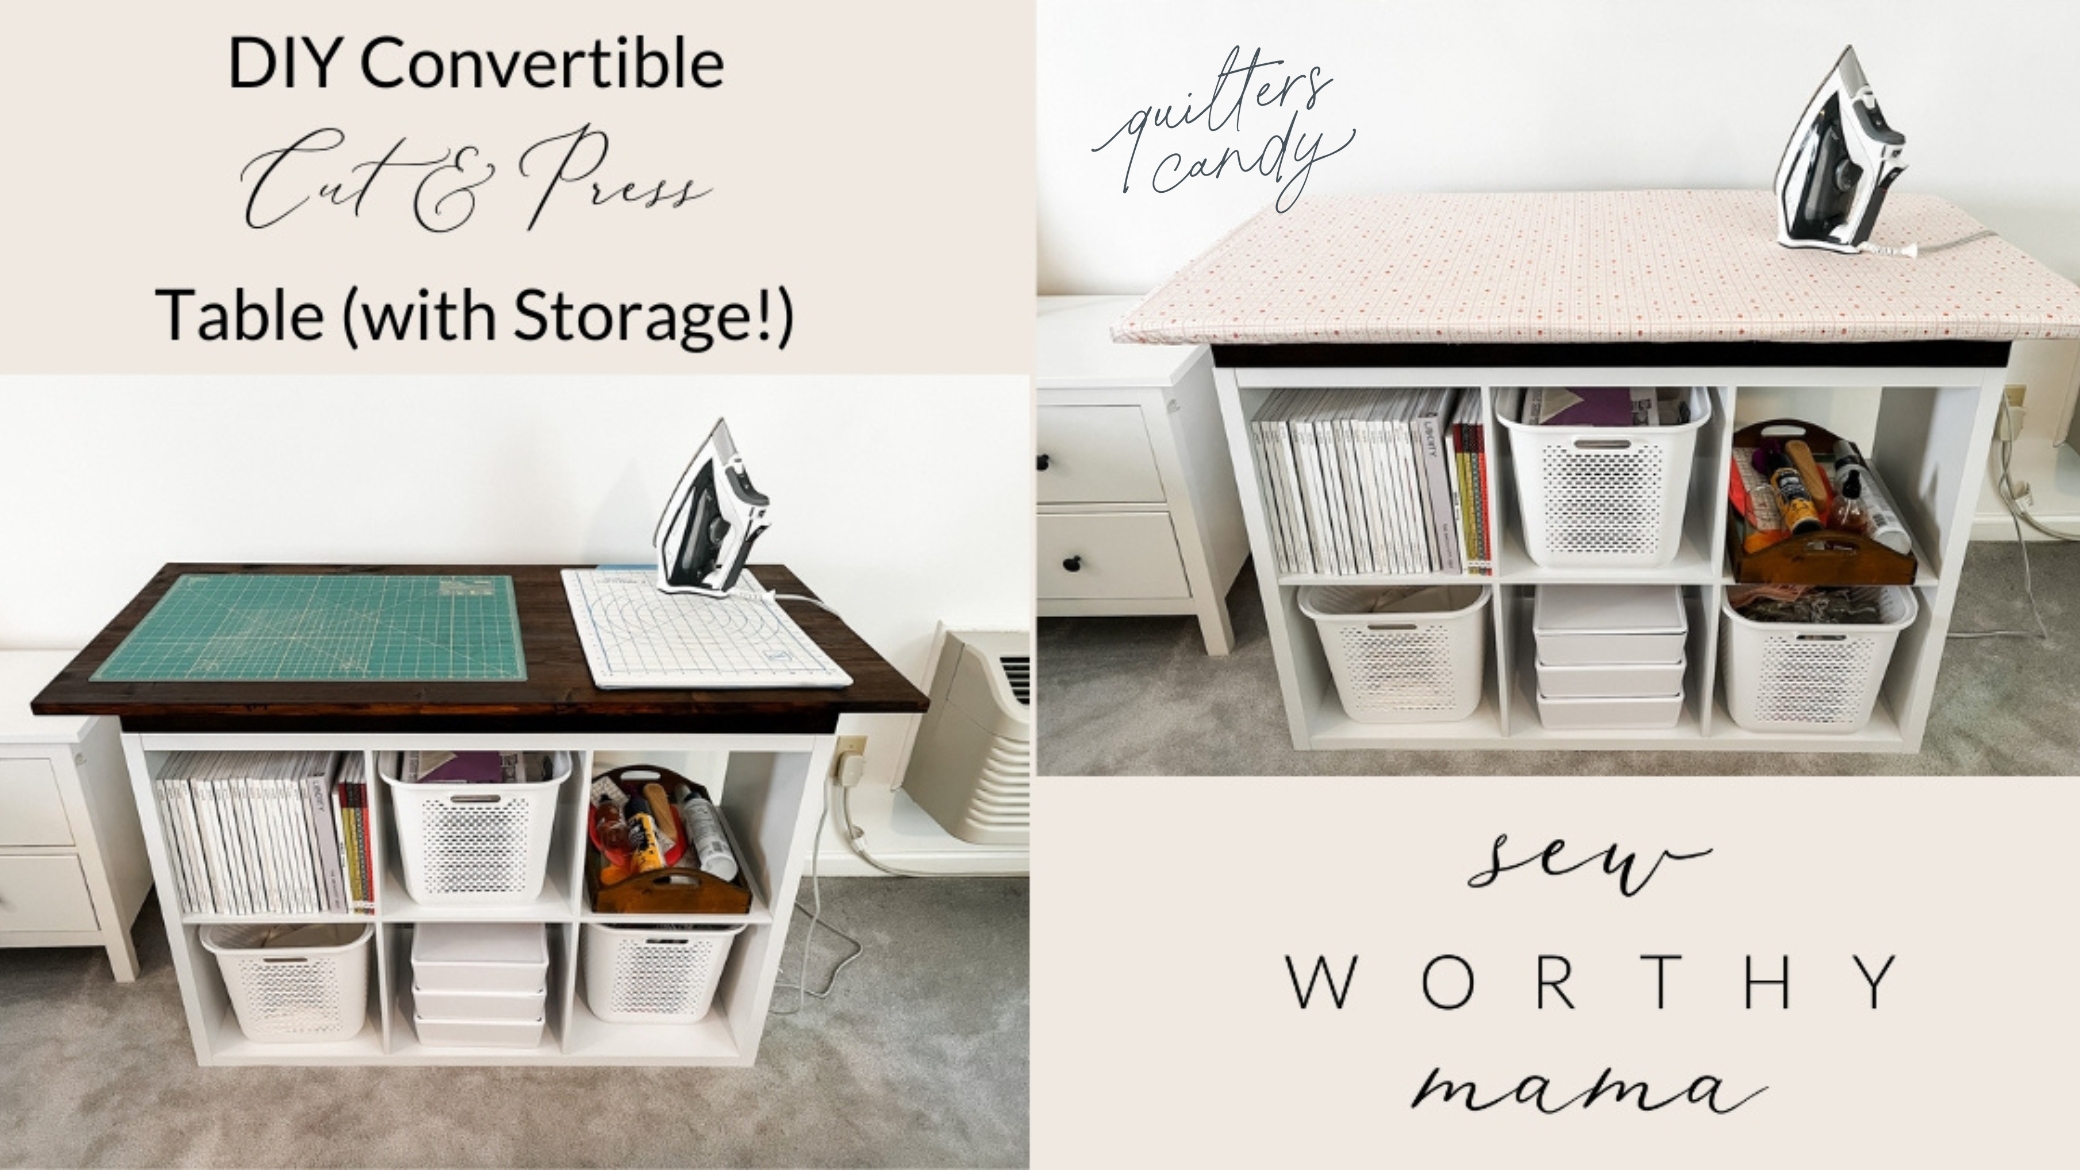
So, I built a NEW table—designed with quilters in mind. Just like my first DIY Cutting Table, my new, smaller DIY Convertible Cut & Press Table (with Storage!) starts with a simple cube shelf available from Walmart or Target, which we will build onto. And the best part is: no building experience or anything fancier than a drill is necessary!

The large, rectangular top can replace your ironing board while the base adds lots of storage and organization. Plus, it takes up only a bit more room than an ironing board, so it’s perfect for small spaces. If you have a separate cutting area, this table can serve as one large pressing station. But, if you only have room for this table, it’s large enough to convert into a multi-function cut AND press table.

Sew Worthy Mama

The DIY Convertible Cut & Press Table features

    • a sturdy base
    • a roomy, rectangular top
    • a washable cushion and cover
    • a customizable look
    • ample storage and organization
    • a hidden storage box
  • And…a convertible design! 

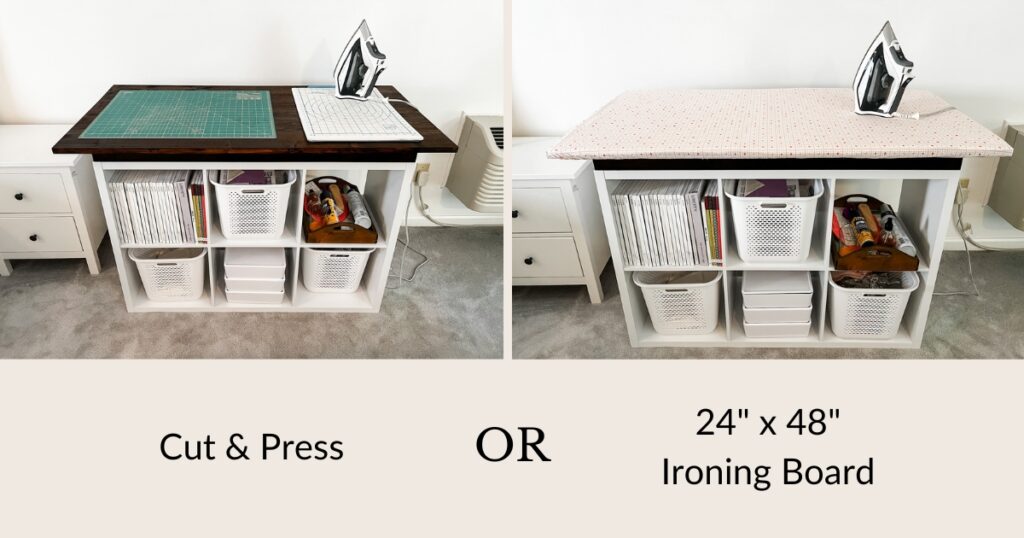
Go from full ironing board to half-and-half cut and press as needed!

The DIY Convertible Cut & Press Table takes up little more space than a traditional ironing board and offers SO much more! Let’s go through each feature in detail.

Sign up here to get my FREE step-by-step guide to build your own!

Features

A Sturdy Base

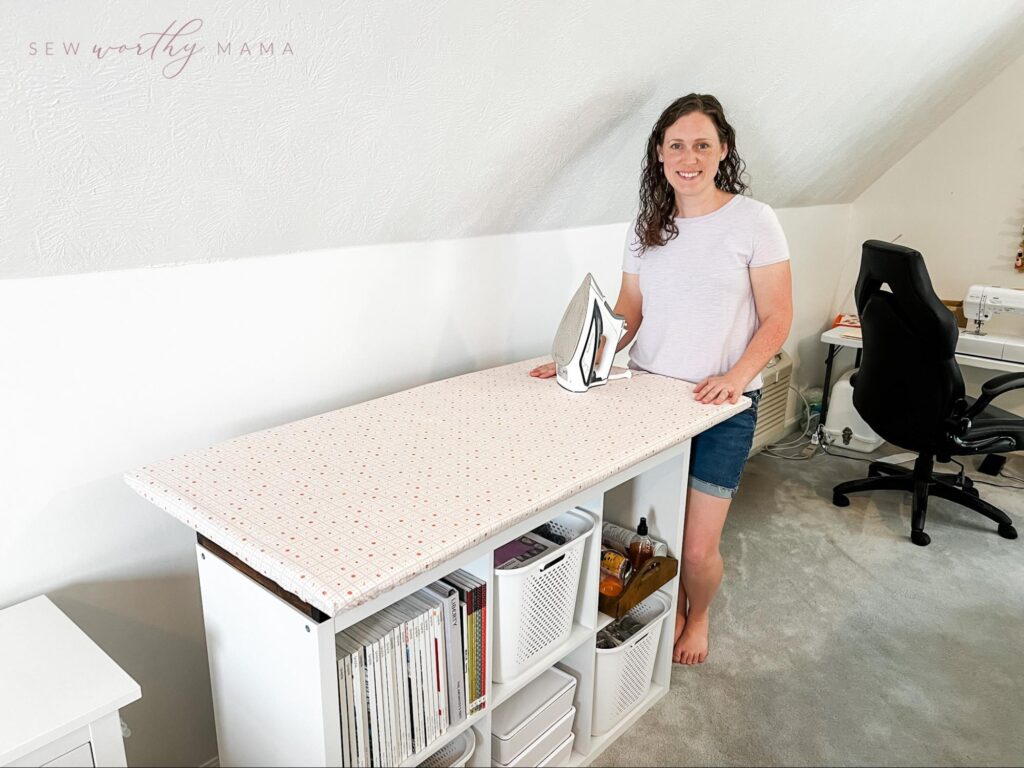
The cube shelf base makes this table much sturdier than an ironing board on a folding metal X-frame. I’m not worried about my kids barely bumping it and knocking it over like I always was with my top-heavy ironing board. Heck, I was constantly worried that I would knock over my own ironing board if I just pressed too much on one end!

ironing table

A Roomy, Rectangular Top

Let’s face it: Traditional ironing boards aren’t built for quilters. The tapered end is fine for ironing shirt sleeves, but when you have an entire quilt top to press, that tapered end makes it hard to press each seam without skipping any. Plus, wiggling the quilt top around one end slows you down.

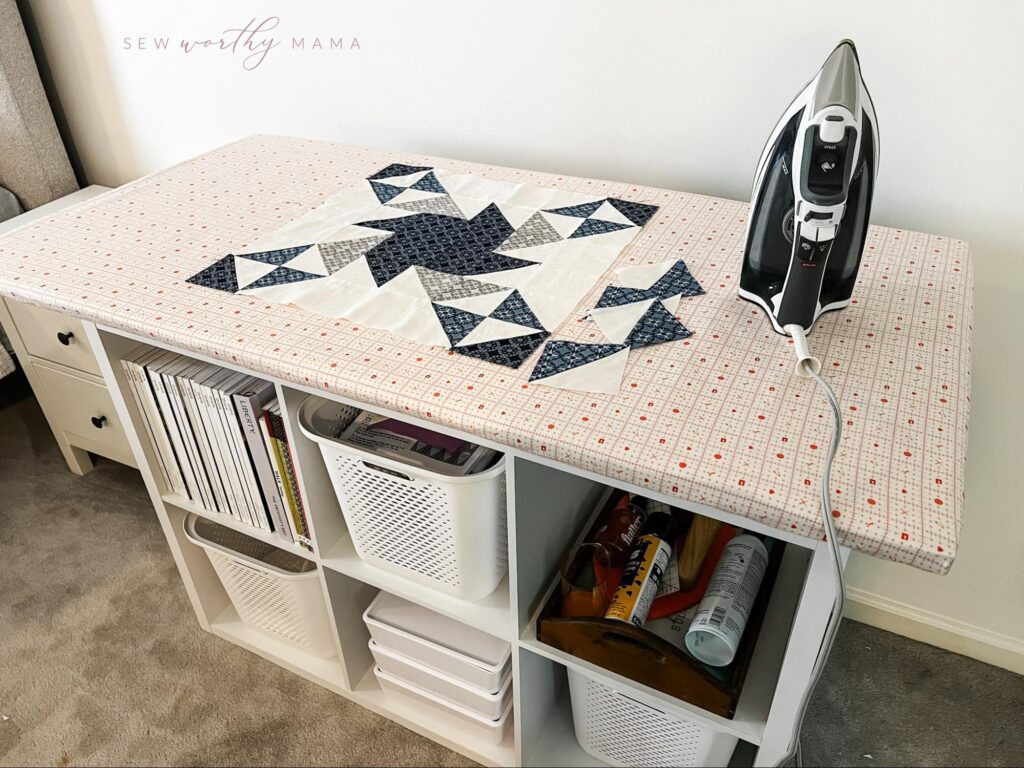
The rectangular top allows you to move a quilt top evenly as you press, ensuring that you don’t miss any seams. 

You’ll also be able to finish pressing much faster because the top is 24” from front to back! That means fewer times repositioning your quilt top as you press.

ironing on table

The block shown here (from my June’s Pinwheel quilt pattern) is 18.5”, and there’s room to spare on the table!

A Washable Cushion and Cover

Many DIY ironing boards instruct you to staple the batting to the board, making it permanent. But if it ever happens to get stained (Have you ever scorched starch? No? Me, neither…), it would be a lot of work to change it out. So, I designed this pressing station with a removable and washable inner cushion and outer cover.

The inner cushion is made of cotton batting and heat-resistant Insul-Bright, which protects the wood underneath from the heat of the iron. I consulted with The Warm Company, who shared their specific recommendations for building an ironing board. In my step-by-step building guide, I share all the details with you, too, so you can be confident your board will be safe to use in your home.

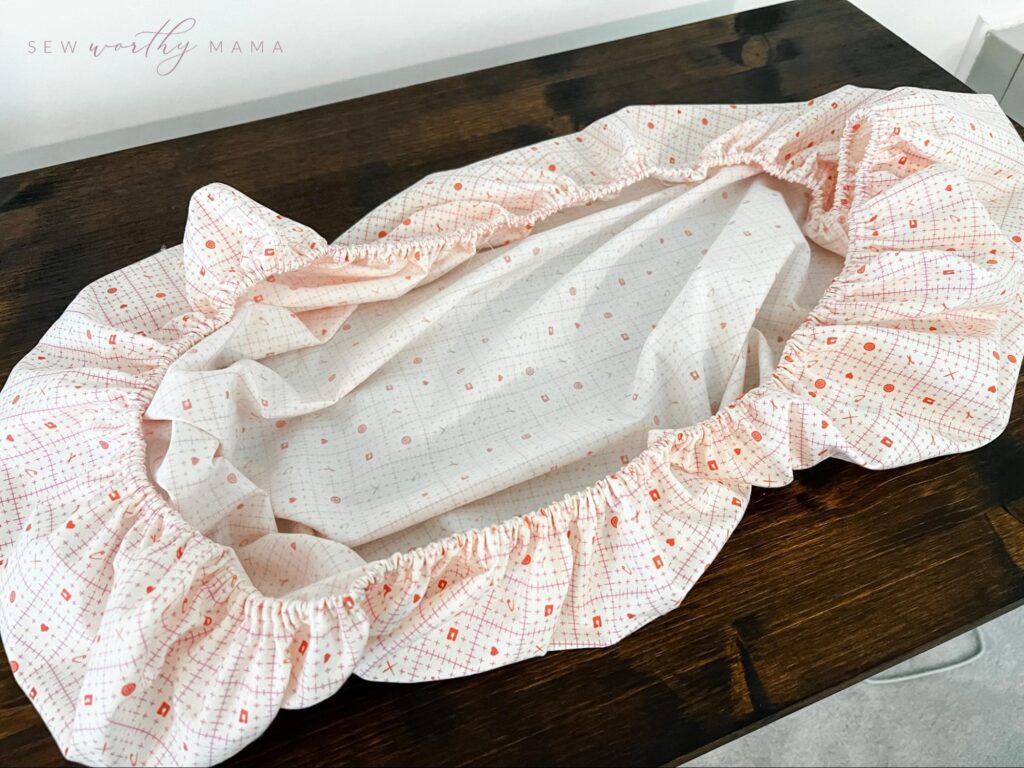
The cover is stitched like a fitted bed sheet so that you can take it off and wash it as needed.

A Customizable Look

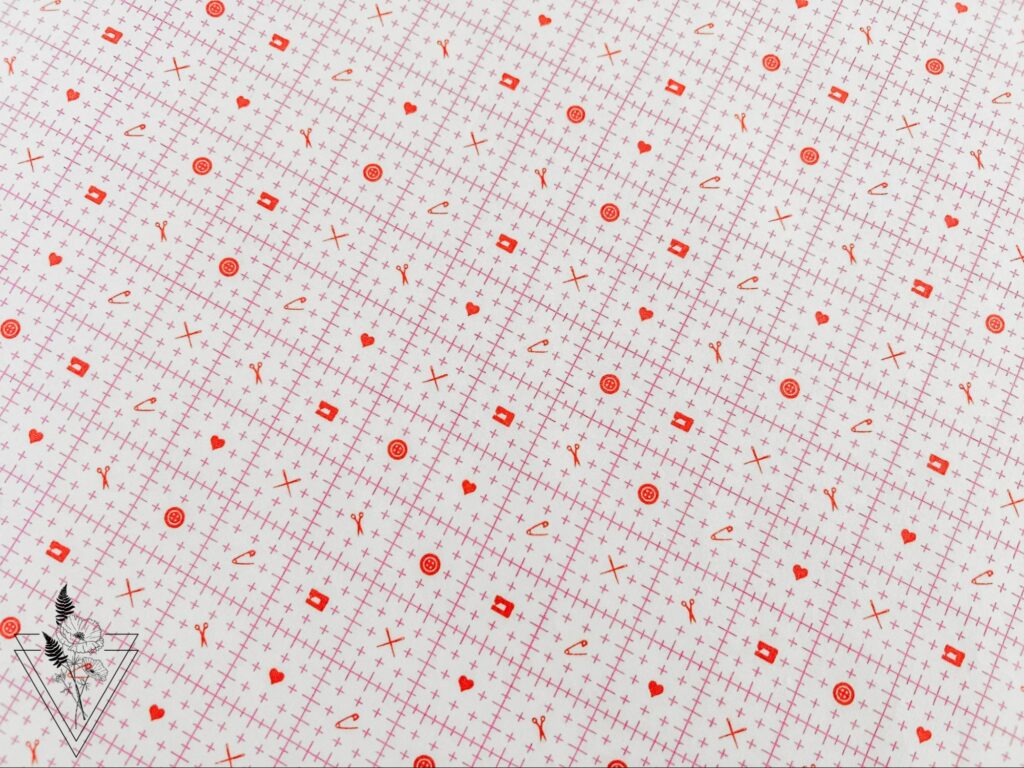
Speaking of the removable cover, you can take it off and replace it with a new one anytime. Like when Elizabeth Chappell releases a new fabric collection, you fall in love, and you have to restyle your whole sewing room! (You do that, too, right?!)

DIY Convertible Cut & Press Table

Further customize your pressing station by choosing your favorite cube shelf color (available in black, espresso, gray, natural, and white). You can also choose what color to stain your wood top. I went with a white shelf and used the Minwax stain color Mission Oak, which both match my larger DIY Cutting Table

And don’t forget baskets and inner shelves! More about them in the storage and organization section below.

Ample Storage and Organization

I am guilty of storing a bunch of supplies on my ironing board because they’re just handy to have close by. But now, with my DIY Convertible Cut & Press Table, I keep all the tools that used to live on top of my ironing board in a cube below on a tray. Everything is still just as accessible, but my board is clutter-free!

In addition to the tools and supplies I used to keep on top of my old ironing board, I now have storage space for lots more! You can keep fabric in the cubes, WIPs, scraps, other tools, and anything else you need to store!

My favorite add-ons for cube shelves are Brightroom bins and baskets from Target, but there are also 13” cube inserts that come in H-shaped, X-shaped, and even quad units that divide cubes up into smaller storage units. Mix and match if you like! Links to all these are also available in my free step-by-step building guide.

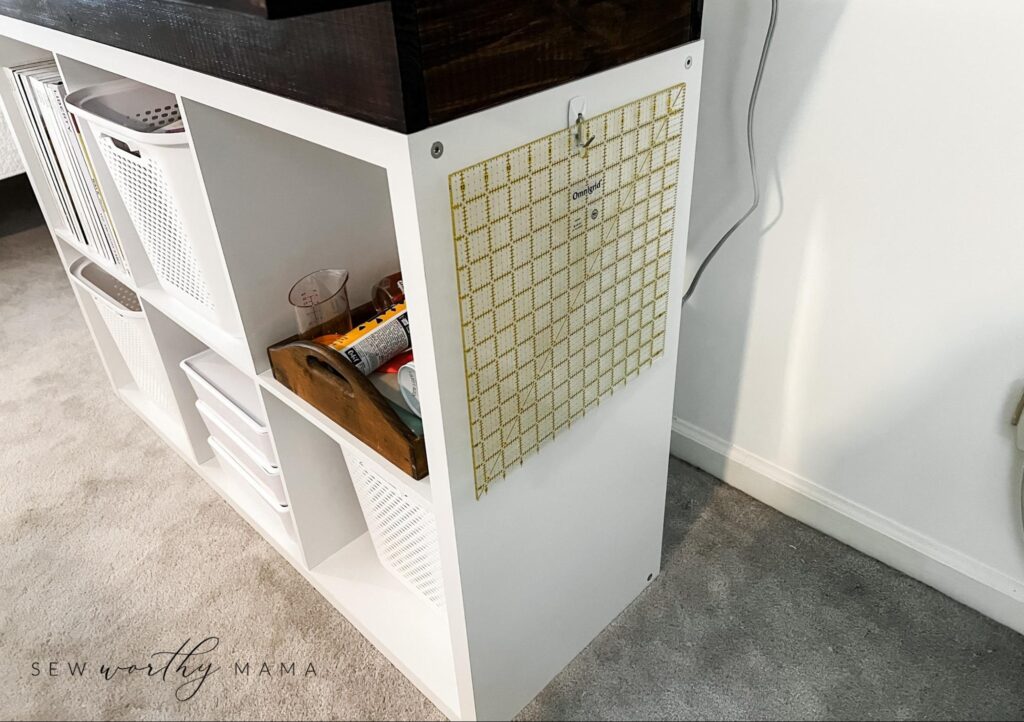
And don’t forget your rulers! Stick 3M Command hooks on the sides of the cube shelf, and store all your quilting rulers! I like to add labels with my Brother label maker so I can remember where each one goes.

ruler holder

Now, get ready for this…There’s more to the storage in this table than just the cubes. Let’s lift the lid!

A Hidden Storage Box

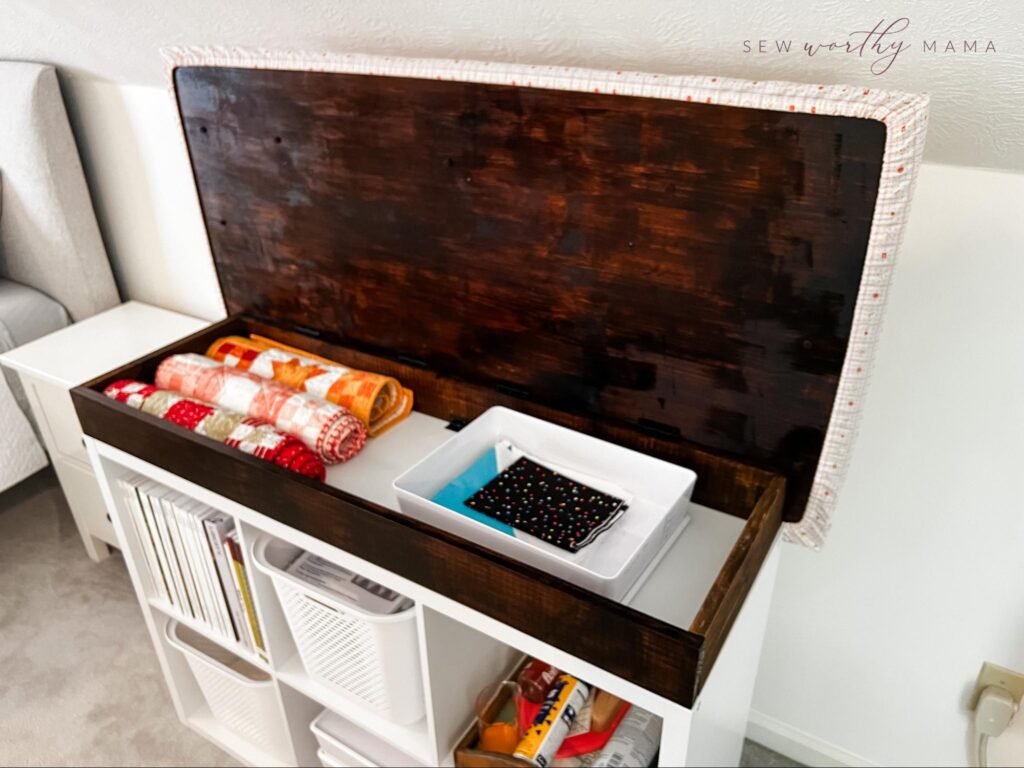
My favorite of the features on my DIY Convertible Cut & Press Table? Definitely the hidden storage under the top. You can put anything you want in here, but I will tell you this is where my printed PDF garment patterns are going! They’re so unwieldy, and often get torn up before I can use them again, and I end up having to print them again, trim and tape again, and cut them out again. It’s so much unnecessary work. But now, I have a safe place to preserve them, ready to use again when I need them! What will you store inside yours?

The top storage box under the ironing board also serves to give the unit some extra height. Ironing boards are usually around 36” high, but the cube shelf is only 30” on its own. Adding this box to the top both adds storage and brings the surface up to an ergonomic height. 

If you would like your table a bit taller, you can further customize this table simply by using a 1” x 6” board for the box instead of a 1” x 4”, and voila, 2 inches taller! Follow the same instructions otherwise.

hidden storage

A Convertible Design

This table is wonderful as a dedicated ironing station, BUT if you have a very small space—or just want more versatility—you can use your table for cutting and pressing. Just remove the cover and pad, and grab a rotary cutting mat and small pressing surface. Some people love wool pressing mats, or you may prefer something like the June Tailor Quilter’s Cut N Press II.

ironing board or cut and press

Building the DIY Convertible Cut & Press Table (with Storage!)

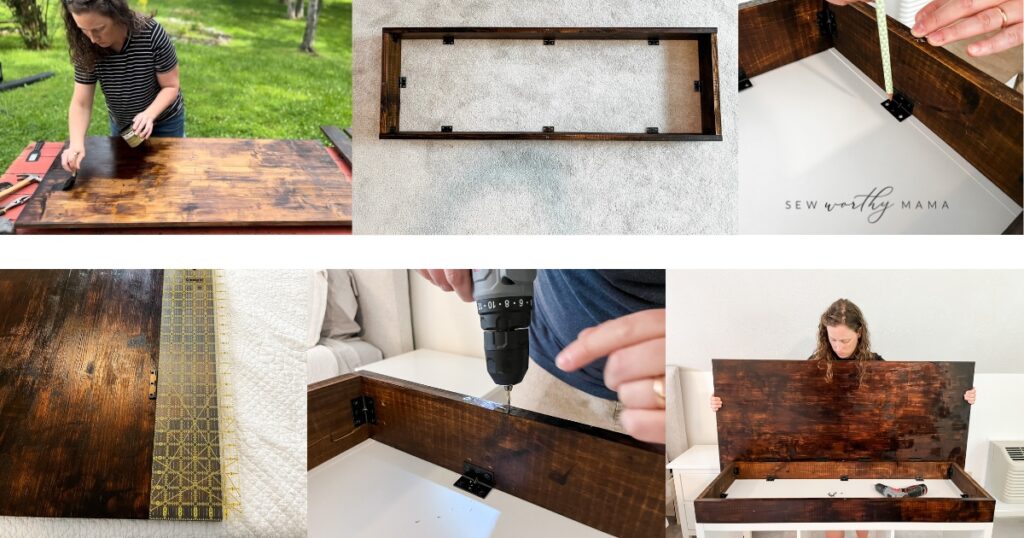
Get my fully linked supply list and detailed step-by-step instructions to build your own. For the basics, see the photos and process below.

Build the Table:

  1. Build the cube shelf according to the manufacturer’s instructions.
  2. Stain the wood for the box as desired.
  3. Build the box for the top of the shelf, and attach it to the shelf.
  4. Attach the lid to the box with hinges.
  5. Add felt furniture pads.
DIY Convertible Cut & Press Table

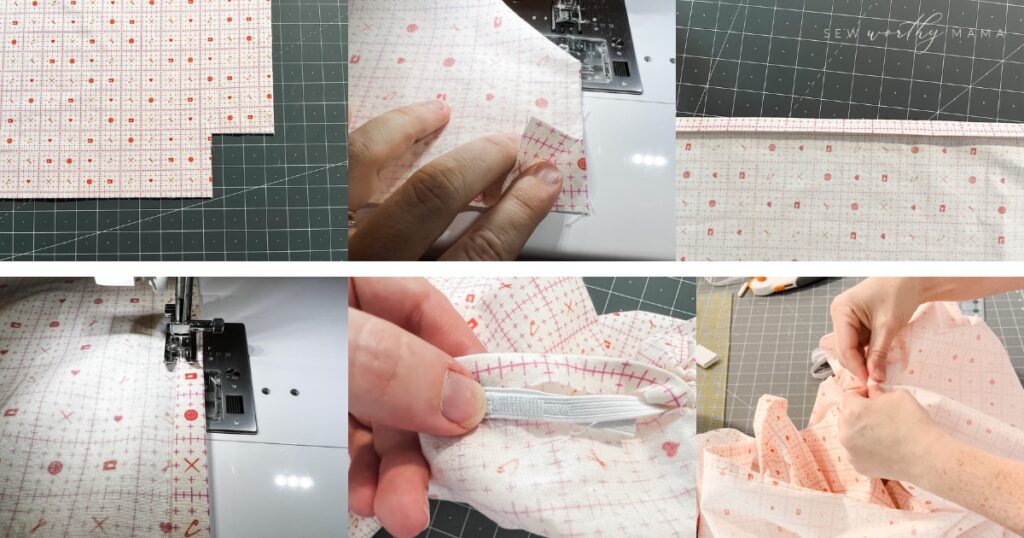
Sew the Pad and Cover

  1. Stitch a layer of Insul-Bright under a layer of Warm & White batting. Quilt them together around the edges, and then place it on top of the table.

2. Stitch the cover with boxed edges, hem the edges, and add elastic. Place it on top of the lid and batting cushion, pulling the elastic edge under the lid like a fitted sheet.

add elastic to the cover

New Patterns for Your New Table

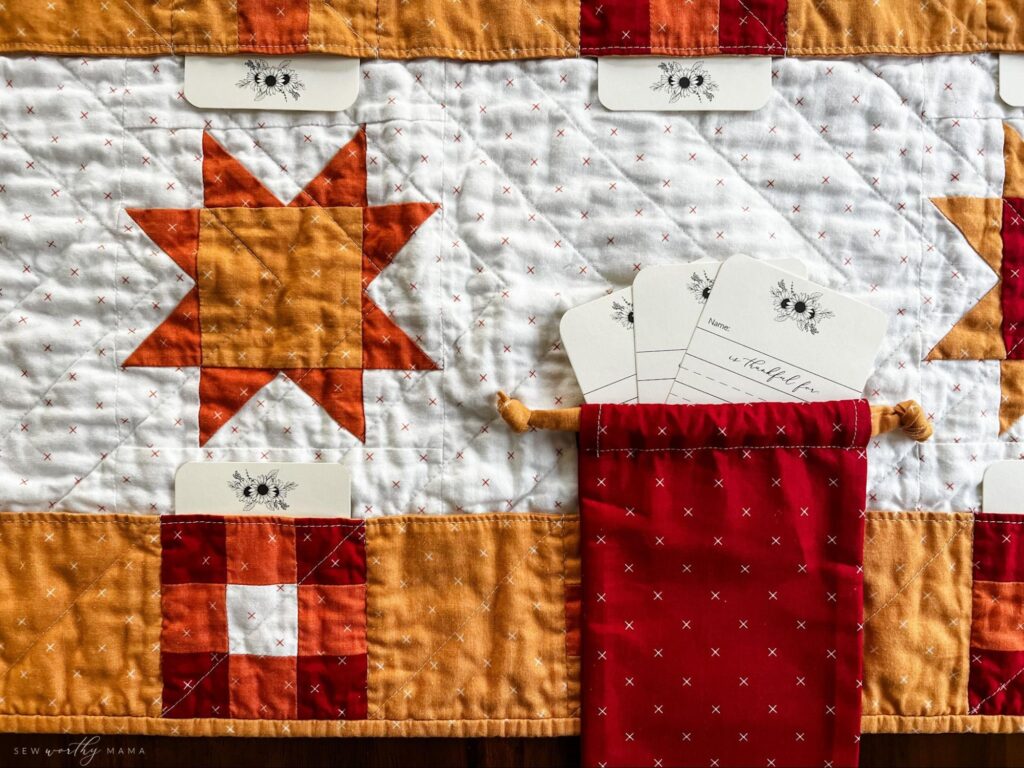
Once you have your new table made, you’re going to need some patterns to sew! Check out my Pockets Full of Blessings Table Runner Collection – more than just a table runner, this pattern uses unique pockets to build family traditions with printable cards. You and your family record your gratitude or little love notes on the cards, display them in the pockets, and save them each year in a keepsake pouch. Perfect for Thanksgiving, Christmas, Valentine’s Day, and more!

pocket

Find out more on the Sew Worthy Mama Journal and take 10% off in my pattern shop with the code QuiltersCandy. And browse all my freebies in The Stash. Enjoy!

MORE BLOG POSTS LIKE THIS ONE

Did you enjoy this tutorial? Be sure to check out these free tutorials: 

DIY Cutting Table

Perfect Patchwork Placemats

3 Hour Quilt Tutorial

or SEARCH THESE

Popular categories

Craft to Career
Digital Downloads
Patterns
Podcast
Quilt Alongs
Quilt Questions
Tutorials
back to the top

Copyright 2024 Quilters Candy  |  Terms & Conditions