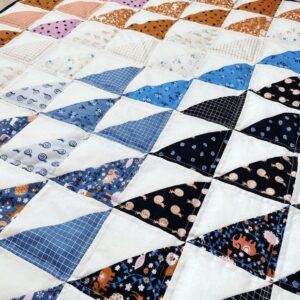
Learn how to make a Weighted Blanket with guest author Melissa of If You Don’t Sew.

Melissa shares her process of making a weighted blanket and why they have become so popular lately. Thank you for being a guest on the blog!
Have you heard of weighted blankets? That have gotten popular lately because of their supposed benefits for:
- Sleep disorders
- ADHD
- Anxiety
- Chronic pain
- Plus more
**Quick disclaimer: I am not an expert so you should definitely consult a doctor if you have questions about whether or not a weighted blanket is right for you!**
There are so many options for weighted blankets on the market but as I always like to say, why buy one when you can make a quilted one? Am I right?
Supplies to make your quilted weighted blanket:
- A finished quilt top… any finished quilt top will do! However, quilting the layers together in a grid pattern is key to making the weighted blanket. So I like to use a quilt top that is already made up of square rows & columns (a simple patchwork quilt or Elizabeth’s gingham quilt pattern are great options). This makes the quilting step super easy because you can simply follow the pattern on your quilt top.
- Quilt backing that is slightly larger than your quilt top.
- OPTIONAL: Batting. I have not used batting in my weighted blankets. My kids tend to get pretty hot at night so adding warmth was not my goal. However, you could certainly add batting if you’d like.
- Fabric for binding (amount will depend on how large your finished blanket is).
- Plastic poly pellets (I used these but there are other options available on the market. You can check out poly pellets on Amazon.
- Additional sewing supplies: Sewing machine, thread, safety pins for basting and a kitchen scale.
Steps to making you Weighted Blanket
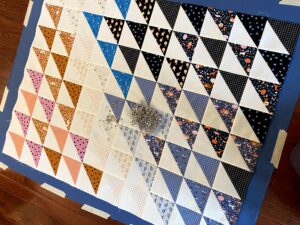
Step 1: Begin by creating your quilt sandwich and basting the layers together. To do this you’ll want to secure your backing to the floor right side facing down. Then center your quilt top face up on top of the backing. (If using batting, layer that in-between the backing and quilt top) Then secure the layers together with safety pins. Sorry spray basters… gotta use pins this time!

Step 2: Take your quilt sandwich to the sewing machine. Quilt horizontal lines AND sew along the top, bottom and one vertical edge of the quilt. Leave the second vertical edge open and do not quilt the vertical lines yet!
 Step 3: Now it’s time to begin adding the weight to your quilt. First, you will need to determine how heavy you would like your finished blanket to be. Most experts recommend using a weighted blanket that is 5% to 10% of your body weight. Divide the desired weight by the number of columns you will have in your quilted grid.
FOR EXAMPLE: If I want the my finished blanket to be 7 lbs and my quilt will have 7 columns, I need one pound of filling in the first column.
Measure out the necessary amount pellets (1 pound in our example, but this maybe a different amount for you). Distribute those pellets evenly between the rows in your quilt by pouring pellets into the open edge of your quilt. For me adding 1/4 cup of pellets to each row worked perfectly.
Holding that open edge up, give the quilt a few gentle shakes so that all of the pellets fall to the bottom of their rows.
Step 4: Now you’ll sew that first column shut. Take a look at the image below. This part is a little trickier than it sounds because you obviously need those pellets to stay put while you run it through the sewing machine. For me it helped to put a line of straight pins or safety pins next to the pellets to help hold them in place while you are sewing.


Repeat steps 3 & 4 for the remaining columns in your quilt.

Step 5: Trim the excess backing fabric and bind your quilt as desired.
You are done!
Bonus points: your arms have had an amazing workout while guiding the weight of the blanket through the sewing machine!
Thank you, Melissa, for sharing how to make out very own Weighted Blanket.
If you like this tutorial, be sure to check out these other free quilting tutorials:


 Step 3:

