How to Spin your seams in quilts

March 22, 2022

How to Spin Your Seams in Quilts

Hi Friends!

My name is JaNean, I am a fellow quilt addict and pattern designer for my company Candor Quilts which I launched last year. I live in the beautiful Salt Lake Valley in northern Utah with my uber geek of a hubby and our 4 kids. I was lucky enough last year to take both of Elizabeth’s courses, Craft to Career and Pattern Writing. She is a fantastic and passionate teacher, and I am so honored to be a guest on her blog this week!

I started quilting in 2008 when I discovered modern quilts made with bright and bold colors. My grandmother was a master quilter, and I always appreciated her work and loved the quilts she made our family, but they just weren’t my style. Once I found the color palettes and compositions of modern quilts, I borrowed a sewing machine and haven’t looked back!

How to Spin Your Seams in Quilts

I love to try new methods and making the whole process easier and more streamlined. One of the things that I have found has helped me tremendously over the last few years is spinning my seams, and I wanted to share with you what that is, how to do it, and why you should try it.

So, spinning seams is exactly that it sounds like. On the back of your quilt blocks, you press seams going in opposite directions to nest or lock them together to help keep the points sharp. Usually if you did that for say, a four-patch block, you would press the long seam to one side after you were done, like this.

photo 1

However, if you just press one half of the seam a little differently, you end up with something that looks like this on the back of your quilt block:

photo 2

See how it looks like a little windmill? It’s spinning! How fun!

Ok, ok, JaNean, we get it. It’s cute! But why should I take the time to do it? How does it help me? Great question! I would love to tell you (any other Elyse Myers fans out there?).

Spinning Seams Benefits

The benefits of spinning your seams come when you go to sew the rest of you blocks together. In modern quilting, we often don’t have sashing between blocks, so we are just sewing them to an identical block or something else the same size without anything in between. If we take the time to spin the seams, especially on something like a 4 patch or a 9 patch, or even in rows, things will go together so much smother. It will be easier to match up the points, keep the quilt square, and it will lay so much flatter which makes it easier to quilt.

Now, I love all those bonuses, but it’s not because I am a perfectionist quilter that must have every single point perfect and so on. Things do go together better, but that is my goal just because it is honestly more FUN! When I sew a few rows of blocks together, and every intersection is nested or locked, and each of the rows start and end without any “fudging” of fabric in between, I literally can’t wipe the smile off my face. It brings me such great joy! And spinning my seams is a big part of making that whole process easier and happen most of the time instead of just some of the time.

So, now that I have told you why you should care, let me show you how to do it.

How to spin your seams

Let’s take the four patch we were looking at earlier. This is the building block of a beautiful buffalo plaid or gingham quilt.

With a 4 patch like this, when we nest the seams to sew the two parts of the block together, we can press the whole seam in one direction, or we can spin them. To spin the seam, all you need to do is make sure that they are all going in the same direction, as in a pinwheel is always spinning clockwise, or counterclockwise. Here I am not refereeing to all seams pressed to the left or to the right, but in a circle.

four pieces of fabric with stitches

If that is making you scratch your head, just take a look at this video:

See how that works? You may have noticed in the video that sometimes you need the help of a seam ripper to get the middle of the seam to lay flat, but you are only taking out a few stiches and it doesn’t harm or compromise your seam at all.

How to Spin your seams in quilts
pieces of fabric and pin

Ok, now that we have a few of these done, let’s see what happens when they are all laid out together.  Since each 4 patch is pressed the same way, as in all the seams spin clockwise, when we put them together, look what happens:

how to spin seams in quilts

They can nest and spin here too!

If we had just pressed them all to one side, we would have had big bulky seams to press down and we wouldn’t have the benefit of nesting the seams as we put blocks together.

Now, take a look at the seam when you sew the blocks next to each other, they nest of course, but now they spin in the OPPOSITE DIRECTION that the block seams did.

If the bocks spun clockwise, the seams where the blocks are sewn to each other will spin counterclockwise. Neat huh? This allows you to spin all the seams in your quilt, and there will be NO BULLKY seams to speak of or drive you or your long armer crazy as you quilt. Awesome!

Applying spinning seams to your quilts

Now that we know how to spin seams, lets look at different ways that we can apply that in different quilt patterns. You won’t always be able to do this of course (for pity sake, if you are making an Elizabeth Hartman pattern, press seams open!), but for many block based patterns this works really well.

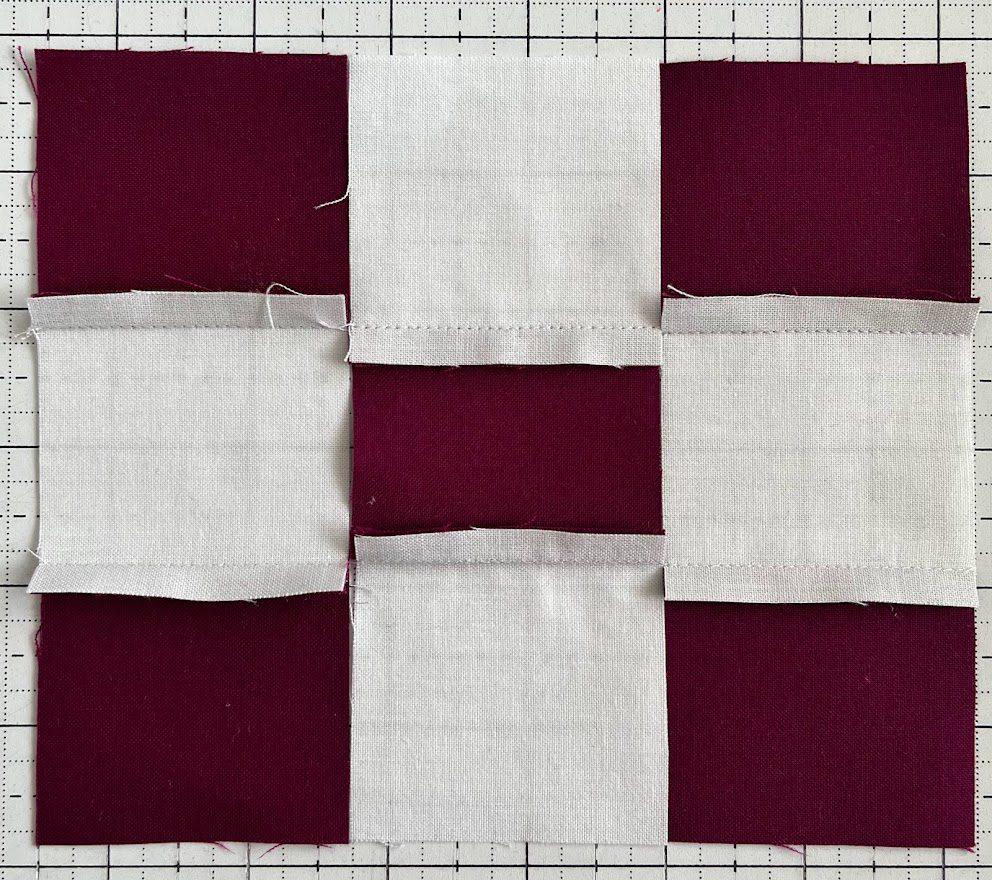
Let’s look at a 9 patch quilt block. You might need to plan this a little, but it doesn’t take too long to figure out, and it saves you lots of headache later. For a nine patch, it usually switches between a light and a dark fabric. This makes our life so much easier. For each of the three sections of a 9 patch, just press the seam to the dark fabric. Boom.

photo 8

See how all the seams are going to nest? Now when we sew those together to make the block, instead of pressing the long seams all to one side, we are going to treat each of the sections separately and spin all the seams in the middle. Once you do this a time or two it becomes second nature, and you won’t have to think about it.

How to Spin your seams in quilts

Now when we sew the 9 patches together, they work a little differently than the 4 patch from earlier.  On the 4 patch blocks they each only had one spun seam in the middle, but for a 9 patch, there are 4 seams, which means if you press them all the same way, they will not go together and nest to each other.

How to Spin your seams in quilts

But wait! If you use a non-directional fabric, all you have to do is rotate the block and voila! Like magic, all the of the seams can nest and therefore spin as you sew these together.

photo 11

Spinning Seams as a Pattern

Think of spinning and nesting seams as an AB pattern. A 4 patch is like this:

How to Spin your seams in quilts

AB

BA

While a 9 patch is like this:

image 2

ABA

BAB

ABA


When you put the 4 patches together, the pattern continues, and things work out perfectly. For the 9 patches if you don’t rotate the block, you get a ABAABA pattern that doesn’t work for spinning seams and makes the seam bulky. 

The blocks need to be pressed every other direction to make the pattern work.

This can also be applied to sewing rows of blocks together.

ABABABABAB

Then the next row they need to start the opposite way.

BABABABABA

When we do that, everything in the whole quilt will be able to nest, and your job making sure all the seams line up gets so much easier.

image 3

Spinning Seams in a Gingham Quilt

For example, let’s look at Elizabeth’s Gingham Quilt Pattern. Hopefully you have Elizabeth’s free pattern by now, but if you haven’t here is the link:

https://quilterscandy.com/free-gingham-quilt-pattern-tutorial/

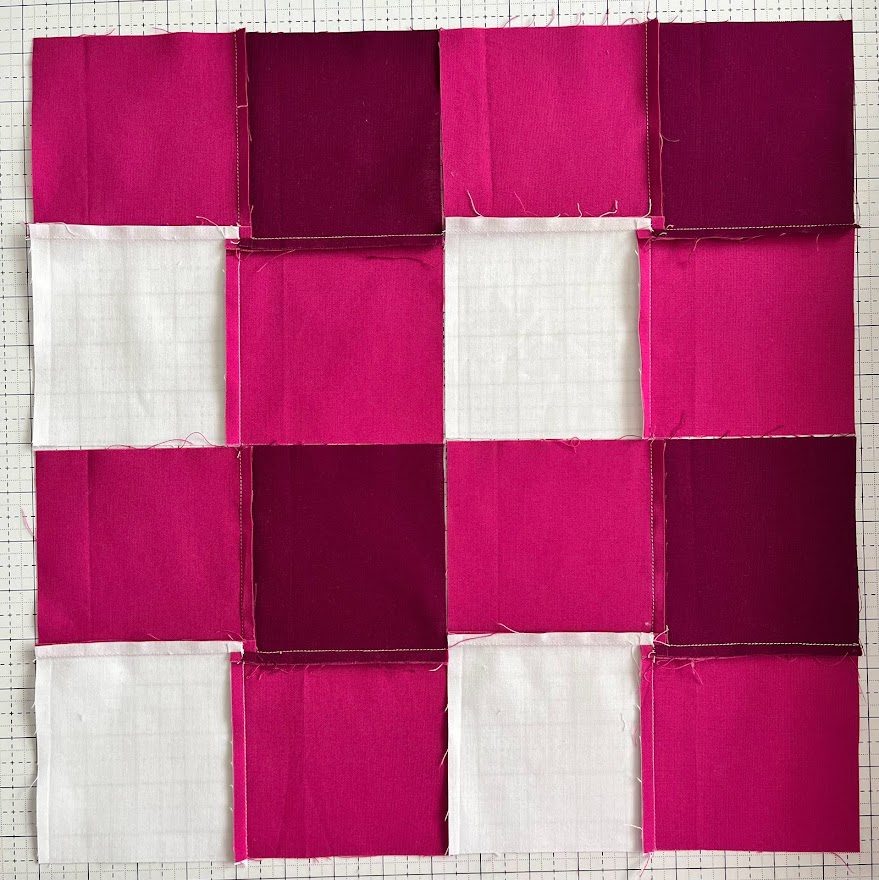
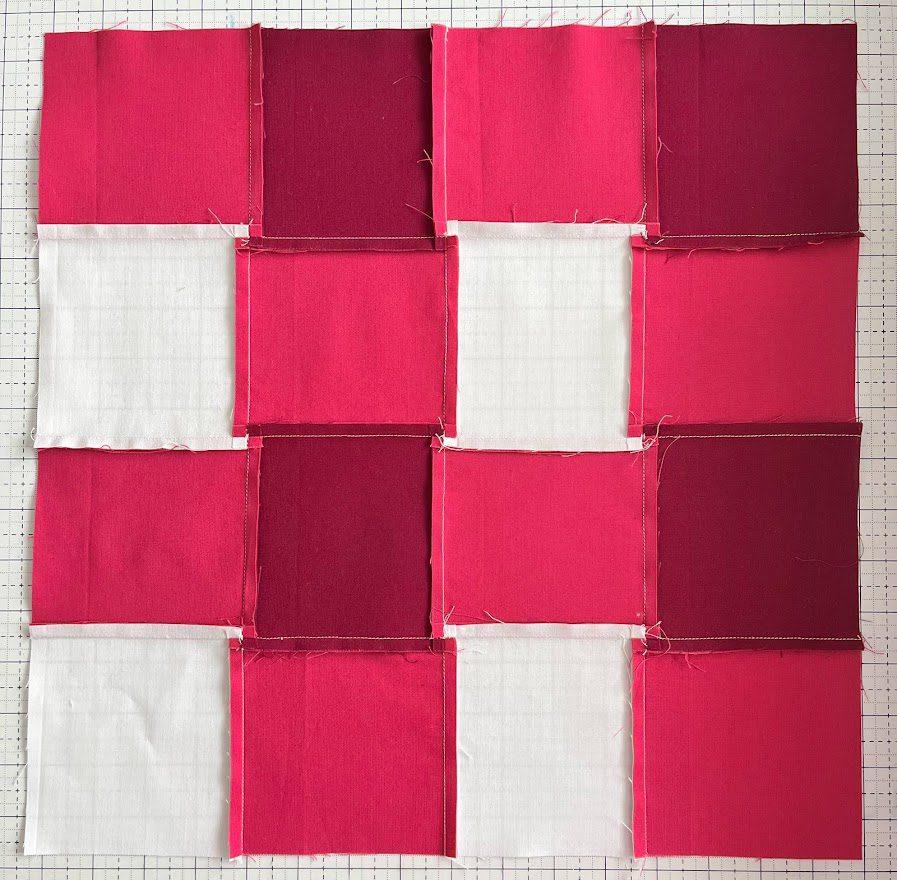
Since she cleverly constructed the gingham pattern in rows, all we have to do is make sure that each row has all of the fabrics pressed every other direction. To make things easier, and since the nature of Gingham includes medium value fabric in every row, let’s just press all the seams TOWARD the medium value fabric for both strip sets. That way, each row will nest AND you will be able to spin the seams too.

image 4

When you do this, it automatically makes the pressing pattern ABABABA/BABABAB since we are always pressing toward the medium fabric and the medium fabric shows up in every row, opposite of where it was in the previous row.

I do the same thing when I sew any rows together on quilts that have basic square blocks. If you start your row with the first seam pressed to the right (A), then the next seam should go to the left (B) and so on. The next row needs to be opposite, so the first seam should be pressed to the left(B), then the second to the right (A), and so on. Think of It like this: for A blocks the seams are pressed AWAY and for B blocks seams we are BRINGING THEM IN. Ok that was a stretch, but you get the idea.

Image 5

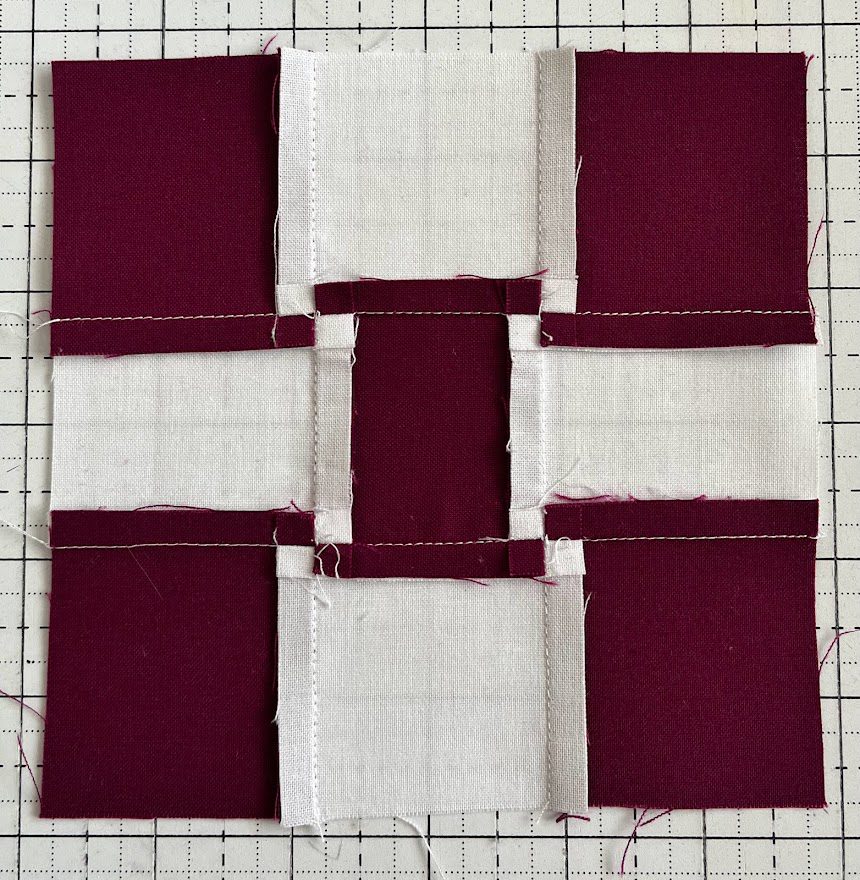
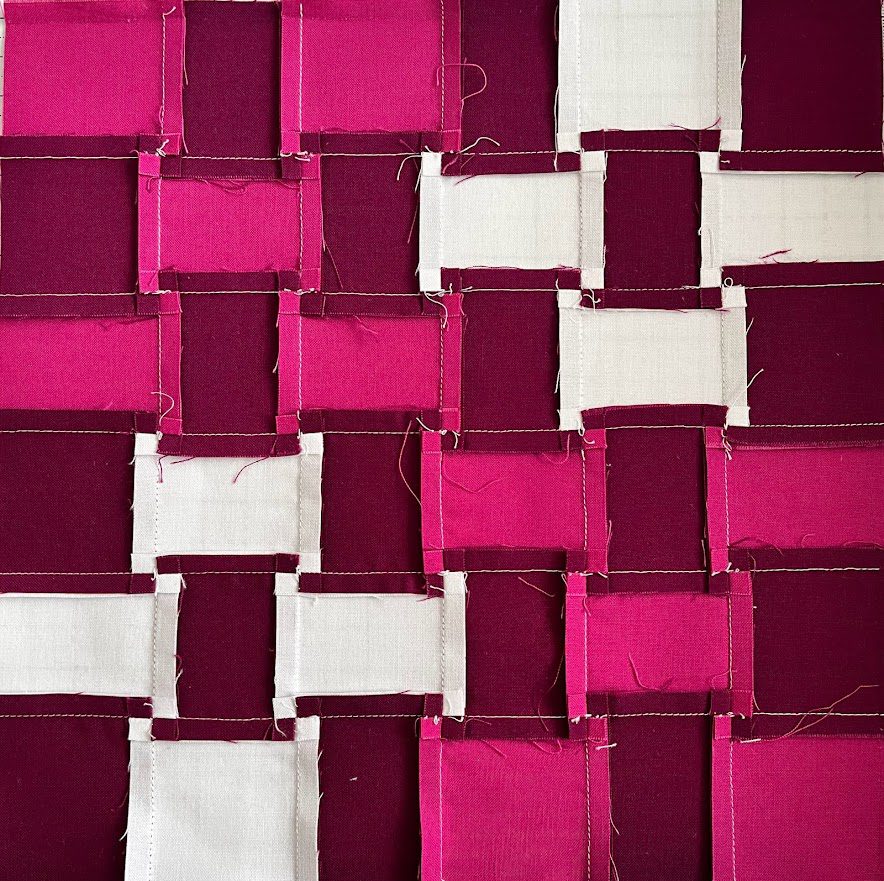
If you look at these four 9 patch blocks I sewed together, you can see the every other pattern if you just look at each row individually. And it makes these really fun spool shapes on the back of the quilt, and such sharp points on the front of the quilt! So much fun.

photo 12
Photo 13

So, there you go! That is how I press all my seams in simple square block quilts (I use this method if HST’s are involved too, but I always press the diagonal seam open to keep the bulk down). I highly encourage you to just TRY spinning seams. If I didn’t do a good enough job explaining it (doing is easier than teaching sometimes :), then just try it for yourself. Get some scraps and make (4) 4 patch blocks and try it. It’s only fabric, and you will get the hang of it after just a few tries.

In case you could use a little cheat sheet to keep with your pattern stash, I have one available to you here:

I hope this has been helpful! If you have any questions or need help, shoot me a DM on Instagram @janeanfrandsen or leave a comment on Facebook @CandorQuilts. I have two patterns with full video tutorials also available on my website candorquilts.com, both of which use this technique.

Happy sewing friends!

or SEARCH THESE

Popular categories

Craft to Career
Digital Downloads
Patterns
Podcast
Quilt Alongs
Quilt Questions
Tutorials
back to the top

Copyright 2024 Quilters Candy  |  Terms & Conditions