• Home
  • Membership
    • Login
    • Learn More
  • Courses
    • Login
    • Quilt Pattern Writing Course
    • Craft To Career
    • FREE Mini Course – Pattern Writing
    • FREE Mini Course – Using Canva
  • Shop
    • My Book
    • Quilt Patterns
    • Templates for Quilt Patterns
    • Weekly Planner
    • Wholesale
    • Pattern Corrections
  • Blog
  • Podcast

Quilters Candy

blog banner cover
Tutorials
/
July 19, 2022

Getting Started With Foundation Paper Piecing
Hello friends, I’m Jennie from Clover & Violet and I’m so excited to be sharing this tutorial on getting started with Foundation Paper Piecing (FPP for short) on Elizabeth’s blog today. I’m a sewing pattern designer with a love for all the small, fun projects you can make in an afternoon and get that creative satisfaction of “I made this today!”. You can learn more about me at my website and my Instagram @cloverandviolet.

Jennie of Clover and Violet

Getting Started with Foundation Paper Piecing

Why Foundation Piecing?

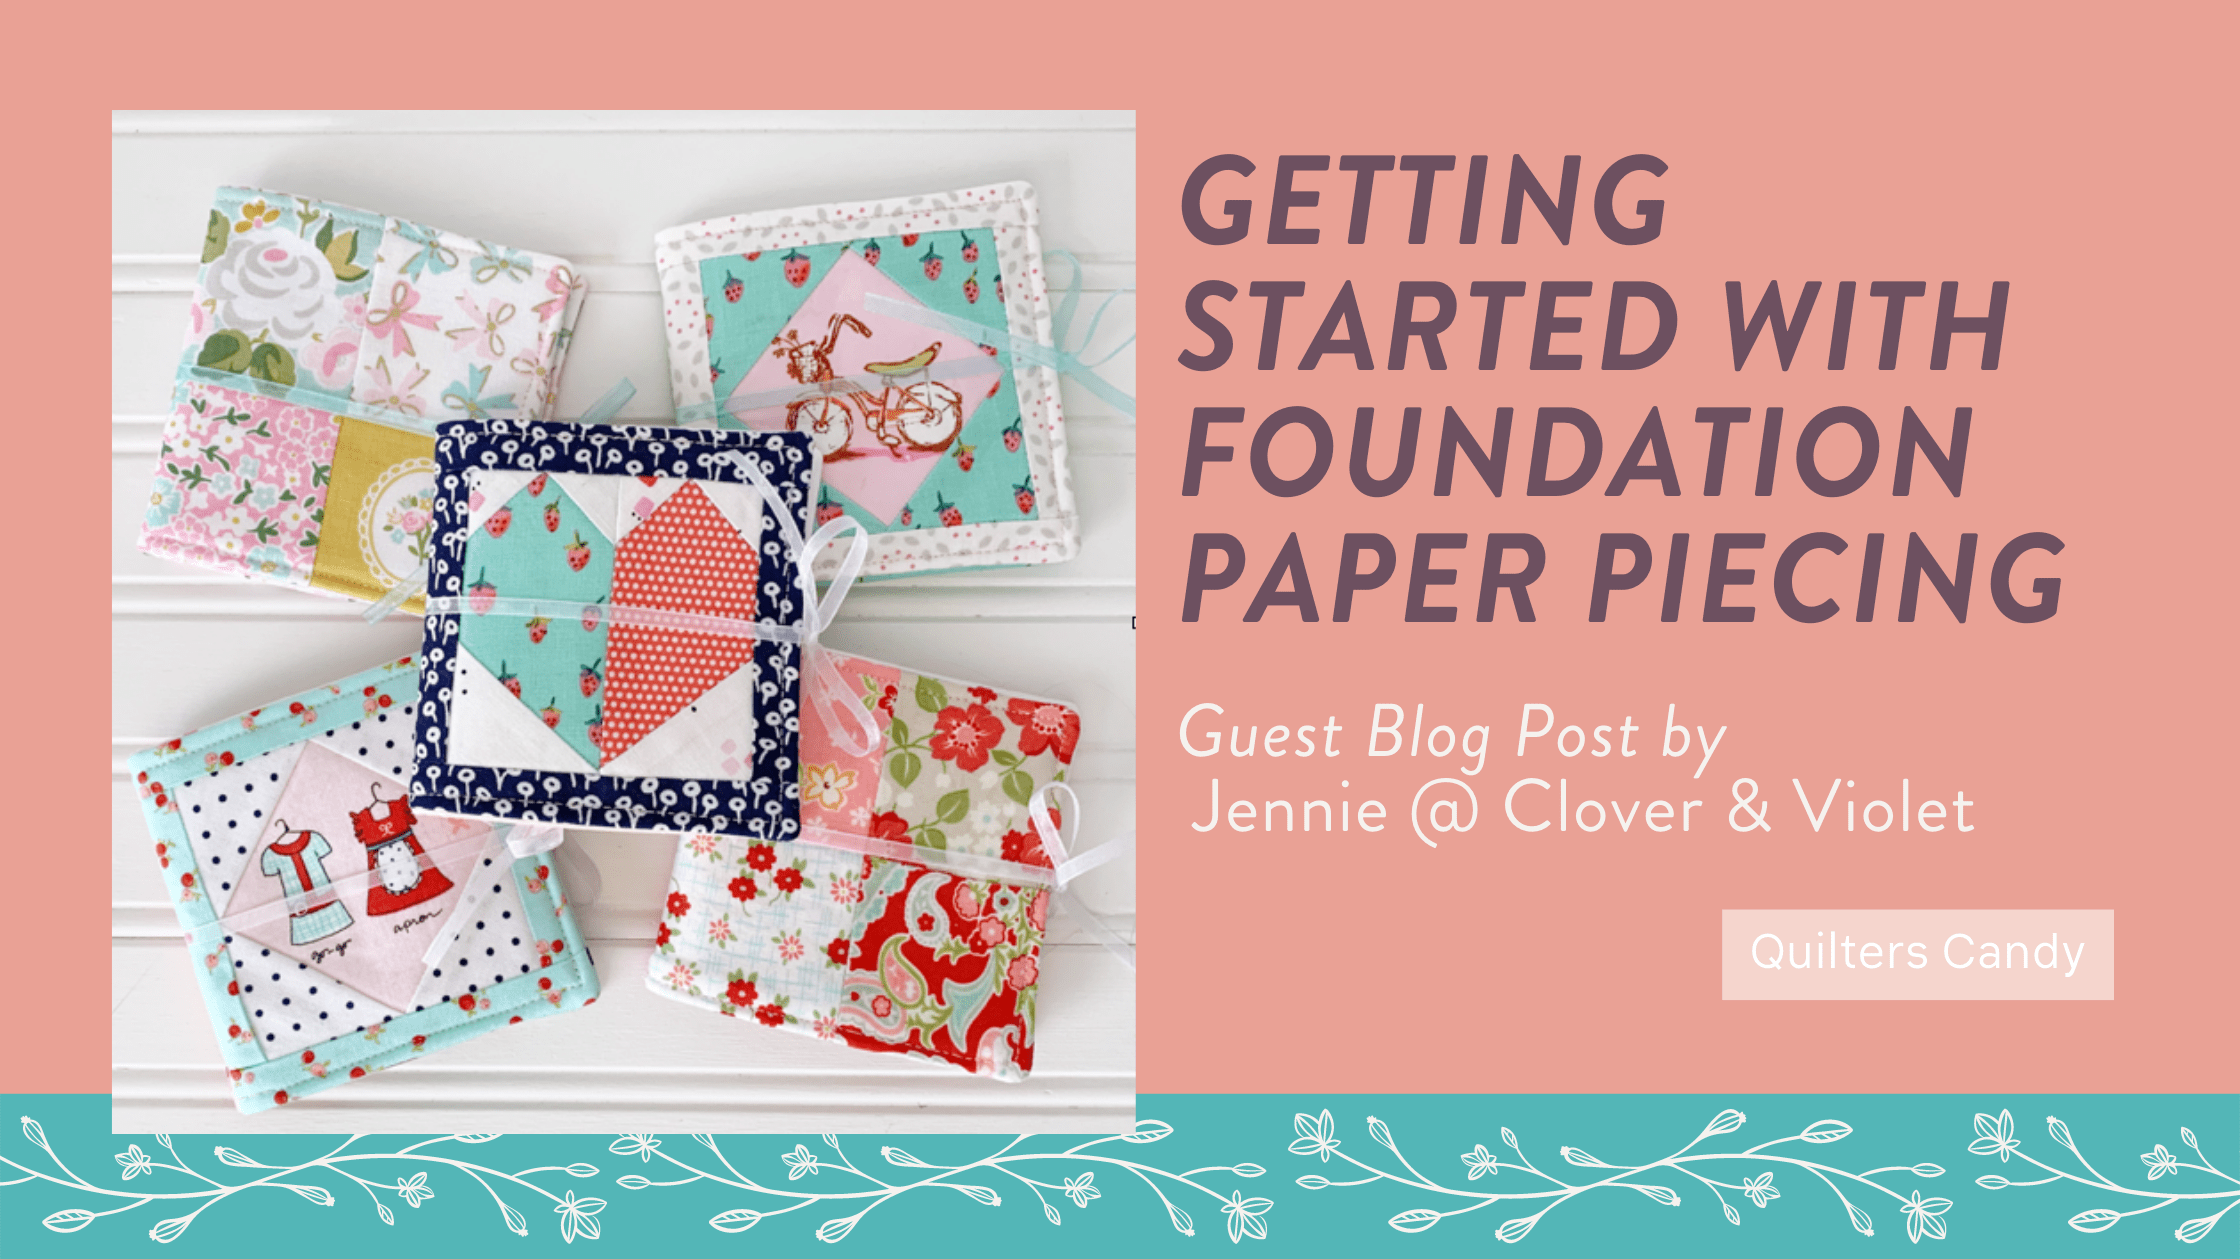
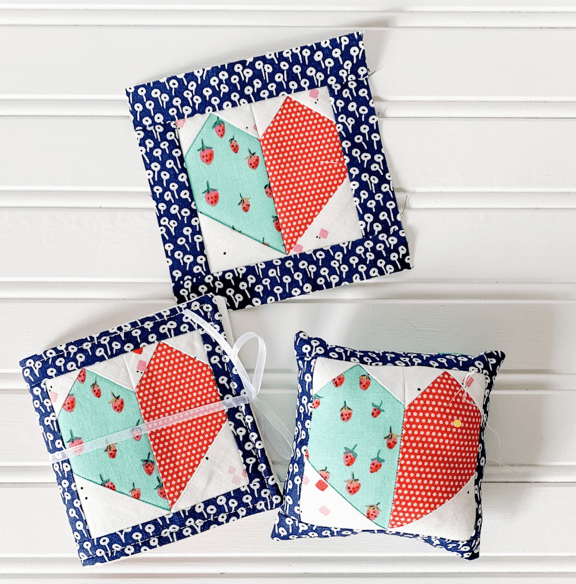
I love Foundation Paper Piecing for its accurate points and the ability to create unique and tiny designs that would be more challenging to traditionally piece. I often use a small element of FPP in projects I make, but was surprised that many of my friends had never tried it and didn’t know where to start. I’ve created a fun, free Mini Needle Book pattern featuring a new FPP cover option, that I designed just for you!

Getting Started With Foundation Paper Piecing

Foundation Paper Piecing is where you sew the fabric to the paper that has a preprinted design on it. It’s a little bit mind bending at first, or at least it was for me. So, here are a few things to remember when you’re getting started:


  • Use lightweight/thin printer paper, this makes tearing the paper away easier.
  • Set your sewing machine stitch length to a short stitch, like 1.5, to make the perforation close together.
  • Make sure you’re printing at 100% or Actual Size and check scale before beginning.
  • Use scraps that are larger than the piece you are covering by at least ¼”. I like to choose larger pieces so that I’m sure it will cover regardless of angle.
  • Use a dry iron, steam will cause the paper to wrinkle.


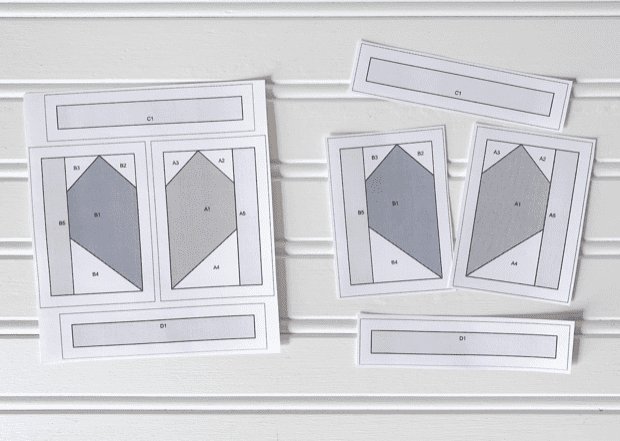
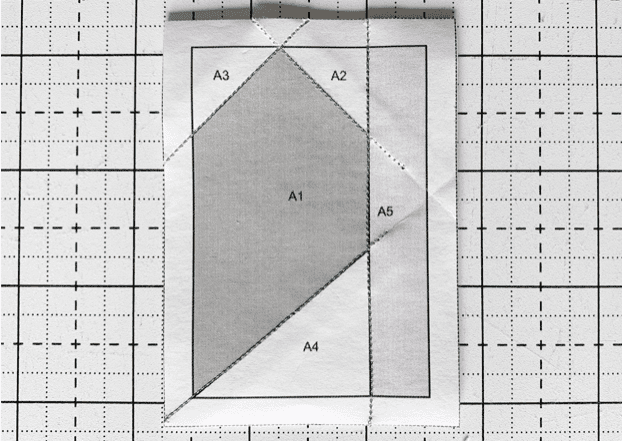
Keeping these things in mind, first you’ll print your pattern and then cut apart any segments. We’ll be using the heart from the Mini Needle Book, you’ll notice that there are A, B, C and D segments. We’re going to start with segment A.

Two paper heart foundation paper

Sewing The Fabric To The Papers

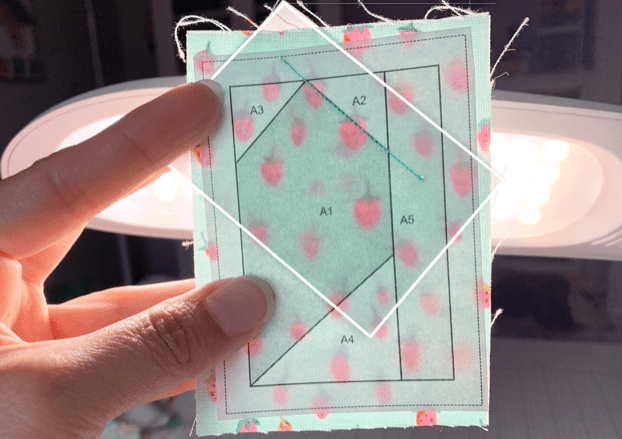
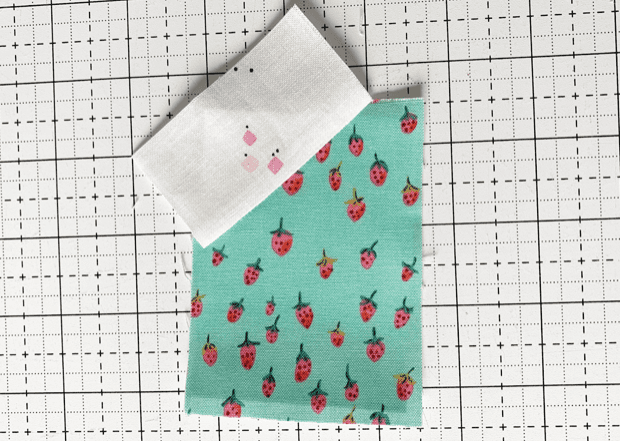
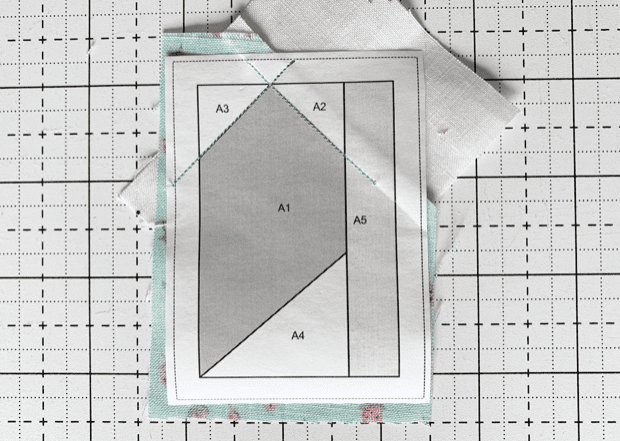
With FPP, the fabrics are placed on the back of the printed papers, and then you sew on the printed side. You’ll begin by placing your main heart piece on the back of the A piece, with the right side facing out. Then, for piece A2, position your piece right sides together with the main heart, overlapping the print by ¼”, the print is hard to see through the paper and the main fabric, but I’ve drawn a little box around it to help you see the fabric placement.

Then, sew along the line between the A1 piece and A2. I like my stitches to extend beyond the line by ¼” so they are nice and secure. I used a bold thread so you can see my stitching line.

After sewing, fold along the sewn line, and trim away any excess fabric.

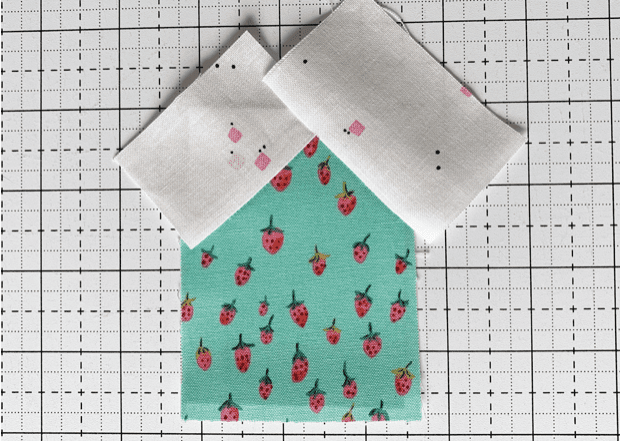
Unfold the paper corner, turn the block over, and press the A2 piece away from the A1 piece, this is what your newly sewn point will look like.

fabric layout example

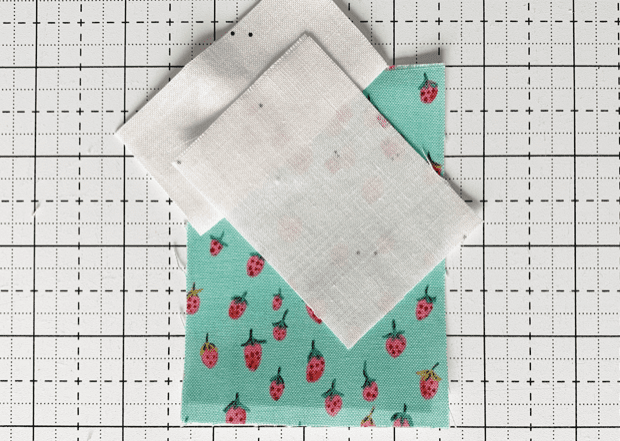
You’ll repeat this process with the A3 piece. Placing the right sides together with the already sewn pieces, remember to overlap the seam line by ¼” at least.

Then, turn the pieces over and sew from the back.

Fold back the paper and trim the excess, just like with the A2 piece.


Fold back the corner and press

Fold back the paper corner, turn over and press the A3 piece in place.

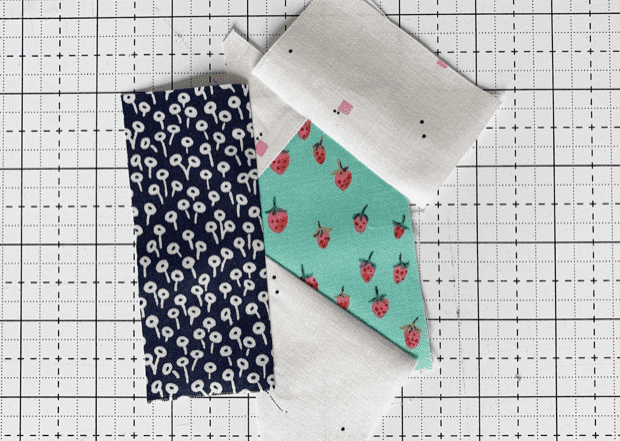
Fabric layout

Continue adding pieces in the same manner to make the whole A segment.

Trim The Segment to the Size of the Paper

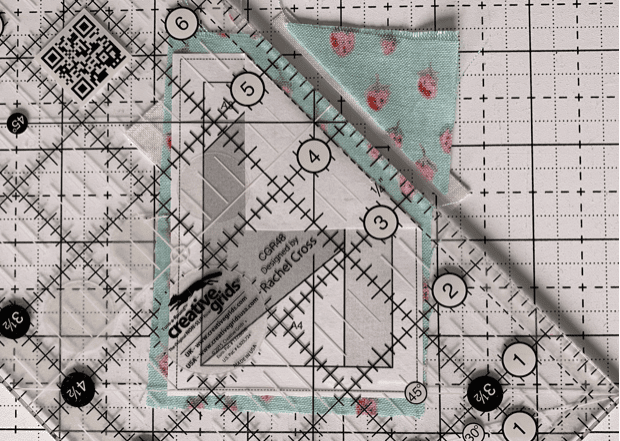
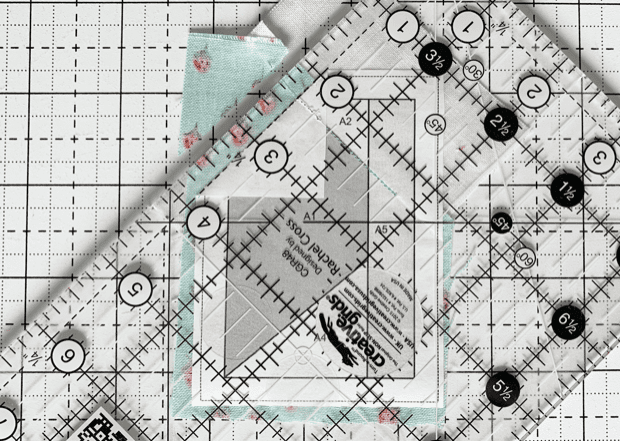
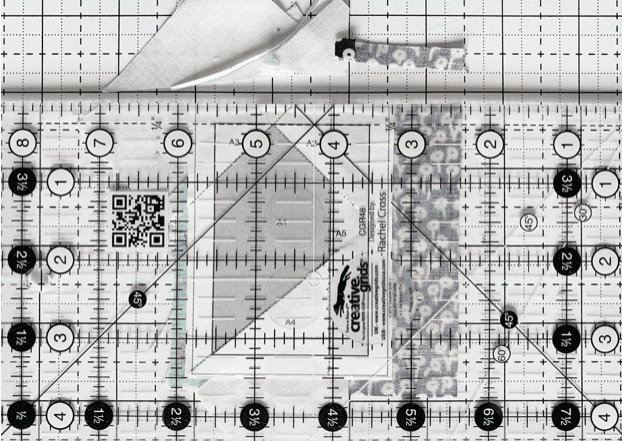
Once you’ve sewn all the pieces to a segment, use your rotary cutter to trim the block down to the dashed outline of the segment.

ruler and foundation paper example
example ruler and paper piecing

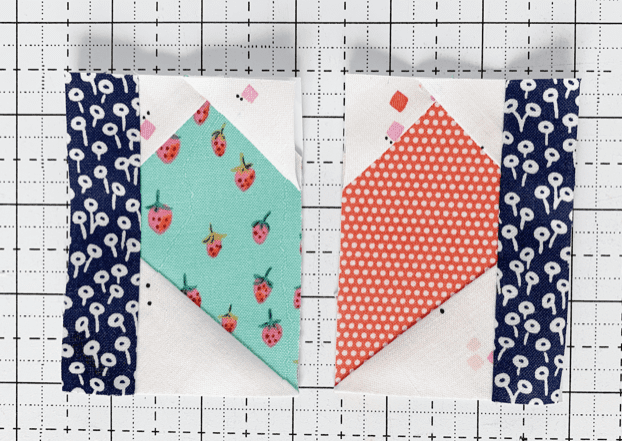
Continue by sewing the second segment in the same manner.

sewing the segments together

Sewing the Segments Together

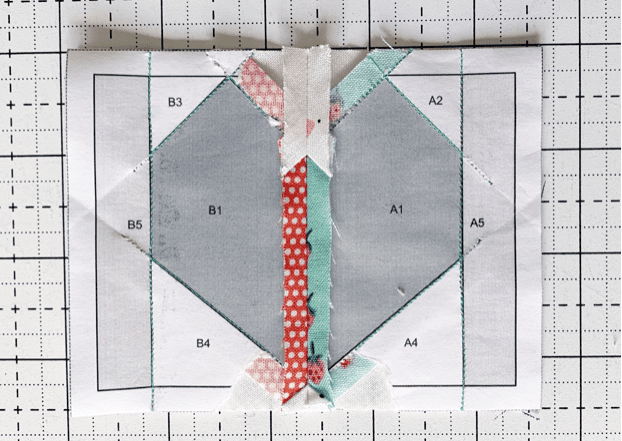
Place the two segments, still attached to the papers, right sides together. Then sew along one of the segment edge lines, sewing the segments together, papers and all.

pressing seams open example

Press the seams of the papers open. Before going on to sew the next segment, tear away any papers that would be under the seam allowance of the first segment seam. In this photo you can see I tore away a triangle near that would be sewn under the seam when adding the top and bottom segment.

papers left for guided sewing

I’ve left the rest of the papers intact to help guide my sewing for perfect points. Sew the top and bottom segments together in the same manner, I did not attach my segments to the papers, but used the segments as templates.

Trim and Finish the Foundation Pieced Block

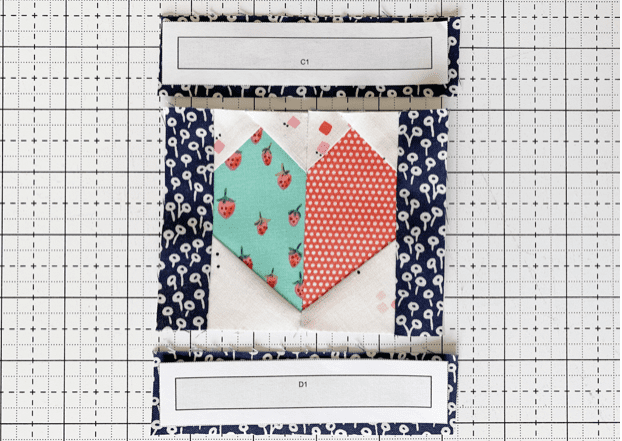
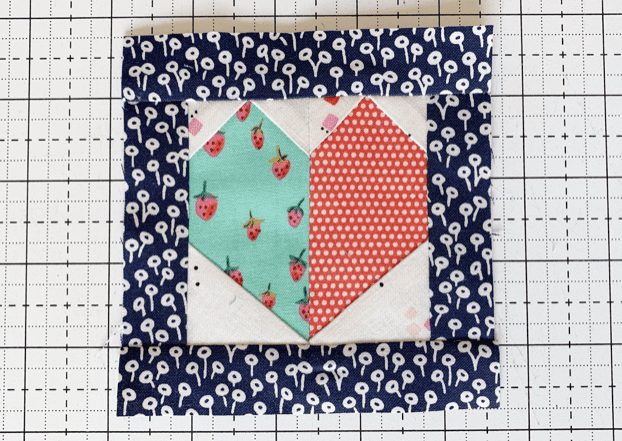
After sewing the final segments, trim the block to 4 ½” square and your block is finished!

finished block

FREE MINI NEEDLE BOOK PATTERN, PERFECT FOR TRYING FOUNDATION PAPER PIECING!

If you’re ready to give Foundation Paper Piecing a try, head over to my website and sign up for the Free Mini Needle Book Pattern which includes two Foundation Paper Pieced cover options, plus a video tutorial for FPP, in case you want a little more detail to get started.

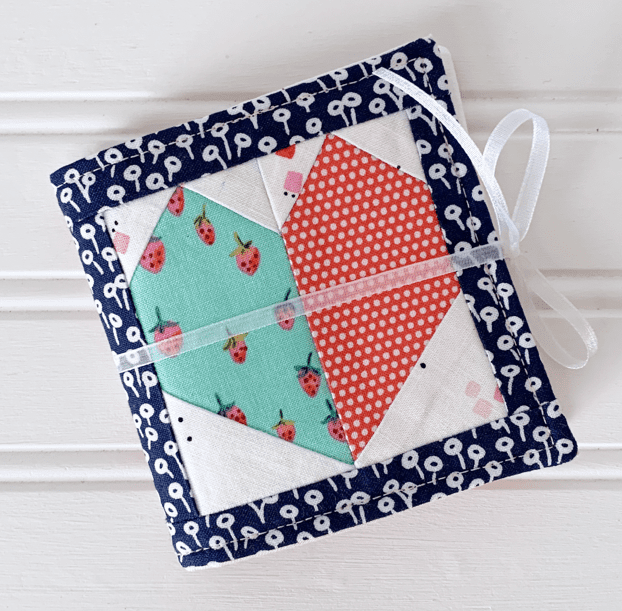
Finished needle book front view

If you enjoy making small projects, learning new things, and making sewing and quilty friends, I’d love for you to join me at the Clover & Violet Sewing Club. The club only opens a couple times a year. Reserve a spot on the waitlist so you don’t miss the chance to join when it opens.

Be sure to tag me, @cloverandviolet on social media so I can see your Mini Needle Book or FPP heart! I’d love to get to know you better!

MORE BLOG POSTS LIKE THIS ONE


Did you enjoy this tutorial? Be sure to check out these free tutorials: 

Glue Basting 

All About Binding Boards 

DIY Fabric Coasters 

0 Comments
Share

You May Also Like

April 18, 2022

Glue Basting

April 5, 2022

How To Make A Set of Authentic Mud Cloth Coasters

March 1, 2022

Sampler Quilt

Leave a Reply Cancel reply

This site uses Akismet to reduce spam. Learn how your comment data is processed.

Previous Post
Starving Artist? No Way!
Next Post
QUilting on the Baby Lock Crescendo
Hi there, I’m

Hi there, I’m

elizabeth

I am a Minnesota born girl living in Texas with my husband and 3 kids. If I could tell my 13 year old self I was a quilter, I would have laughed in disbelief.  However, a few years ago I discovered how cool quilting really is!  I want to share how cool quilting is with others.  Join me in my online modern Quilters Candy Membership, or check out my quilt patterns.  I even offer a course once a year teaching you how to write and sell your own quilt patterns. I am excited to be quilty friends!

Join the Membership

Shop Quilt Patterns

Check out the Courses

Quilting Tutorial Videos

Categories

  • Craft to Career
  • Digital Downloads
  • Patterns
  • Podcast
  • Quilt Alongs
  • Quilt Questions
  • Tutorials
  • Uncategorized

Recent Posts

  • blog banner

    How to Make the Crazy Curves Block

    August 9, 2022
  • Blog banner

    How to Make Chemistry Fabric Pins

    August 2, 2022
  • How To Make A Charm Pack Tote

    July 26, 2022

Latest Video

Latest Video Latest Video

Subscribe to My Channel

Follow Quilters Candy on Instagram

Learn how to grow your email list faster, what my Learn how to grow your email list faster, what my best growth opt-ins have been, AND try an idea I share that is bound to grow your list! Listen to this week’s @crafttocareer podcast by clicking the link in my bio.
.
.
.
.
.
#quilterscandy #crafttocareerpodcast #emaillistbuilding #emaillistgrowth
I’m going to @artgalleryfabrics this October wit I’m going to @artgalleryfabrics this October with some of my alumni! We’re can’t wait to tell you more about it! Here’s who will be joining me:
@thewannabegrandma 
@becca.plymale.creative 
@jenlevin 
@cloverandviolet 
@juliawachs.designs 
@kileysquiltroom 
@marygoroundquilts 
@ritualquiltcompany 
@sewhookedontreasures 
@thaicharmllc 
@theretroquilter 
@seams_sew_me
.
.
.
.
#quilterscandy #quiltersretreat
What are you doing today? I am getting brand new c What are you doing today? I am getting brand new course content ready for the Quilt Pattern Writing course! A brand new workbook, a surprise bonus package for students, and more! I can’t wait for doors to open September 6th. Click the link in my bio to join the waitlist!
.
.
.
#quilterscandy #quiltpatterncourse #patternwriting
Ready for curves? Today on the blog Ann of @cozyco Ready for curves? Today on the blog Ann of @cozycolorquilts walks us through her Crazy Curves Block! Ann is an alum of my Pattern Course and donates many of her quilts to a charity for kids! Make sure the click the link in my bio to learn more.
.
.
.
.
#quilterscandy #cozycolorquilts #sewingcurves #quiltsforkids
This #aftertherainquilt stole my heart! @abbymaed This #aftertherainquilt stole my heart! @abbymaed made this version and styled it, and now I want an exact quilt in a pink room with a string of pom-poms on the wall! Double tap if you love this version of the quilt as much as I do! ❤️ Pattern is available in my shop, link in my bio.
Free Fabric Pin Tutorial from @kreativekymona on t Free Fabric Pin Tutorial from @kreativekymona on the blog! These cute pins are made from the periodic table using fabric from @robertkaufman - but you can make any kind of fabric pin! Click the link in my bio to read the free tutorial on my blog.
  • About
  • Contact
  • Pattern Corrections
  • Terms And Conditions

Copyright © 2022 | Quilters Candy Site Powered by Pix & Hue.