How to Make the Crazy Curves Block
August 9, 2022

blog banner

Hey there, quilty friend! My name is Beth Ann Graybeal here at Cozy Color Quilts. I am excited to share with you How to Make the Crazy Curves Block. To give you a quick intro, I’ve been married to my husband for 22 years and we have 3 children. My oldest is about to go to college so I’m soaking in these last days with all three of them together. We are a homeschool family and have been since the very beginning of their preschool days. It’s been quite an adventure for sure!

How to Make the Crazy Curves Block

In the thick of homeschool days, I needed a creative outlet. That’s when I turned to quilting. However, my very first experience with quilting was a quilting class I took with a friend when I was about 10 years old. I made a tulip wall hanging by hand. Although I never made another quilt after that while growing up, the lessons I learned were planted deep inside my mind. Back to needing a creative outlet as a busy mama, I decided to make a quilt. My supportive husband bought me my very first sewing machine and suddenly, those skills I learned as a 10 years old, came flooding back to my mind. I actually remembered so much more than I realized. To increase my knowledge of quilting, I dove into YouTube tutorials and quilting books trying to glean as much as I could. Here we are about 10 years later, and I’m designing and writing quilt patterns. Never underestimate the impact of what you learn early on in life!

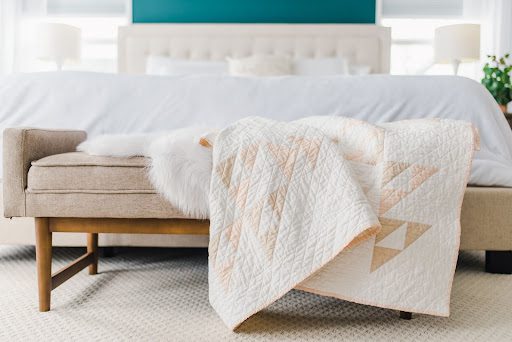
bed with quilt draped on a bench at the foot of the bed

Quilts For Kids

My quilt pattern designing began back in 2020 when I enrolled in Elizabeth’s Quilt Pattern Writing Course. Shortly after completing it, I listed my very first pattern on Etsy. I was hooked! It wasn’t long, however, that I dealt with a deep longing for something a little more focused and purposeful…more intentional in the designing of quilts. That’s when I decided to make quilt patterns appropriate to donate to Quilts for Kids, Inc. This charity located in PA donates quilts to children suffering from terminal illness, trauma, abuse, and natural disasters.

Quilt for kids logo

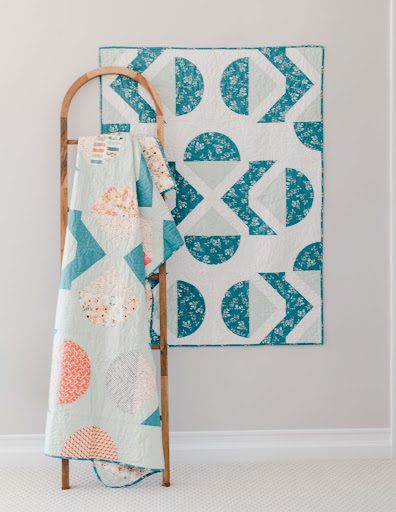
After discussing my ideas to QFK, an official online group began. About once or twice a year, CCQ hosts a QAL & Donate. Using a recent CCQ pattern, we all participate in a typical quilt along. At the end, we donate our finished quilts to Quilts for Kids. During the most recent event, we made the baby size Movie Night Quilt. This pattern encompasses the Crazy Curves Block and that is what I’m here to teach you today.

photo of Movie Night Quilt showing the crazy curves block

Quilts, Coffee and Jazz

One more thing before we jump in…with every CCQ quilt pattern, I offer you my favorite coffee and jazz suggestions for your enjoyment while you make your quilt. I always say, quilting in my home is at its best when accompanied with strong coffee and fantastic jazz!

So go grab your favorite mug, let the aroma of freshly ground espresso fill the air, and enjoy the silky, white goodness topping your mug. (A drip coffee works just as fine.) I highly recommend a decaf vanilla latte to accompany your Move Night quilt making. Proceed to your favorite music platform and search for the classic “As Time Goes By” sung by Dooley Wilson. 

Now that we have our coffee and jazz together, we are in the mood for some crazy curves!

How. to Make the Crazy Curves Block
coffee steps 2

How to Make The Crazy Curves Block

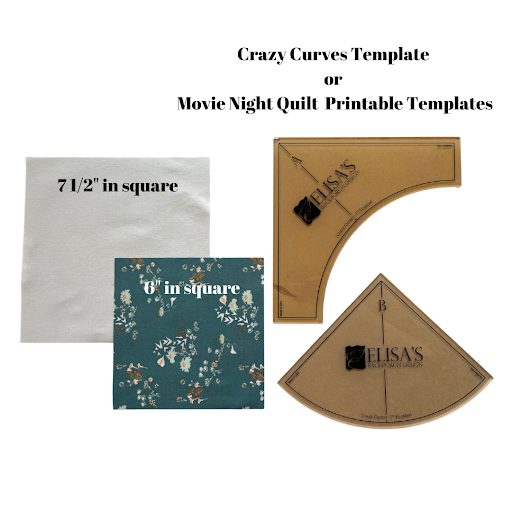
First up, you need to gather your supplies. The convex curve will be your main fabric and the concave curve is your background. You’ll need a 6” square for the convex curve and a 7 ½” square for the concave curve. If you want to add to your quilting templates, I used the Crazy Curves Templates and have loved having them added to my collection. However, if saving money is your top priority, here is a FREE printable template.

Crazy Curves Template

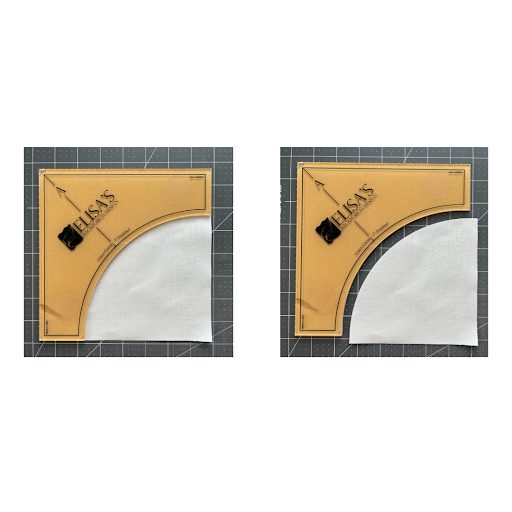
Take the concave template and line it up on the top left corner of the 7 ½” square (background fabric). Because I’m right handed, this is how it looks for me. Regardless, get comfortable with your angle and carefully cut along the curved side of the template.

cutting with template

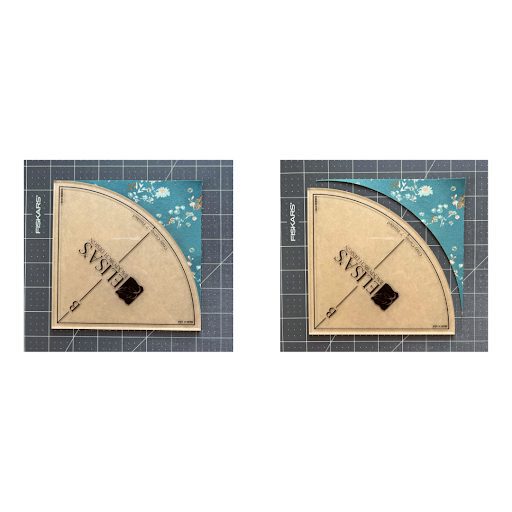
Do the same thing with the 6” square (main fabric) and convex template. 

curves template

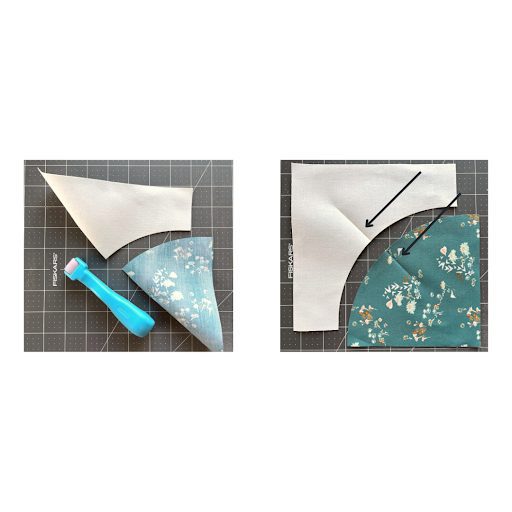
Next you will want to fold each piece in half creating a crease in the center. You can most certainly use your fingers to press or you can use this handy “roll and press” notion I found from Fat Quarter Shop. Either way works just fine. After you press, open up each piece to see a crease in the center.

pressing creases

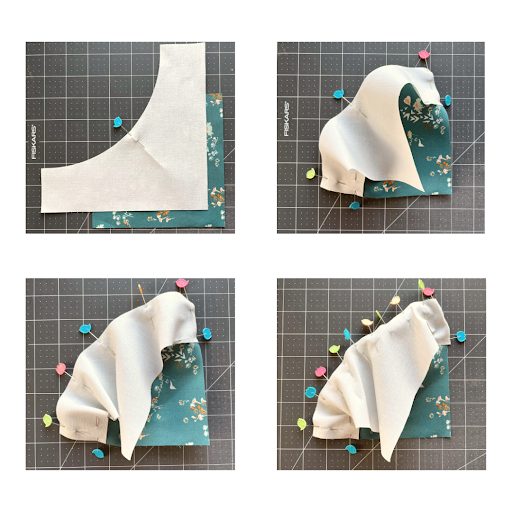
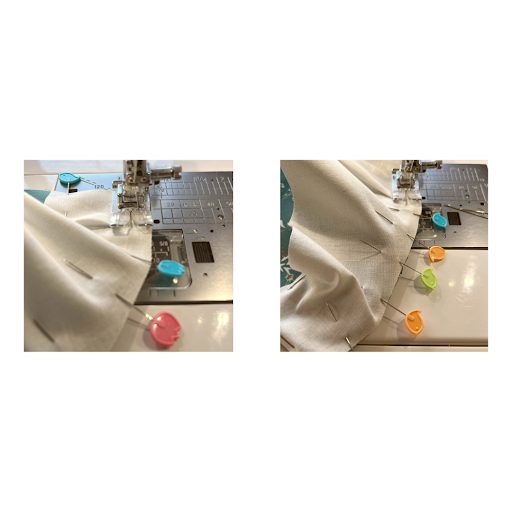
Several opinions are available for this next step. You can pin, glue, or use simply hold the fabric together as you guide the pieces through the machine. I’m going to share my favorite technique of pinning but it all comes down to doing it however you please. You can get the basic idea from this pinning demonstration and use it for other options.


Placing your fabrics RST (right sides together), line up the creases and insert a pin. Continue to follow these steps: 


  • Pin the two corners at the top. (Optional: You can place a pin below the corners you just pinned to hold it in place more securely. I learned this trick from a QAL & Donate participant!) 
  • Then add pins between the center and end locations for a total of (5) pins across the curve.
  • Call me old school but I continue to add pins in between the (5) current pins for a total of (9) across the curve.
pinning curved fabric

From this point on, it really is like any other piecing. Sew a ¼” from the curved edge. Go very slowly, smoothing out the wrinkles as you move. Sometimes you’ll end up with tiny creases but they will smooth out when you press it.

Sewing the curves

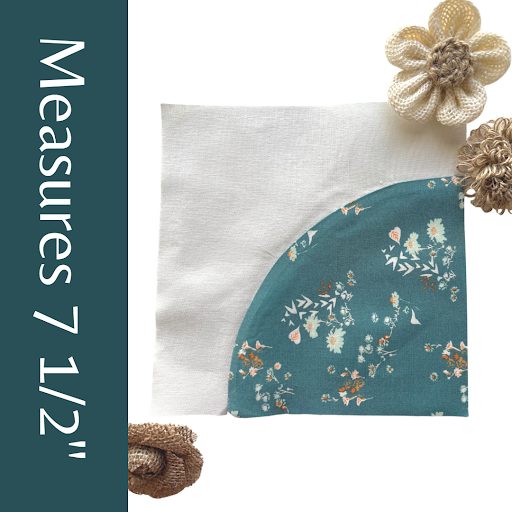
After you’re finished, press toward the convex curve and tada! You have a Crazy Curve Block!

finished block

And there you have it! Not so bad, is it? With a little practice, you’ll be on your way to making some perfect Crazy Curves with endless quilt pattern ideas.

Your Quilt For Kids Invitation

As mentioned above, the baby size Movie Quilt makes a great donation for Quilts for Kids. If you’re interested in purchasing the pattern, use the code CRAZYCURVES for 15% off your Movie Night Quilt pattern. 

As we come to the end, I want to give you my deepest thank you for joining me today. I also want to personally invite you to join our next event for it would be such an honor for you to participate. These quilt alongs bring incredible joy to you as the quilter knowing they will comfort a child who is experiencing extremely rough circumstances. To receive information about upcoming events, please join our Cozy Color Quilts world. Know that you don’t have to wait for another QAL & Donate to donate a quilt though. You can do so at any time. If you’re interested, I have some simple guidelines for you as you prepare as well as some patterns that would work for donations. You will never regret showing deep compassion through your love of quilting! And while you’re at it, go ahead and spread the word to your quilty friends. The need for quilts will never end. Take care, my friend, enjoy making some Crazy Curve blocks!

“The more that know, the more that sew.” 

Linda Arye, Founder of Quilts for Kids, Inc.

MORE FREE TUTORIALS


If you liked this tutorial, be sure to check out these other free quilting tutorials!


or SEARCH THESE

Popular categories

Craft to Career
Digital Downloads
Patterns
Podcast
Quilt Alongs
Quilt Questions
Tutorials
back to the top

Copyright 2024 Quilters Candy  |  Terms & Conditions