
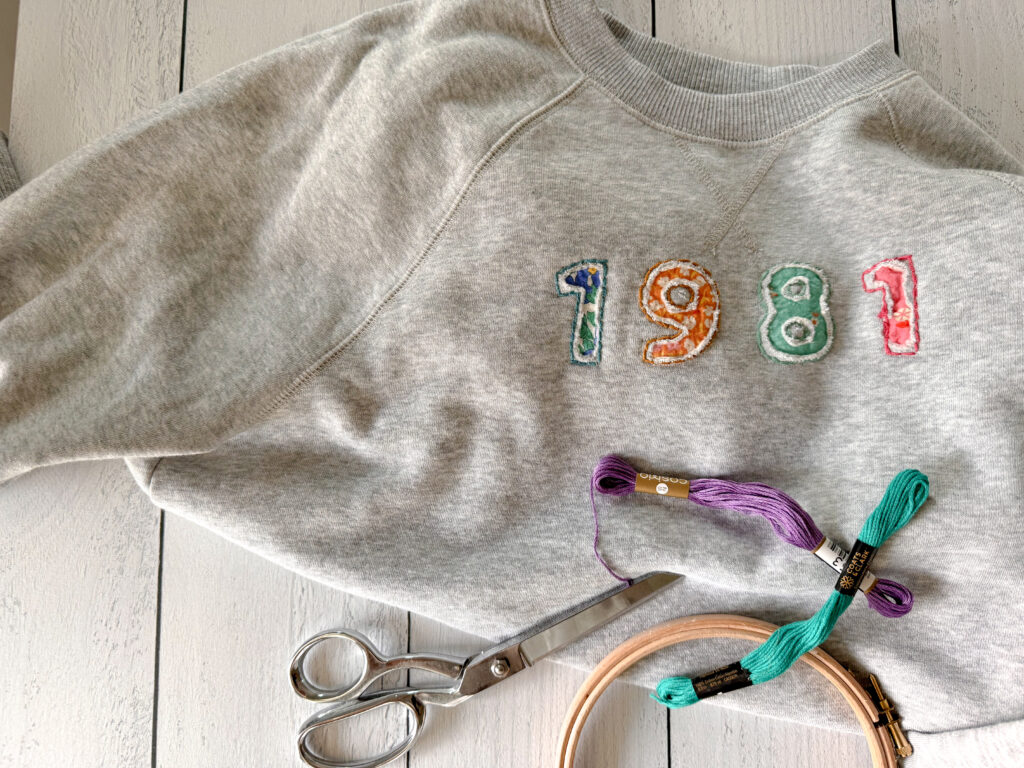
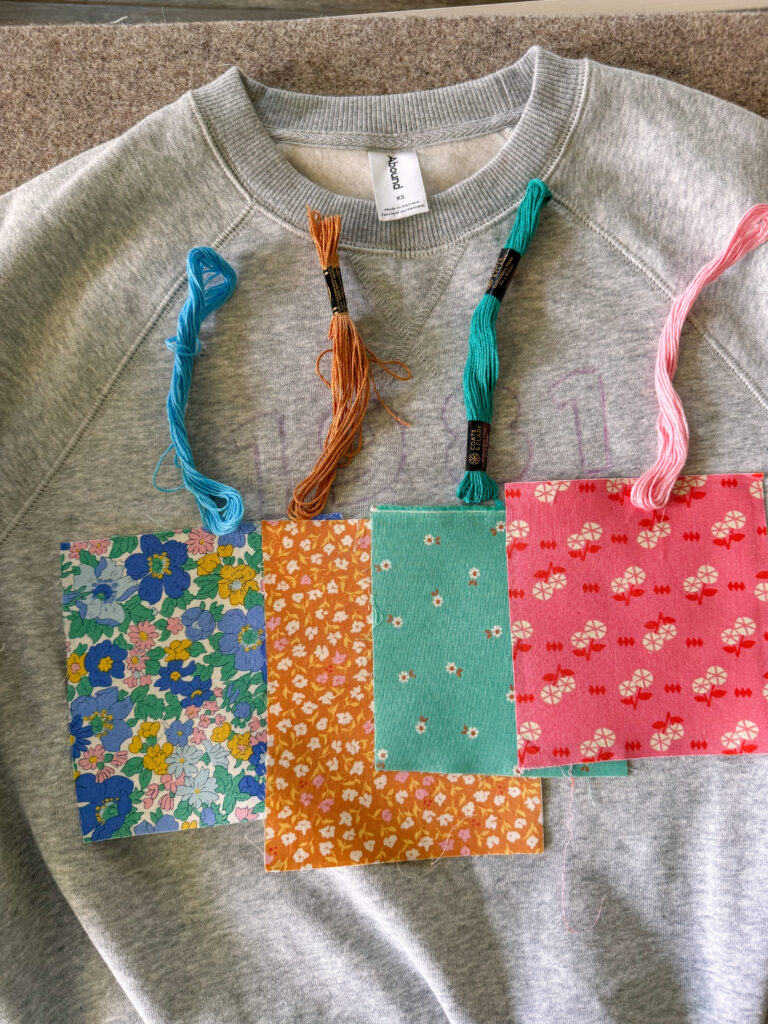
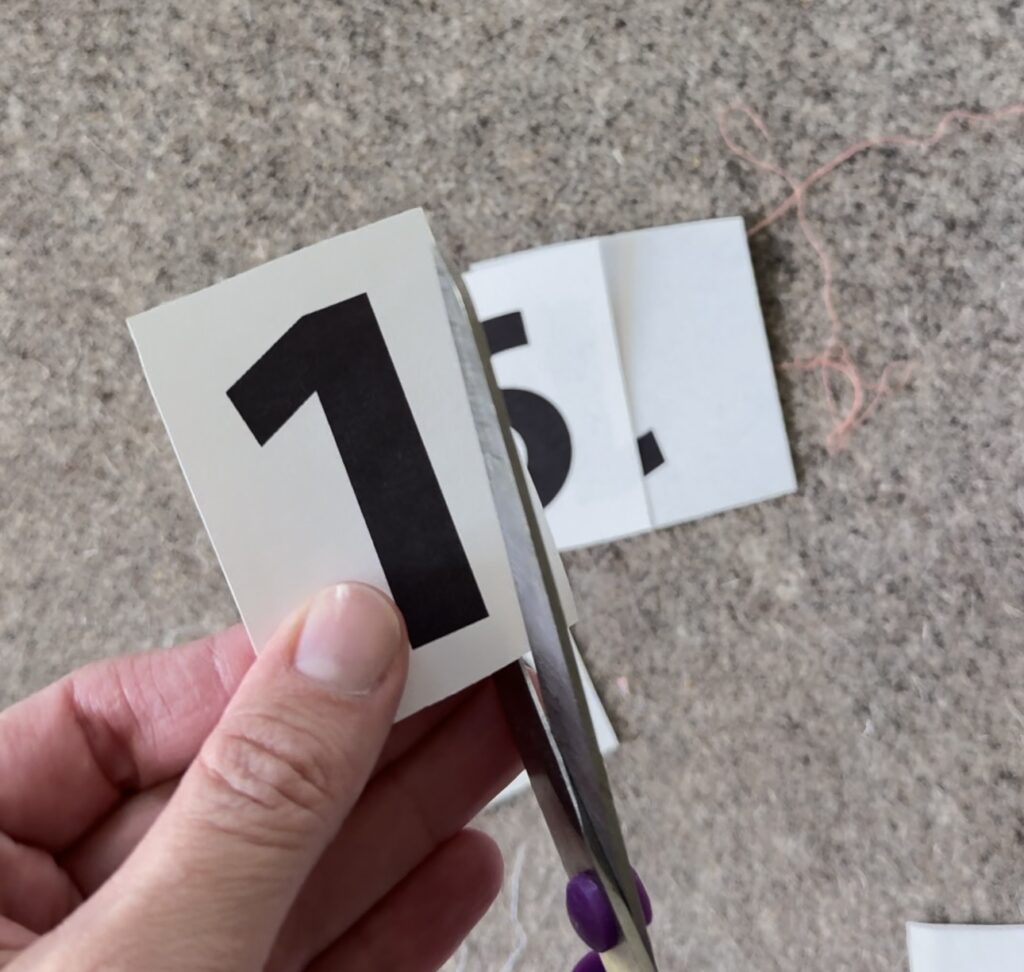
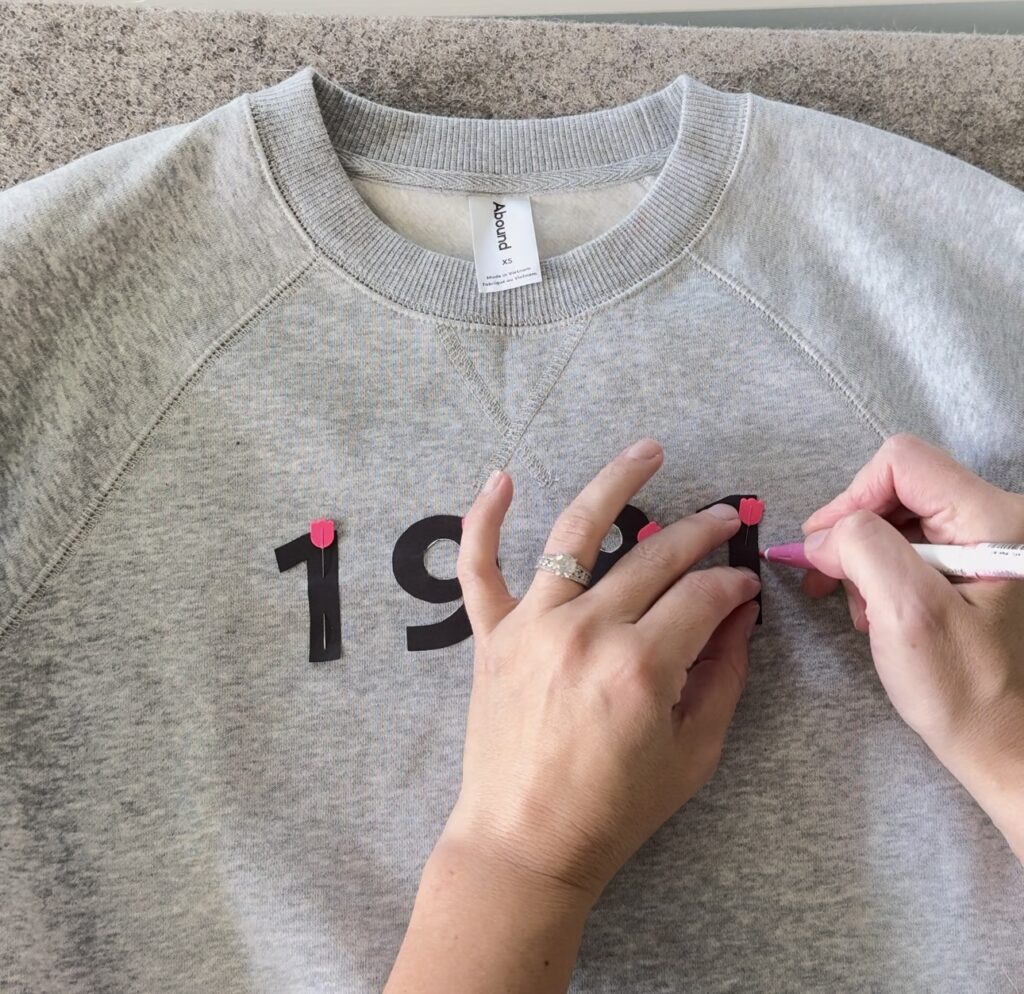
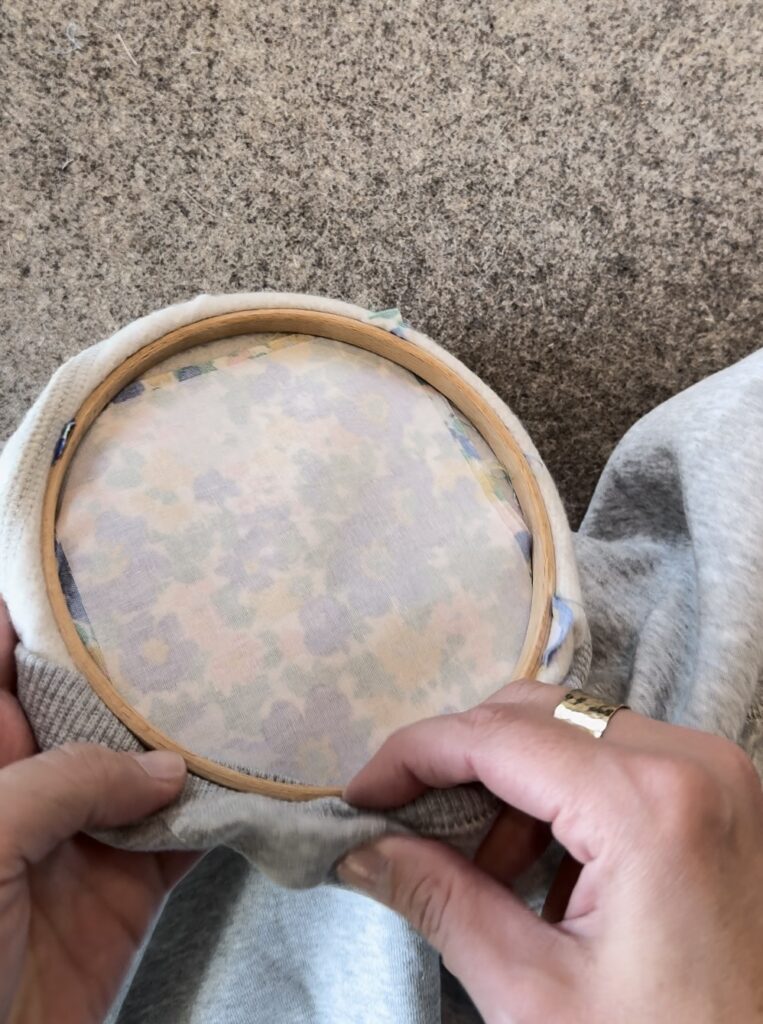
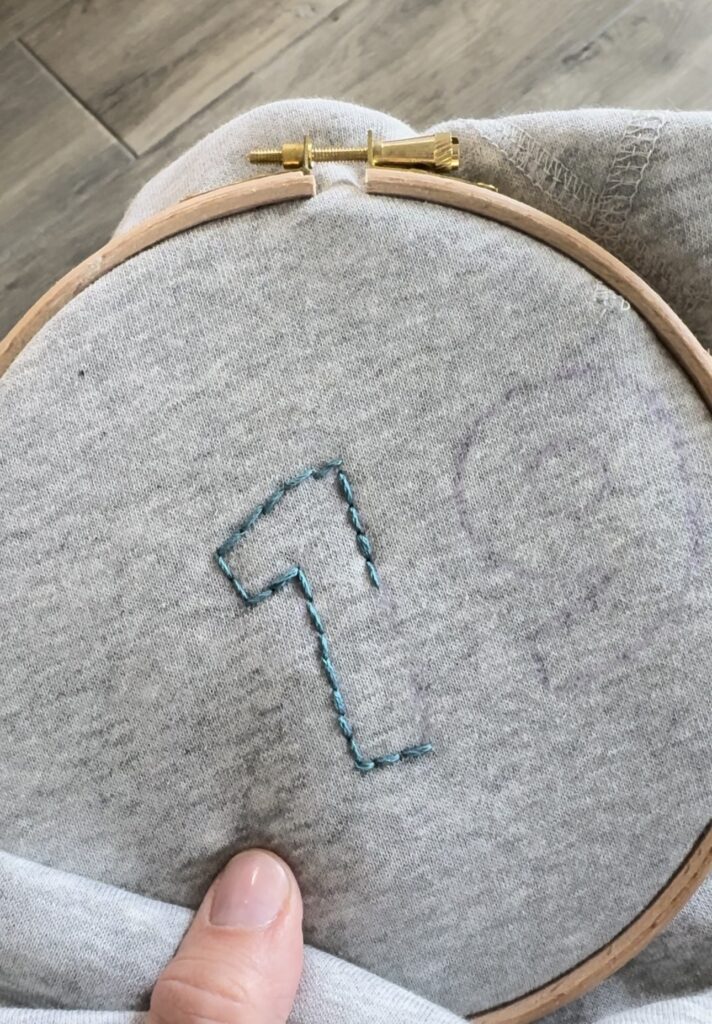
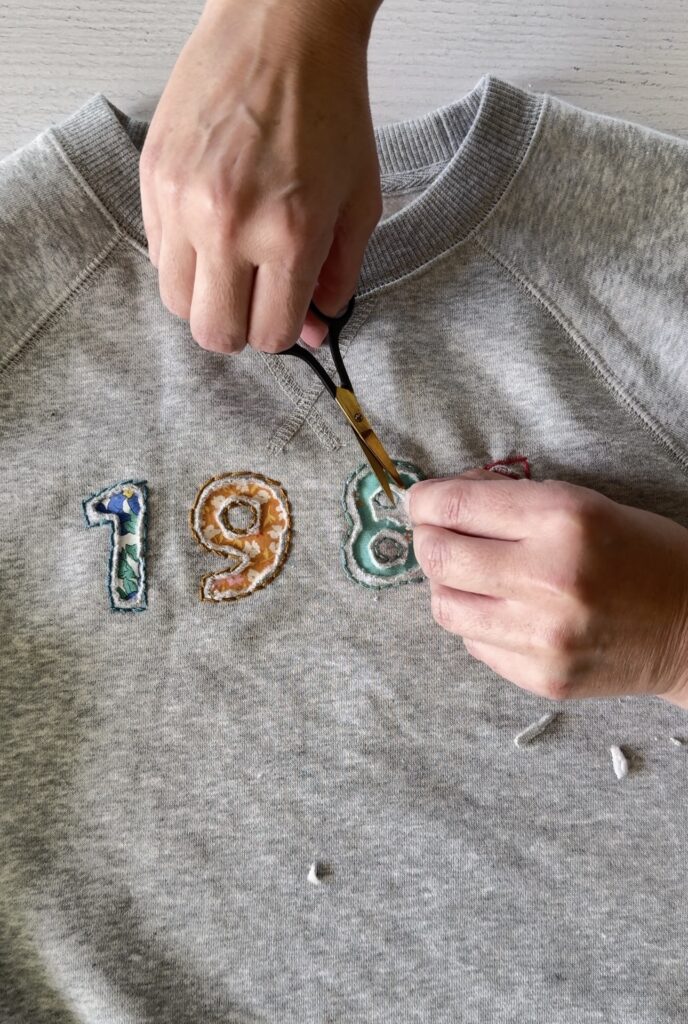
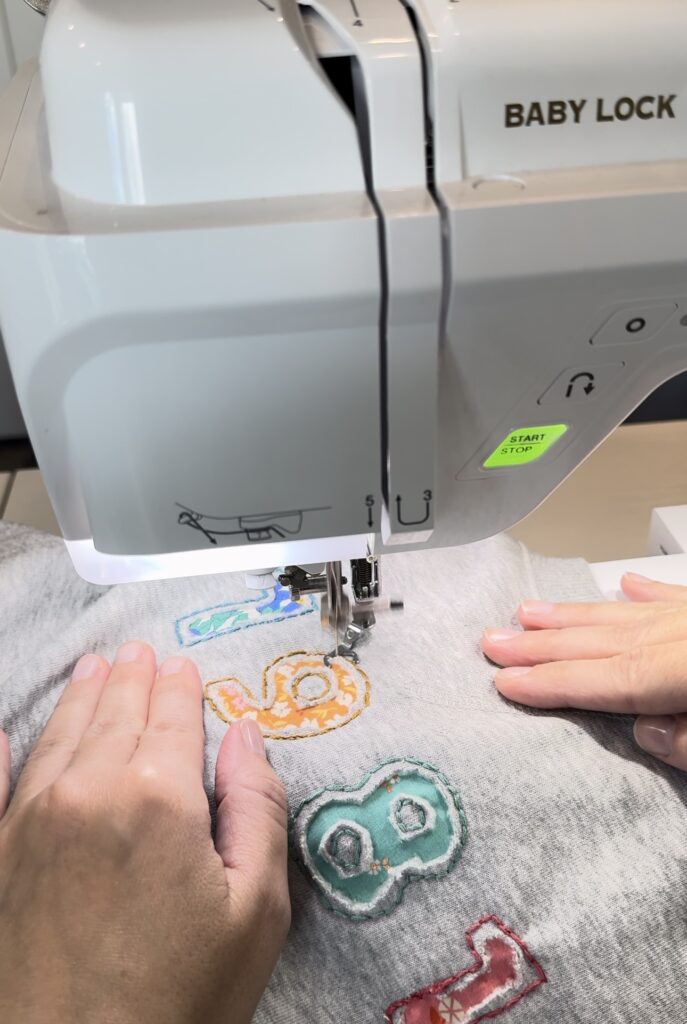
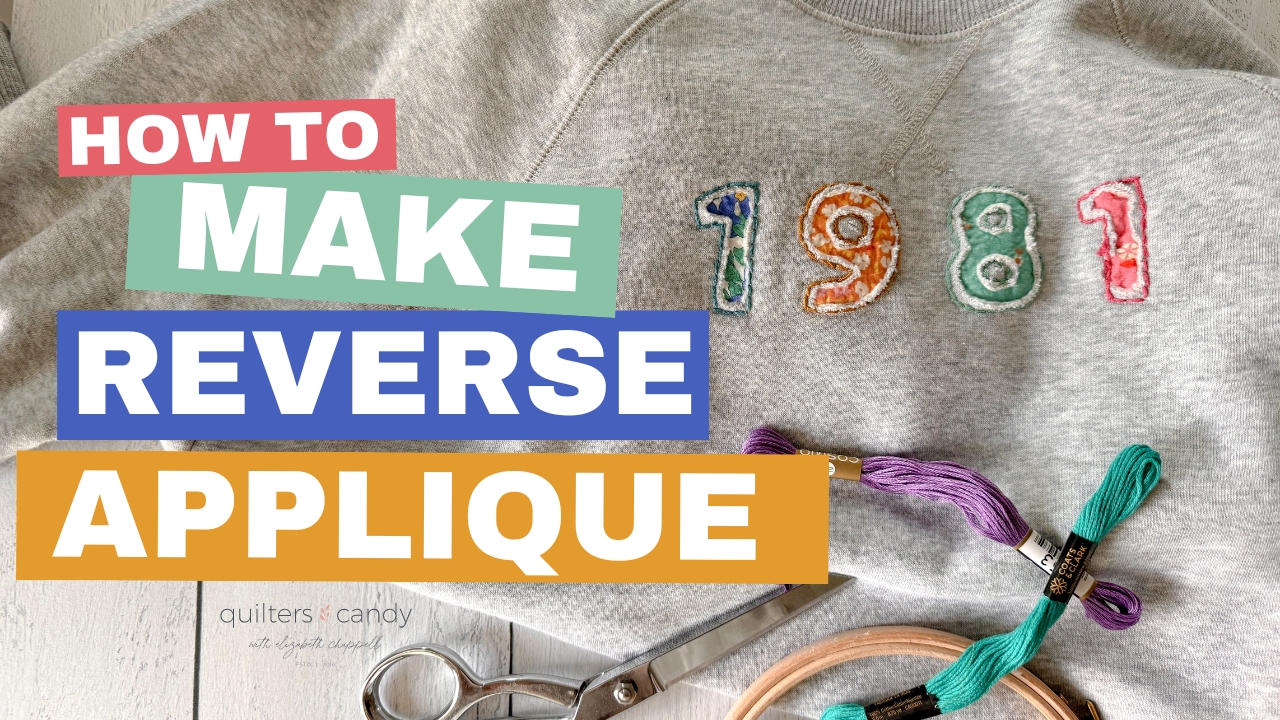
DIY Reverse Appliqué Sweatshirt: Step-by-Step Guide for Beginners
RECENT BLOG entries
DIY Reverse Appliqué Sweatshirt: Step-by-Step Guide for Beginners
DIY Reverse Appliqué Sweatshirt: Step-by-Step Guide for Beginners
DIY Reverse Appliqué Sweatshirt: Step-by-Step Guide for Beginners
DIY Reverse Appliqué Sweatshirt: Step-by-Step Guide for Beginners
DIY Reverse Appliqué Sweatshirt: Step-by-Step Guide for Beginners
DIY Reverse Appliqué Sweatshirt: Step-by-Step Guide for Beginners
the latest
November 20, 2025
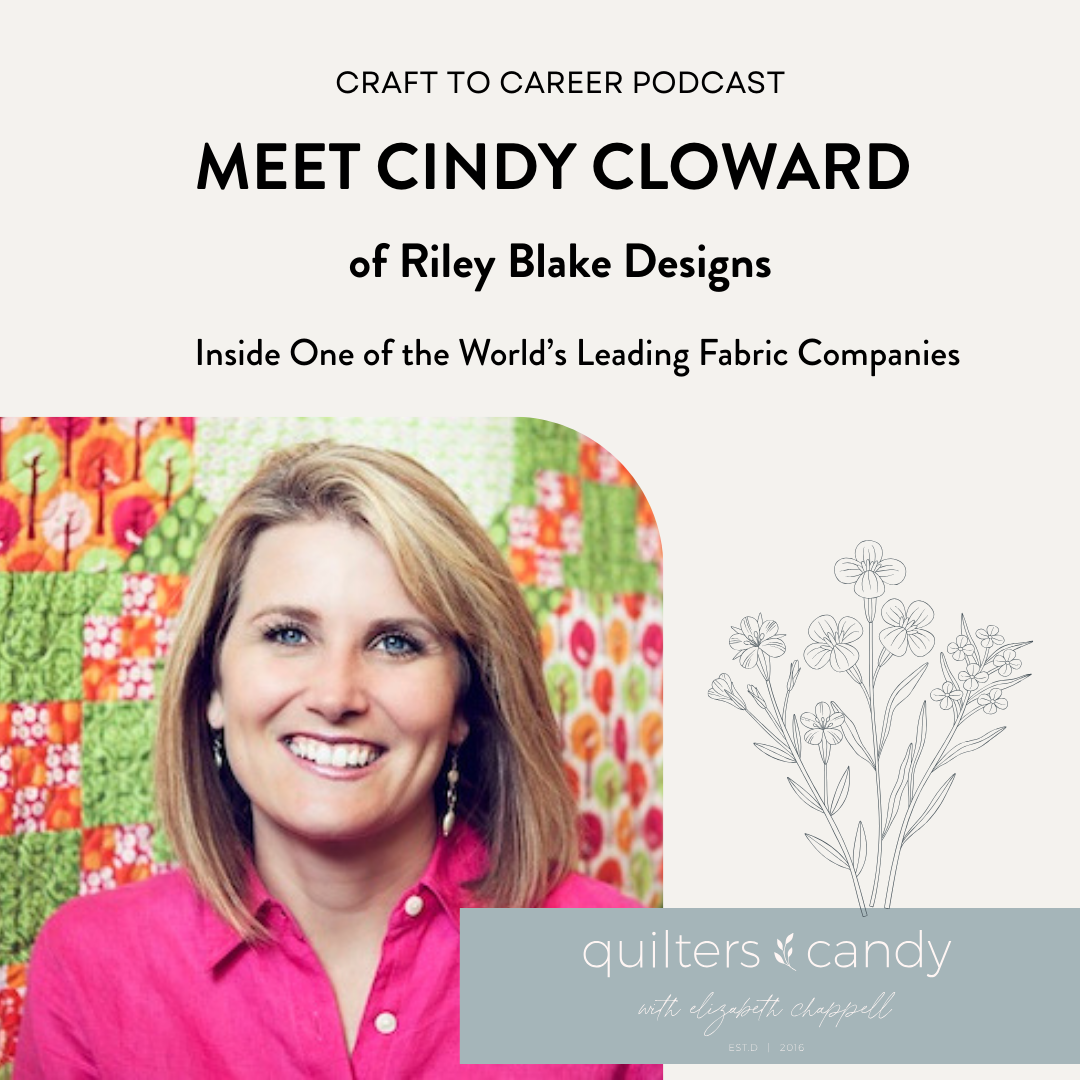
Meet Cindy Cloward of Riley Blake Designs If you are a quilter or sewist, you have almost certainly worked with fabrics from Riley Blake Designs. Known around the world for their high-quality quilting cottons, modern prints, timeless basics, and beloved designer collaborations, Riley Blake Designs has grown into one of the most influential fabric manufacturers […]
tune in
tune into the
Craft to Career
Podcast
Each week get insights on how to turn your craft into a successful career. With both guest speakers and tips from myself, you get valuable, free education on the Craft to Career podcast!
or SEARCH THESE
Popular categories
Craft to Career
Digital Downloads
Patterns
Podcast
Quilt Alongs
Quilt Questions
Tutorials


