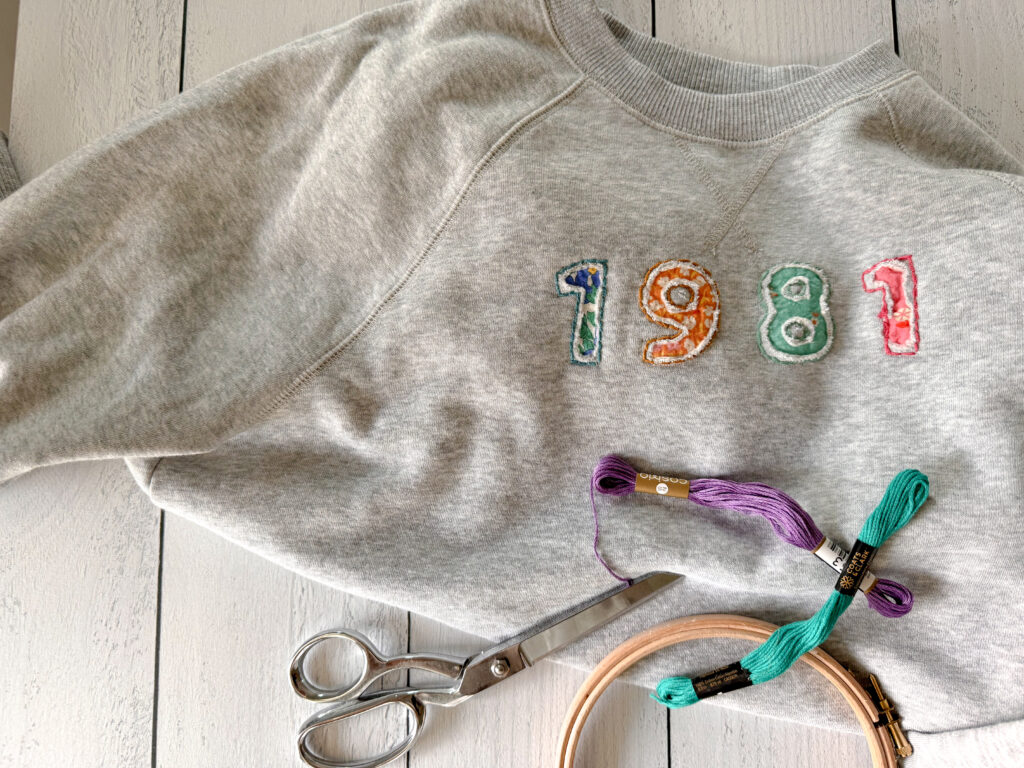
Reverse appliqué is a fun and easy way to transform a sweatshirt into a one-of-a-kind fashion statement. In this tutorial, I’ll walk you through each step of creating your reverse appliqué sweatshirt, perfect for beginners and seasoned crafters.
What is Reverse Appliqué?
Reverse appliqué is a sewing technique where layers of fabric are sewn together, and then the top layer is cut away to reveal the fabric underneath. Unlike traditional appliqué, where the design is added on top of the fabric, reverse appliqué reveals a hidden design within the fabric layers.

Materials You’ll Need for Your Reverse Appliqué Sweatshirt
Before you get started, gather the following materials:
- Sweatshirt or Clothing Item: Choose a sweatshirt or any other clothing item you want to customize. Cotton or cotton-blend fabrics work best.
- Decorative Fabric: Select a contrasting fabric that will be visible through the cutouts in your sweatshirt. Quilting cotton or lightweight fabric works well.
- Embroidery Hoop: This keeps the fabric taut and stable while you stitch.
- Embroidery Floss: Pick embroidery floss in a color that complements or contrasts with your fabrics. You’ll use this for hand-stitching your design.
- Needle: Use a needle that is sharp enough to pass through both layers of fabric smoothly.
- Small Scissors: Precision is key, so sharp, small scissors are ideal for cutting out your design.
- Interfacing (Pellon 101 recommended): Provides stability to the decorative fabric, ensuring that your design holds up well over time.
- Disappearing Ink Pen: For tracing your design onto the fabric. This ink will fade over time or can be removed with water.
Start Making Your Reverse Applique Sweatshirt
Step 1: Choose and Prepare Your Design
The first step in your reverse appliqué project is deciding on a design. Simple shapes like hearts, stars, or geometric patterns are great for beginners. If you’re feeling more adventurous, you can opt for intricate designs such as florals or abstract shapes.
- Pro Tip: If you’re new to reverse appliqué, start with a simple shape to get the hang of the technique before moving on to more complex designs.
Once you’ve selected your design, print it out on paper. Carefully cut out the shape, creating a template. Pin the template onto your sweatshirt, ensuring it’s placed exactly where you want your design to appear.
Step 2: Trace Your Design
With your template securely pinned, use a disappearing ink pen to trace around the shape onto your sweatshirt. This step ensures that you have a clear guide for where you’ll be stitching and cutting.
- Pro Tip: Double-check that your traced design is centered and straight before moving on to the next step.
Step 3: Secure the Decorative Fabric
Now, it’s time to attach your decorative fabric to the inside of your sweatshirt. Cut a piece of fabric slightly larger than your traced design. Place it on the inside of the sweatshirt, positioning it directly behind the traced shape.
Secure the fabric in place with an embroidery hoop. This will keep both the sweatshirt and fabric taut while you work, preventing any shifting or bunching.
- Pro Tip: Ensure the fabric is smooth and wrinkle-free inside the hoop to achieve a clean and professional finish.
Step 4: Start Stitching
With everything in place, you’re ready to start stitching. Thread your needle with embroidery floss and use a backstitch to sew along the lines of your traced design. The backstitch is ideal for this project because it creates a strong and continuous line that will hold the fabric layers together securely.
- Pro Tip: Take your time with this step. Neat and even stitches will make a big difference in the final appearance of your reverse appliqué.
Step 5: Trim the Excess Fabric
Once you’ve stitched all the way around your design, it’s time to reveal the decorative fabric beneath. Carefully use your small scissors to cut out the inside of the design on the sweatshirt fabric. Be sure to only cut the sweatshirt fabric—avoid cutting the decorative fabric underneath.
- Pro Tip: Leave a small border (about 1/8 inch) around your stitches to prevent the fabric from fraying too much.
Step 6: Secure the Edges with a Sewing Machine
To ensure your reverse appliqué design stays secure and lasts through wear and washing, it’s a good idea to sew around the edges with a sewing machine. This will reinforce your hand-stitched design and add a polished finish.
- Pro Tip: If you don’t have a sewing machine, you can carefully hand-sew around the edges, but a machine will give you a stronger and more durable finish.
Step 7: Enjoy Your Custom Reverse Appliqué Sweatshirt!
Congratulations! You’ve just created a unique piece of clothing that reflects your personal style. Wear your new reverse appliqué sweatshirt with pride, and get ready to impress friends and family with your DIY skills.
- Pro Tip: Try experimenting with different shapes, colors, and fabrics to create a whole collection of custom reverse appliqué clothing.
Final Thoughts
Reverse appliqué is a fantastic way to add a creative touch to your wardrobe without needing a lot of fancy tools or equipment. With a bit of practice, you’ll be able to transform any piece of clothing into something truly special. Happy crafting!
MORE BLOG POSTS LIKE THIS
If you enjoyed this tutorial, you will love these other tutorials!
WANT TO LEARN EMBROIDERY?
I learned with this kit from MINDFUL MANTRA EMBROIDERY.
BEST SELLING QUILT PATTERNS
Check out these best selling quilt patterns in my shop.