• Home
  • Membership
    • Learn More
    • Quilters Candy Membership Login
    • Craft 2 Career Club Login
  • Courses
    • Course Login
    • Quilt Pattern Writing Course
    • Craft To Career
    • FREE mini Pattern Writing Course
    • Quilt Pattern Templates
  • Shop
    • Quilt Patterns
    • My Book
    • Wholesale Patterns
    • Pattern Corrections
  • Blog
  • Podcast

Quilters Candy

Photography Tips and Tricks with Liza Taylor Handmade
Tutorials
/
March 14, 2022

Quilt Photography Tips by Liza Taylor Handmade
Learn Quilt Photography Tips!

Hi Friends! I am Liza from Liza Taylor Handmade. I am so excited to be here sharing all of my photography tips and tricks. These will help take your photos to the next level! Don’t forget to snag my free photography cheat sheet at the end of this post. 🙂 

Sharing beautiful photos on Instagram has been such a joy for me and I have learned a lot along the way. Read on to get all my tips, from styling indoor photos, to getting the best “quilts in the wild” shots! 

Before we start, you don’t need any fancy equipment – I take all of my photos on my iphone! I also DIYed my photo board (more on that later) and thrifted most of my styling props. Finding inexpensive ways to make beautiful photos is what I love to do! 

Photography Tips and Tricks with Liza Taylor Handmade

free pdf cheat sheet
Quilt Photography Cheat Sheet

Quilt Photography tips: Indoor Photos

The key to beautiful indoor photos is good lighting! I take all of my photos right under my window, with all artificial lighting turned OFF. 

Be conscious of what time of day the lighting is best in the room you take your photos in. For instance, I take all of my photos in the afternoon. That is when the sun is pouring in my window! 

I avoid taking photos on gloomy days, but sometimes it is inevitable. In that case, editing will be your friend! I will share more about editing later on.

For all of my indoor photos I use a photo board that I made myself! You can buy photo boards online, but they get really expensive. But you do you! I really wanted a distressed white shiplap board, so I went to my local craft store and found all the supplies to make my own. And the best part was it cost me $22! You can find the full tutorial for that on my Instagram HERE.

a hand holding a quilt clip on the grass
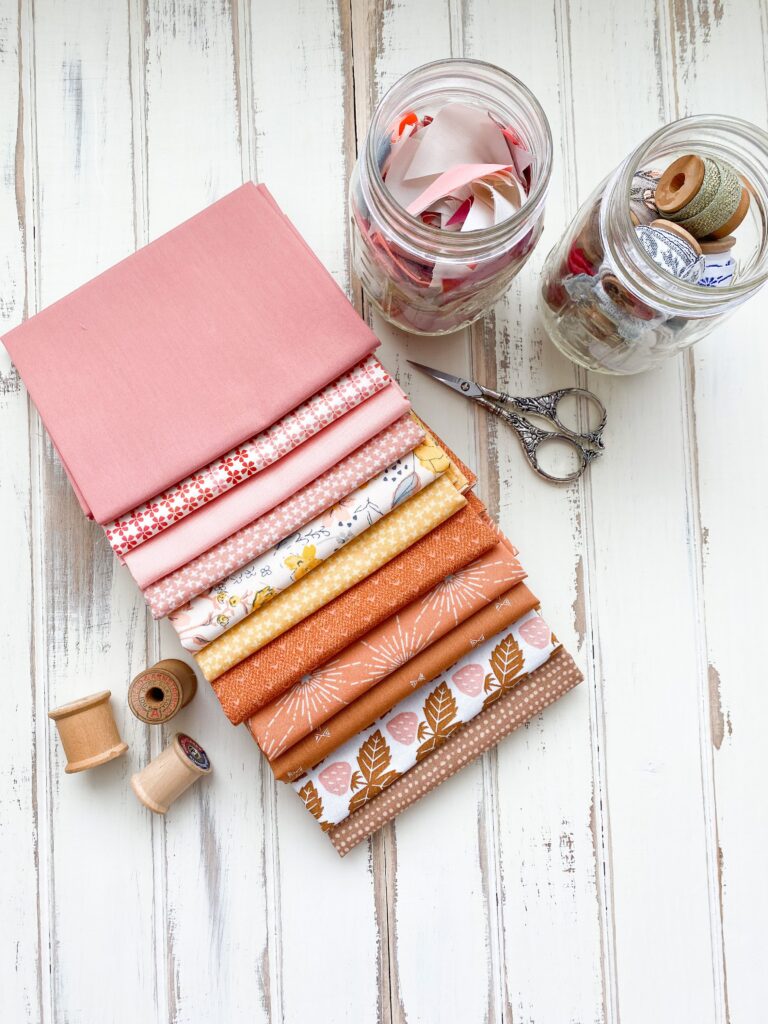
Quilting fabrics that are pastel on a wooden table
Quilt Photography Cheat Sheet

Quilt Photography Tips: Styling indoor Photos

Do you like to post your fabric pulls for your upcoming makes, but feel like they look a little blah with just the fabric? Me too! This is where styling props make ALL the difference. 

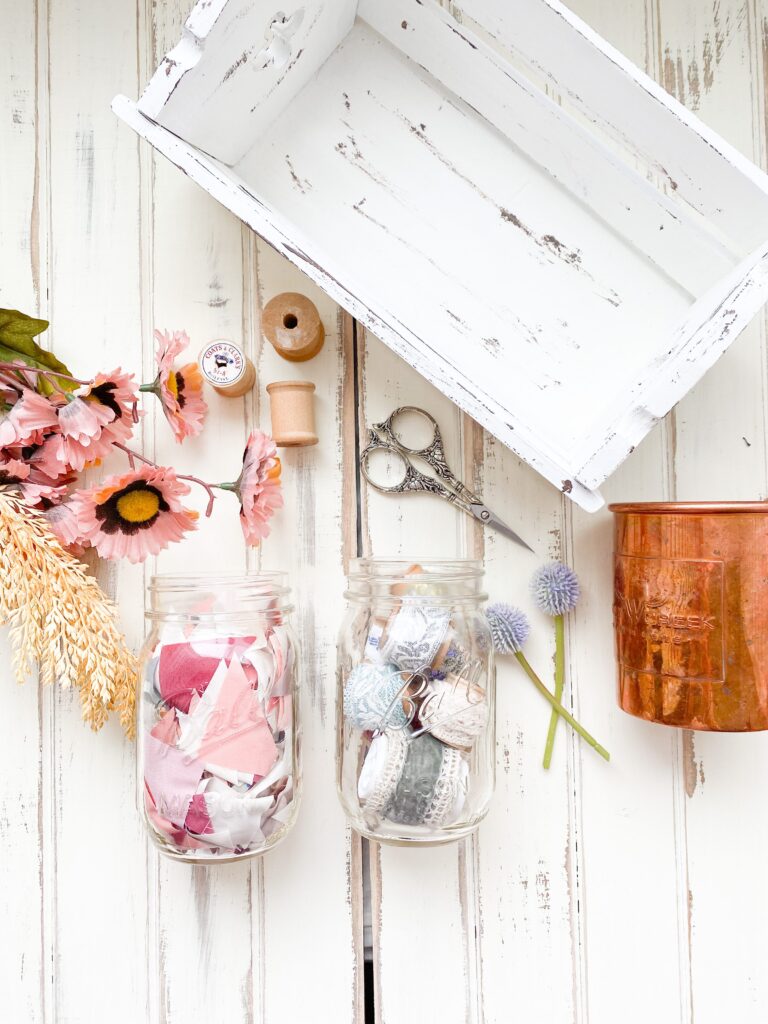
Some examples of props I regularly use are: mason jars filled with different things (fabric scraps, vintage spools filled with ribbon, etc.) little scissors, loose ribbon, and faux florals. Get creative and use whatever you find beautiful! 

quilting supplies on a wood table

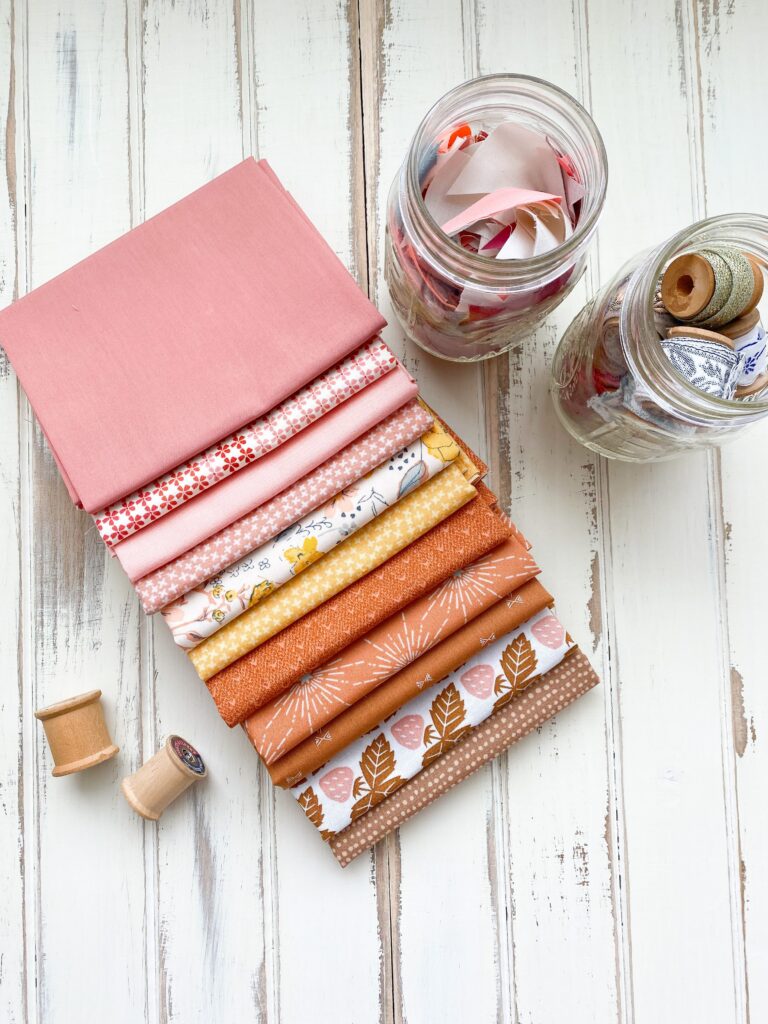
My number one tip for using props is to always group them in ODD numbers. Odd number groupings make for a more balanced photo. Take a look at the two photos below, one has been styled with my odd number rule and the other with even numbers. 

Quilting fabrics that are pastel on a wooden table

See the difference? I usually group things in ones or threes. It really helps pull the eye around the photo! 

Quilt Photography Tips: Outdoor Photos

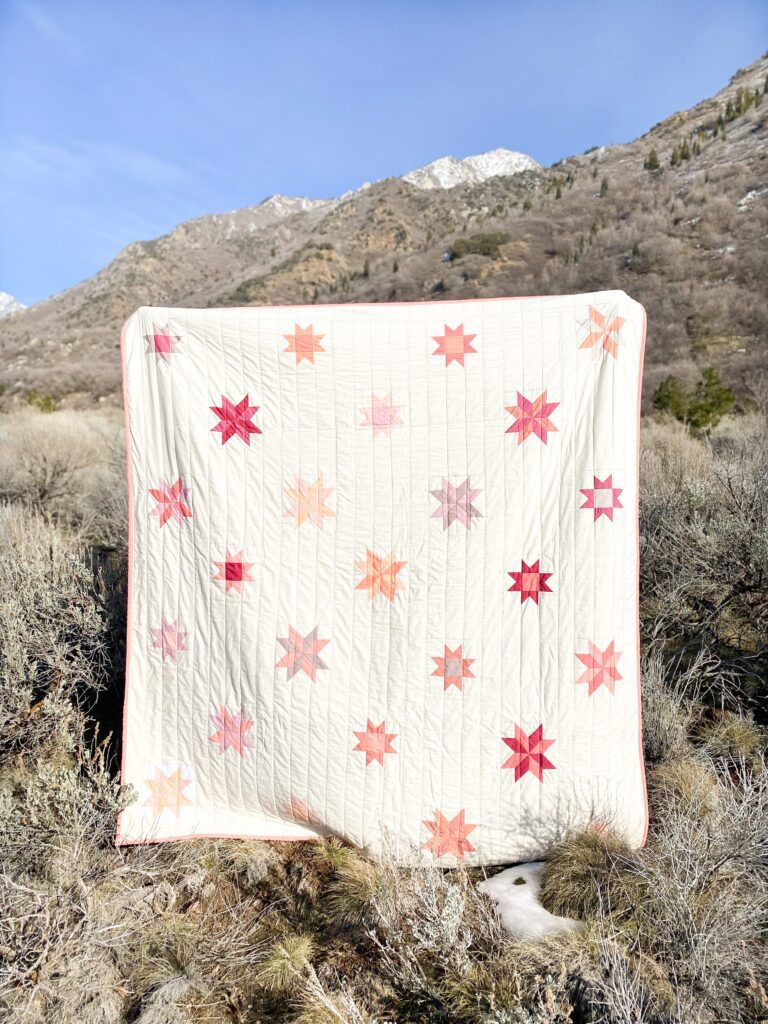
Quilting photography tip: Outdoor photos are so much fun! I love a good #quiltsinthewild shot. The trick to getting a good photo is knowing where the sun is, and how to position your quilt depending on what time of day it is! 

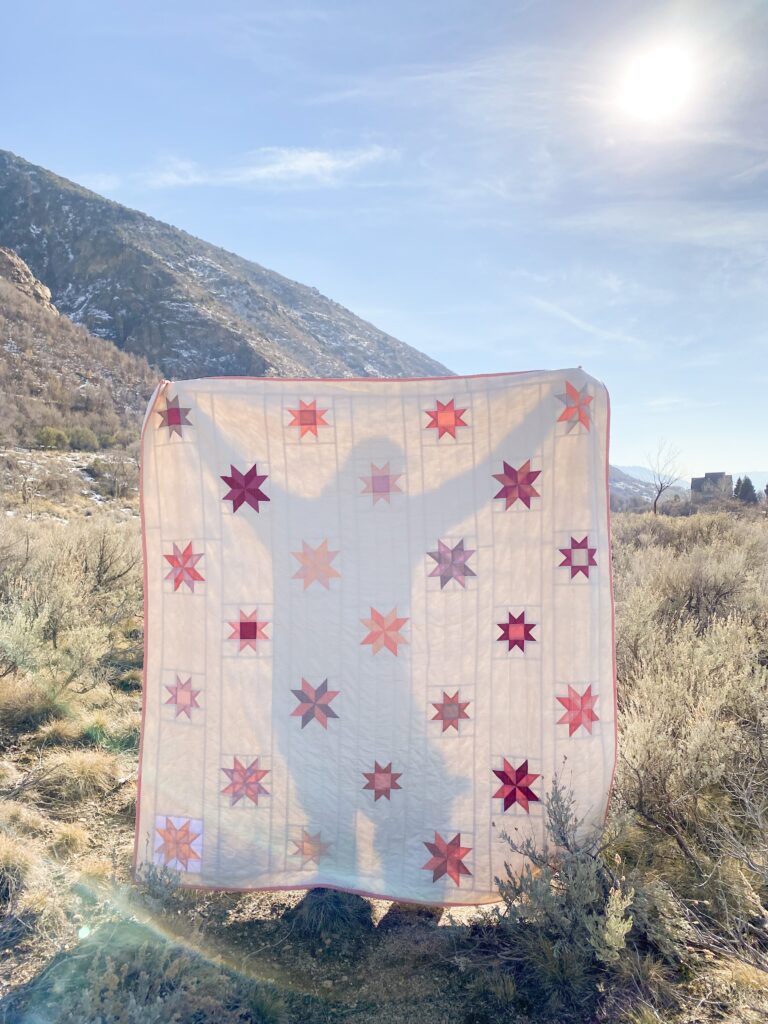
You always want to have the sun FACING your quilt, not behind it. In the two photos below, you can see the difference. The one with the sun behind it totally blows the quilt out, making it see through. You want the sun facing the quilt so that you can see your beautiful top and all the colors in it! 

A low volume quilt outdoors with mountains and the sun in the background

If you have a location where you want your quilt to be in a certain direction, I would recommend going to that place when the sun is opposite your focal point. 

I love finding a good fence, or tree branch you can hang your quilt from. I think they make the prettiest photos, and really show the movement of the quilt. I usually go to local parks, lakes, or in the mountains. 

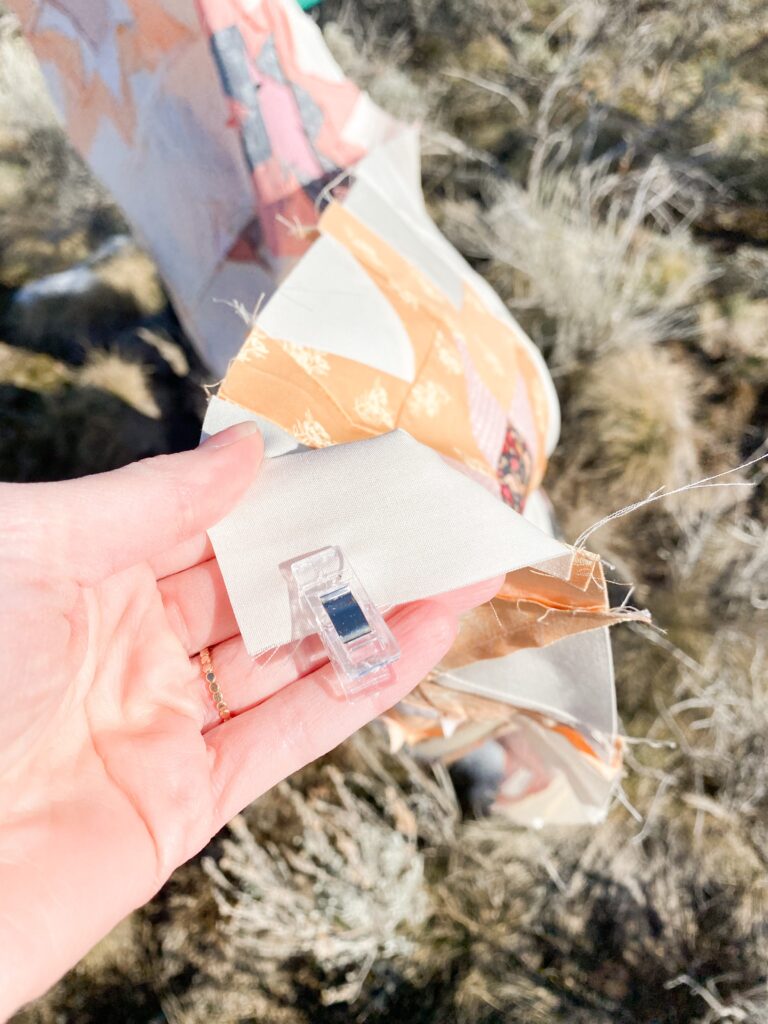
Another item I like to bring on my outdoor photoshoots are binding clips! I only bring these if I’m photographing quilt tops though. I clip them to the bottom corners and it helps keep the top down, and not get blown in the wind! 

a hand holding a quilt clip on the grass

Quilt Photography tip: Editing Your Photos

One of the funnest parts for me is editing my photos! I use the Lightroom app on my phone – and the best part is, it is free! 

You never want to edit your photos so much that they don’t look real, I usually only play with the exposure, temperature, and saturation. I want to keep the overall look as natural as possible!

My favorite feature on the Lightroom app is the “brush”. You can use it to select certain parts of your photo, so you don’t have to do the same editing on everything! For example, sometimes my background needs a lot more exposure than my focal point, so it is super handy to be able to separate the two! 

I like the temperature feature because it gives my photos warmth, and I use the saturation feature to make my colors pop if it was a gloomy day! 

I hope you all enjoyed these tips! You can get a free cheat sheet with all of these tips by clicking here! 

MORE FREE TUTORIALS

If you liked this tutorial, be sure to check out these other free quilting tutorials!

  • Scandinavian Quilted Heart Banner 
  • Quilted Book Mark
  • 5 Tips For Better Photos
0 Comments
Share

You May Also Like

June 8, 2020

How To Use Bias Binding: A Full Tutorial + Video

August 2, 2022

How to Make Chemistry Fabric Pins

March 29, 2022

Scrappy Mug Rug Tutorial

Leave a Reply Cancel reply

This site uses Akismet to reduce spam. Learn how your comment data is processed.

Previous Post
Starting a Magazine with Kiley of Modish Quilter
Next Post
hiring A Virtual Assistant with Kristy Yoder
Hi there, I’m

Hi there, I’m

elizabeth

I am a Minnesota born girl living in Texas with my husband and 3 kids. If I could tell my 13 year old self I was a quilter, I would have laughed in disbelief.  However, a few years ago I discovered how cool quilting really is!  I want to share how cool quilting is with others.  Join me in my online modern Quilters Candy Membership, or check out my quilt patterns.  I even offer a course once a year teaching you how to write and sell your own quilt patterns. I am excited to be quilty friends!

Join the Membership

Shop Quilt Patterns

Check out the Courses

Quilting Tutorial Videos

Categories

  • Craft to Career
  • Digital Downloads
  • Patterns
  • Podcast
  • Quilt Alongs
  • Quilt Questions
  • Tutorials
  • Uncategorized

Recent Posts

  • Tips on Sewing a curved quilt

    March 14, 2023
  • Perfect Point Triangles

    Perfect Points when sewing Equilateral Triangles

    March 7, 2023
  • Split Quarter Square Triangles Blog Post

    Fast and Easy Split Quarter Square Triangles

    February 28, 2023

Latest Video

Latest Video Latest Video

Subscribe to My Channel

Follow Quilters Candy on Instagram

Are you joining? QAL for #gardenharvestquilt is co Are you joining? QAL for #gardenharvestquilt is coming up, and these lovely versions are great inspiration! Click the link in my bio to join the quilt along that starts April 17th. ⁣
Makers in order of appearance:⁣
1. @magnoliaridgequilts⁣
2. and 3. @honey.spun⁣
4. @sandiego.sewn⁣
5. @bohoquiltco⁣
6. @becca.plymale.creative
Are you joining? I can’t wait to share the grand Are you joining? I can’t wait to share the grand prize! Hint: @babylocksewing There are also some amazing fabric bundles being put together by different shops. Join the #gardenharvestqal in the link in my bio to get all the details!
I love getting updates from my past students! This I love getting updates from my past students! This update from @vogonverse was too exciting not to share. Having the courage to apply and move forward pays off! Well done Nik! 🎉🎉🎉
Free coaching? That’s right! I’m giving a free Free coaching? That’s right! I’m giving a free one month business coaching session and one free 1 hour coaching session to any 2 people! This is to celebrate 100 episodes of the @crafttocareer podcast! 🎉 To enter: leave a review of the podcast on Apple Podcasts or my website for episode 100, DM me a screenshot of your review. Deadline: Wednesday at midnight. 3-22-23. Winners will be announce Friday on the podcast!
Invisible binding? That’s right! @quilterscandym Invisible binding? That’s right! @quilterscandymembership join me Monday at 10 am CST and guest @bluebeaglequilts will teach us how to face our quilts. Can’t make it? Don’t worry - this will be recorded and members can watch it later. Raise your hand if you’re excited to learn how to face your quilt! 🤚 Quilt: Sampler made with by some alumni who came to @artgalleryfabrics with me! Shirt: made with my #agfgayleloraine fabrics ❤️
The perfect curves… for your quilts! @lynsavenue The perfect curves… for your quilts! @lynsavenue gives you all the help and tips you need to get those intimidating curves to come out looking perfect every time! Visit my blog for the free tutorial.
  • About
  • Contact
  • Pattern Corrections
  • Terms And Conditions

Copyright © 2022 | Quilters Candy Site Powered by Pix & Hue.