Personalizing Your Quilts with Hand Embroidery

August 29, 2023

Hand Embroidered Quilts

Heather shares personalizing your quilts with hand embroidery.

I’m Heather Bohannon, the quilter and designer at Boho Quilt Co. I recently discovered a common trend in many of the quilts I was making for gifts and commissions: I was adding a personal touch with embroidery. Often adding simple stitches or an initial or name, I found that adding an embroidered detail to my quilt tops and backs took my quilts to the next level. Don’t let the idea of embroidery scare you away though; I don’t have a history with the craft, but I learned a couple of stitches and got creative. Applying this technique to your quilts can open the door to some really fun and very personal touches that can make a gift extra special for a recipient. If you are selling your quilts, adding some embroidered touches could make your quilts that much more unique. Simply knowing a stitch or two can take you a long way!

Ideas for using embroidery in your quilts:

  • Add simple stitches: outline shapes or blocks, add x’s in various spots, scatter small stars around blocks
  • Stitch a single initial or set of initials, or a first name
  • Embroider a couple’s last name and wedding date; embroider the year the quilt is gifted
  • Forever stitch in quilty memory a favorite phrase, inside joke, or lyric
  • Stitch a handprint or a whole family of handprints!

The sky is the limit with how you can use embroidery to personalize your quilts. I absolutely love this technique for making an already personalized craft that much more personal!

Applying embroidery can be as simple or as complex as you want it to be. I recently completed a bigger project (a blessing on a going away quilt for my daughter’s teacher),so I decided I needed a break on my next quilt and simply added an initial and some decorative stitching and embroidery to the quilt top. You might want to add a baby’s initials to a quilt, or a wedding date; maybe you’re feeling ambitious and want to add a song lyric along the bottom of the backing. I want to show you a few things I’ve tried, from simple to more complex, and then I’ll provide a tutorial for adding a date to a quilt top to get you started. After reading through this post, you’ll have ideas that will inspire you to add something special to your next project that will make it stand apart and have an extra special touch.

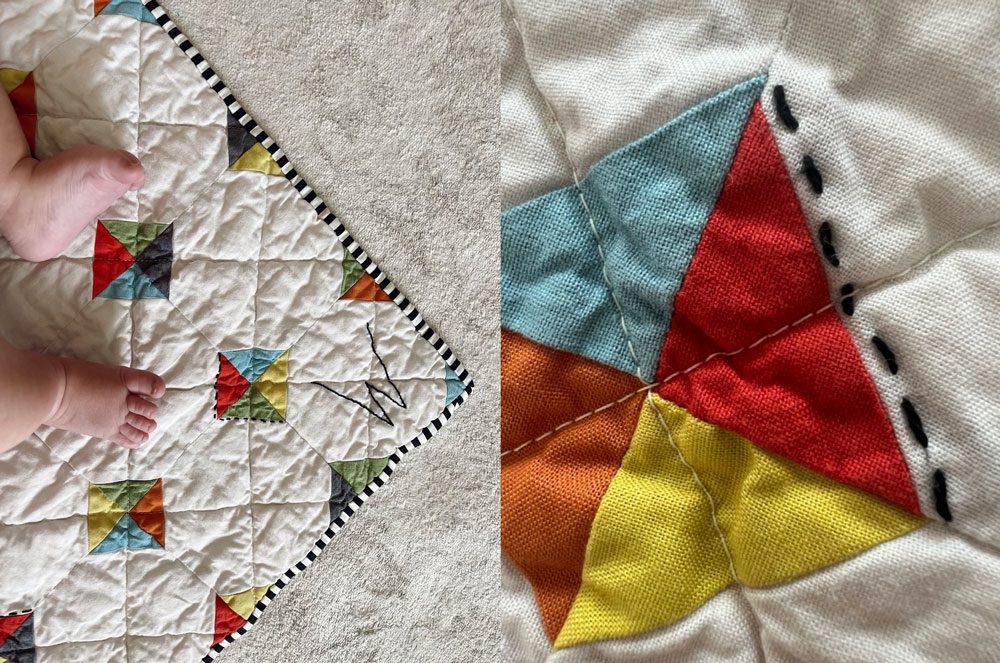
baby quilt with embroidery

On this baby quilt, I added some smaller stitches at various places all around the quilt, and put the baby’s first name initial at the bottom. Simple, yet meaningful.

name embroidered on a quilt

This name placard is simple, but its placement on the back of a quilt gives the recipient (just shy of two years old!) a sense of ownership. Doing the embroidery on a separate piece of fabric on an embroidery hoop meant that it was very easy for me to take along on a road trip!

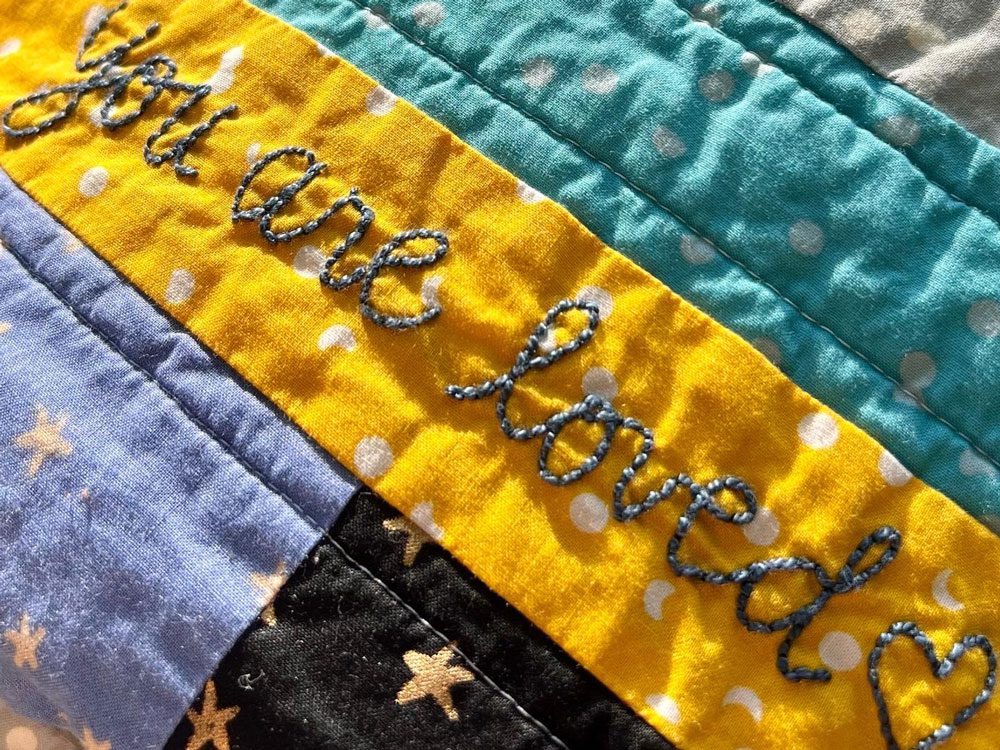
you are loved quilt
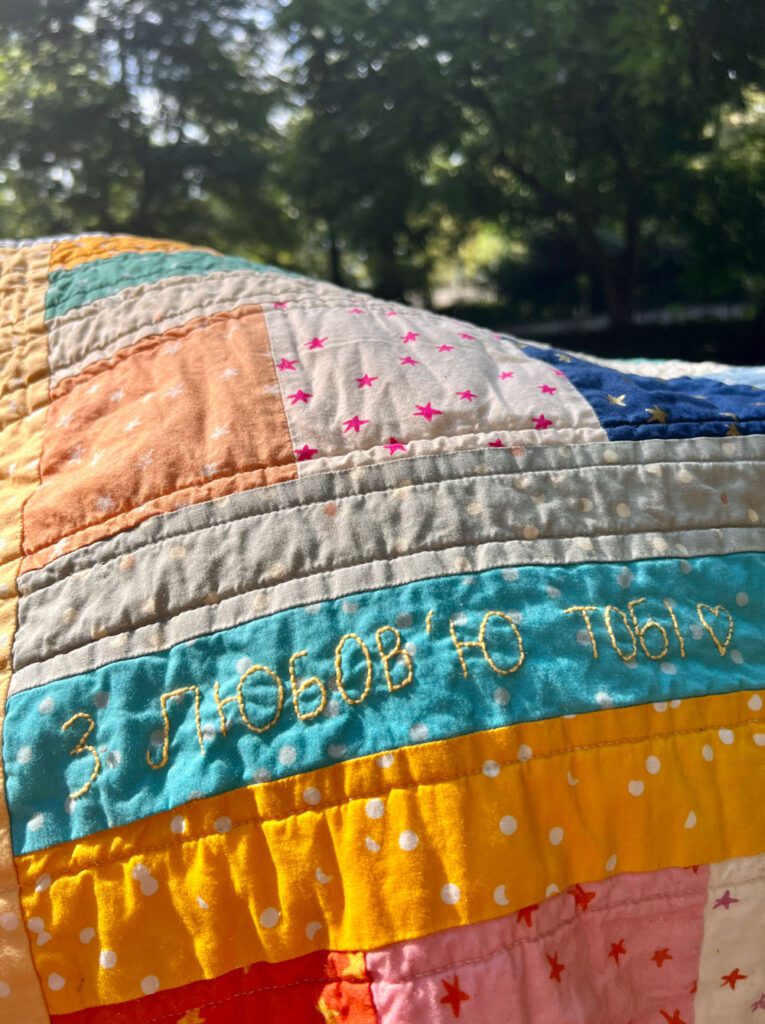
Ukraine Quilt

This quilt was sent to Ukraine at the beginning of the war to distribute to refugees fleeing their homes, and says “You are loved” in Ukrainian and English; I wanted whoever received the quilt to know they were cared for no matter what was happening around them.

Quilt label embroidery
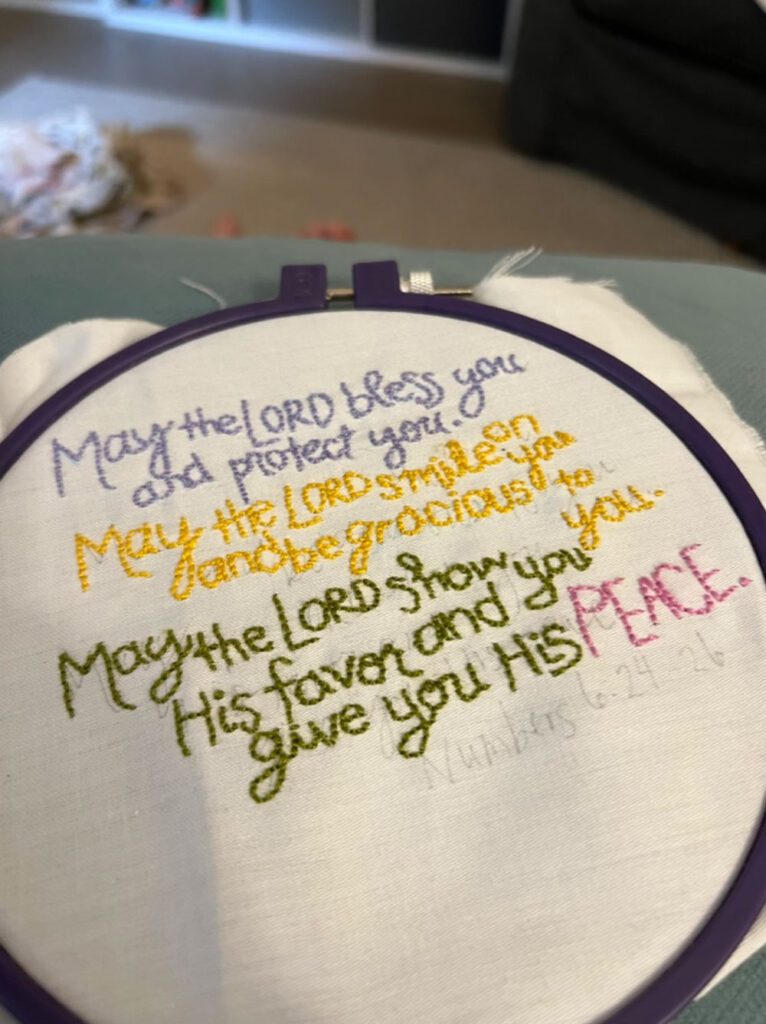
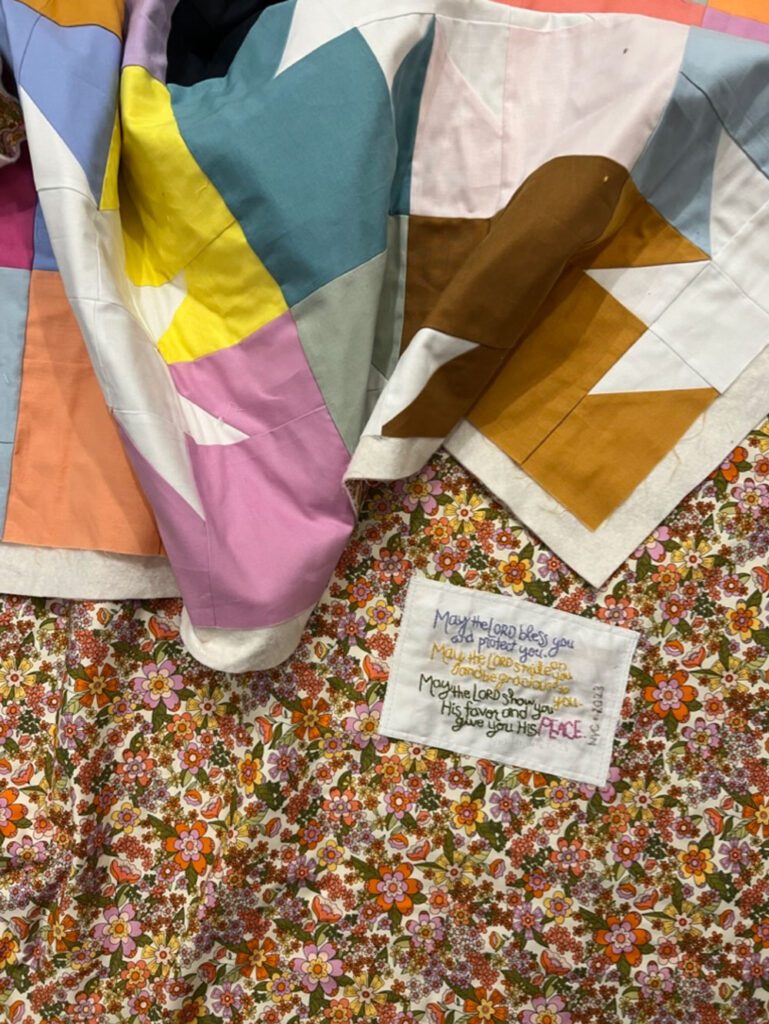
embroidered quilt label

My daughter’s wonderful preschool teacher moved back to Northern Ireland and so I put a blessing on her quilt to send her on her way. This was the longest bit of personalization I have done to date! The end result was very much worth the time it took to complete.

A couple of things to consider before you start making your quilt extra personalized with some embroidery:

  1. This is not hand quilting. While hand quilting actually goes through all the layers of the quilt (quilt top, batting, and backing), this technique is simply adding a decorative element to your quilt top or backing, so you’re only going through one layer.
  2. With that in mind, you’ll be completing the embroidery step before finishing your quilt. Don’t baste your quilt quite yet! You’ll need access to your needle and thread in order to tie it off at various points as you go, and that would be impossible to do if the quilt was already basted.
  3. Decide whether you’d like to quilt directly on the quilt top or backing itself (definitely best for small, decorative stitches) or if you want to embroider your words or image on another piece of fabric that you can then sew onto your quilt. Either way, it’s very handy to have an embroidery hoop to make your fabric taut and easier to work with. I sometimes decide to embroider on a separate piece of fabric and sew it onto the quilt because I’m going to be in the car for a trip and I want something smaller to be working on without holding an entire quilt top, but this is completely personal preference!

Without further ado, let’s add a date to my newest quilt!

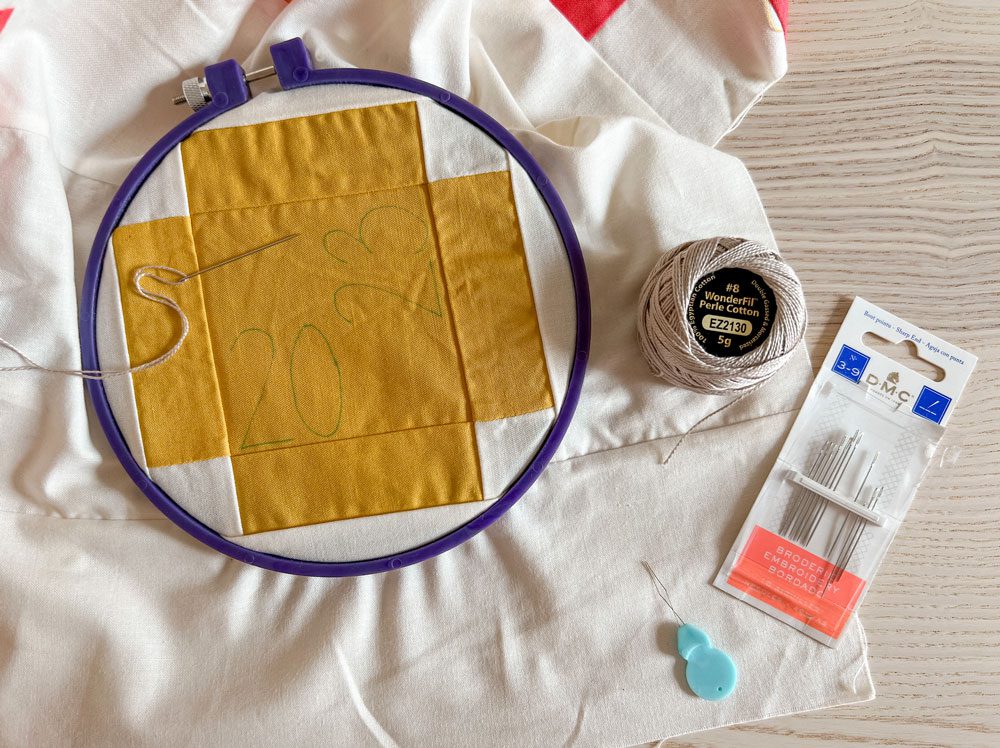
Materials you’ll need:

  1. Scrap paper (for practicing your design)
  2. Water soluble marking pen
  3. Embroidery hoop
  4. Embroidery needle & needle threader
  5. Wonderfil Perle Cotton #8 embroidery thread (you can play around with weight as you figure out what you like to use) in a coordinating color
  6. A quilt (or piece of fabric to embroider on that you’ll then sew onto your quilt*)

Directions:

*For the sake of this tutorial, we will embroider “2023” onto my newest quilt that just happens to be my newest pattern (coming soon!). I’m going to embroider directly onto my quilt, but follow these same directions if you’re going to use a separate piece of fabric and simple sew the fabric piece onto your quilt top or back however you like. I find that this method is more useful for larger letters, images, or phrases.

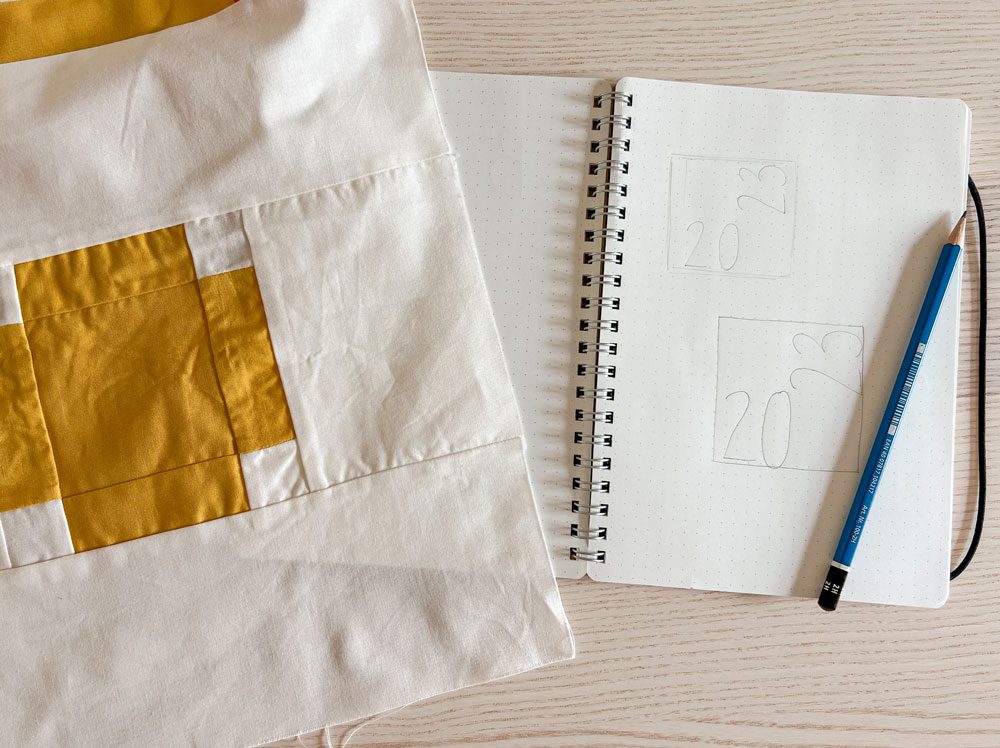
  1. Sketch out your idea on a sheet of paper. If you want to be really technical, you could use graph paper and recreate your block and the placement of your text, but I’m a huge fan of eyeballing it. After all, the handmade factor that comes with embroidery makes this detail feel so endearing!
a copy, pencil and fabric

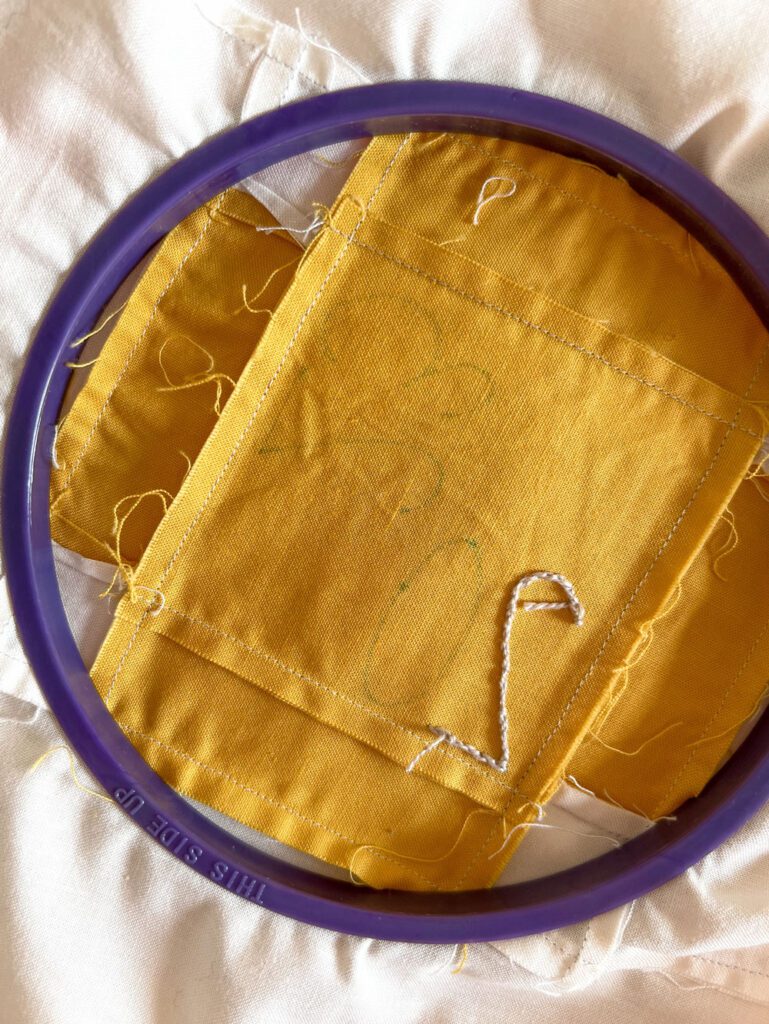
2. When you’re ready, grab your water soluble marking pen, and draw out your date on your fabric. Remember, this will wash out. You can always splash some water on it if you really hate what you write and let it dry. Or, simply write around it as long as you can see it and you know where you’ll be stitching.

embroidery with marker

3. Now it’s time to put your embroidery hoop around your text; get it nice and taut so that it will be easy to push a needle through. Thread your embroidery needle and make a nice quilter’s knot at the end of your thread.

embroidery thread

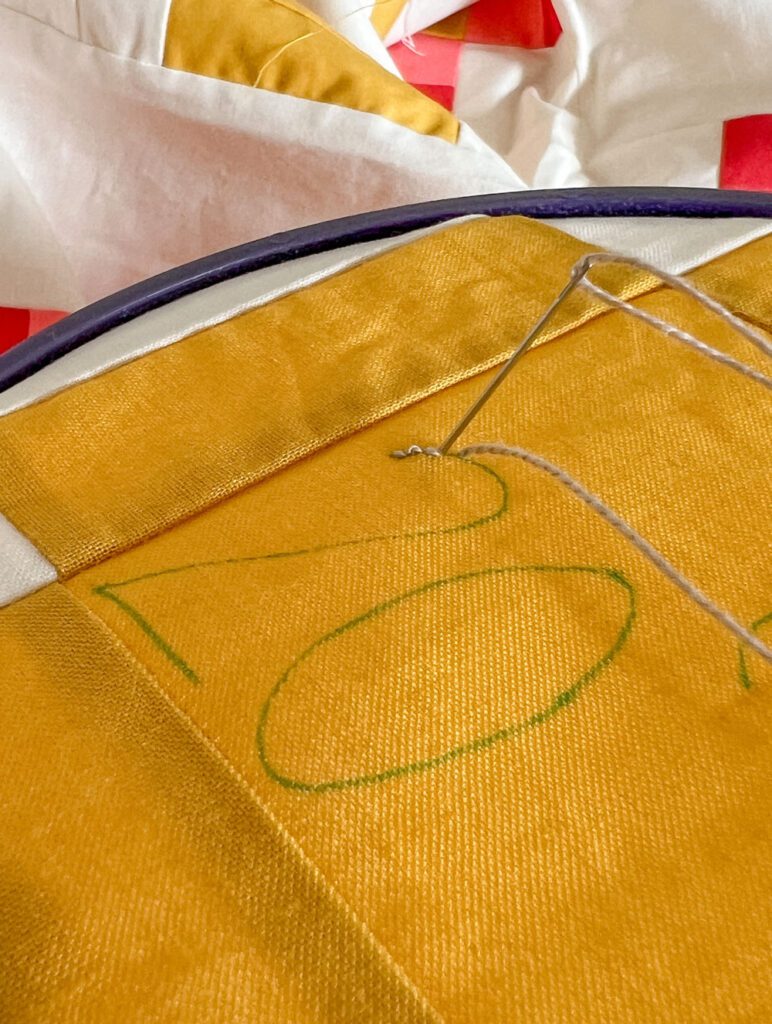
4. Now let’s start stitching! There’s really no doing this “wrong,” but let me tell you my preferred method: I push my needle through the back of fabric at the very beginning of my first number and do one stitch forward, like I’m going to be doing a running stitch. From then on, I do back stitches and try to make them as even as possible as I go. Remember that the goal isn’t perfection, and some variation in stitch length is just fine! You can pull stitches out and start again if something goes horribly wrong, but allow for some imperfection along the way.

close up quilt embroidery

After each number, I loop the needle under and through the last stitch on the back and tie a knot, and then cut the thread about a 1/4 of an inch short. Don’t stitch continuously from number to number, because you don’t want the thread to be visible from the front of the quilt, especially if you are using a darker thread. (Trust me, I’ve learned the hard way!) If you are stitching a word or phrase, you can definitely stitch continuously from letter to letter more often than not, just be careful about big gaps between letters or if you’re using all capitals or large letters.

back of quilt embroidery

Continue following the guides you’ve drawn out in soluble marker, and enjoy the process. I find that this kind of embroidery can lend itself to relaxing in the evenings while watching TV or a movie with my family in a way that quilting at my machine can’t, and I think it’s a fun change of pace. If I plan ahead enough, it’s also something I can take ahead on road trips and vacations so that I can always have quilting close at hand!

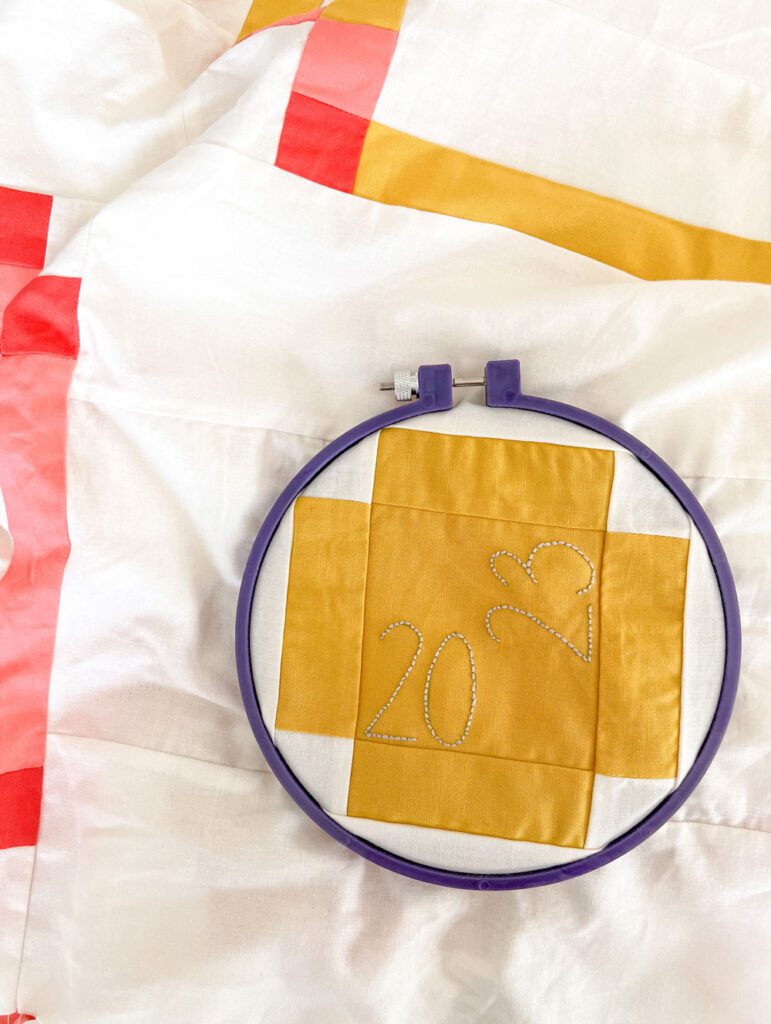
5. Before you know it, you’ll have your date embroidered! The year would be fun to put on a graduation or a wedding quilt. Then you can venture into more complex things like names, song lyrics, and learning different stitches. I love how the possibilities are endless!

quilt embroidery in the hoop
finished-embroidery-on-quilt

And just like that, a simple technique adds a lot of character to your quilts. I would love to see what you make! Follow and tag me on Instagram at @bohoquiltco and subscribe to my email list on my website at www.bohoquiltco.com to hear about my upcoming #portisaacquilt pattern coming this fall!

MORE BLOG POSTS LIKE THIS ONE

or SEARCH THESE

Popular categories

Craft to Career
Digital Downloads
Patterns
Podcast
Quilt Alongs
Quilt Questions
Tutorials
back to the top

Copyright 2024 Quilters Candy  |  Terms & Conditions