Perfect HSTs without Trimming

October 4, 2022

Perfect Half Square Triangles Without Trimming Blog banner

Hello quilty friends! I’m Carli from Guilty Quilty Studio. I’m an engineer by day and an avid quilter and pattern designer by night. I love almost every step of the quilting process . . . but trimming half-square triangles (HSTs) isn’t one of them. Maybe you feel the same way. If so, this post is for you! 

Perfect HSTs Without Trimming

Props to the rare quilter who has the patience of a saint and finds trimming dozens of individual HSTs therapeutic, but that’s decidedly NOT me . . . and I’d be willing to bet it’s not most quilters. What can I say, I’m a lazy quilter and proud of it! There’s just something about having to re-cut a piece I’ve already cut once that really erks me and I don’t want to spend my precious quilting time that way.

But . .  if you don’t trim your HSTs, getting your points to line up is almost impossible and we all love nice points. If you’ve ever skipped the trimming on an HST-heavy project, you’ll know how quickly it can become one of the most frustrating and unpleasant projects you’ll ever make. It’s quite a conundrum. Rather than deal with it, I used to just avoid HSTs altogether.

When I discovered that you could strip-piece HSTs precisely, without trimming, a whole new world opened up! But a word of warning: once you try this technique, you may never go back. It’s addicting!

Cheat Sheet for Perfect HSTS Without Trimming

Grab a free downloadable cheat sheet for this method here.

Now, full disclosure, I didn’t come up with this technique. It’s actually been around for quite a while but, for reasons beyond me, it has never become super popular. I’m on a mission to change that because HSTs don’t need to be so unpleasant. Perfect HSTs Without Trimming needs to be shared! Without further ado, here’s how to strip-piece accurate HSTs quickly and painlessly; the lazy quilter way.

The MethoD

  1. First, cut your strips. The chart below lists some common HST sizes and the corresponding width of the strip you need. For more sizes and the equation to calculate strip widths for any size, grab my FREE HSTs by the strip cheat sheet download.
HST size chart

For the purpose of this tutorial, I’m going to be making HST units with a finished size of 2.5″ inches and an unfinished size of 3″ so I’m using 2.5″ wide strips. You’ll need two strips in different fabrics; one for each side of the HST unit.

Fabric for HSTs

To speed up this process, grab yourself an XL Stripology ruler. You’ll have all your strips cut in seconds.

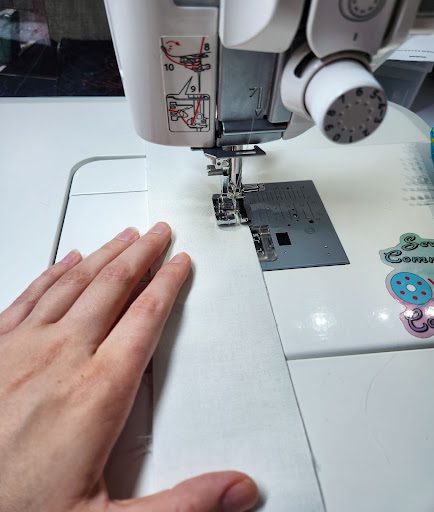
2. Match the strips right sides together and sew your 1/4″ seam down BOTH sides of the strip to form a tube. If you have speed control on your sewing machine, now’s a great time to turn that baby all the way up and unleash the beast!

Sewing a seam

3. Find the unfinished size mark on each edge of one of the corners of your ruler. Since my unfinished HST size is 3″, I’m finding the 3″ mark on each edge. 

Place a piece of masking tape or washi tape on the BACK of your ruler diagonally across the corner spanning the 3″ mark (or whatever unfinished size you are making). You can help align your tape better by checking to make sure that it crosses each of the intermediate cross-hair markings on your ruler since you want the tape to be at a 45° angle. Take a moment to get this as accurate as you can, it will result in a better finished HST

Trimming washi tape

4. Align the masking tape on the corner of your ruler with the seam on one edge of your strip tube. Aligning to the seam and not the edge of the strip makes this process much more accurate. Cut against BOTH sides of the ruler forming one HST unit.

Cutting sides

5. Flip the strip over and repeat this process aligning the masking tape to the seam and the edge of the ruler with the cut edge of the strip tube. If your seam isn’t perfectly straight and the cut edge doesn’t align perfectly to the edge of the ruler, don’t worry about it; this is why you cut on BOTH sides of the ruler with each HST. Just make sure there’s a sliver of overhang.

Trimming each side

6. Continue this way until you run out of strip tube. Now all that’s left is to press your seams. Open each HST unit and press according to your preference. You may have a stitch or two remaining at the apex of the HST unit. Just pop it gently. It should come out very easily.

opening triangle

Viola! Perfect HSTs in a fraction of the time with only one round of cutting and sewing, and no marking! It’s like magic!

HSTs all lined up in various colors

Ready to give it a try? Grab my FREE Strip Ts quilt pattern and learn to love HSTs again.

The Elephant in the Room

If you’re a more advanced quilter, you might be thinking: “Wait, doesn’t that produce a bunch of bias edges?” You’d be absolutely right. That is the main drawback of this method since 2-at-a-time and 8-at-a-time methods produce only straight-of-grain edges. However, I have found that most quilters are perfectly OK working with bias edges. After all, they’re everywhere in quilting any time you’re sewing something other than just a square or a rectangle. You’re probably sewing some degree of bias edges regularly without even realizing it.

There are also some very simple ways to make sewing bias edges a breeze and the benefits (and time and fabric saved) with this method vastly outweigh this drawback. It takes a hot minute to get the hang of it, but once you do, I’m sure you’ll love this method just as much as I do. Your points will never look better and you’ll be able to make beautiful HST quilts, like this one, super fast

Perfect HSTs Without Trimming finished quilt

Pattern: Strip Ts. Grab a free copy here.

PAST BLOG POSTS

Did you enjoy this post? Check out these past blog posts:
 

or SEARCH THESE

Popular categories

Craft to Career
Digital Downloads
Patterns
Podcast
Quilt Alongs
Quilt Questions
Tutorials
back to the top

Copyright 2024 Quilters Candy  |  Terms & Conditions