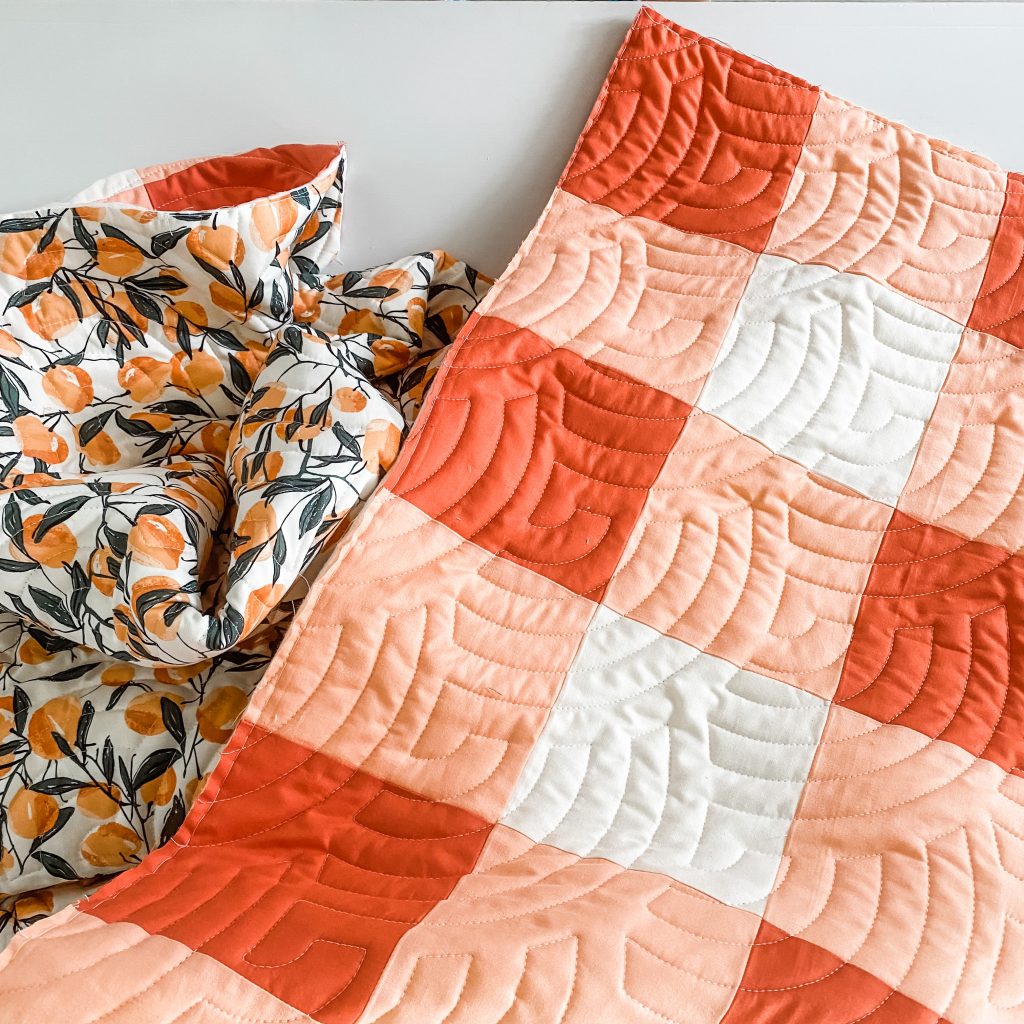
Get this FREE Gingham Quilt Pattern and Tutorial
Do you want a free gingham quilt pattern and tutorial? I am sharing how I made this pattern a little different from other gingham quilt patterns, and also sharing a FREE download for the quilt pattern. Get Pattern Here: Free Gingham Quilt Pattern
My name is Elizabeth Chappell, and I am the owner of Quilters Candy. I write quilt patterns, am offering a course on how to sell and write quilt patterns, and I host an online modern quilt guild. I am excited to share this tutorial and free pattern on Amy’s blog.

GINGHAM QUILTS
Every other gingham quilt pattern I found had a border that didn’t make my OCD tendencies happy. If you notice most Gingham Quilts have a border with mis-matching fabrics. That is why I created this new pattern with a border that has matching fabrics on all sides. Note the difference in these two photos:
I wanted a Gingham Quilt pattern that looked like the quilt on the bottom. I wanted a border that had matching fabrics on all sides. Yet I couldn’t find a gingham pattern (for free or for purchase) that had that. So I decided to write one, using the simplified strip piecing method.
Strip Piecing your own Gingham Quilt
To make a gingham quilt, there is an easier way than cutting each square and sewing them together. This easier method is called Strip Piecing. This is what strip piecing entails:
- Cutting strips of fabric.
- Sewing those strips together.
- Cutting the strips into new strips made up of squares.
- Sew those newly cut strips (with squares) together.
Steps to Making Free Gingham Quilt
- Cutting Fabric Strips. My version of the pattern calls for cutting strips 5 ½” x WOF.
- Pin and sew alternating fabric strips together. You will want the free pattern download for this step, as it tells you how many and which color strips to sew together.
- Sew matching strips together, alternating rows so it goes Fabric A, Fabric B, Fabric A, Fabric B, and so on.
- Press seams all in one direction.
- Cut your sewn together strips into new rows. This step will give you strips with squares. NOTE: Because your fabric is too large to fit on a cutting mat, I carefully fold my sewn together strips in half. I then press it with an iron and fold in half again. Make sure your edges line up. This way you can cut you fabric easily. However, if you do not fold your fabric carefully in this step, your squares will be wonky.
- With your new strips that have squares in them, sew alternating rows together.
- NOTE: Be sure to pin at each corner so the corners match and the seams nest.
- Sew all rows together.
- Press seams in one direction, and your quilt top is ready to be quilted! That’s it. This can be done in a matter of hours.
- Quilt in your desired method. I, personally, love to use a minky backing when I can, and send it to a long arm quilter. I consider it treating myself. 😉
DOWNLOAD FREE PATTERN HERE
All you need to do now is decide what fabrics you want to use to make your gingham quilt! Be sure to use the hashtags #QuiltersCandy and #GinghamLove so we can see your finished quilt.
If you like this tutorial, be sure to visit my other free tutorials, like this one on DIY Spray Starch. Not to mention using spray starch to make your quilt will help your points to match!
More photos of my two versions, one with orange fabrics, the other with blues.
Orange fabrics: Warp and Weft by Alexia Marcelle Abegg for Ruby Star Society. Colors: Warp Weft Wovens Persimmon, Warp Weft Wovens Dahlia, and Warp Weft Wovens Natural. Backing, Leos Orchard by Bonnie Christine for Art Gallery Fabrics.
Blue Fabrics: Peppered Cotton by Cottoneer in the following colors: Lake, Fog, and Oyster.