Reversible quilted pillow cover tutorial
Ever find yourself with extra quilt blocks and no idea what to do with them? Maybe they’re test blocks from a new pattern, leftover pieces from a quilt project, or part of a UFO (Unfinished Object) that’s been sitting in your sewing space for ages. Instead of letting them collect dust, use this Reversible quilted pillow cover tutorial! Transform them into a stylish reversible pillow cover!
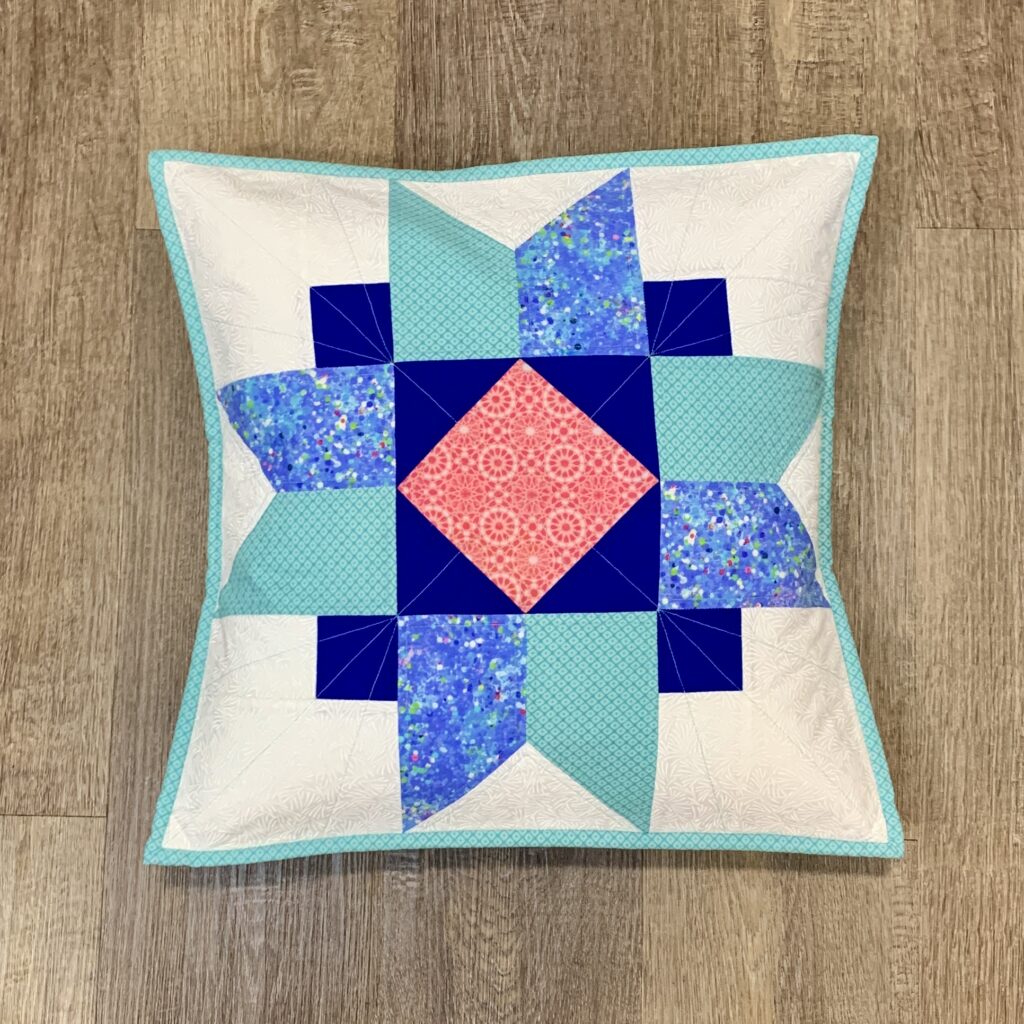
This easy reversible quilted pillow tutorial is the perfect way to repurpose orphan blocks while adding a touch of handmade charm to your home. Plus, since it’s reversible, you can switch up your décor in seconds—one side for everyday use and the other for seasonal vibes. Think fall to Christmas with a simple flip! No need for extra storage, just a clever two-in-one design.
Best Quilt Blocks for This Project
To keep things simple, use quilt blocks that share the same grid layout—like 2×2, 3×3, or 4×4 designs. They don’t have to match exactly, but having the same structure will ensure a smooth, professional-looking finish.
Ideal Block Sizes:
✅ 16″ x 16″
✅ 18″ x 18″
✅ 20″ x 20″
Dig through your scrap fabric and UFO pile, grab two quilt blocks, and let’s make something beautiful!
Fabric & Material Requirements
For a 16” x 16” Pillow Cover
- (2) 16 ½” x 16 ½” unfinished quilt blocks
- ½ yard coordinating fabric for the pillow back
- ¼ yard binding fabric
- ½ yard fusible fleece
For an 18” x 18” Pillow Cover
- (2) 18 ½” x 18 ½” unfinished quilt blocks
- ⅝ yard coordinating fabric for the pillow back
- ¼ yard binding fabric
- ⅝ yard fusible fleece
For a 20” x 20” Pillow Cover
- (2) 20 ½” x 20 ½” unfinished quilt blocks
- ⅝ yard coordinating fabric for the pillow back
- ¼ yard binding fabric
- ⅝ yard fusible fleece
Other Supplies You’ll Need
✔️ Hand-sewing needle & matching thread
✔️ Optional: Embroidery floss, perle cotton, or sashiko thread for decorative stitching
Cutting Instructions
For a 16” x 16” Pillow Cover
✂️ From pillow back fabric: (2) 16 ½” x 18 ½” rectangles
✂️ From binding fabric: (2) 2 ½” x WOF strips
✂️ From fusible fleece: (2) 16 ½” x 16 ½” squares
For an 18” x 18” Pillow Cover
✂️ From pillow back fabric: (2) 18 ½” x 20 ½” rectangles
✂️ From binding fabric: (3) 2 ½” x WOF strips
✂️ From fusible fleece: (2) 18 ½” x 18 ½” squares
For a 20” x 20” Pillow Cover
✂️ From pillow back fabric: (2) 20 ½” x 22 ½” rectangles
✂️ From binding fabric: (3) 2 ½” x WOF strips
✂️ From fusible fleece: (2) 20 ½” x 20 ½” squares
Assembly Instructions
Transform your extra quilt blocks into a stylish and functional reversible pillow cover with this simple step-by-step tutorial. Perfect for using up leftover blocks, this DIY pillow project is beginner-friendly and adds a personal touch to your home decor.
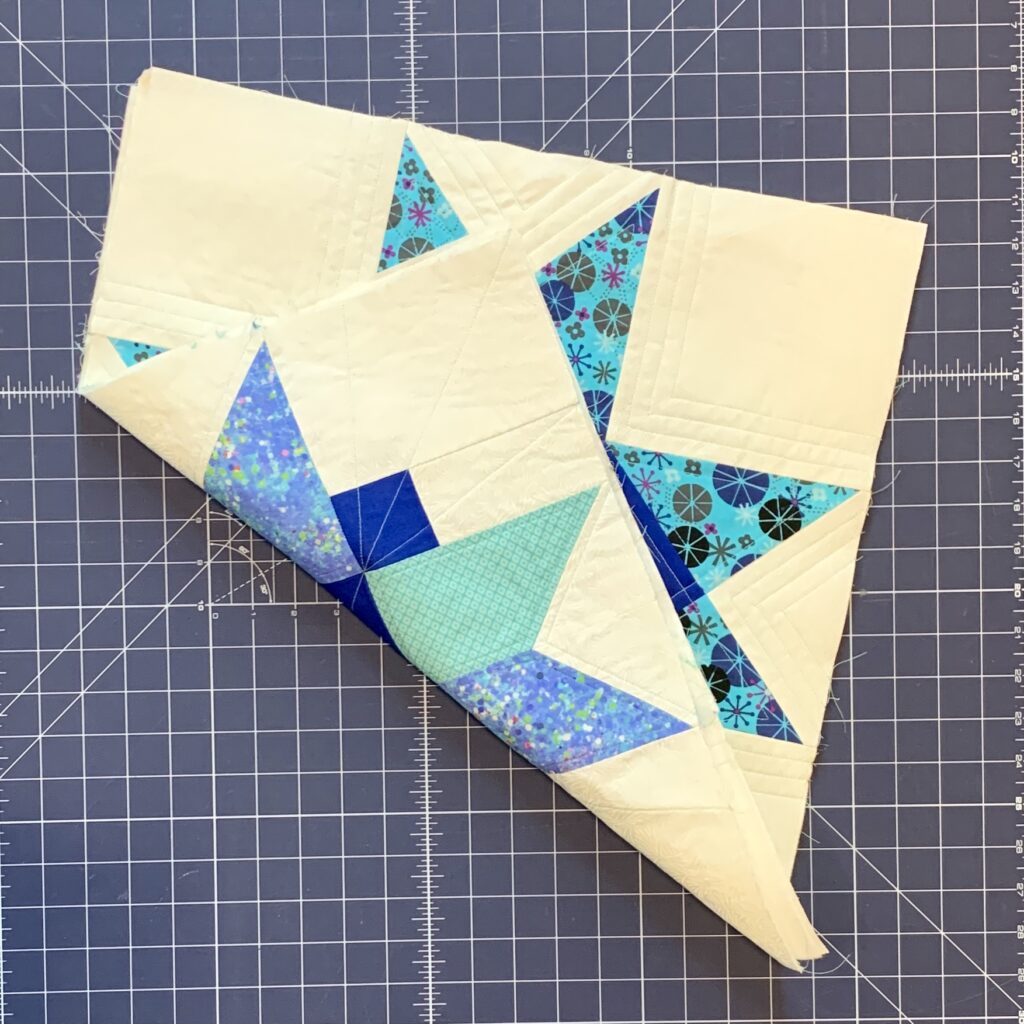
1️⃣ Prepare the Quilt Blocks
✅ Follow the fusible fleece manufacturer’s instructions to adhere the fleece to the wrong side of each quilt block. This step adds structure and durability to your pillow cover.
2️⃣ Quilt the Blocks
🎨 Quilt each block as desired! You can:
- Match quilting designs on both sides for a cohesive look.
- Make each side unique for a fun, two-in-one reversible design.
💡 Pro Tip: Try free-motion quilting or hand-quilting for a decorative touch!
3️⃣ Assemble the Pillow Cover
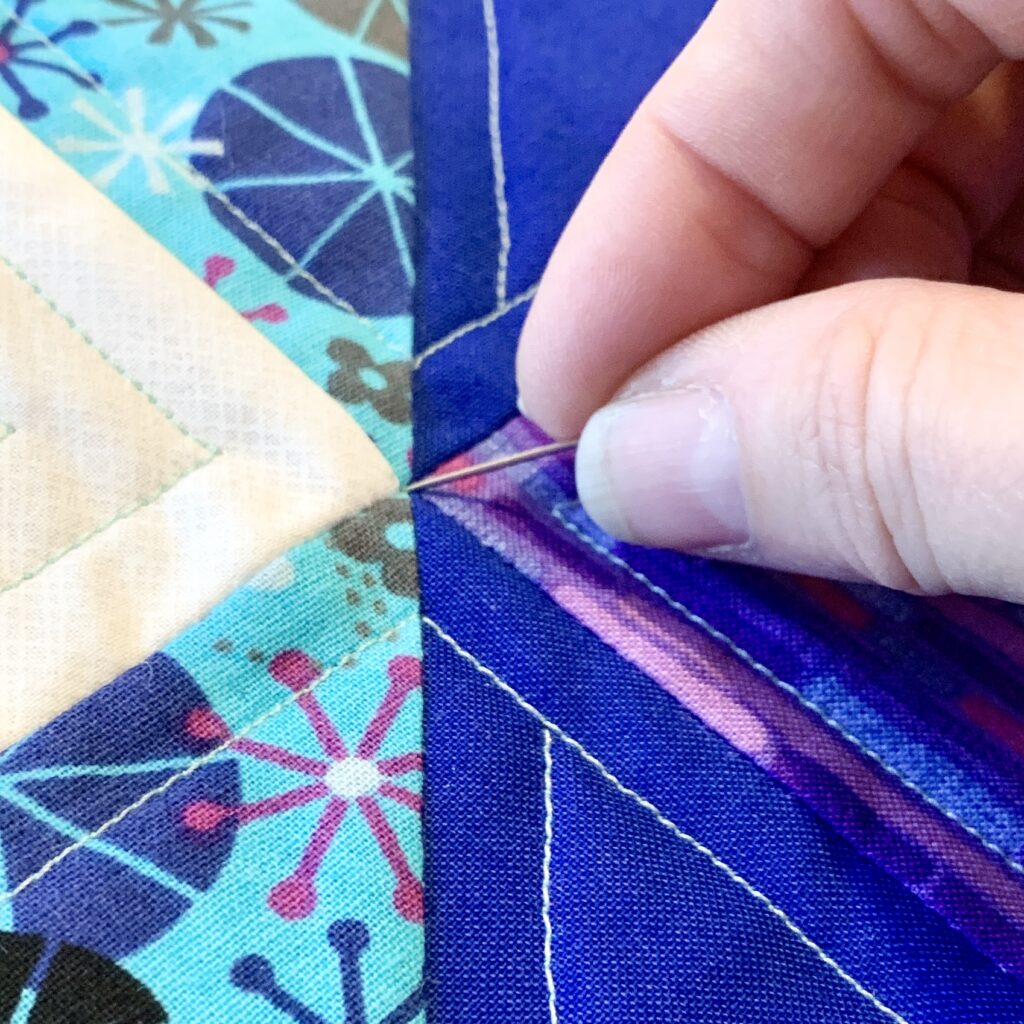
Tack the Quilt Blocks Together
🪡 Using a hand-sewing needle and thread, secure the two quilt blocks together at the corner seams:
- Insert the needle through one corner seam on the top block.
- Find the matching corner seam on the second block and take a small stitch.
- Repeat with a second stitch for extra hold, then tie off on the top.
- Hide the knot by taking a large stitch under the top fabric layer, pulling the knot underneath.
- Thread the second loose end and repeat to ensure a clean finish.
✅ Alternative Techniques:
- Use embroidery floss or thicker thread for a decorative, hand-tied effect. Leave ½” thread tails for a textured look.
- Hand-sew the blocks together using large decorative embroidery stitches (such as sashiko or running stitch).
Stitch the Quilt Blocks Together
✂️ Sew around the edges of the quilt blocks using a ⅛” seam allowance to secure them in place.