Front Porch Quilt Along Week 4

July 21, 2025

Front Porch Quilt Along Week 4

đź§µ Welcome to Week 4 of the Front Porch Quilt Along!

This week, we’re assembling our quilt tops—and if you’ve taken a peek at the pattern, you may have noticed a unique twist. Instead of sewing rows first, we’re starting with columns. Why? Because each column has blocks that face a different direction!

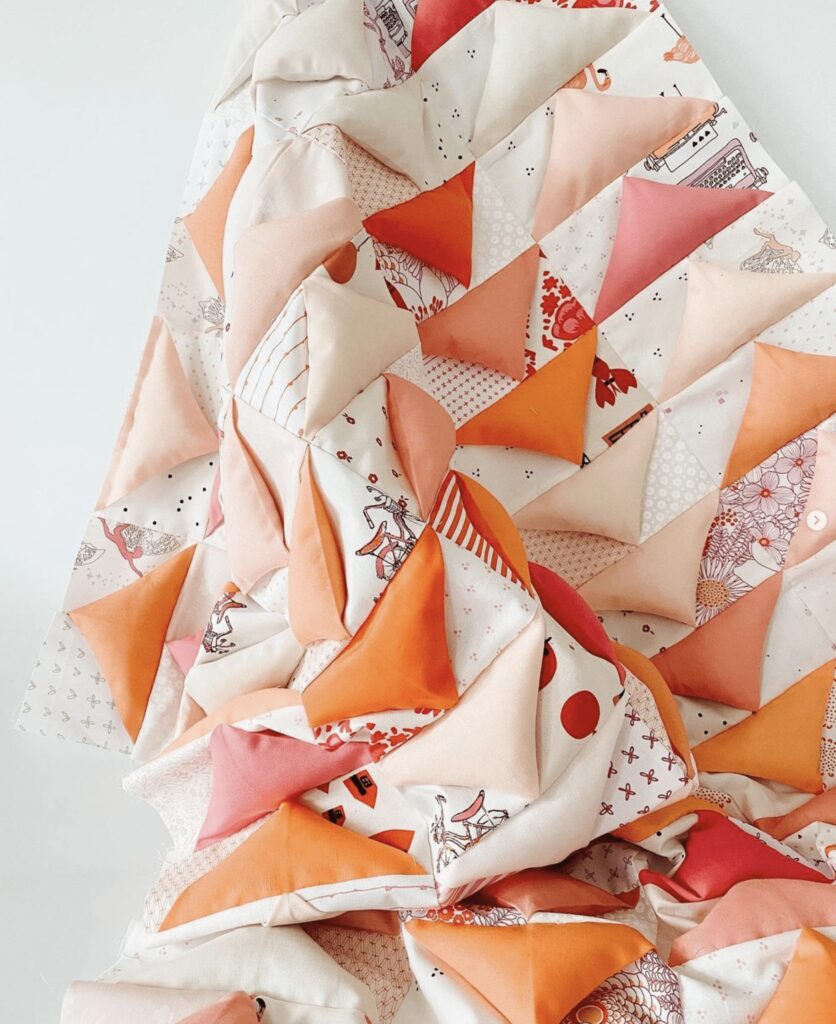
Take a look at the photo below to see what I mean. Once your columns are pieced, you’ll sew them together to complete your quilt top.

Can’t wait to see your quilts coming together—it’s such a fun stage in the process!

Front Porch Quilt Assembly

Quilt Assembly Tips

Why Columns First?
Each column in the Front Porch quilt has blocks pointing in alternating directions. By assembling columns first, your flying geese keep their orientation and everything lines up just right.

Tip: Sew with the Back of Your Blocks Facing Up

Once you’ve pressed and trimmed your blocks, here’s a simple trick to keep your points crisp and perfectly aligned:

Sew with the back side of your blocks facing up.
As you piece your blocks into columns, this gives you a clear view of where your seams intersect—right where those triangle points land.

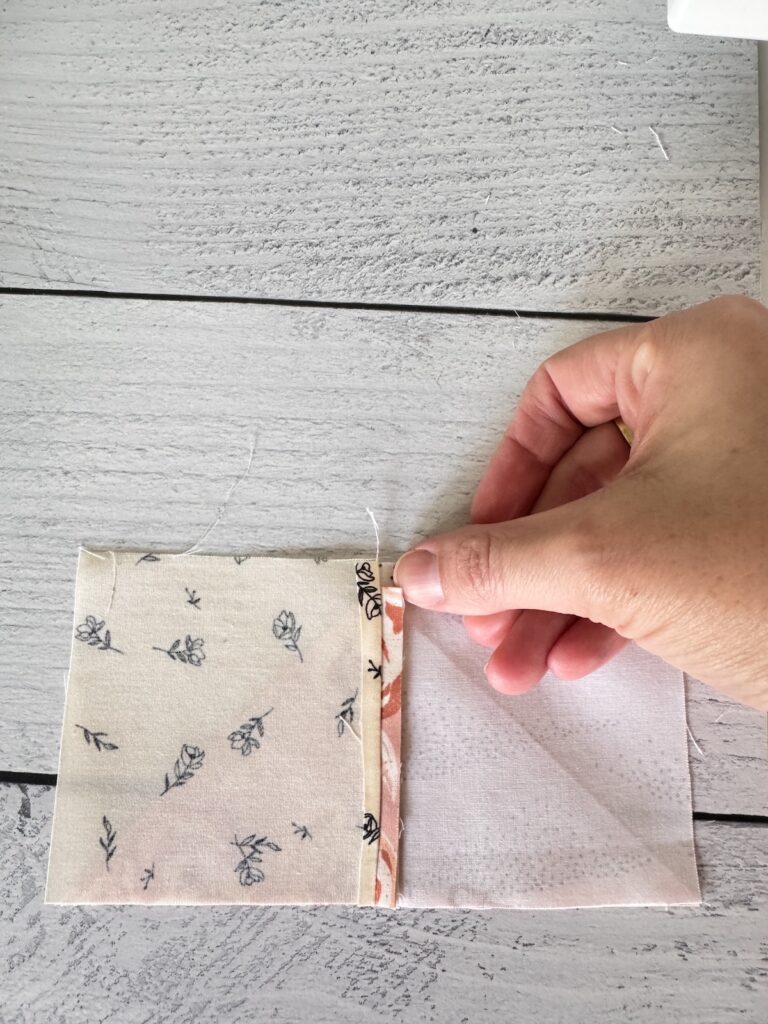
In the photo below, you’ll see my thumb sitting just under the ÂĽ” seam mark. If you line up your needle to sew right at the top of that spot, you’ll get sharp, accurate points every time.

A small shift with magical results—give it a try!

Back side of a Front Porch quilt block highlighting the ÂĽ" seam allowance with the triangle point visible for accurate alignment during assembly.

TIPS FOR ADDING FILL

I experimented with adding fill to my flying geese blocks for the Quilt Along, and y’all—I love the result!

Here’s how to do it:

  • Push your fill to the bottom of your triangle before pinning it shut.

  • Pin the triangle closed.

  • Then, with right sides together (RST), pin your top flying geese block in place.

  • Sew with a ¼” seam as usual.

  • Once done, the fill will redistribute nicely and add that perfect puff without bunching at the bottom.

What I used:
Pellon’s Perfect Loft polyester fiberfill (32 oz. bag). One bag is plenty for the baby size and works great for the larger quilt, too!

Puff Quilt

đź§µ Other Fun Fill Ideas

  • Beads for a weighted blanket effect

  • Batting: Some quilters cut triangle pieces of batting to create a slightly puffy but flatter effect

  • Scraps or wool roving for a textured, eco-friendly option


đź—‚ Organizing Your Columns

When it’s time to piece your quilt top, try one of these approaches:

  1. Keep your layout visible on a design wall or floor. Take pieces to your machine one at a time so they stay in order.

  2. Label and stack your columns:

    • I used this method for my QAL version.

    • I gathered each column by placing the bottom block on top, then stacked the others below it in order.

    • That way, when sewing, I start with the bottom block and work my way up to the top.

My go-to tool:
I used Seams Sew Me alphabet clips to label each column—and they worked like a charm!

✂️ Sewing Columns Together

Now that your columns are complete, it’s time to join them into one beautiful quilt top!

Pin, pin, pin.
Use pins at every corner of your flying geese blocks when sewing columns together. I know—it’s a lot of pins, but trust me, it’s worth it for neat, matching corners.

And if your points aren’t perfect? That’s okay too.

The beauty of this scrappy background is how forgiving it is. The eye is naturally drawn to the colorful flying geese—not the background. So if things aren’t exactly perfect, no one will notice but you!

Share Your Quilt Top Assembly

This Week’s Prize: A Full PDF Pattern Library!

Post a photo of your quilt top assembly and you’ll be entered to win my entire PDF pattern library—including the not yet released Christmas Cheer quilt pattern!

I can’t wait to see your quilt tops coming together. This is such an exciting step!

HOW TO ENTER:

  • Use a public Instagram account (required so I can see your post).

    Don’t have one? You can create a free, public account just for the quilt along—and only post your fabric pull if you’d like!

  • Post a photo of your quilt top assembly.

  • Use the hashtag #FrontPorch25 in your caption so your entry is visible.

I can’t wait to see your progress!

👀 What’s Next?

Next Monday kicks off Week Five: Quilting!

Can’t wait and want to start quilting this week? That’s totally okay! Jump in when you’re ready—this quilt along is meant to fit your schedule.

or SEARCH THESE

Popular categories

Craft to Career
Digital Downloads
Patterns
Podcast
Quilt Alongs
Quilt Questions
Tutorials
back to the top

Copyright 2024 Quilters Candy  |  Terms & Conditions