• Home
  • Membership
    • Learn More
    • Quilters Candy Membership Login
    • Craft 2 Career Club Login
  • Courses
    • Course Login
    • Quilt Pattern Writing Course
    • Craft To Career
    • FREE mini Pattern Writing Course
    • Quilt Pattern Templates
  • Shop
    • Quilt Patterns
    • My Book
    • Wholesale Patterns
    • Pattern Corrections
  • Blog
  • Podcast

Quilters Candy

How to Make a Quilt Block Lanyard
Tutorials
/
January 11, 2022

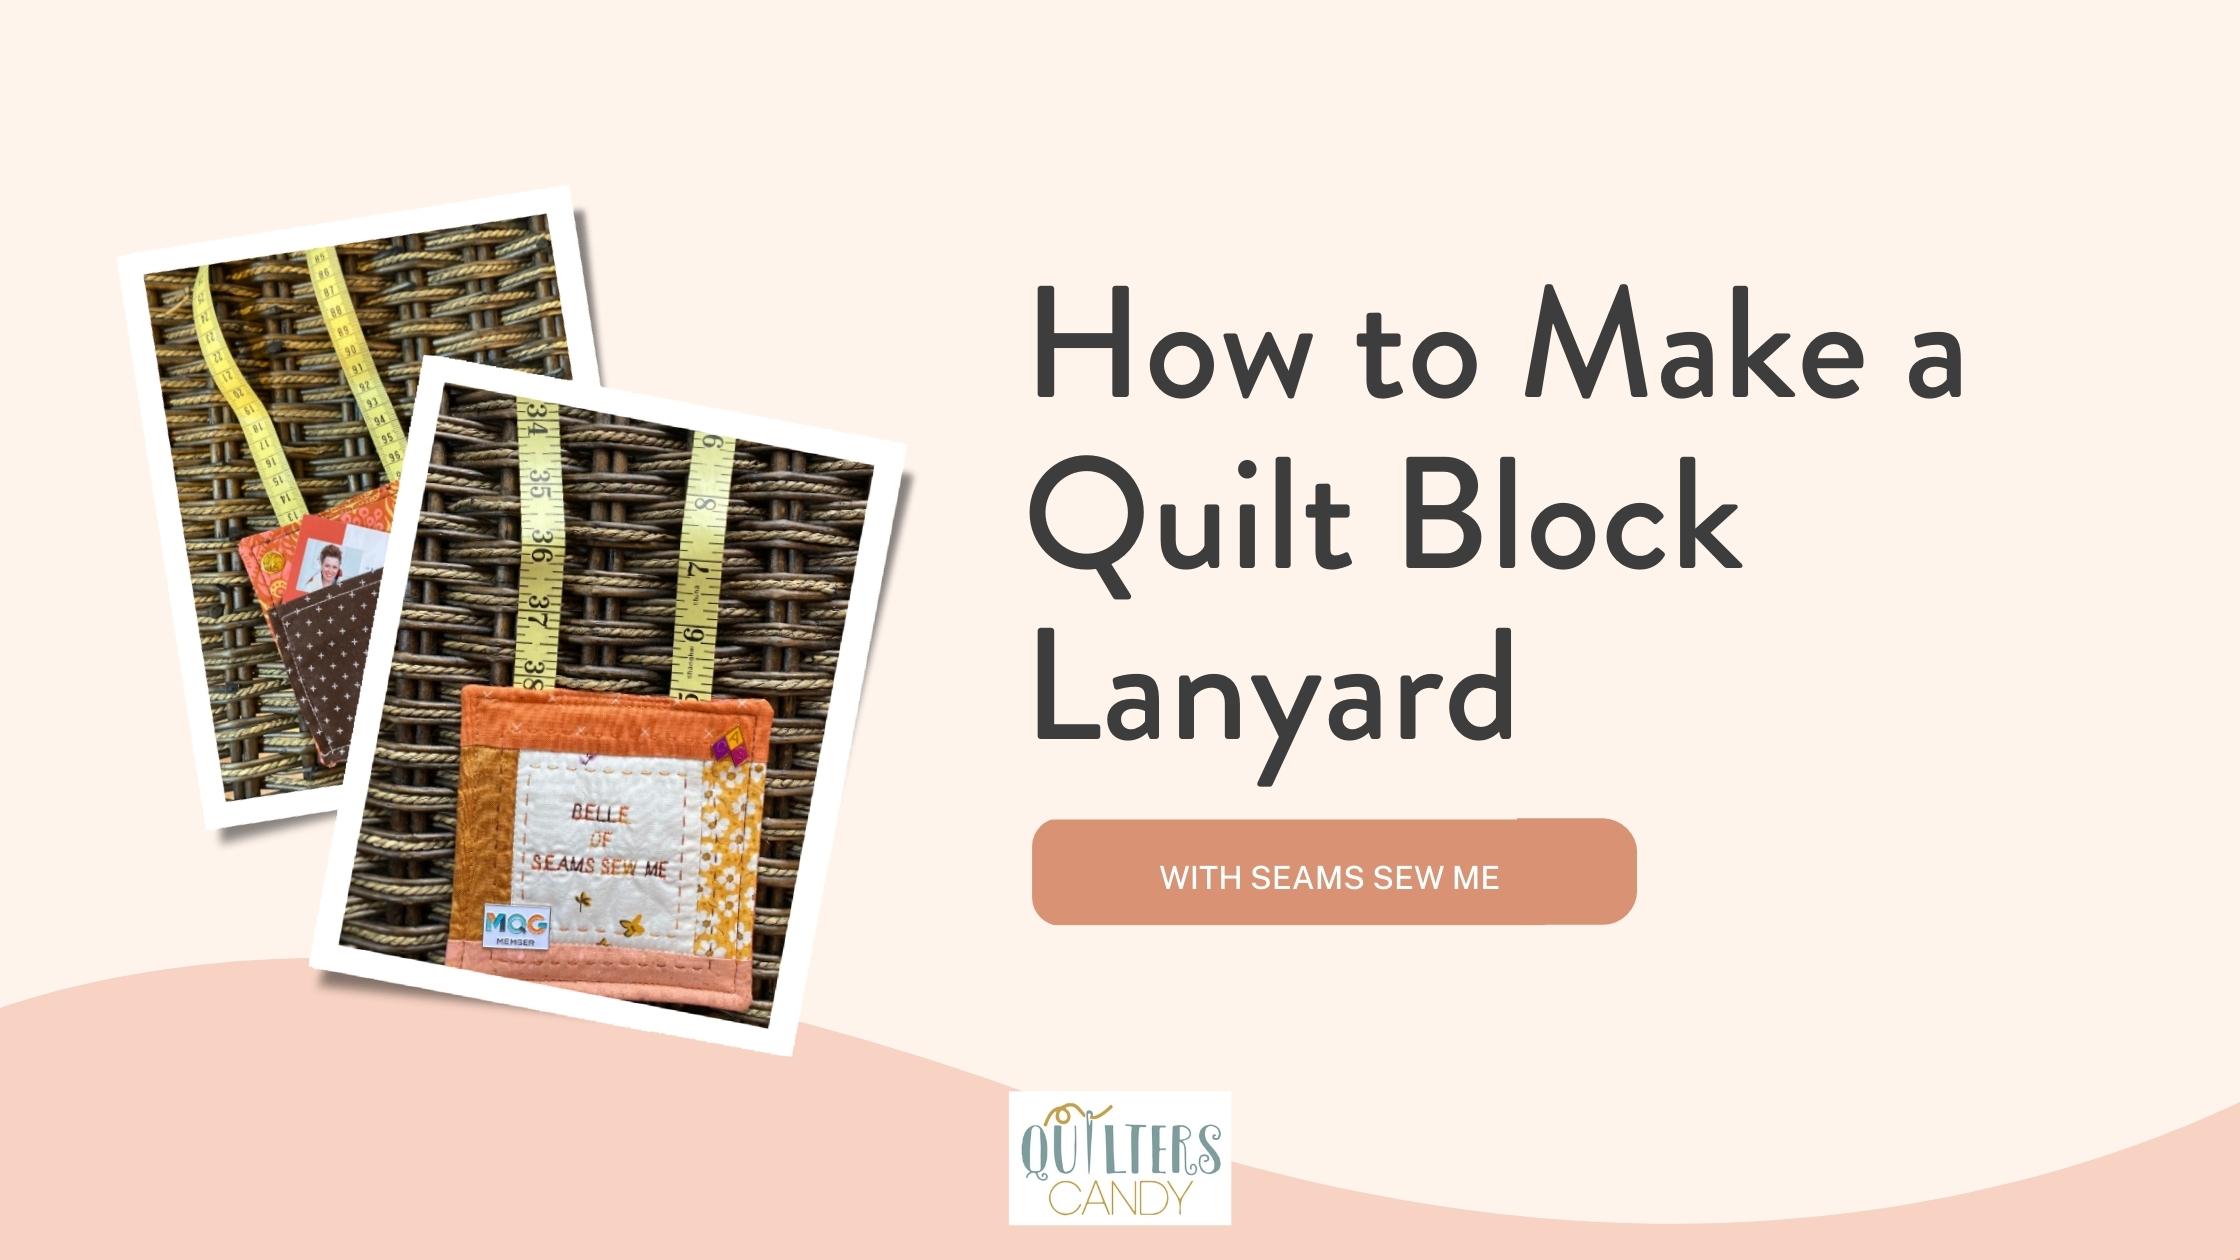
How To Make A Quilt Block Lanyard

Learn how to make a QUILT BLOCK LANYARD in this guest blog post.

Hello quilty friends, I’m Belle of Seams Sew Me, and am a newer pattern designer and quilt maker. I recently graduated from Elizabeth’s Quilt Pattern Writing course this fall after discovering the love of quilting in early 2020. Making lovely things and supporting others to do the same brings my heart much joy. With that said, let’s make something fun (and useful)!

I’m excited to share this Quilt Block Lanyard tutorial with you just in time for MGQ’s Quilt Con as well as AQS’s Quilt Weeks held throughout the country! I have also created a helpful YouTube tutorial to accompany this blog post.

WHY A QUILT BLOCK LANYARD

  • A Quilt Block Lanyard is a great way to display your name.
  • Hold your business cards with style. 
  • Express your personality.
  • Use when going to quilt conferences, quilt shows, guild meeting and retreats!
  • Use your scraps. Most of us have plenty of scraps, HST’s, or maybe even small orphan blocks that we are trying to find a use for. This project is perfect for using up some of your favorite fabrics!

SUPPLIES FOR MAKING A QUILT BLOCK LANYARD

  • Fabric scraps
  • Batting
  • Sewing Machine
  • Thread
  • Cutting Mat
  • Ruler
  • Rotary cutter
  • Clover clips
  • Point turner
  • Measuring tape cut to 36″ (to hang your quilt block from)
  • Optional: ribbon, string, binding, embroidery thread, needle, permanent fabric marker, basting spray, Fabric Tac

MAKING YOUR QUILT BLOCK LANYARD

STEP 1 - CHOOSE AND MAKE YOUR DESIRED QUILT BLOCK

Watch my video tutorial below and read through these directions before you begin . 

You have many quilt block options to choose from. Perhaps a sawtooth star, churn dash, square in a square, a log cabin or completely improv.

Pick a block that makes your heart sing. For this tutorial I am making a 5″ x 5″ finished block using a square and some strips.  You can use whatever scraps you have on hand. This size seems to be large enough for others to see yet not so large that it’s in your way.

1. Lay out your scraps and decide what block you would like to make. Keep in mind that your name will likely show up better if embroidered or written on a light piece of fabric.

Making a Quilt Lanyard

2. Sew your quilt block together and trim to a 5.5″ square.

Making a Quilt Lanyard

STEP 2 - QUILTING YOUR BLOCK

  1. Cut a 6.5″ square piece of batting. Note: if you make a different size block, your batting needs to be 1″ larger than the size of your block.
  2. Spray a small amount of basting spray on your batting and lay your quilt block on top of the batting, with the right side facing up.
  3. Embroider, write (permanent fabric marker) or hand stitch your name where desired on your block.
  4. Quilt your block as desired either by hand or with your machine. This is a great time to use a decorative stitch.
  5. Starch and press the block so it lays nice and flat.
  6. Trim your quilted block to 5.5″
Quilting your Quilt Block Lanyard

STEP 3 - CUT BACKING AND POCKET

  1. Cut a 5.5″ piece of fabric for your backing.
  2. Cut a 3.5″ x 5.5″ piece of fabric for your back pocket.
  3. Fold the top of edge of the pocket under ¼” and stitch ⅛” so you have a finished edge.
Backing on Quilt Block Lanyard

STEP 4 - ASSEMBLE YOUR QUILT BLOCK SANDWICH

  1. Lay your quilt block with right side facing up and place your pocket on top of the quilt block with right sides together.
Quilt Block Sandwich for Quilt Lanyard

2. Place your backing square on top of the pocket fabric with the right side facing down (wrong side toward you). Clip all three layers together with clover clips.

3. Measure and mark 1″ on the top left AND top right of the block.

Adding a Border to Quilt Block Lanyard

4. Sew ¼” around the entire block starting at the 1″ mark on the right side of the block and stop at the second mark. Be sure to backstitch and leave the top opening between the marked lines unstitched.

5. Clip the corners of block, turn right side out and point out the corners with a point turner or chopstick.

6. Fold the top opening under ¼” and press. I use a lot of starch.

Finishing your Quilt Block Lanyard

STEP 5 - FINISHING YOUR QUILT BLOCK LANYARD

  1. Cut your measuring tape to 36″ and insert each end ½” into the top of the quilt block. Line up the edges of the measuring tape with the edges of your two seams. Make sure your measuring tape is not twisted so it lays properly around your neck. Use clips to hold in place.
Adding a necklace to Quilt Block Lanyard

2. Sew a ⅛” top stitch around the entire block to close your opening and secure the ends of the measuring tape.

Option: As mentioned in the video tutorial, you do have the option to use some Fabric Tac inside your block to secure the block or you can also stitch in the ditch on the top portion of your block BEFORE you sew your ⅛” top stitch. Please reference the video.

3. Give your quilt block lanyard one last press and enjoy wearing it at upcoming quilt conferences, quilt shows, retreats or guild meetings!

ENJOY YOUR QUILT BLOCK LANYARD

Your Quilt Block Lanyard is finished! 

This is a great project for your local quilt guild to make as a group.  Or several quilty friends can make one together before going to Quilt Con.

I’ll be wearing mine and hope to see some of you and your lanyards! 

If you make the quilt block lanyard, please use the hashtag #quiltblocklanyard so we can see all of the creative versions everyone makes.

If you enjoyed this tutorial, visit my website or you can find me on Instagram.  Keep making lovely things quilty friends!

More from Belle of Seams Sew Me:

Free Easy Pin Cushion Tutorial

Free Quilt Journal Cover PDF download with bonus video tutorial

0 Comments
Share

You May Also Like

February 21, 2023

Flanged Binding Two Ways

September 13, 2021

DIY Fabric Coaster

August 29, 2022

A Quilted Tote Bag – Using the Baby Lock Sashiko

Leave a Reply Cancel reply

This site uses Akismet to reduce spam. Learn how your comment data is processed.

Previous Post
Starting A Creative Business with Emily of Homemade Emily Jane
Next Post
Best Tips For Business Success
Hi there, I’m

Hi there, I’m

elizabeth

I am a Minnesota born girl living in Texas with my husband and 3 kids. If I could tell my 13 year old self I was a quilter, I would have laughed in disbelief.  However, a few years ago I discovered how cool quilting really is!  I want to share how cool quilting is with others.  Join me in my online modern Quilters Candy Membership, or check out my quilt patterns.  I even offer a course once a year teaching you how to write and sell your own quilt patterns. I am excited to be quilty friends!

Join the Membership

Shop Quilt Patterns

Check out the Courses

Quilting Tutorial Videos

Categories

  • Craft to Career
  • Digital Downloads
  • Patterns
  • Podcast
  • Quilt Alongs
  • Quilt Questions
  • Tutorials
  • Uncategorized

Recent Posts

  • Tips on Sewing a curved quilt

    March 14, 2023
  • Perfect Point Triangles

    Perfect Points when sewing Equilateral Triangles

    March 7, 2023
  • Split Quarter Square Triangles Blog Post

    Fast and Easy Split Quarter Square Triangles

    February 28, 2023

Latest Video

Latest Video Latest Video

Subscribe to My Channel

Follow Quilters Candy on Instagram

Are you joining? QAL for #gardenharvestquilt is co Are you joining? QAL for #gardenharvestquilt is coming up, and these lovely versions are great inspiration! Click the link in my bio to join the quilt along that starts April 17th. ⁣
Makers in order of appearance:⁣
1. @magnoliaridgequilts⁣
2. and 3. @honey.spun⁣
4. @sandiego.sewn⁣
5. @bohoquiltco⁣
6. @becca.plymale.creative
Are you joining? I can’t wait to share the grand Are you joining? I can’t wait to share the grand prize! Hint: @babylocksewing There are also some amazing fabric bundles being put together by different shops. Join the #gardenharvestqal in the link in my bio to get all the details!
I love getting updates from my past students! This I love getting updates from my past students! This update from @vogonverse was too exciting not to share. Having the courage to apply and move forward pays off! Well done Nik! 🎉🎉🎉
Free coaching? That’s right! I’m giving a free Free coaching? That’s right! I’m giving a free one month business coaching session and one free 1 hour coaching session to any 2 people! This is to celebrate 100 episodes of the @crafttocareer podcast! 🎉 To enter: leave a review of the podcast on Apple Podcasts or my website for episode 100, DM me a screenshot of your review. Deadline: Wednesday at midnight. 3-22-23. Winners will be announce Friday on the podcast!
Invisible binding? That’s right! @quilterscandym Invisible binding? That’s right! @quilterscandymembership join me Monday at 10 am CST and guest @bluebeaglequilts will teach us how to face our quilts. Can’t make it? Don’t worry - this will be recorded and members can watch it later. Raise your hand if you’re excited to learn how to face your quilt! 🤚 Quilt: Sampler made with by some alumni who came to @artgalleryfabrics with me! Shirt: made with my #agfgayleloraine fabrics ❤️
The perfect curves… for your quilts! @lynsavenue The perfect curves… for your quilts! @lynsavenue gives you all the help and tips you need to get those intimidating curves to come out looking perfect every time! Visit my blog for the free tutorial.
  • About
  • Contact
  • Pattern Corrections
  • Terms And Conditions

Copyright © 2022 | Quilters Candy Site Powered by Pix & Hue.