How to Make Scrappy Gift Tags with Improv Fabric (Great for Quilters!)
Elizabeth Chappell
Looking for a creative way to use up your fabric scraps? These scrappy gift tags are the perfect mini project for quilters and makers! I’m Jody Sterling, quilt pattern designer and the hands behind Sew Beachy Quilts, and I started making these little tags as thank-you notes for my pattern orders. But I quickly discovered they’re perfect for any occasion — from birthdays to holidays and everything in between. Bonus: you get to play with your favorite fabric bits and selvages in the cutest way!
The tags I use measure 2¼” x 3½”. I originally thought sewing the scraps directly to the tags was the way to go, but quickly realized it was super difficult to write a note on the back! So I began to make improv fabric from my scraps, sewed the improv fabric to the tag, then trimmed along the edge of the tag. I added a piece of twine, wrote a thank you note on the back, and sent the tag with my first order!
Here are the steps to make your own fabric tags:
Order tags and twine (links below). Or make your own with cardstock, a hole punch and ribbon or twine you have at home.
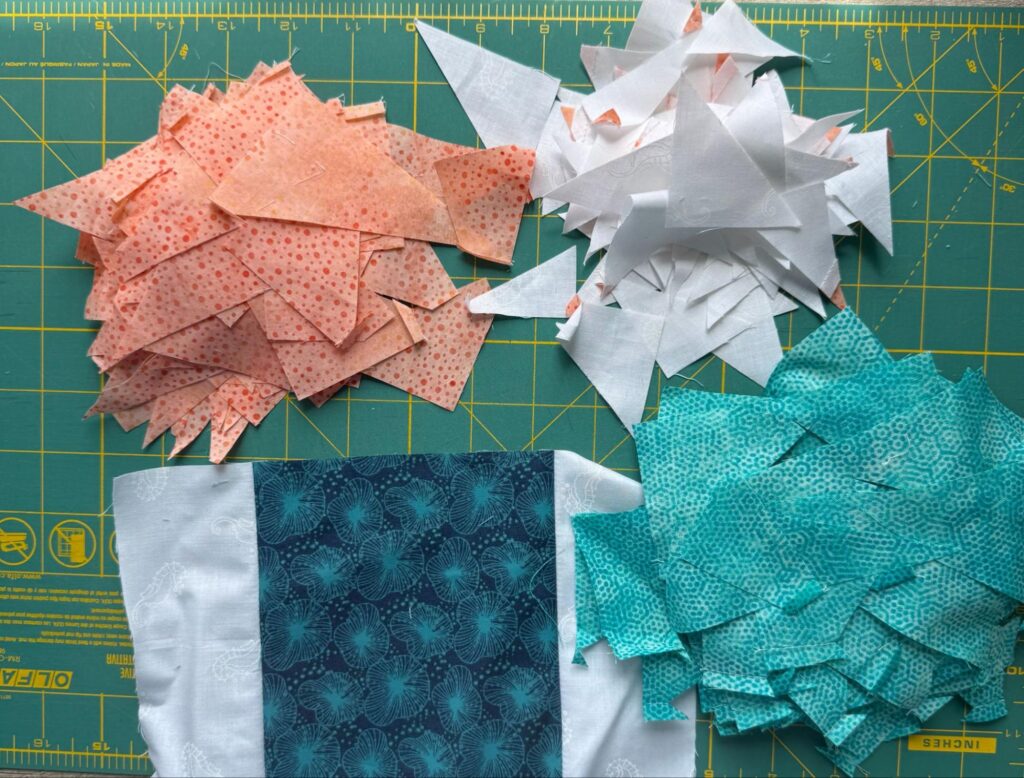
Gather your scraps. These are scraps from a previous project, but I especially enjoy using fabric selvages!
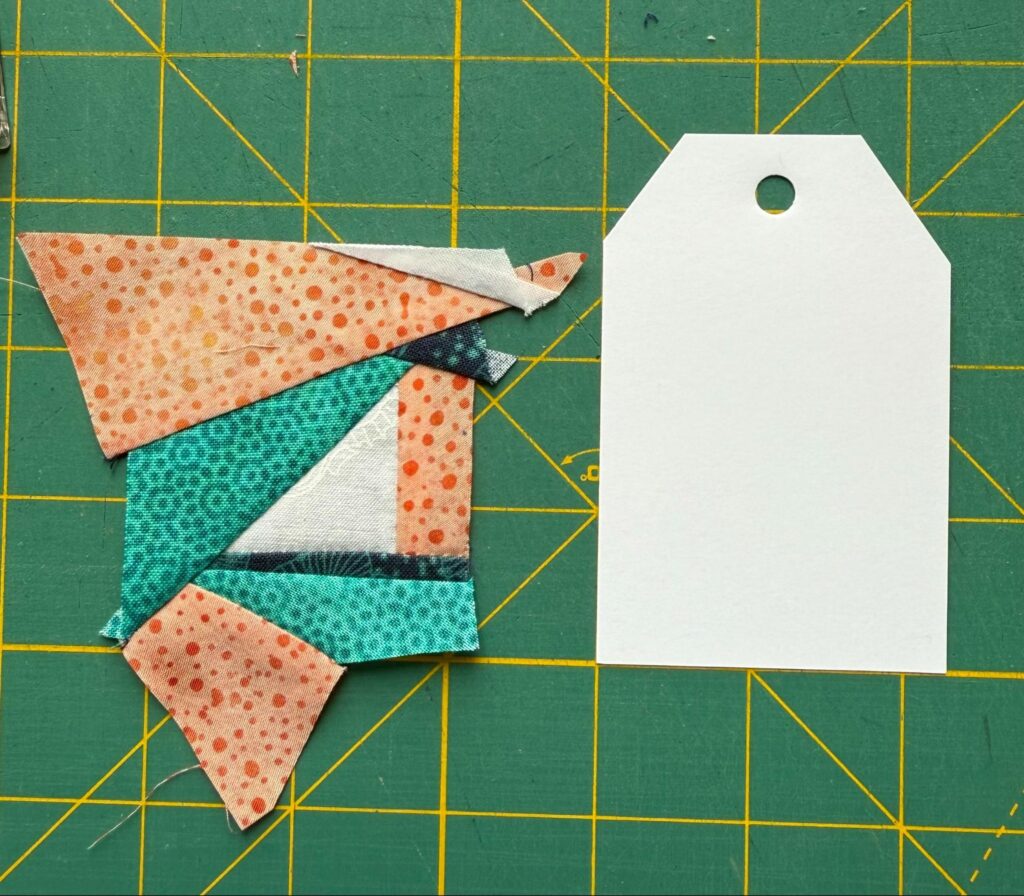
3. Sew small scraps together to form your improv fabric. Your improv fabric should be larger than the size of your tag. You can also create large improv fabric and cut pieces from that, if you prefer.
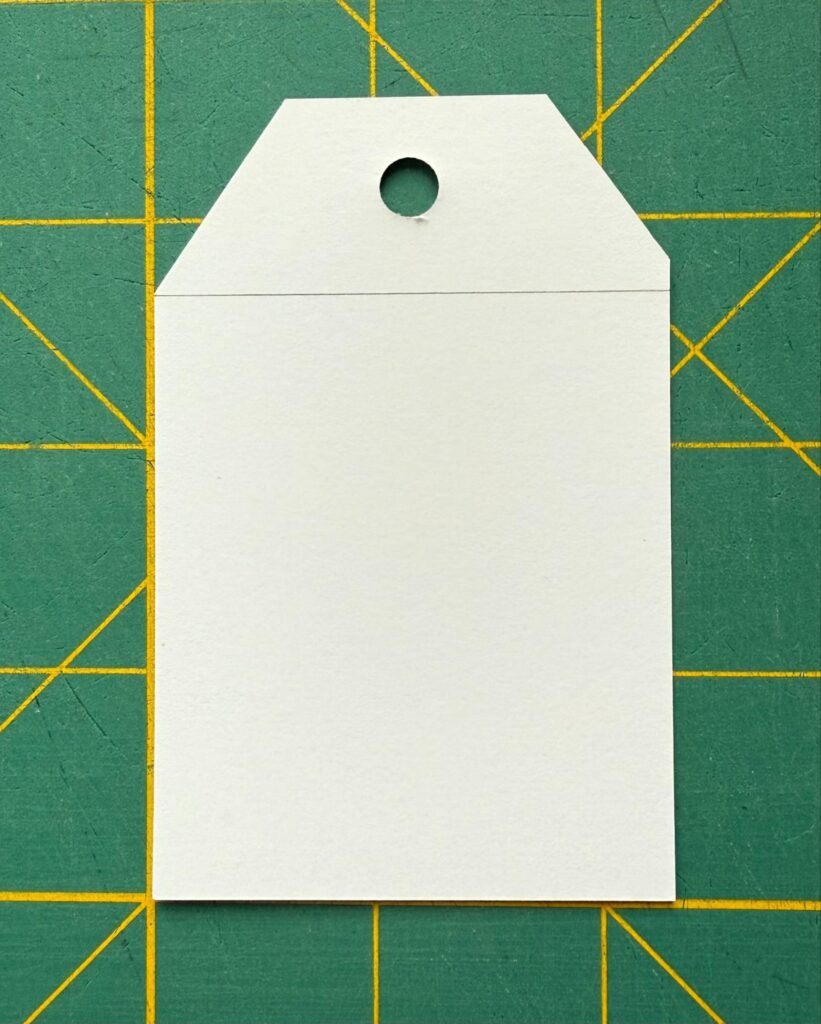
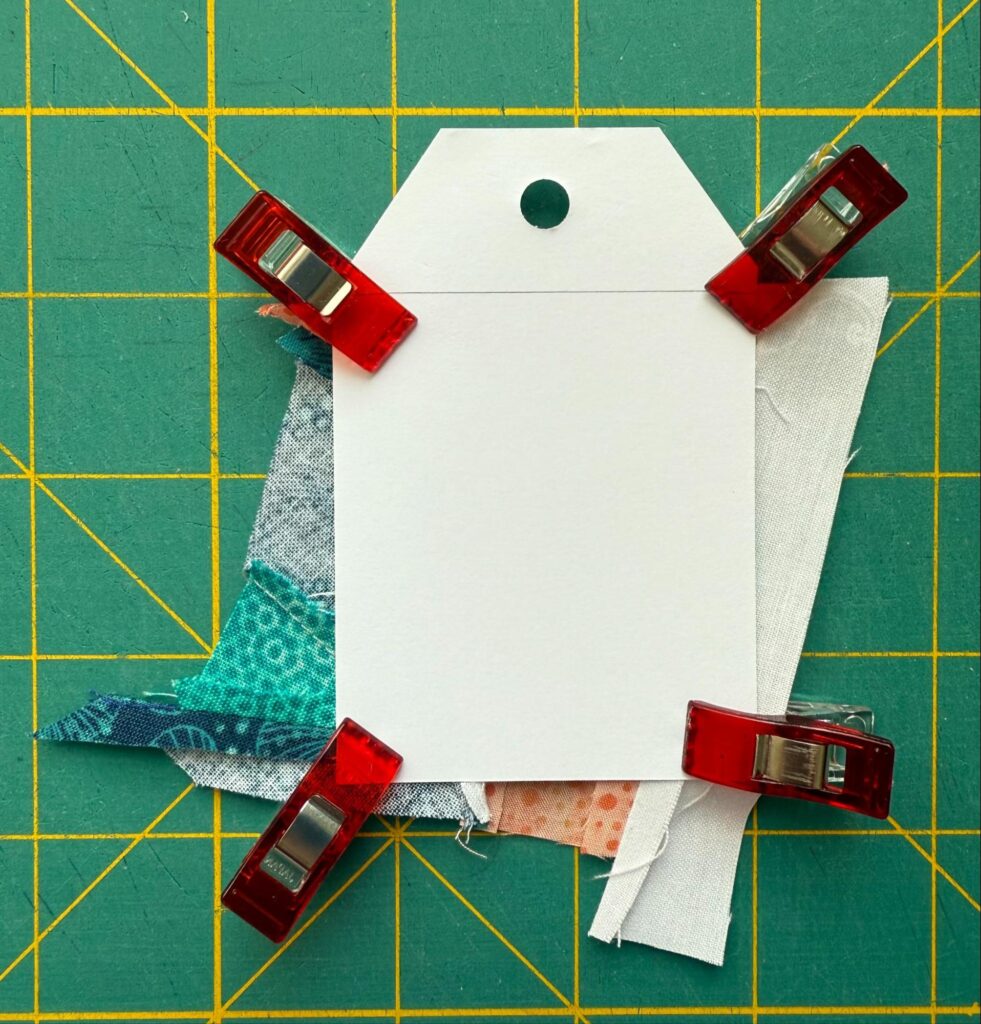
4. On the back side of your tag, draw a straight line in pencil to use as a sewing guide line, where the top of your fabric will line up on the front. (You can see these tags were not cut symmetrically!)
5. Cut a straight edge on one side of your improv fabric. This will be the top of your tag.
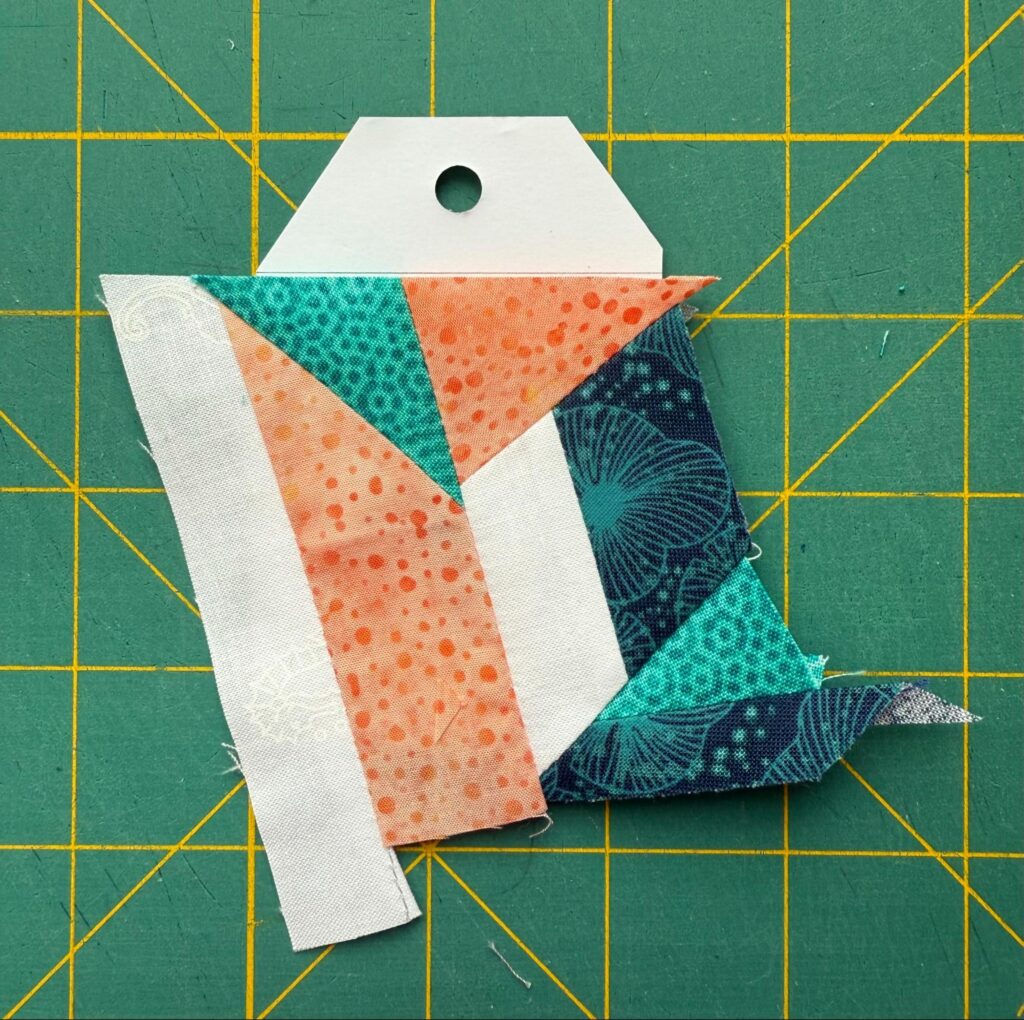
6. With your improv fabric wrong side up, place the tag on top of the improv fabric, wrong side up. Line up the top/straight edge of your improv fabric with the pencil line on the back of the tag. Clip your improv fabric in place.
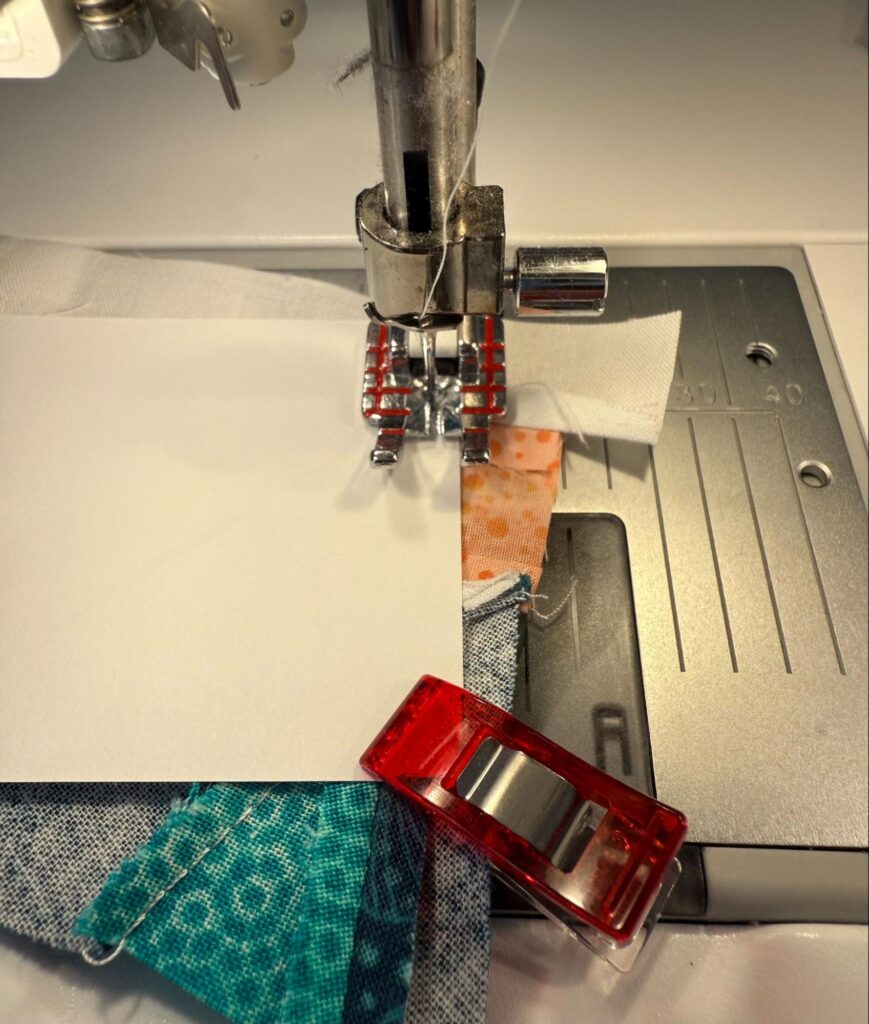
7. With the tag on top, and using the edge of the tag as a guide, sew your improv fabric to all 4 sides of the tag, using a ⅛” seam. I usually start in a bottom corner and begin and end with a tack stitch (or a backstitch) to secure in place.
Trim the improv fabric using the edges of the tag as a guide.
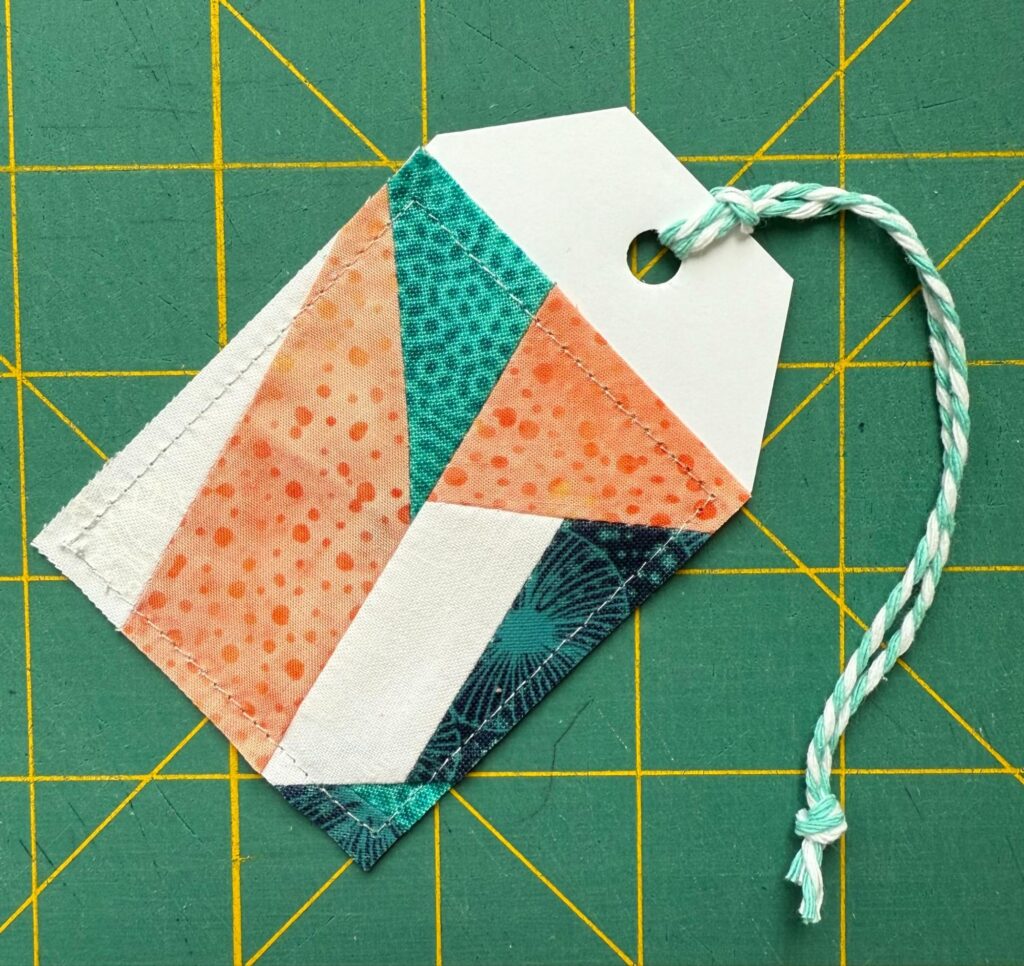
Add a piece of twine, write a note on the back and you’re ready to use your tag!
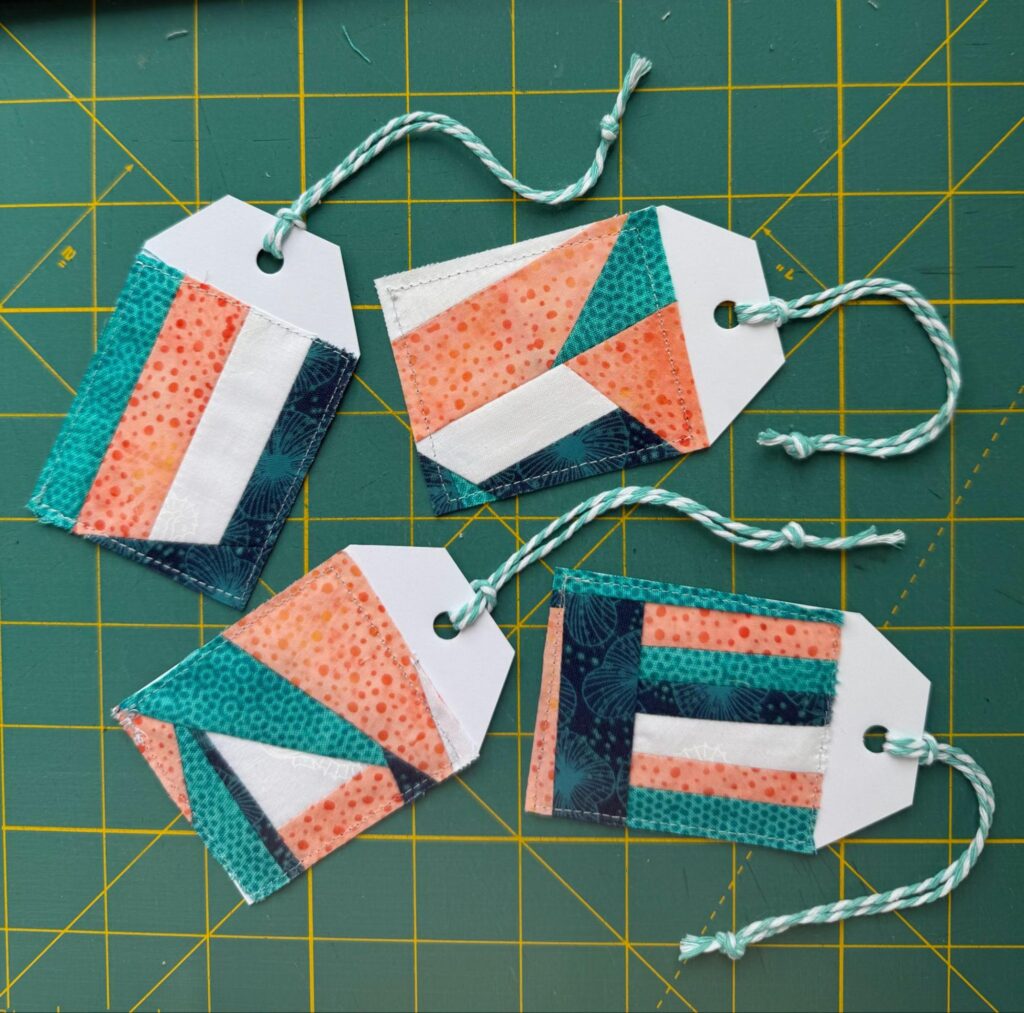
I got a little carried away and kept making!
Links for Tags and Twine (none are affiliate links):
The original plan of making thank-you tags has morphed into gift tags, as well — birthday, Christmas, Hanukah, new home, etc. They can be customized to fit any occasion!