

Learn to Decorate with your Quilts as Wall Hangings
Want to learn to turn your Quilts in decorative wall hangings? I am excited to have Wendy of The Weekend Quilter as a guest on my blog today sharing how to turn your quilts into decorative wall hangings. Wendy is a friend, a talented pattern designer and quilter, and is sharing how to turn YOUR quilts into decorative wall hangings. (Pst. Like this pattern? Get it HERE for free). If you like this tutorial and want more, be sure to check out the Quilters Candy Membership. In the membership I provide monthly tutorials, just like this, made just for Quilters.


Quilts are made not just to be displayed on your bed, couch or chairs. They’re a work of art and deserve to be a wall hanging as well. In this blog, I am going to show you how to prepare your quilt for a wall hanging. The following steps can be applied to quilts of all sizes. Mini quilt used in this tutorial measures 24” x 24”.
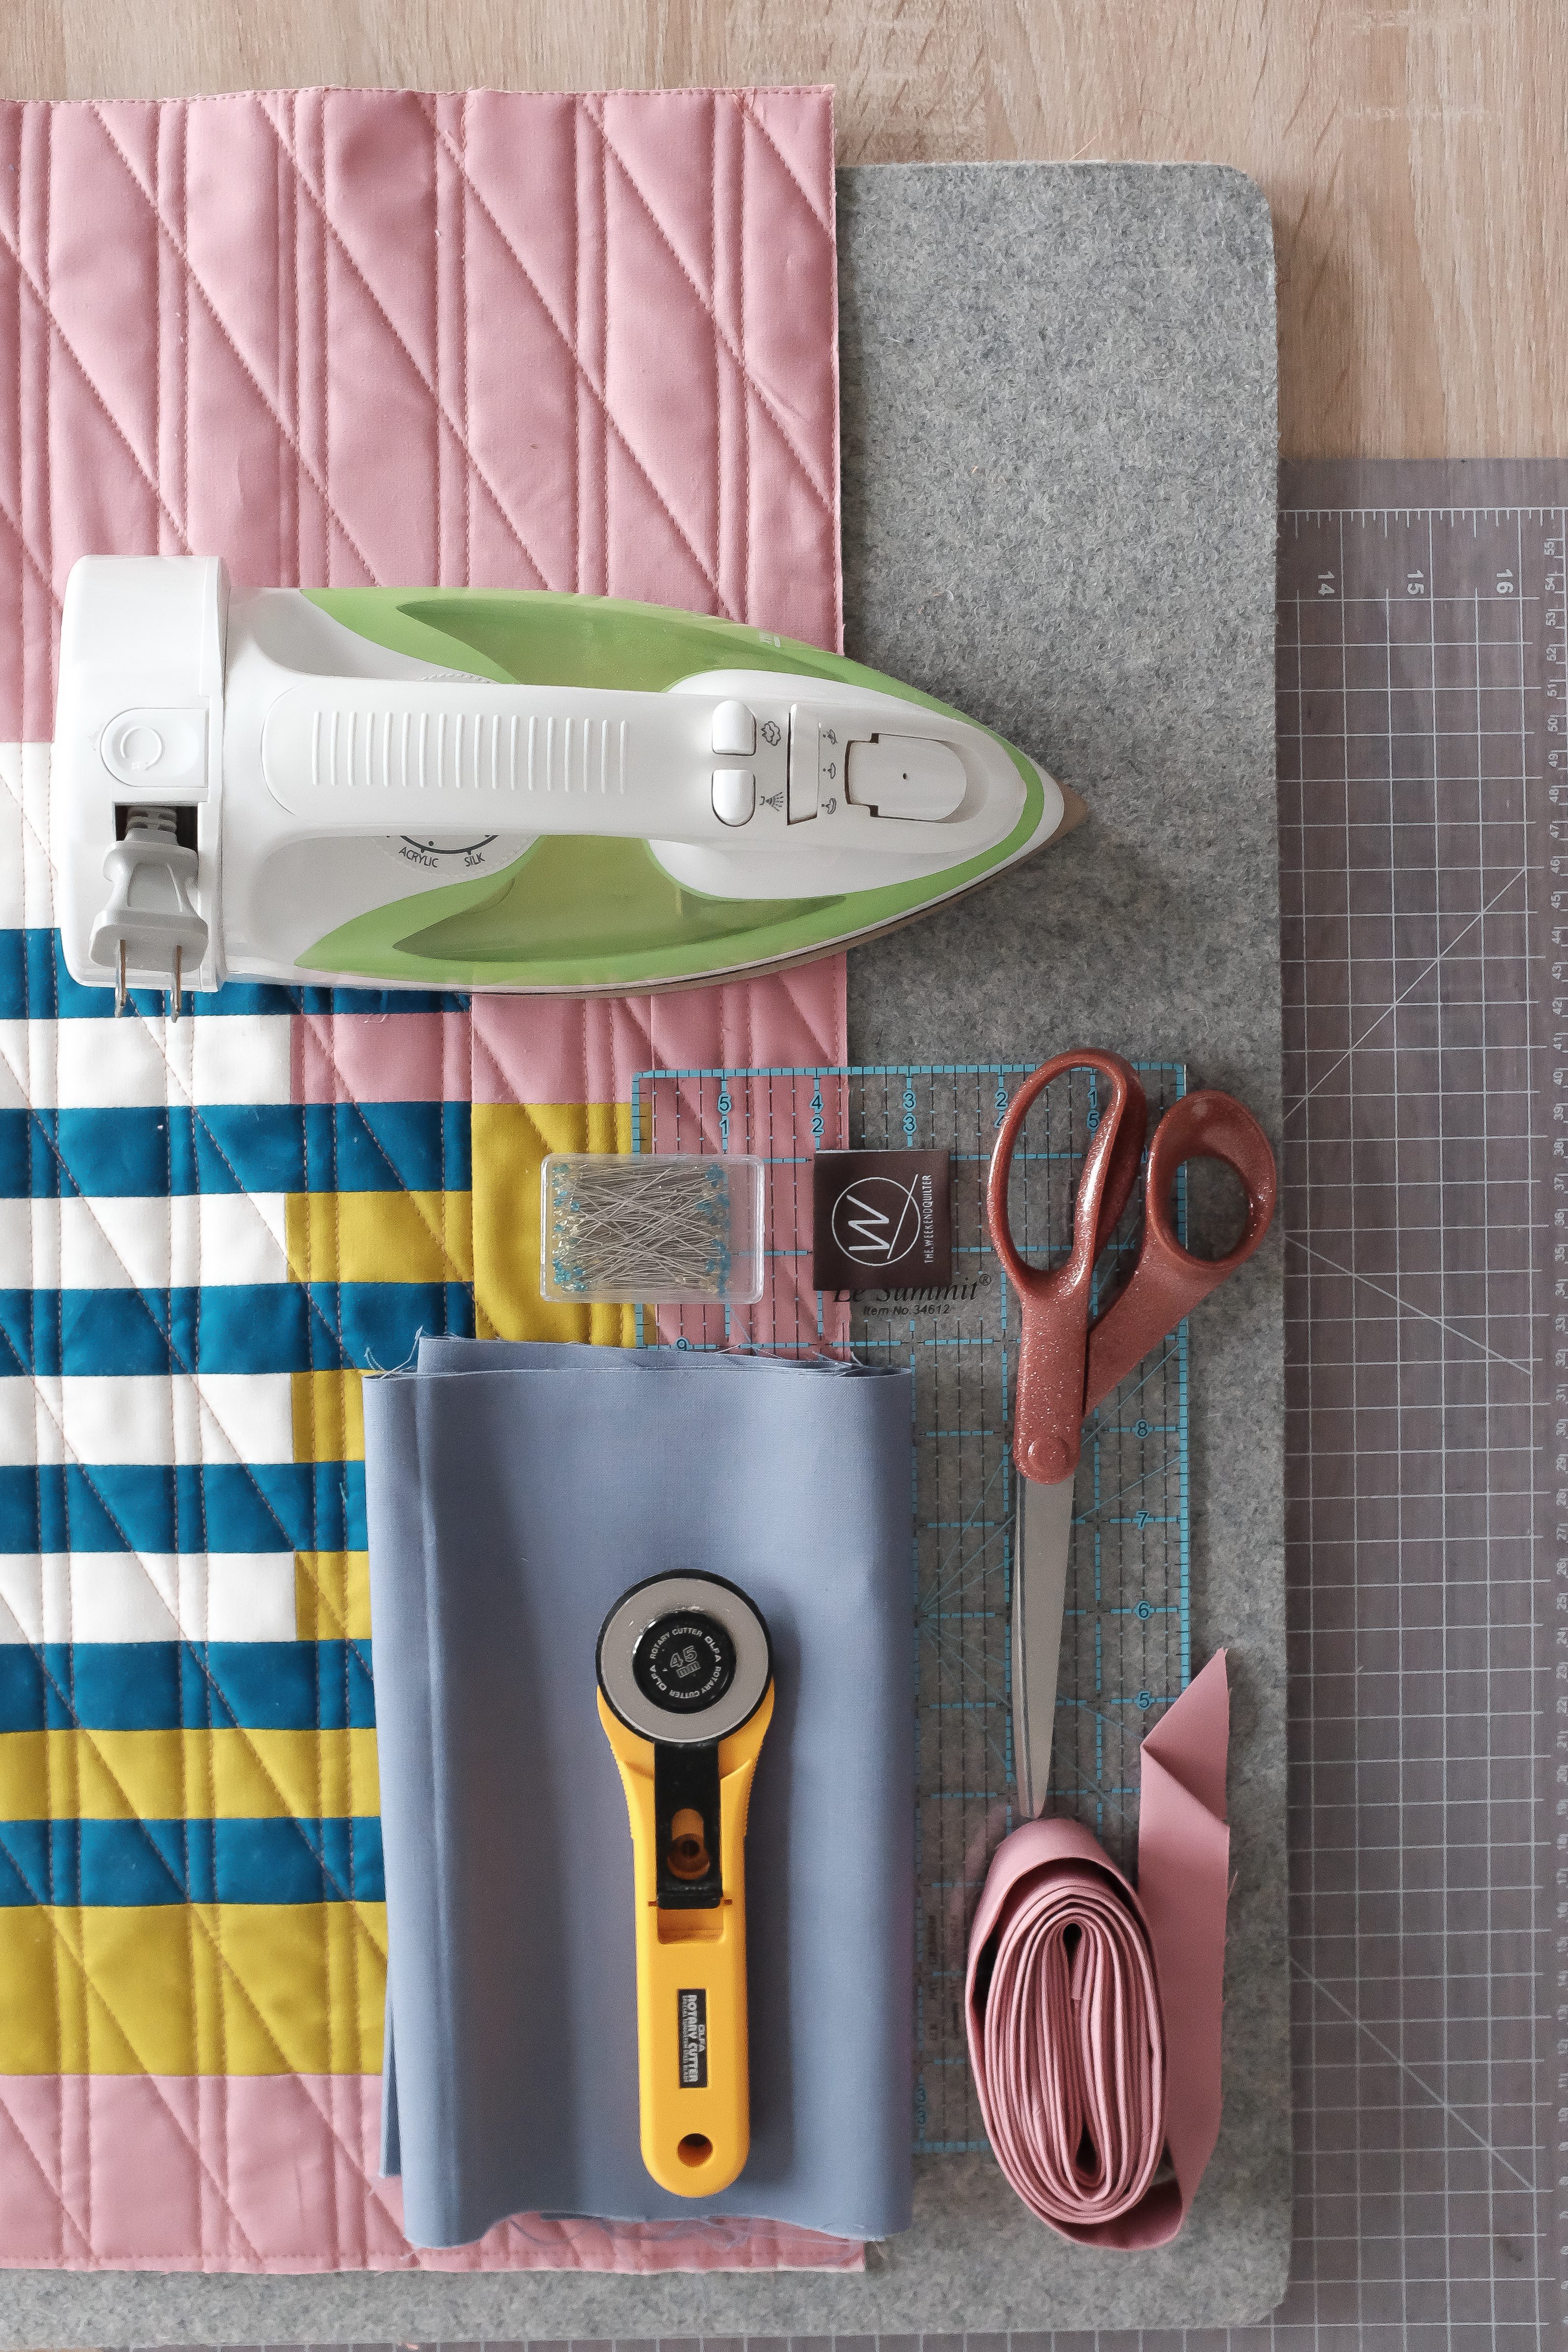
WHAT YOU NEED:
- Backing fabric or fabric coordinating the back and / or quilt binding – a fat eighth (9” x 21”) or scraps
- Quilt sandwich – quilted and squared up, without the binding attached
- Rotary cutter
- Cutting mat
- Quilting ruler
- Iron
- Ironing board or wool pressing mat
- Quilt label (optional)
- Prepared quilt binding
- Wooden dowel – can be found at your big box or local hardware, arts and craft store
- Sharp scissors (not for fabric) or handheld saw

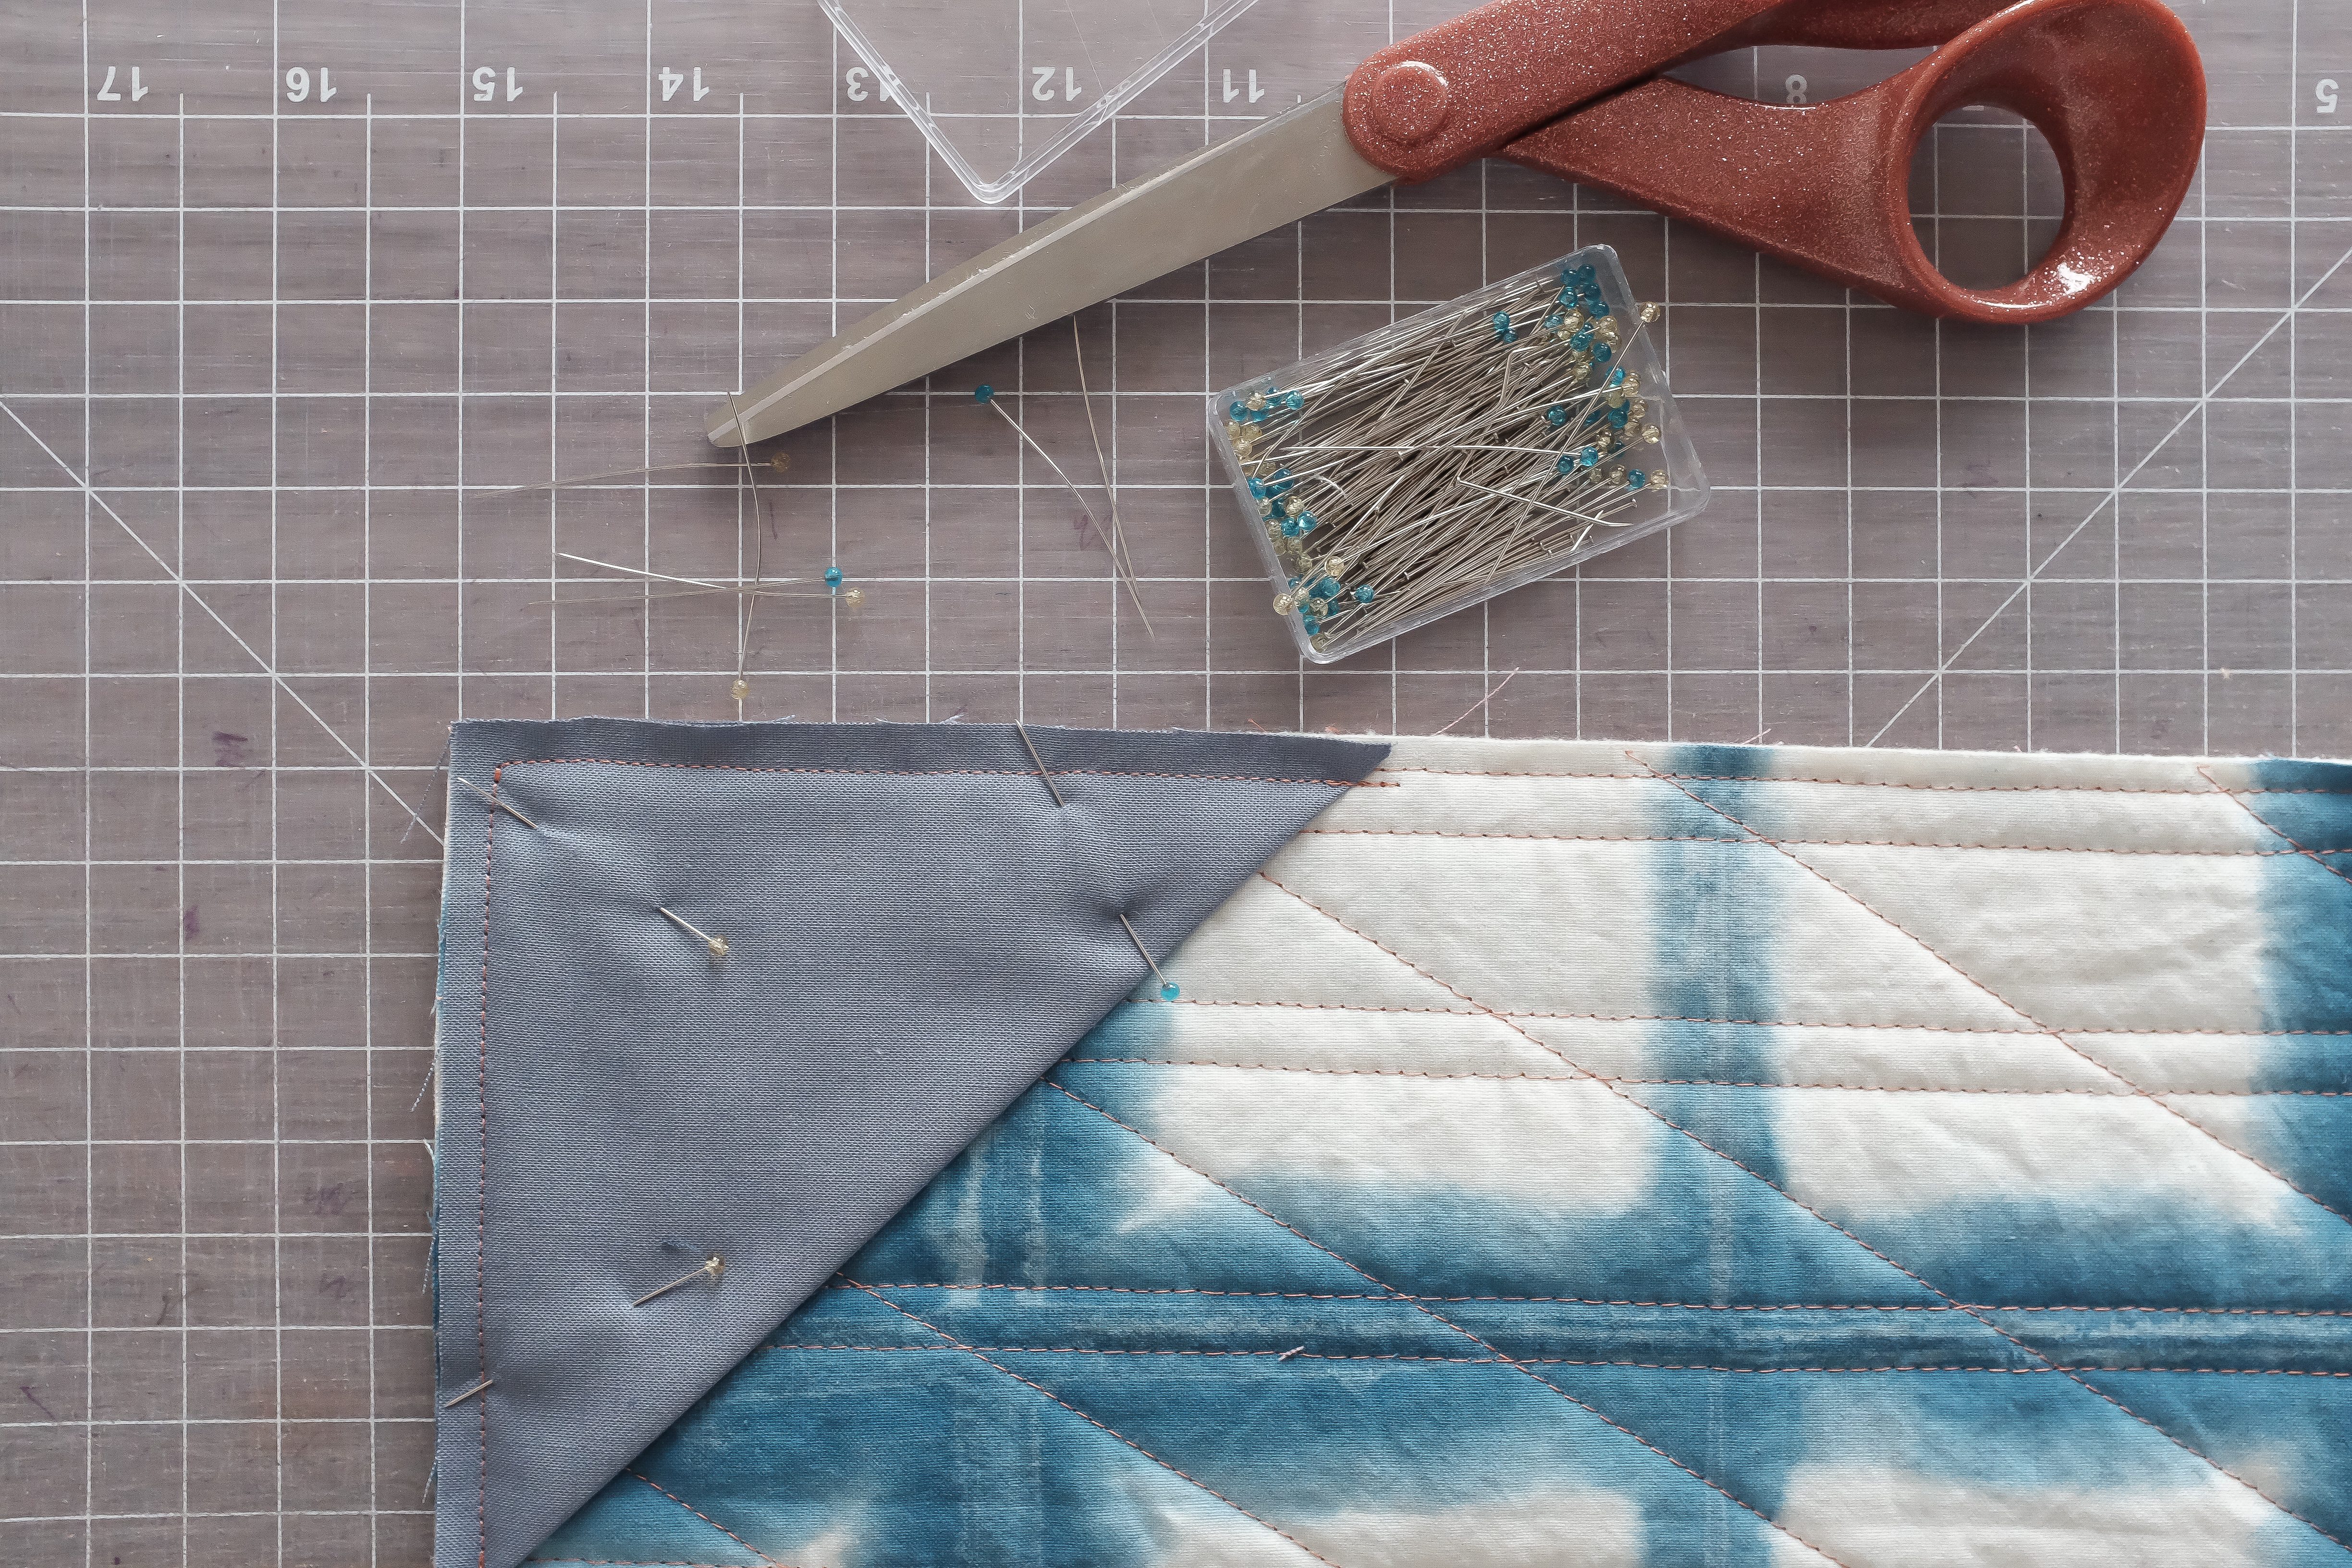
- Take backing or coordinating fabric and cut two 5” x 5” squares. With the wrong sides of the fabric facing each other, fold each square diagonally in half and press with iron. Set aside folded squares for Step 3.
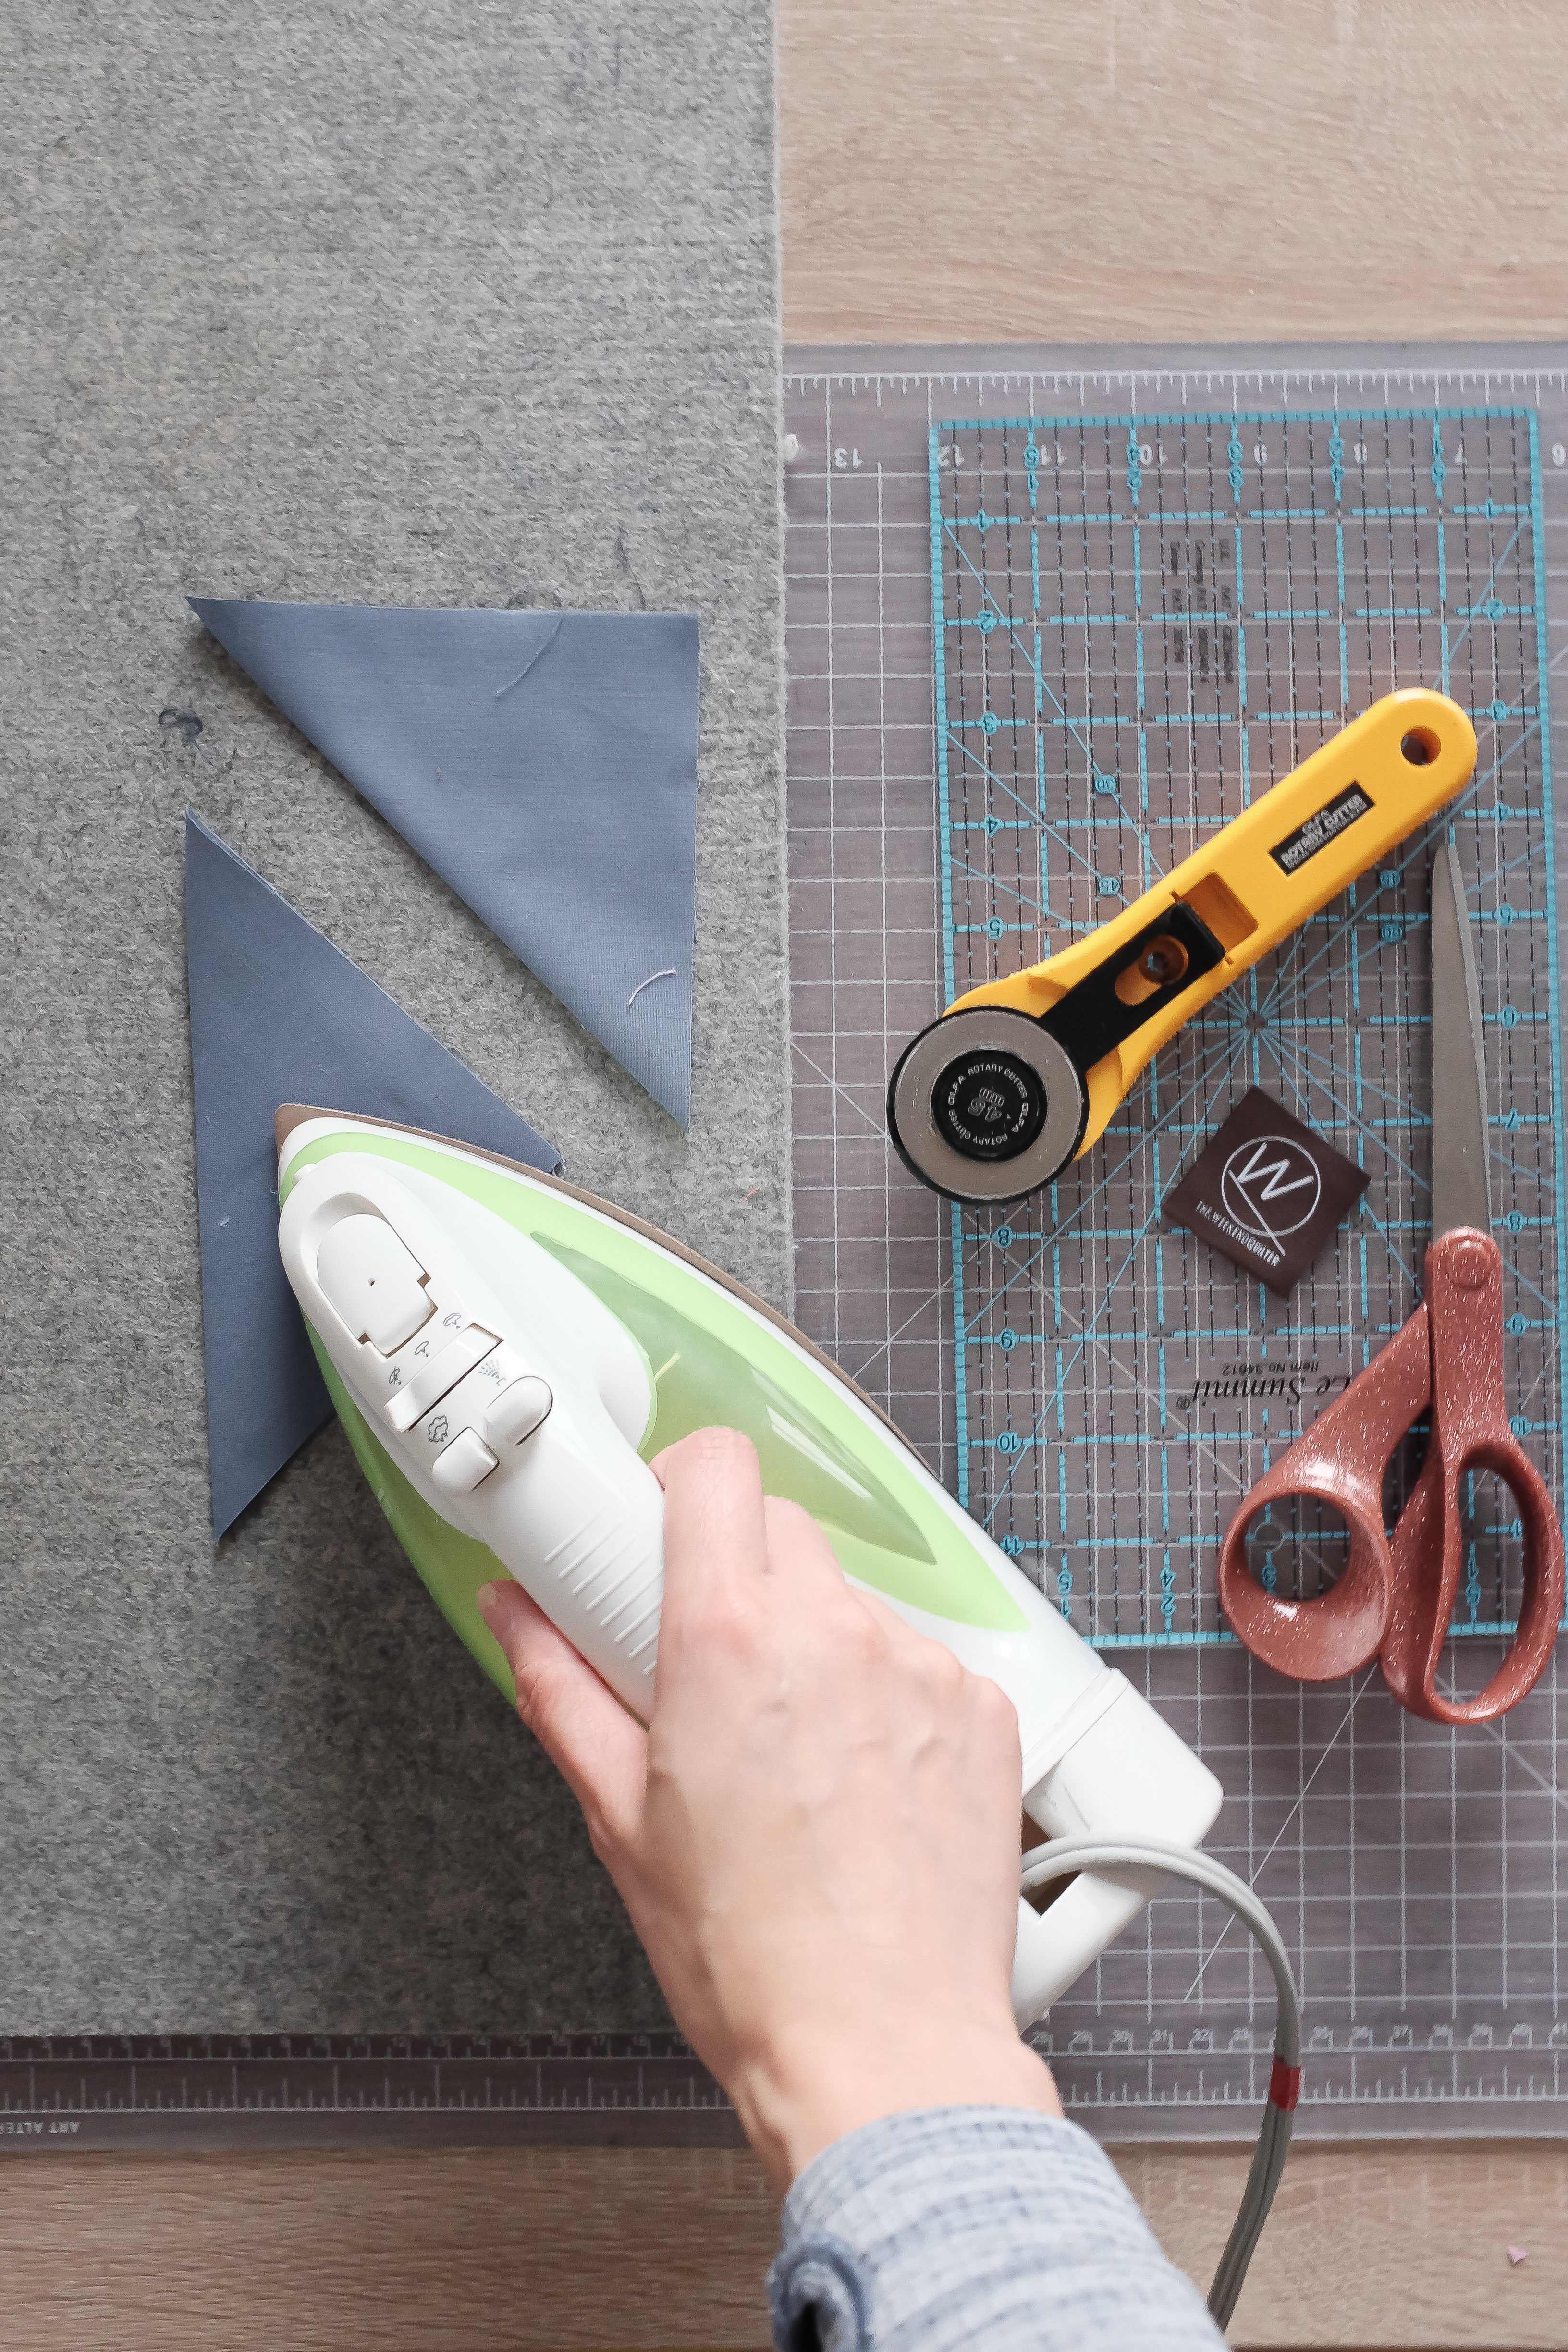

Tip: The larger the squares are, the more enforcement. The smaller the squares are, the less enforcement. Size of these squares will also be dependent on the size of the quilt.
- For additional enforcement, cut one 2½” x 7” rectangle. On each shorter end of the rectangle, fold the raw edges towards the center of the reverse side of the fabric twice. Press and sew to create a hem. Then fold the rectangle in half lengthwise and press.
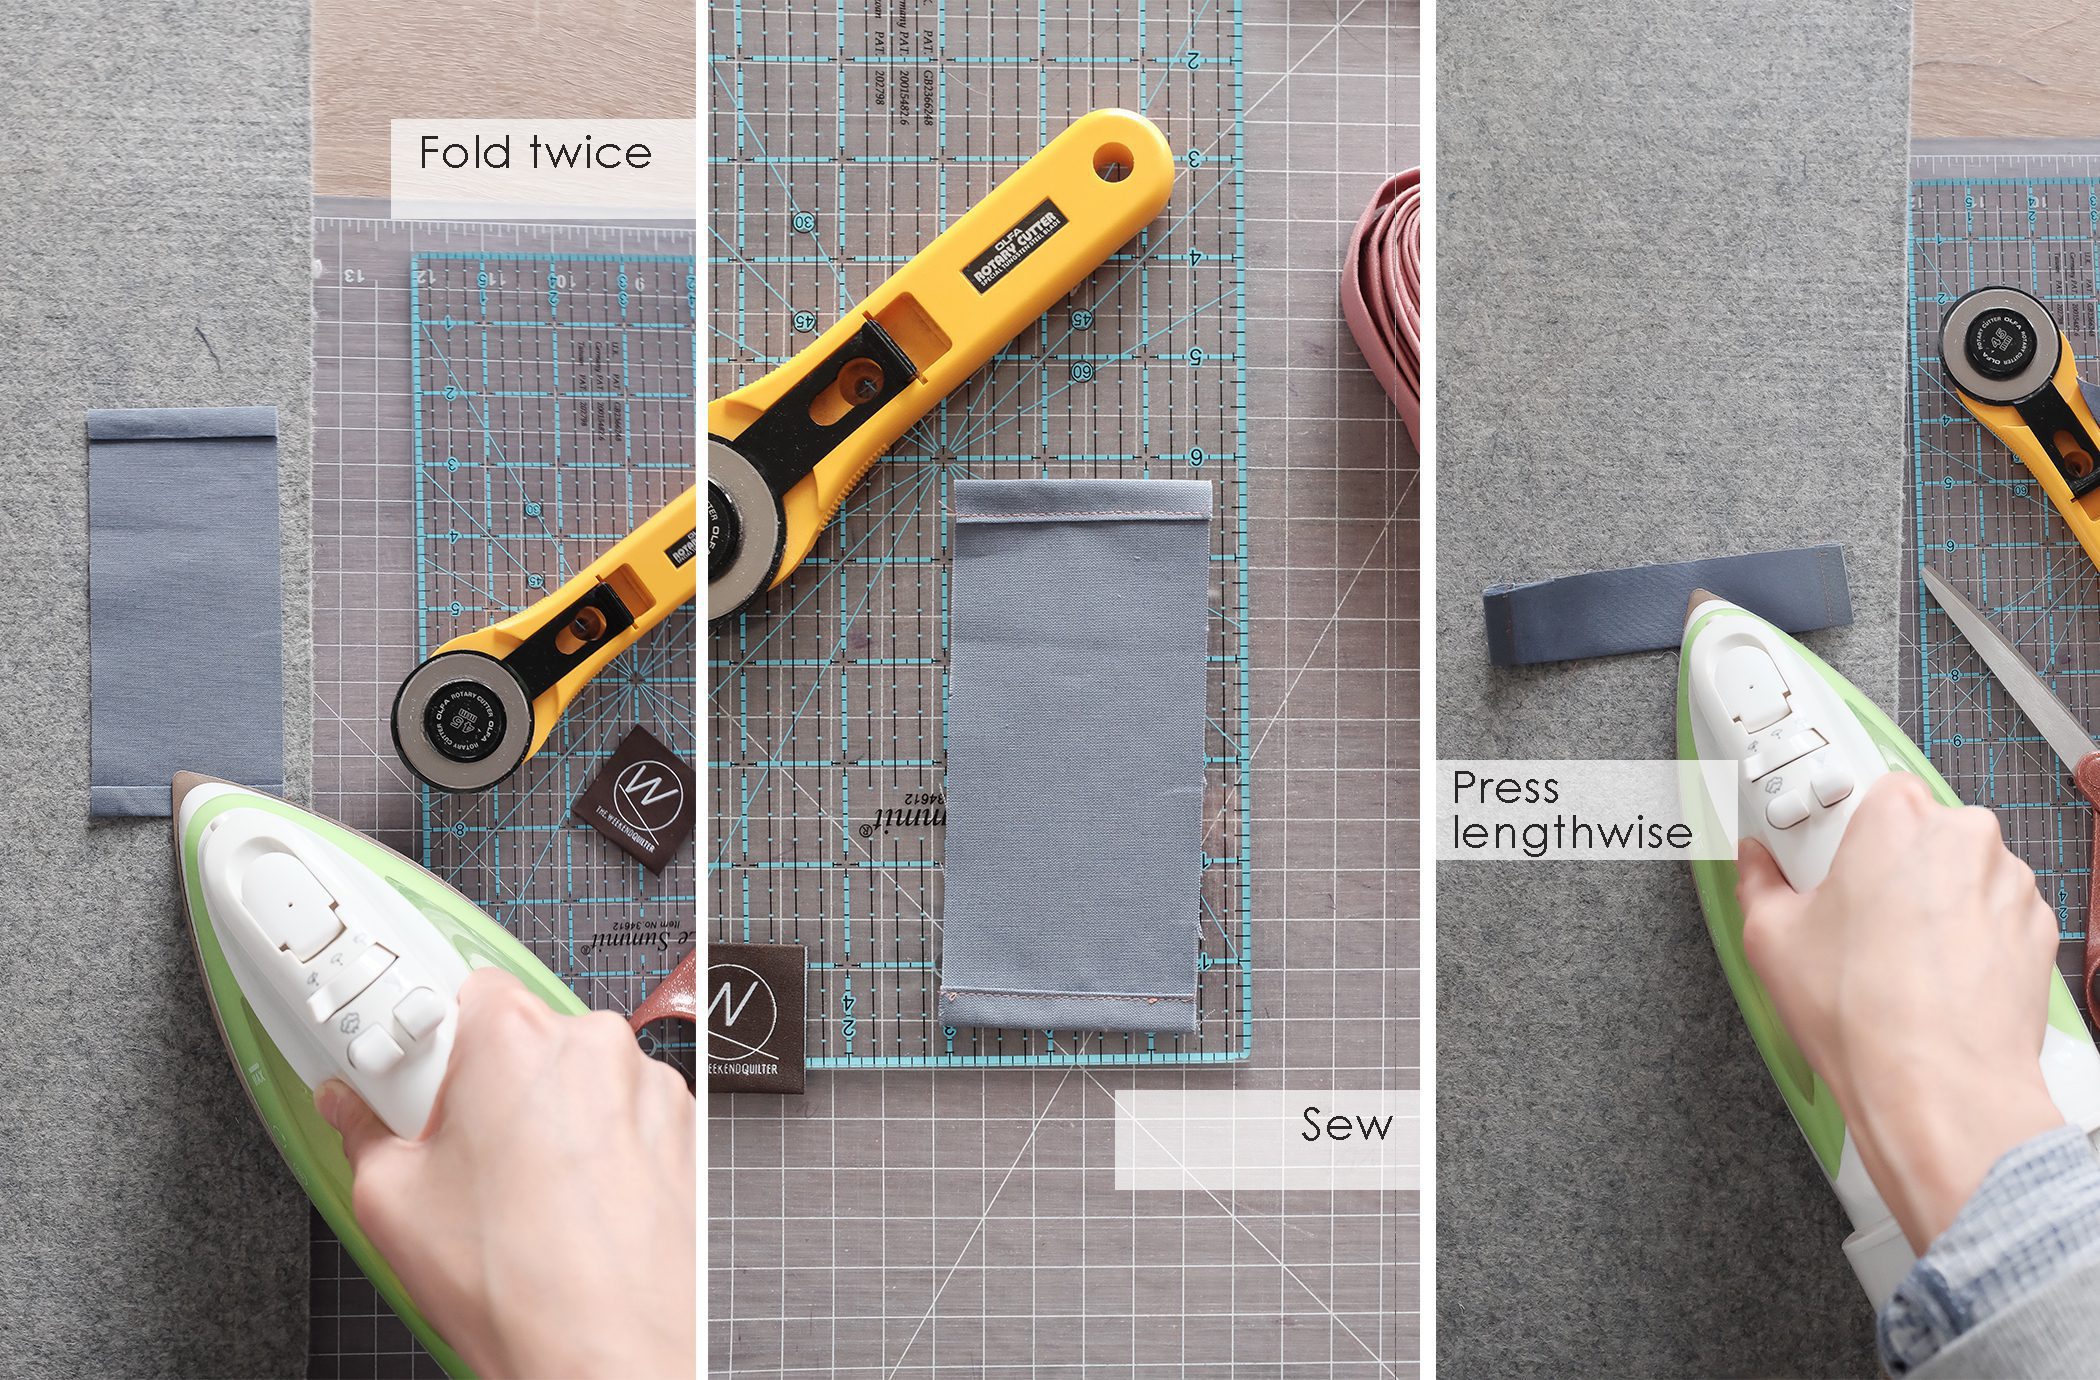
Additional enforcement will be placed between the two folded squares prepared in Step 1. For larger quilts, repeat Step 2 accordingly for additional enforcement.
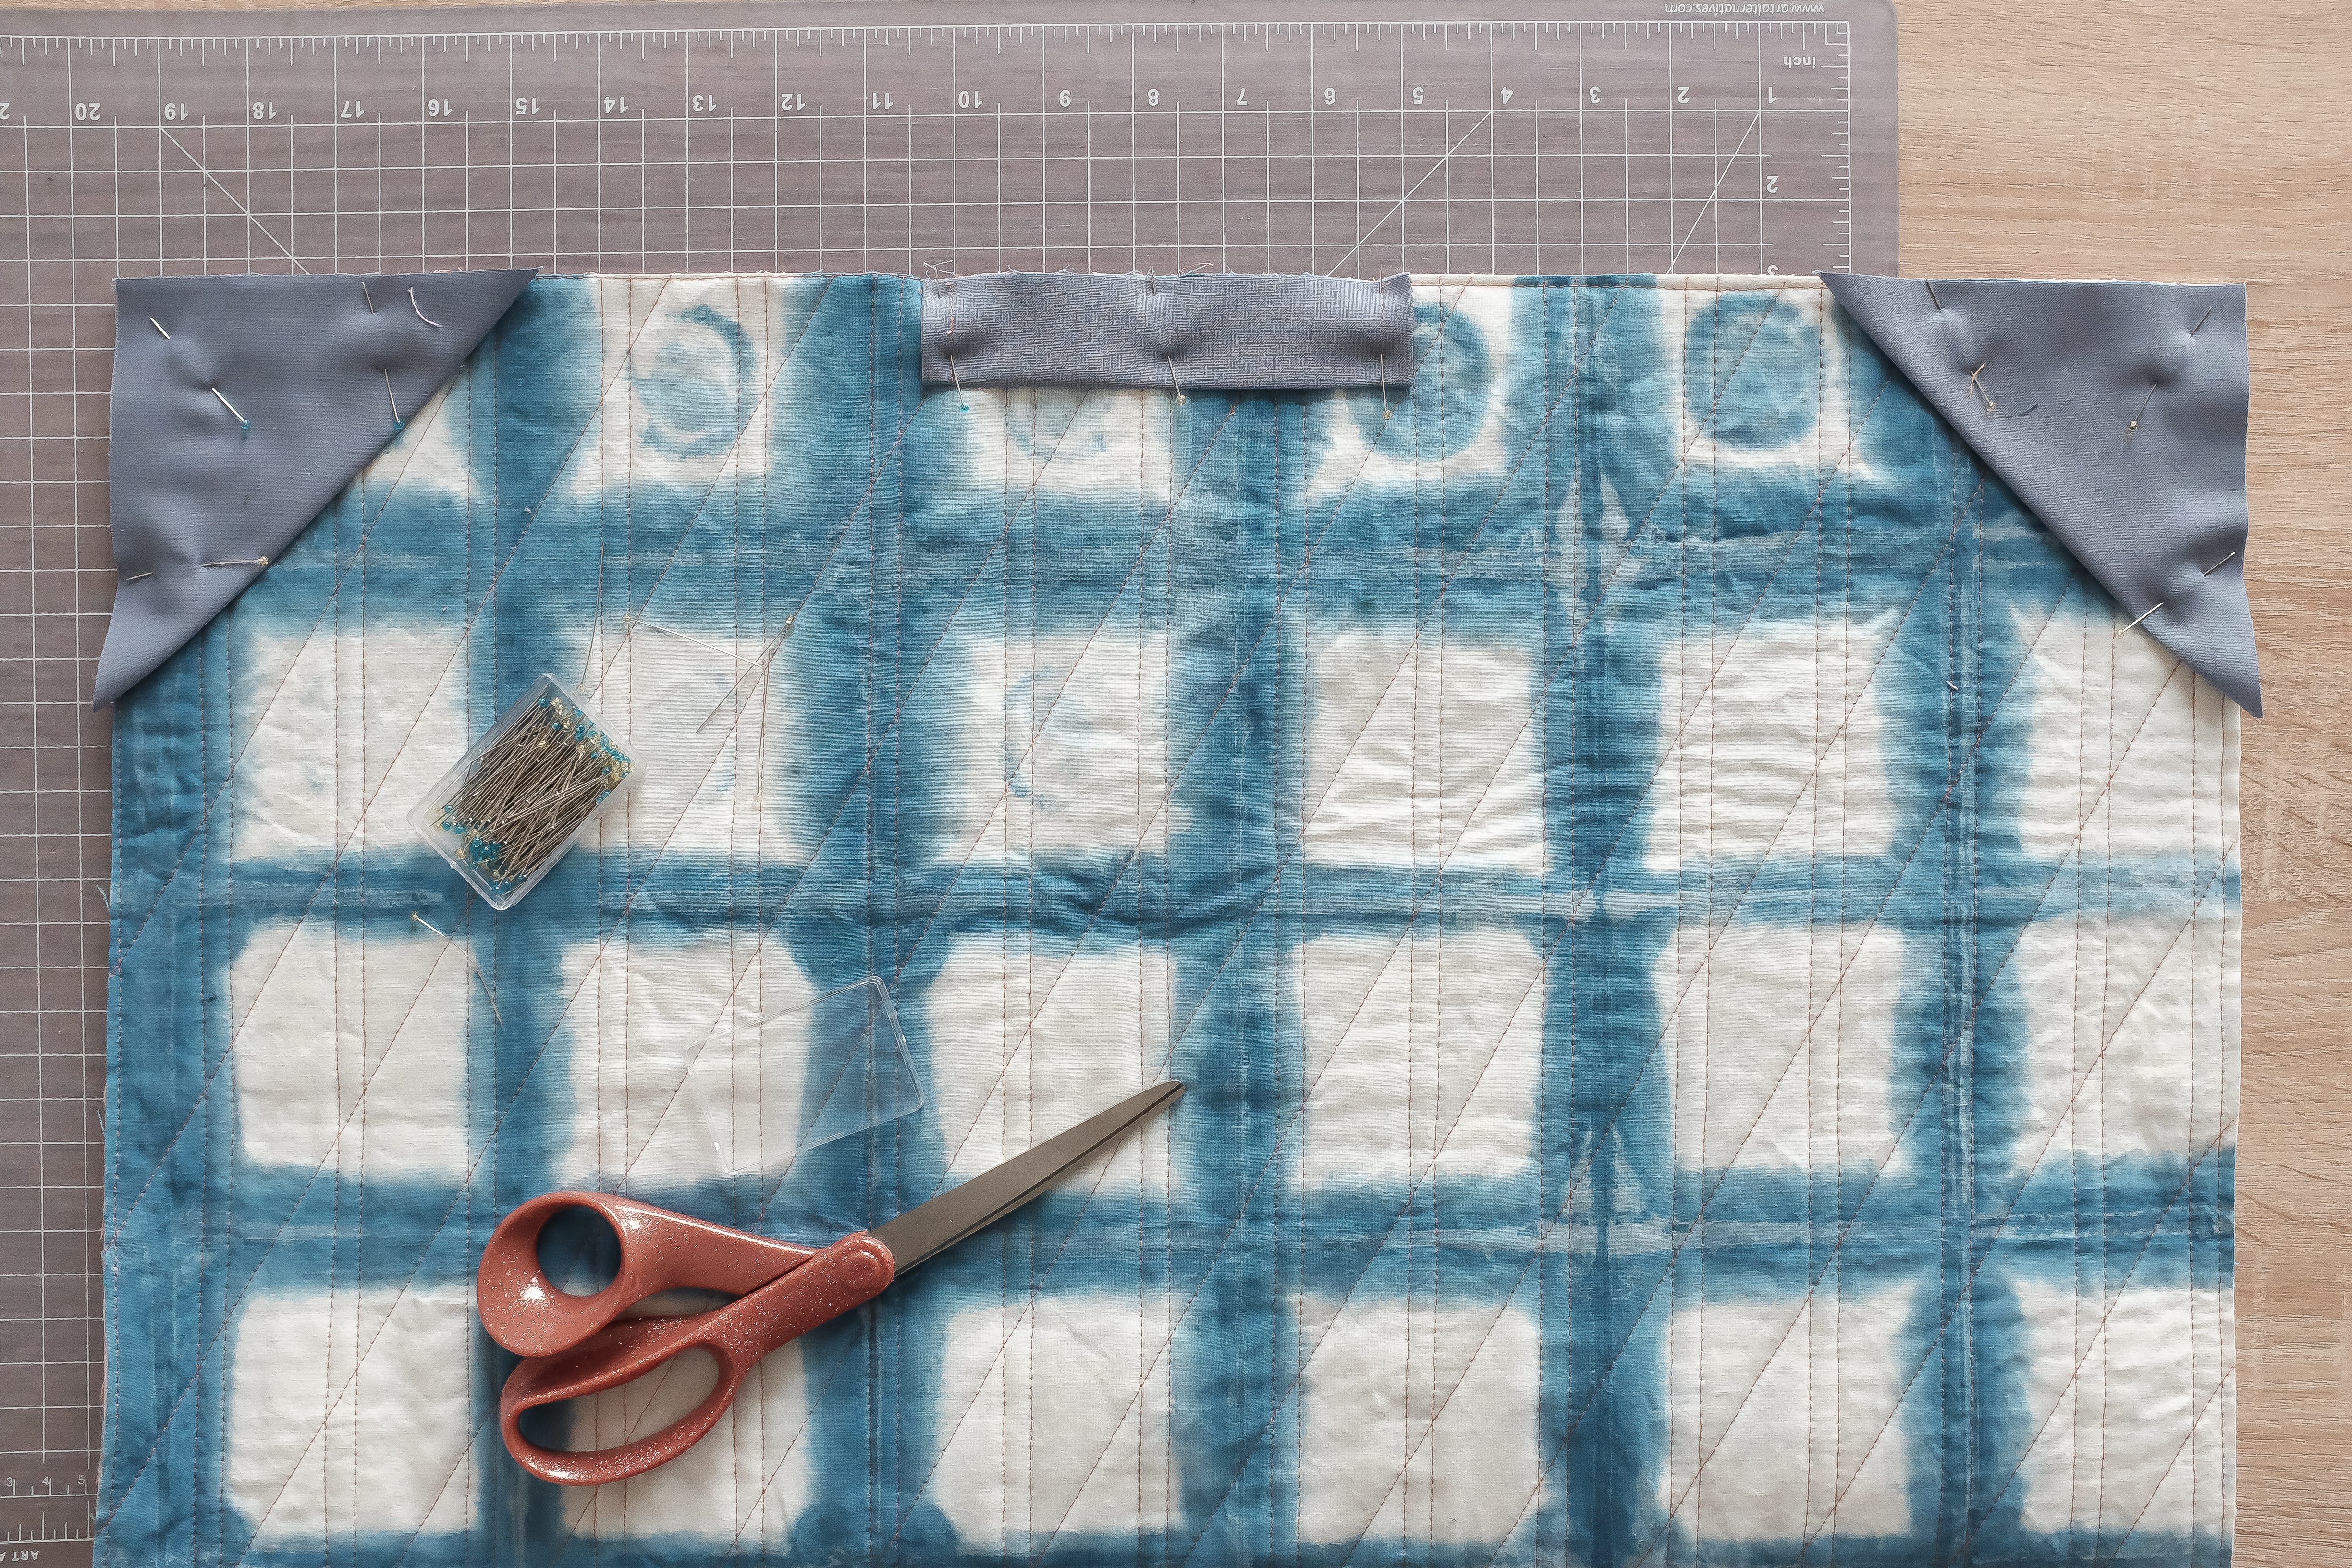
- As shown in the image below, pin each folded square and additional enforcement to the back of the quilt sandwich, and sew ¼” away from the raw edge.
Optional: Attach quilt label on top of one of the folded squares or preferred location.

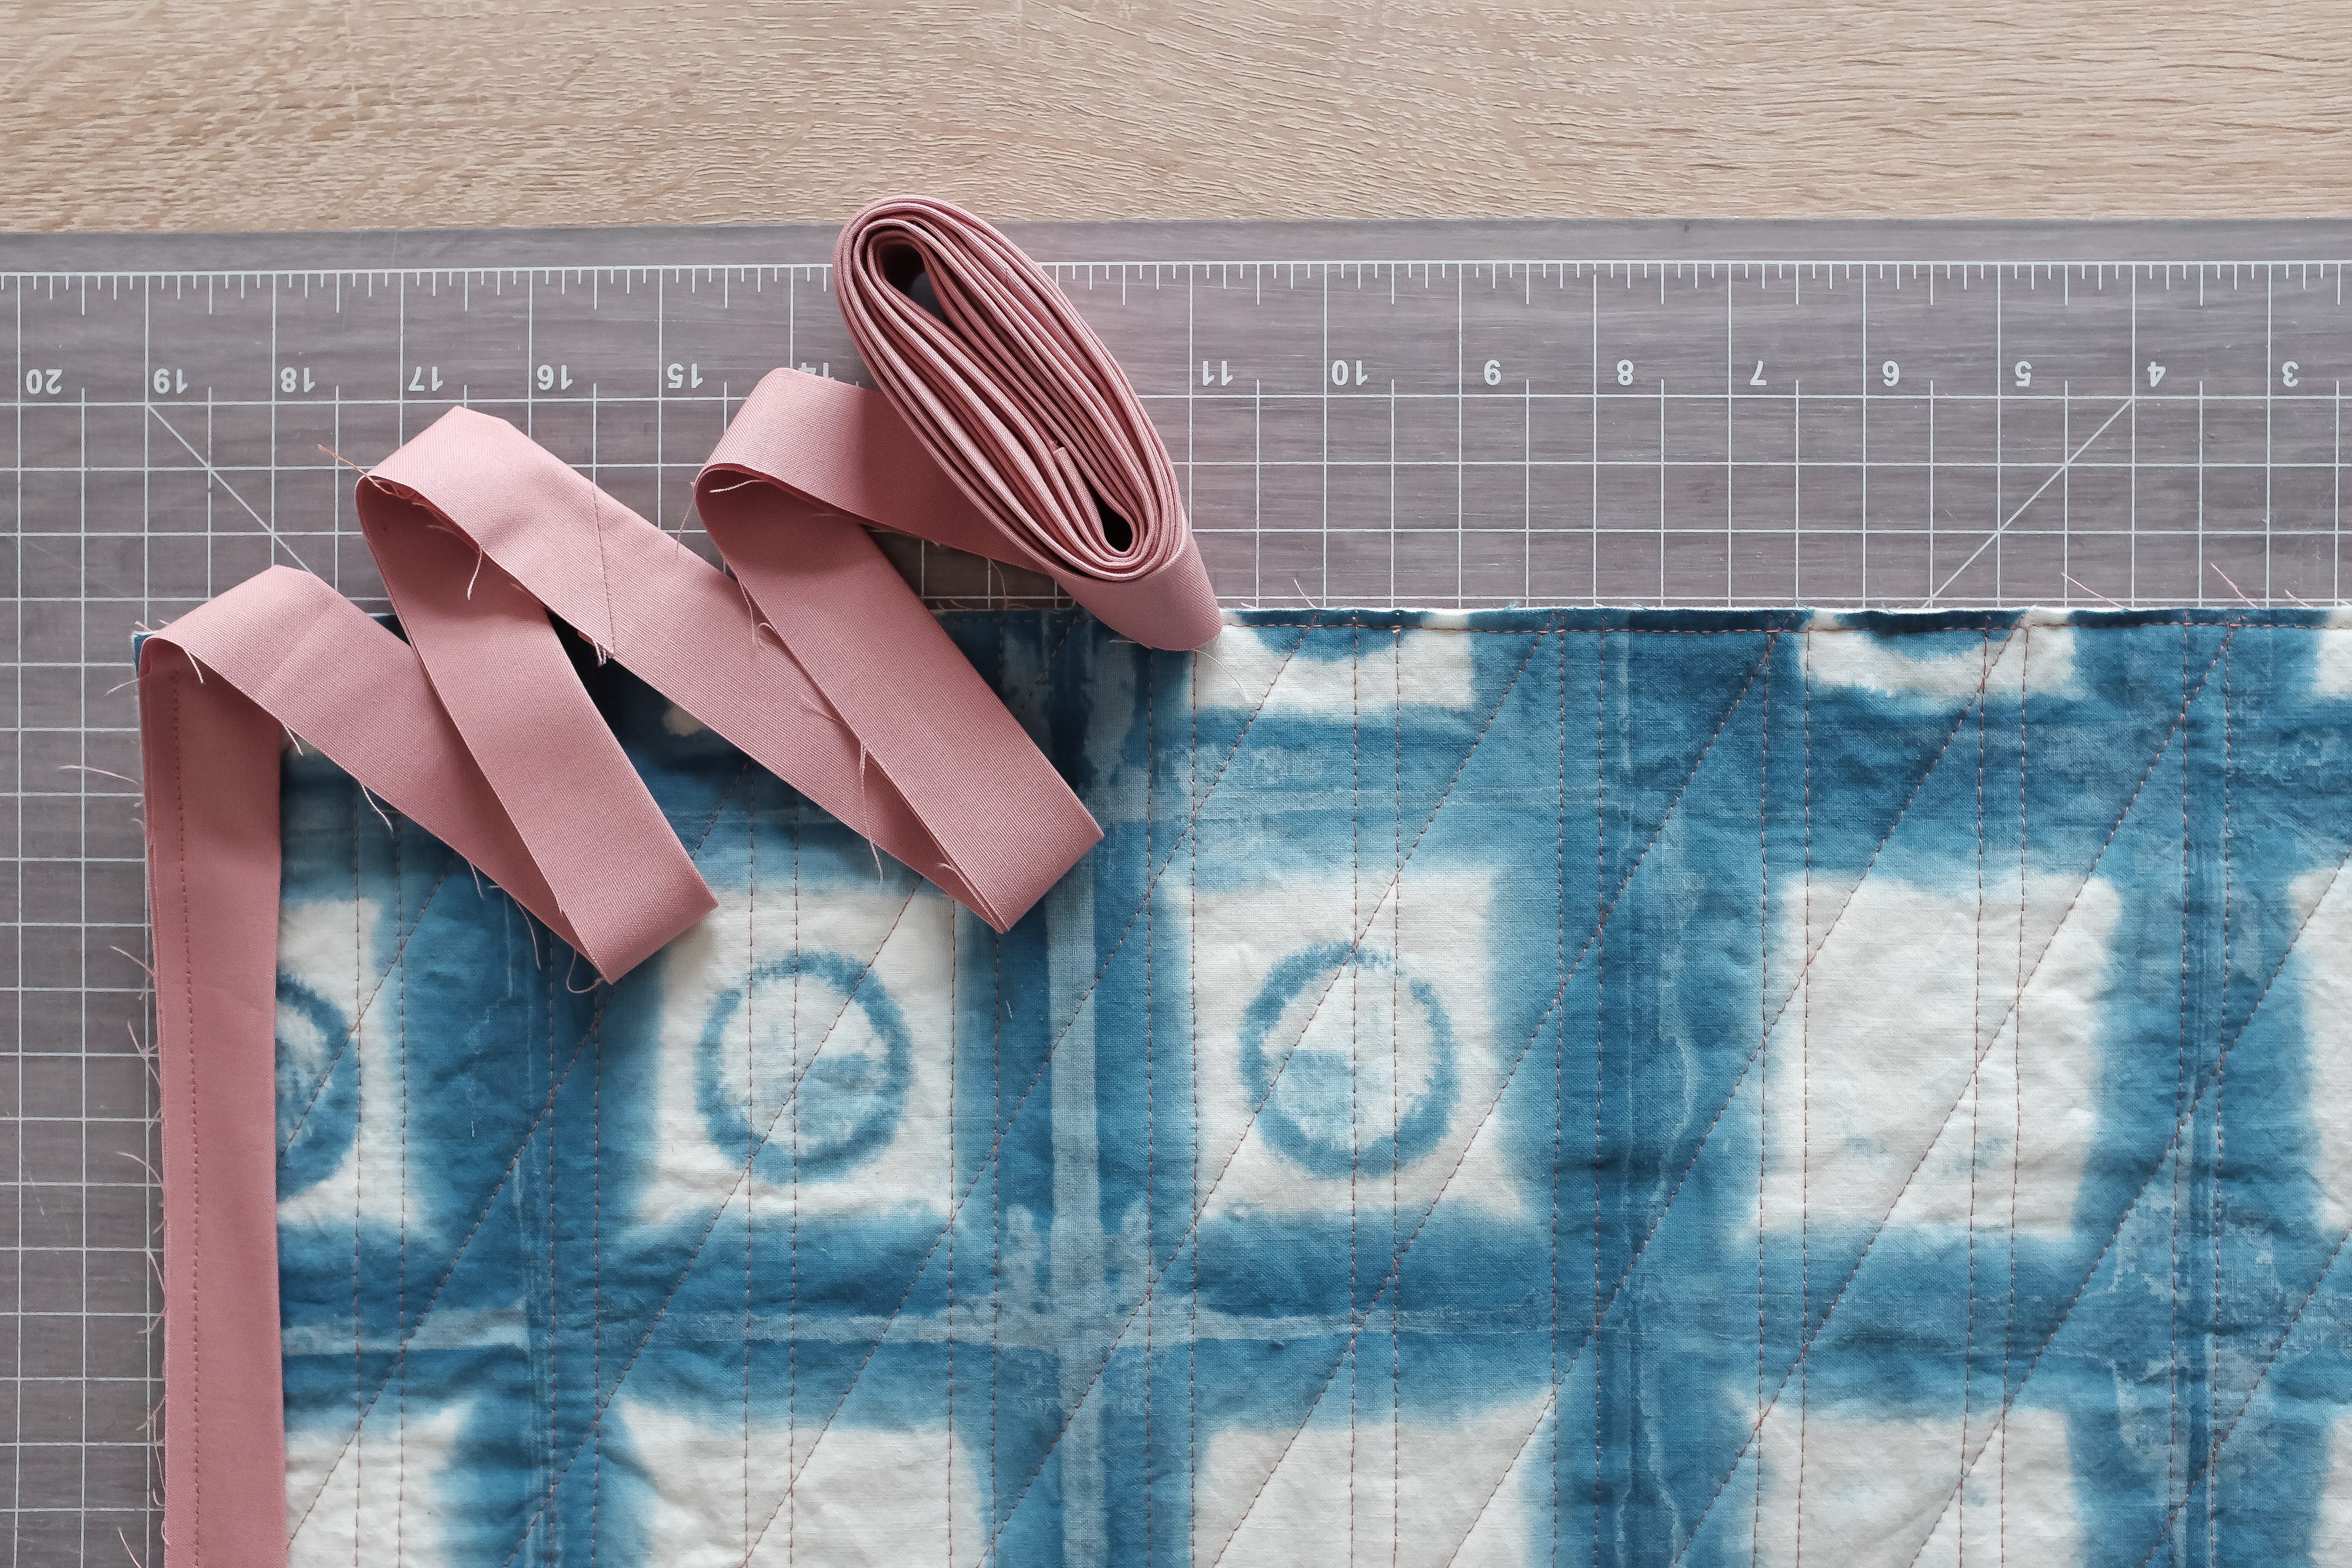
- Attach binding to quilt using preferred method and trim loose threads.
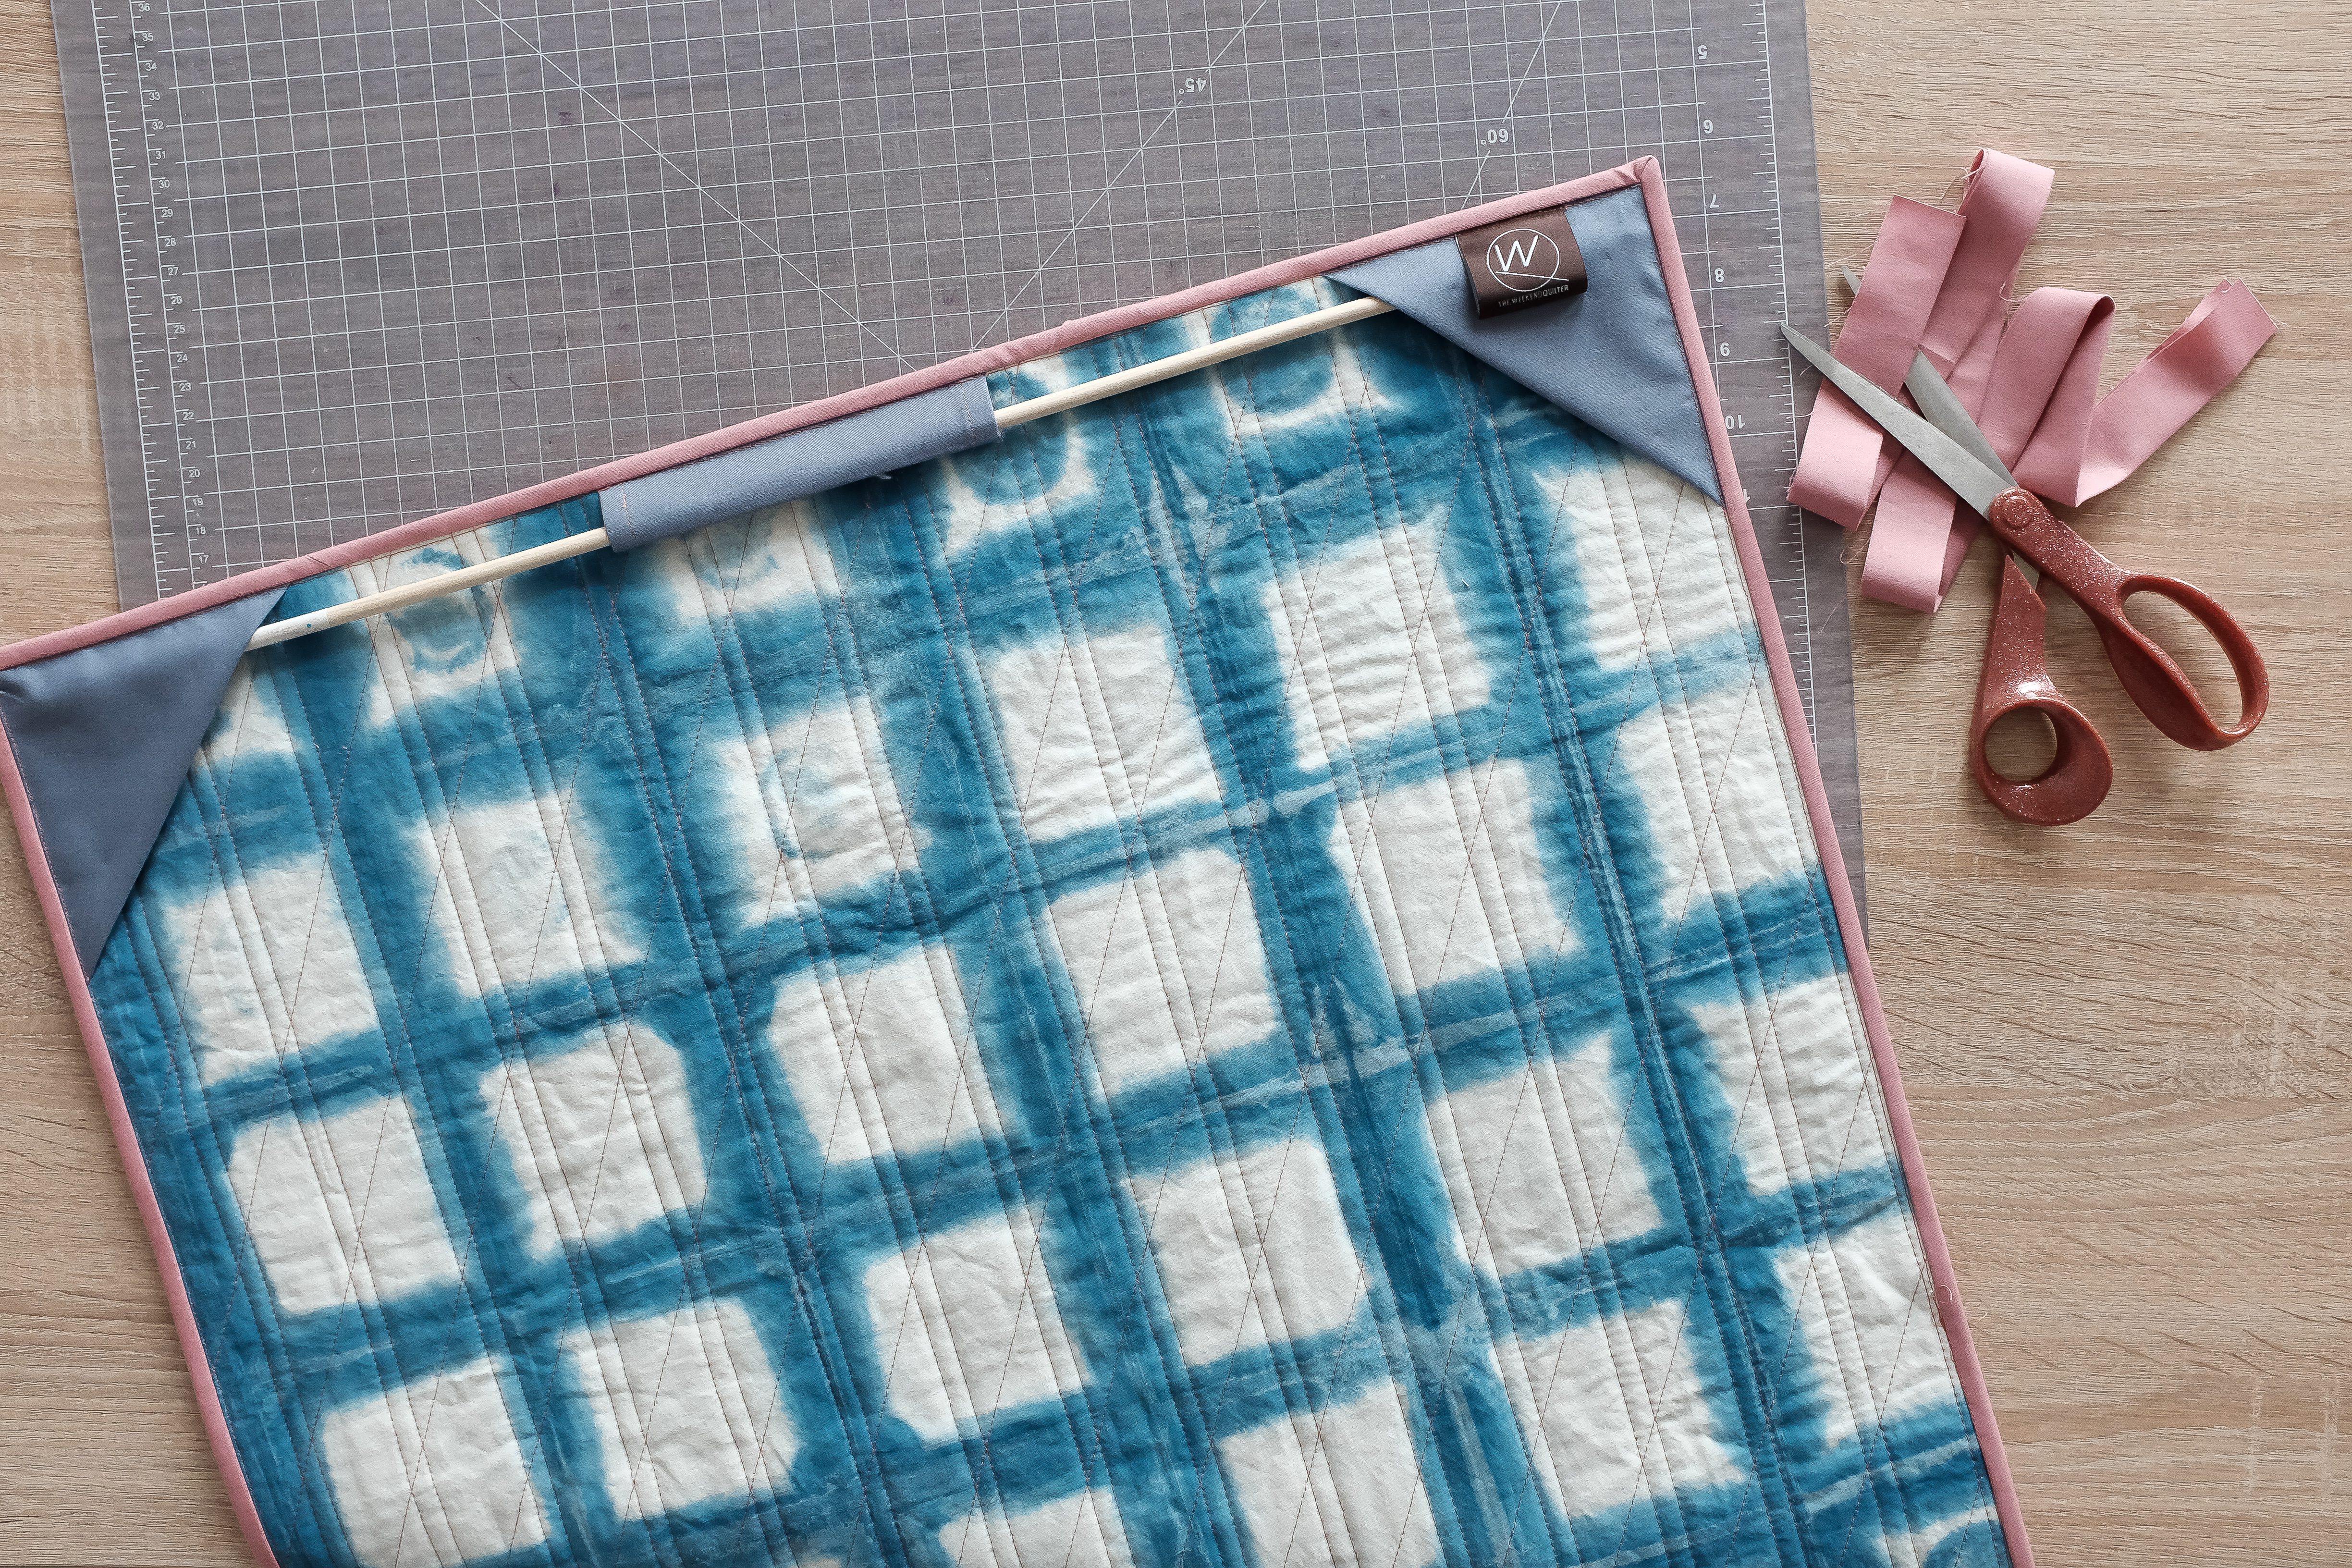
- With a pair of sharp scissors or saw, trim the wooden dowel to the width of the quilt. Slide dowel through the additional enforcement and folded squares.
- Hang and enjoy!
FOR MORE TUTORIALS:
For more quilty tips, tutorials and the latest designs, be sure to check out the Quilters Candy Membership. I share tutorials like this every month! You can see some of my other popular free tutorials HERE and HERE.
Also be sure to visit Wendy @the.weekendquilter on Instagram or head to her website.
Mini quilt used in this tutorial was designed by Amanda of @BroadclothStudio. Download Interlocked mini quilt pattern for FREE here.
Thank you, Wendy! I hope you found this tutorial helpful. I know I will be using this to hang one of my latest quilts. Leave a question if you have one, or a comment on which quilt you plan to hang in your home.