Quilting Ruler Hack: Save Time and Cut More Accurately on Any Quilt Project
Elizabeth Chappell
Time-Saving Quilting Ruler Hack: How to Cut Perfectly Accurate Quilt Blocks Every Time
Quilting Ruler Hack
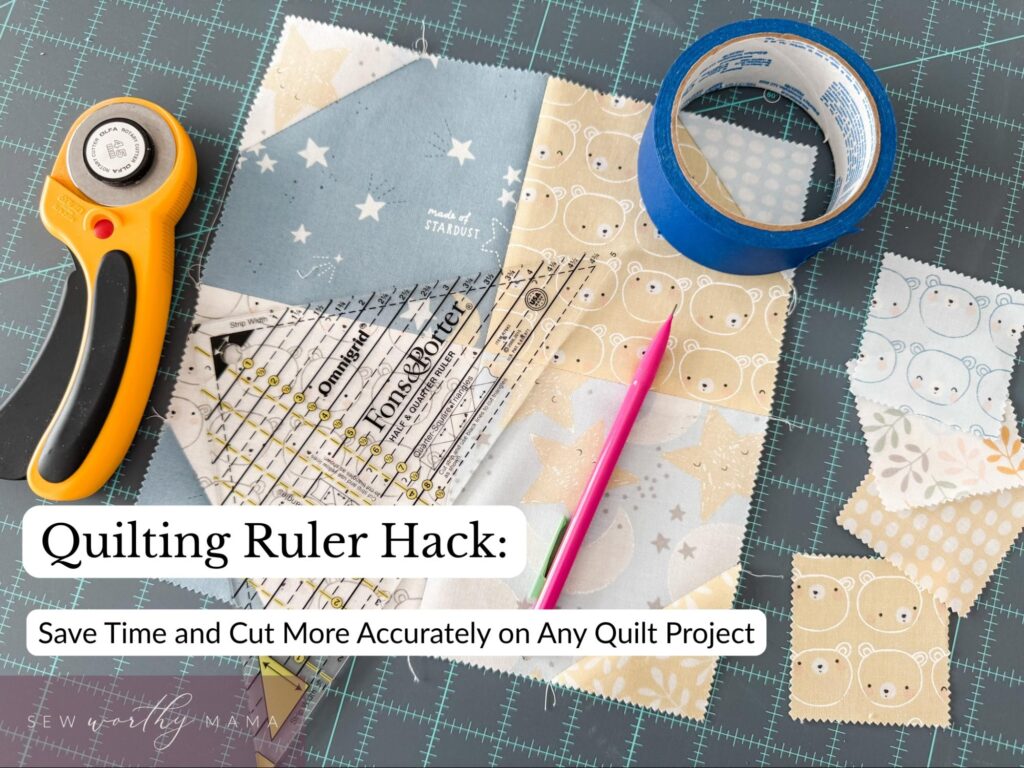
Tired of spending hours marking lines and double-checking measurements, only to end up with quilt blocks that don’t quite match up? This simple quilting ruler hack will completely change the way you cut your fabric. It’s fast, accurate, and works with nearly any quilting ruler you already own! Whether you’re making half-square triangles, flying geese, or intricate patchwork blocks, this trick will help you cut perfectly straight lines—saving you time and improving your precision on every quilt project.
This post contains affiliate links, which means I may earn a small commission at no additional cost to you when you make a purchase after clicking these links. Read more about affiliate links here. Thanks for supporting small businesses when you shop!
Meet Casey from Sew Worthy Mama
Hi, I’m Casey Chatham from Sew Worthy Mama, and I’m thrilled to be guest blogging here on Quilters Candy!
When I discovered this simple “ruler hinge” trick, it truly was a where-have-you-been-my-whole-life moment. It works with almost any ruler you already own and will speed up your cutting and marking for HSTs, Flying Geese, and stitch-and-flip blocks — while keeping every line perfectly aligned.
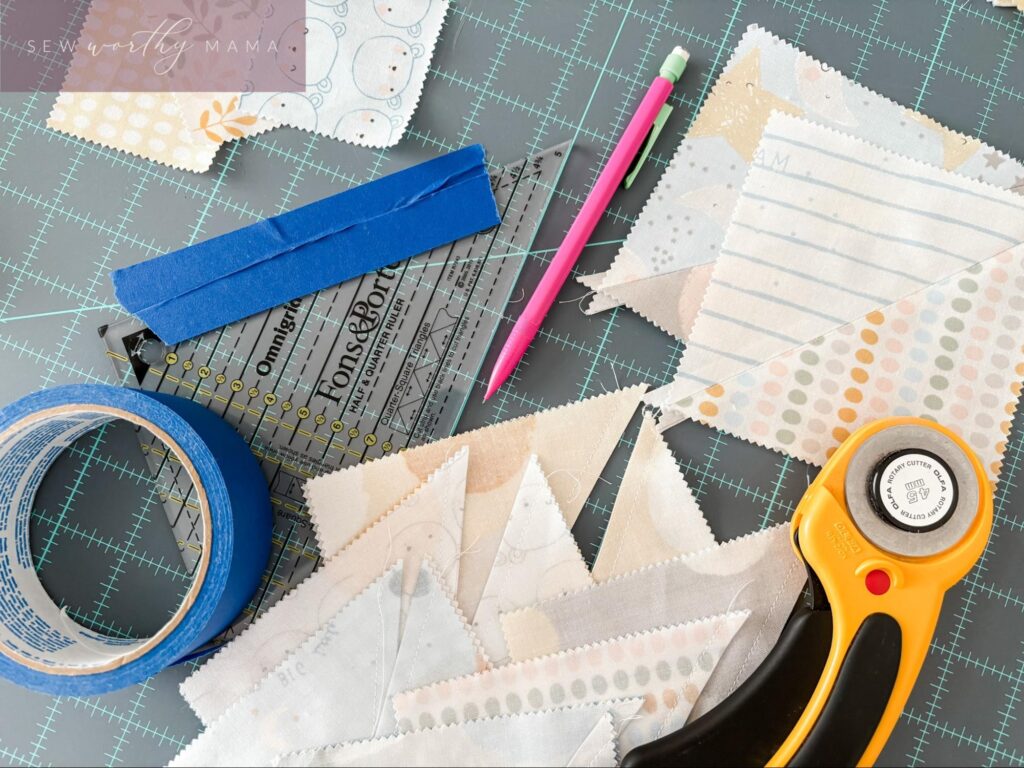
📏 Supplies You’ll Need
The best part? You probably have all of these in your sewing space right now.
Supply
Notes
Quilting Ruler
Any clear acrylic ruler will work, but a medium-sized square or triangle is ideal. My favorite is a half- or quarter-square-triangle ruler (Amazon, Sewing Parts Online).
Painter’s Tape
The classic low-tack blue tape is perfect. Avoid masking or office tape to prevent residue (Amazon, Lowe’s).
Fabric Marker or Pencil
Try the Dritz Mark-B-Gone for light fabrics or the Clover White Gel Pen for dark ones (Amazon, Sewing Parts Online).
Rotary Cutter + Mat
I love the 45 mm ergonomic Olfa rotary cutter with a Creative Grids mat (Sewing Parts Online).
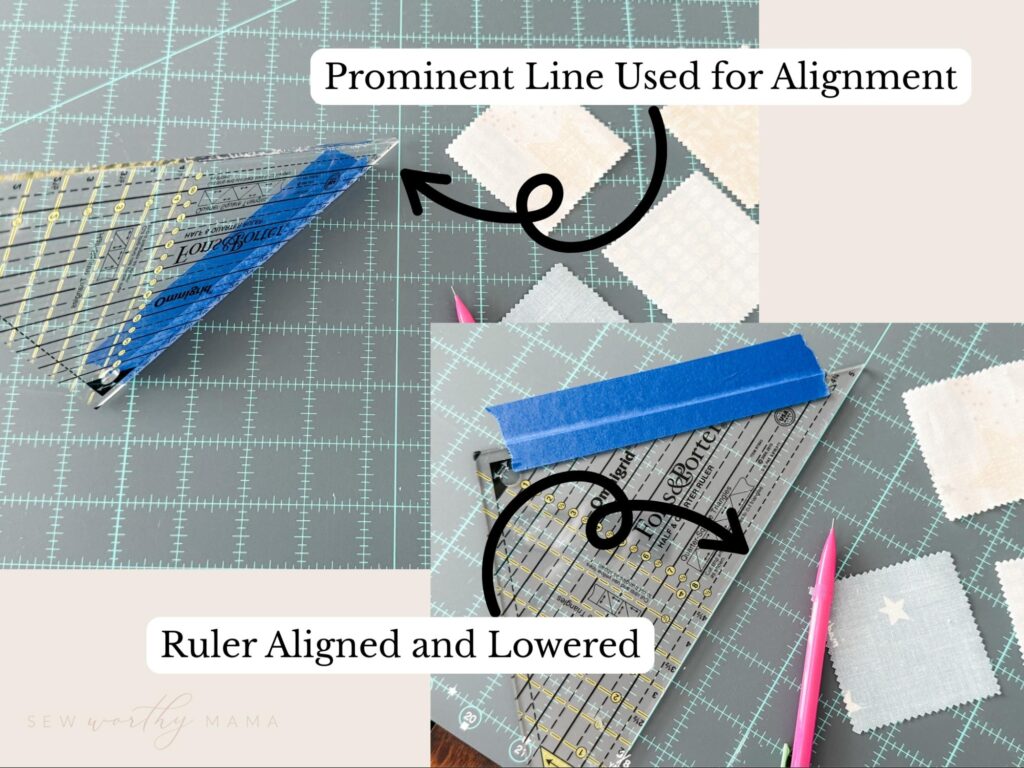
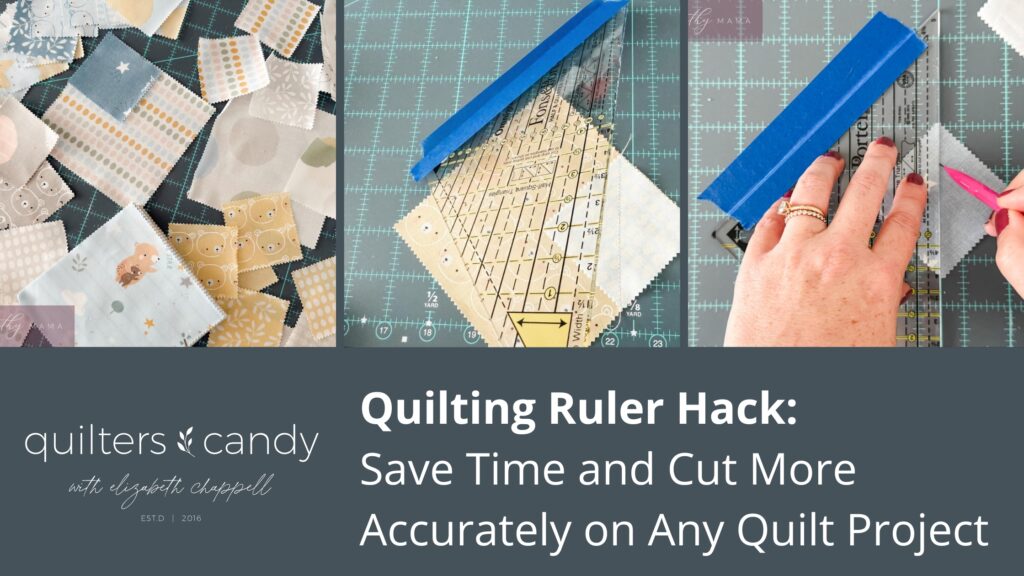
This method uses painter’s tape to create a hinge on your ruler. You’ll be able to lift it like a door, slide fabric underneath, and drop it back in the exact same spot — every single time.
Step 1: Prep Your Ruler
Lay your ruler flat on your cutting mat, aligned with a strong grid line near the center. This edge will become your “action edge” — the one you’ll draw or cut along.
TIP: Right-handed quilters can align the ruler to the left edge of the grid line; lefties, to the right. This compensates for your marking pen’s width.
Step 2: Create the Hinge Edge
While keeping your ruler aligned, tear a strip of painter’s tape just shorter than the ruler edge. Press half the tape onto the ruler, then smooth the rest onto the mat — firmly, without slack.
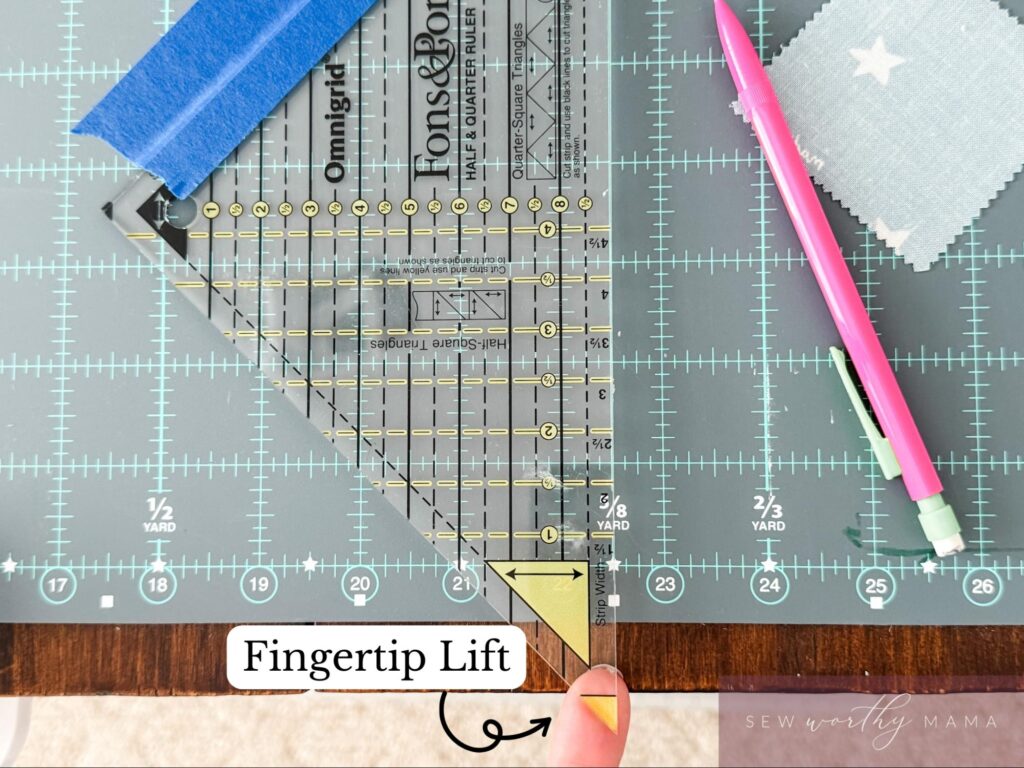
TIP: Let the ruler’s corner hang slightly off the table so you can easily lift and lower it later.
Step 3: Confirm Alignment
Double-check that your ruler hasn’t shifted. If it has, peel up the tape and try again.
TIP: Use a tiny rolled piece of tape under the ruler temporarily to help hold it steady during setup.
Step 4: Line Up and Mark
Lift the ruler like a door on its hinge. Place your fabric square underneath, aligning the corners to the same grid line. Lower the ruler — it’s perfectly aligned and ready to mark.
Step 5: Mark, Lift, Align, Repeat!
Press lightly, draw your line, then lift the ruler, swap in the next fabric, and lower it again. Because your hinge keeps everything in place, each line stays perfectly straight and consistent.
You can even work assembly-line style with multiple squares at once — a total time-saver!
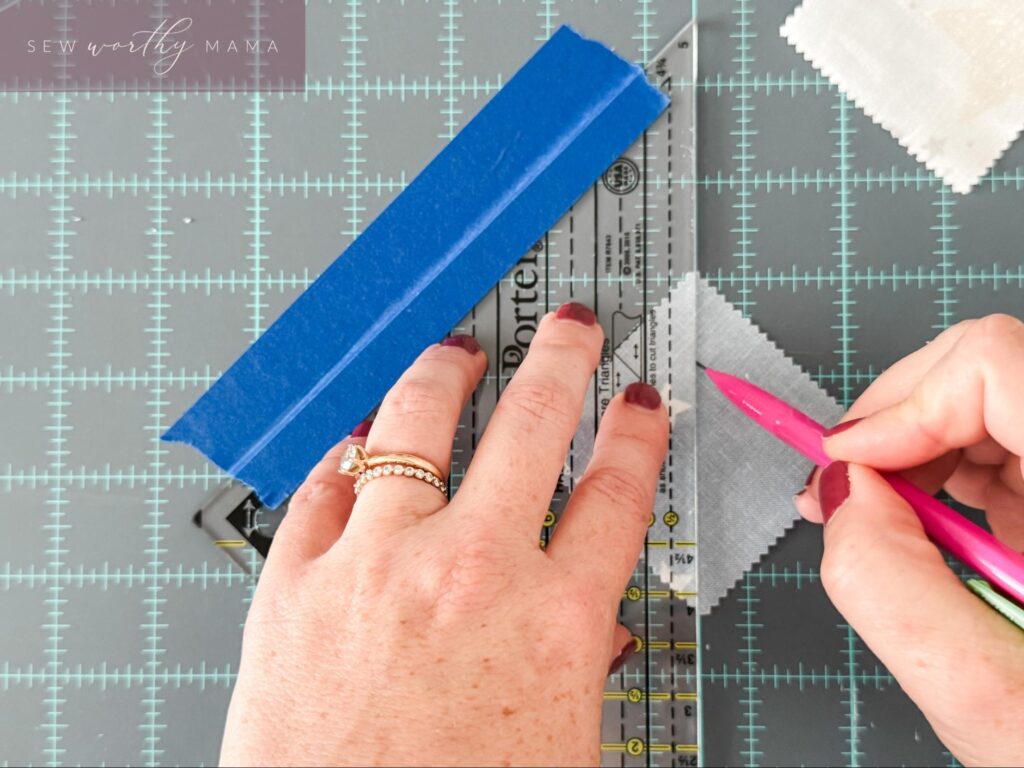
✂️ Cutting Using the Hinge Hack
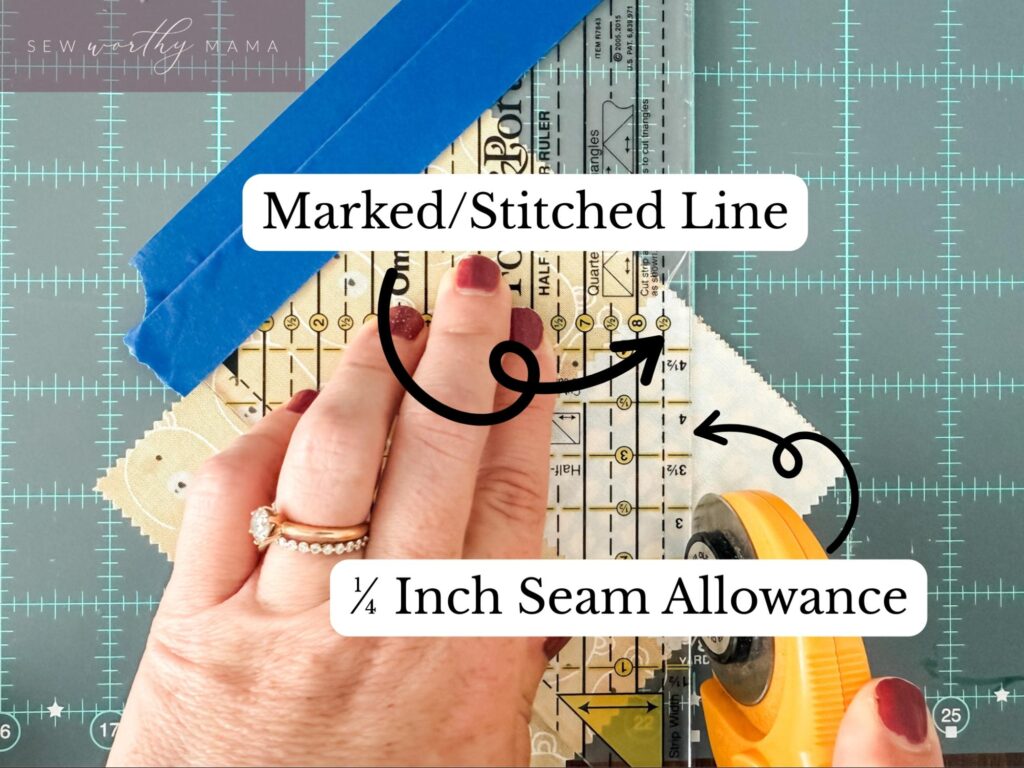
Once your lines are stitched (either on or ¼″ away from the drawn line), use the same hinge setup to cut accurately and quickly.
TIP: When cutting stitch-and-flip blocks, align your stitching ¼″ from the ruler’s action edge to preserve the seam allowance.
🌟 Why This Hack Is a Game-Changer
1. Maximized Efficiency
If you make HSTs or Flying Geese in bulk, this trick saves hours. Instead of realigning your ruler 175 times for one quilt, you align it once.
2. Perfect Accuracy
Because your ruler never shifts, your seams and points are beautifully precise — every time.
3. Less Strain
Less bending and squinting means happier shoulders and more time to actually sew!
4. Residue-Free
Painter’s tape gives all the hold with none of the sticky mess.
💬 Final Thoughts
Try this ruler hack on your next batch of stitch-and-flip blocks, Half-Square Triangles, or Flying Geese. Once you see how much faster and cleaner your results are, you’ll never go back!
🧶 More Time-Saving Quilting Tips
Love efficient quilting? Check out my patterns designed with quick-piecing techniques like: