

Reversible quilted pillow cover tutorial
Ever find yourself with extra quilt blocks and no idea what to do with them? Maybe they’re test blocks from a new pattern, leftover pieces from a quilt project, or part of a UFO (Unfinished Object) that’s been sitting in your sewing space for ages. Instead of letting them collect dust, use this Reversible quilted pillow cover tutorial! Transform them into a stylish reversible pillow cover!
This easy reversible quilted pillow tutorial is the perfect way to repurpose orphan blocks while adding a touch of handmade charm to your home. Plus, since it’s reversible, you can switch up your décor in seconds—one side for everyday use and the other for seasonal vibes. Think fall to Christmas with a simple flip! No need for extra storage, just a clever two-in-one design.
Best Quilt Blocks for This Project
To keep things simple, use quilt blocks that share the same grid layout—like 2×2, 3×3, or 4×4 designs. They don’t have to match exactly, but having the same structure will ensure a smooth, professional-looking finish.
Ideal Block Sizes:
✅ 16″ x 16″
✅ 18″ x 18″
✅ 20″ x 20″
Dig through your scrap fabric and UFO pile, grab two quilt blocks, and let’s make something beautiful!
Fabric & Material Requirements
For a 16” x 16” Pillow Cover
- (2) 16 ½” x 16 ½” unfinished quilt blocks
- ½ yard coordinating fabric for the pillow back
- ¼ yard binding fabric
- ½ yard fusible fleece
For an 18” x 18” Pillow Cover
- (2) 18 ½” x 18 ½” unfinished quilt blocks
- ⅝ yard coordinating fabric for the pillow back
- ¼ yard binding fabric
- ⅝ yard fusible fleece
For a 20” x 20” Pillow Cover
- (2) 20 ½” x 20 ½” unfinished quilt blocks
- ⅝ yard coordinating fabric for the pillow back
- ¼ yard binding fabric
- ⅝ yard fusible fleece
Other Supplies You’ll Need
✔️ Hand-sewing needle & matching thread
✔️ Optional: Embroidery floss, perle cotton, or sashiko thread for decorative stitching
Cutting Instructions
For a 16” x 16” Pillow Cover
✂️ From pillow back fabric: (2) 16 ½” x 18 ½” rectangles
✂️ From binding fabric: (2) 2 ½” x WOF strips
✂️ From fusible fleece: (2) 16 ½” x 16 ½” squares
For an 18” x 18” Pillow Cover
✂️ From pillow back fabric: (2) 18 ½” x 20 ½” rectangles
✂️ From binding fabric: (3) 2 ½” x WOF strips
✂️ From fusible fleece: (2) 18 ½” x 18 ½” squares
For a 20” x 20” Pillow Cover
✂️ From pillow back fabric: (2) 20 ½” x 22 ½” rectangles
✂️ From binding fabric: (3) 2 ½” x WOF strips
✂️ From fusible fleece: (2) 20 ½” x 20 ½” squares
Assembly Instructions
Transform your extra quilt blocks into a stylish and functional reversible pillow cover with this simple step-by-step tutorial. Perfect for using up leftover blocks, this DIY pillow project is beginner-friendly and adds a personal touch to your home decor.
1️⃣ Prepare the Quilt Blocks
✅ Follow the fusible fleece manufacturer’s instructions to adhere the fleece to the wrong side of each quilt block. This step adds structure and durability to your pillow cover.
2️⃣ Quilt the Blocks
🎨 Quilt each block as desired! You can:
- Match quilting designs on both sides for a cohesive look.
- Make each side unique for a fun, two-in-one reversible design.
💡 Pro Tip: Try free-motion quilting or hand-quilting for a decorative touch!
3️⃣ Assemble the Pillow Cover
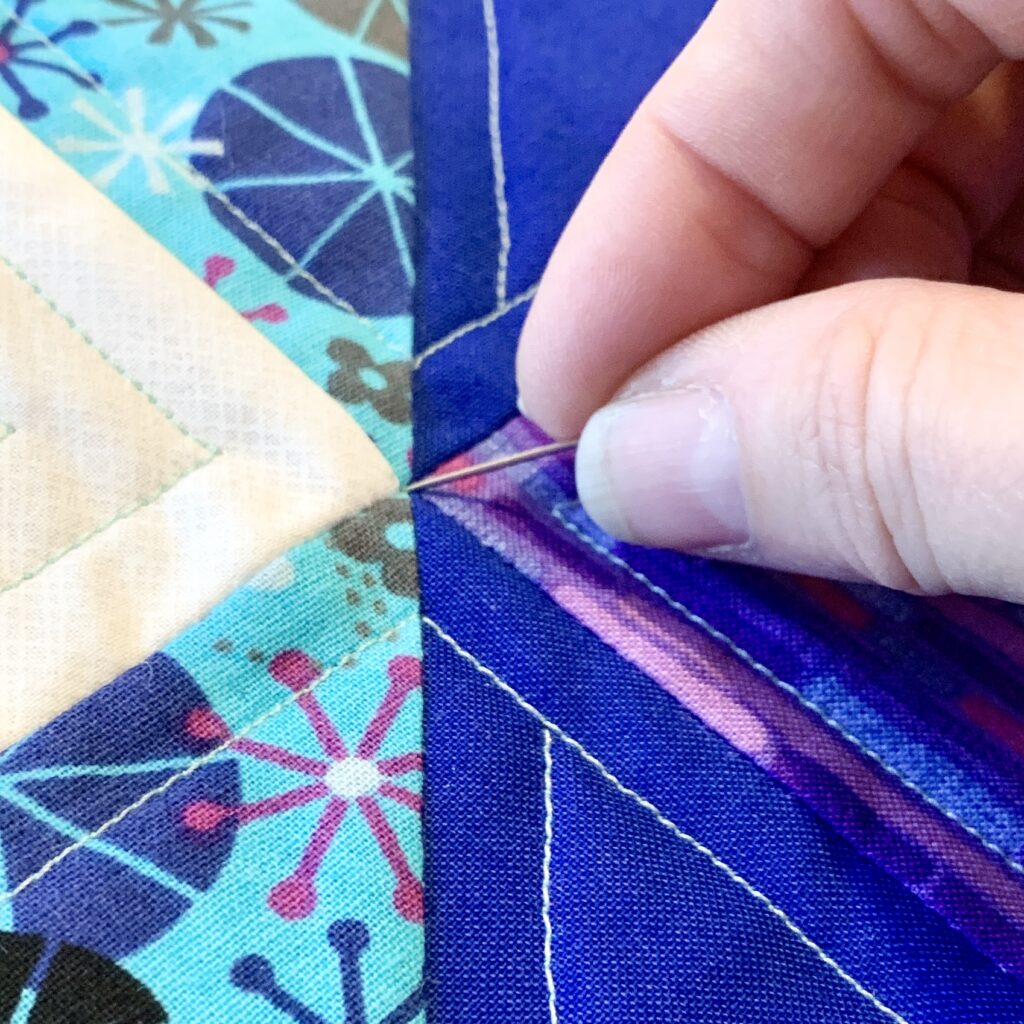
Tack the Quilt Blocks Together
🪡 Using a hand-sewing needle and thread, secure the two quilt blocks together at the corner seams:
- Insert the needle through one corner seam on the top block.
- Find the matching corner seam on the second block and take a small stitch.
- Repeat with a second stitch for extra hold, then tie off on the top.
- Hide the knot by taking a large stitch under the top fabric layer, pulling the knot underneath.
- Thread the second loose end and repeat to ensure a clean finish.
✅ Alternative Techniques:
- Use embroidery floss or thicker thread for a decorative, hand-tied effect. Leave ½” thread tails for a textured look.
- Hand-sew the blocks together using large decorative embroidery stitches (such as sashiko or running stitch).
Stitch the Quilt Blocks Together
✂️ Sew around the edges of the quilt blocks using a ⅛” seam allowance to secure them in place.

4️⃣ Prepare & Attach the Pillow Backing
Create the Pillow Back Panels
1️⃣ Fold one pillow back rectangle in half lengthwise (matching the quilt block’s width and height).
2️⃣ Press and topstitch ¼” from the fold for a clean finish.
3️⃣ Repeat for the second rectangle.

Attach the Pillow Back to the Quilt Blocks
🧵 One side of your reversible quilt pillow will have binding that shows. To ensure a neat finish:
- Lay the quilted blocks face down, with the side that will match your binding on the bottom.
- Place one pillow back panel on top, aligning three edges with the folded edge facing the center.
- Position the second pillow back panel on the opposite side, aligning edges.
- Pin or clip in place, then sew around all edges using a ⅛” seam allowance.
💡 Pro Tip: Want an easy-to-remove pillow cover? Swap out the envelope back for a zipper closure!

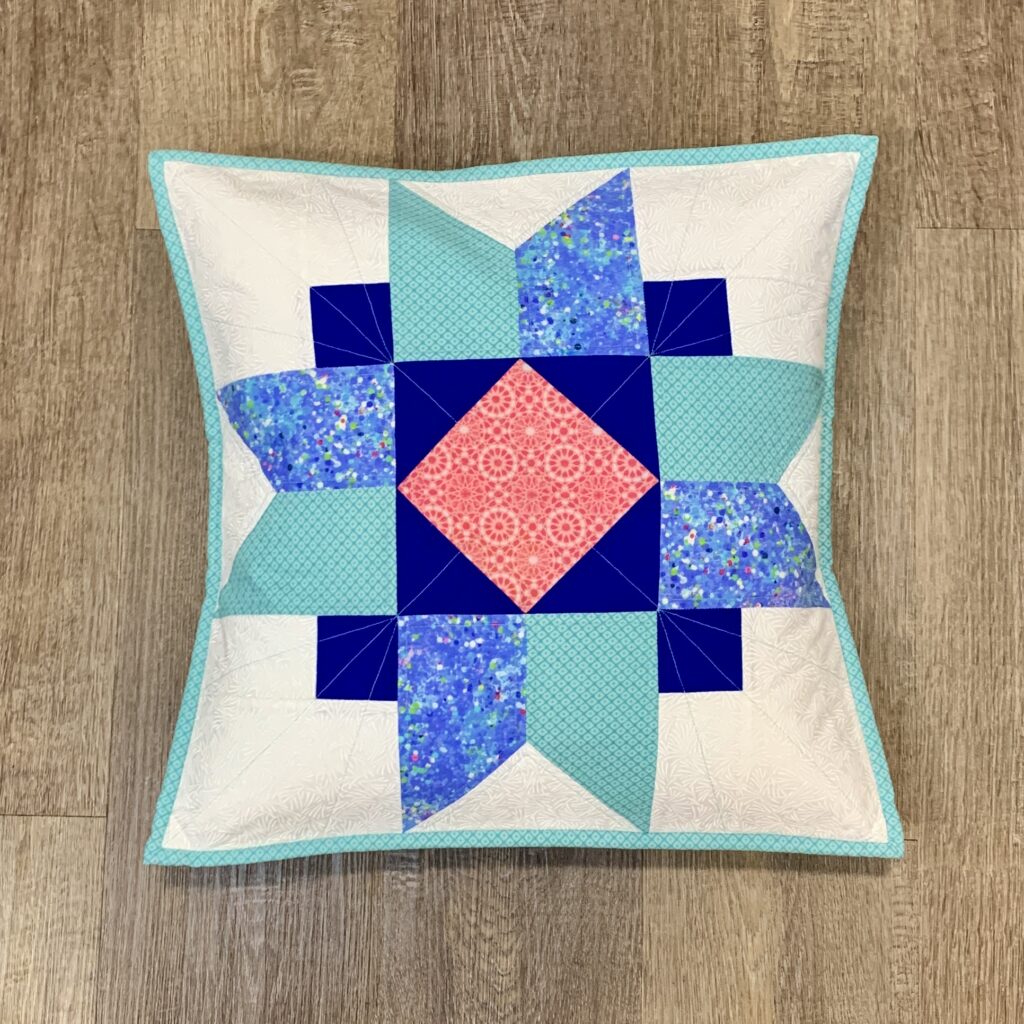
5️⃣ Bind & Finish Your Quilted Pillow Cover
- Bind the pillow edges using your favorite binding method.
- Insert a pillow form and enjoy!
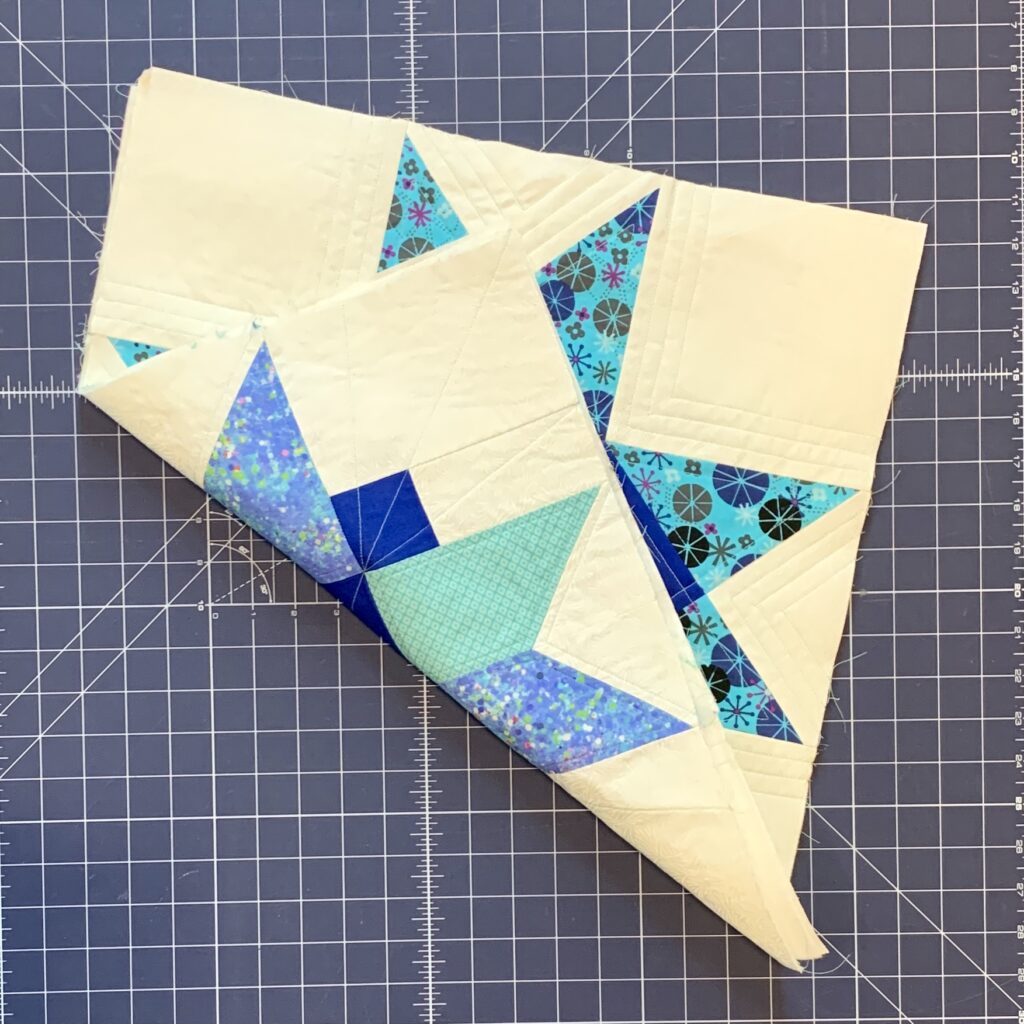
How to Use Your Reversible Quilt Pillow Cover
✨ When you’re ready for a fresh look, simply flip the pillow cover inside out to reveal the other side. Push out the corners (they’ll be slightly rounded due to the binding), and your decor is refreshed in seconds!

Need a pillow insert?
Need a custom pillow insert for your quilted pillow cover? Instead of searching for the perfect size, make your own with this quick and easy sewing tutorial!
Materials Needed
✔ Solid fabric or muslin (cut 1” larger than your pillow size)
✔ Polyester fiberfill (or your preferred stuffing)
✔ Sewing machine & thread
✔ Scissors or rotary cutter
✔ Iron & pressing tool
Step-by-Step Instructions
1️⃣ Cut Your Fabric
- Cut (2) pieces of solid fabric or muslin that are 1” larger than your finished pillow cover.
- Example: For an 18” x 18” pillow, cut (2) 19” x 19” squares.
2️⃣ Sew the Pillow Insert
- Lay the fabric pieces right sides together (RST) and align the edges.
- Sew around all four sides using a ½” seam allowance, but leave a 4” opening on one side.
- Backstitch at both ends of the opening for durability.
3️⃣ Turn & Press
- Clip the corners to reduce bulk.
- Turn the pillow insert right side out.
- Press the edges, making sure to fold in the raw edges of the opening so they align with the seam.
4️⃣ Fill with Fiberfill
- Stuff the insert with polyester fiberfill (or your preferred stuffing) until it reaches your desired firmness.
💡 Pro Tip: For a fuller look, slightly overstuff the insert—it will soften over time!
5️⃣ Close the Opening
- Topstitch ⅛” from the edge to close the opening securely.
- Backstitch at both ends for extra strength.
Your Custom Pillow Insert is Ready!
Now, just slip your pillow insert into your reversible quilted pillow cover, and enjoy a perfectly fitted, handmade pillow that adds comfort and style to your space.


MORE BLOG POSTS LIKE THIS
If you enjoyed this blog post, you will love these tutorials!