Binding is one of the final steps in making a quilt—and it’s also one of the most satisfying. Binding frames your quilt, protects the edges, and brings the whole project together in a clean, professional way.
Whether you’re finishing your very first quilt or just want a refresher, this guide will walk you through how to make quilt binding strips step by step.
In this post, I’m focusing on straight-grain binding, which is the most common type of binding used for quilts with straight edges and corners.
What Is Quilt Binding?
Quilt binding is a long strip of fabric that wraps around the raw edges of your quilt sandwich, securing the quilt top, batting, and backing together while giving the quilt a finished edge.
Most quilters use double-fold binding, meaning the binding strip is folded in half lengthwise before being attached. This creates a durable edge that holds up well to everyday use and washing.
Decide How Wide to Cut Your Binding Strips
The most common binding strip width is 2.5 inches, and it’s a great choice for most quilts. When folded in half and stitched to the quilt, this width creates a binding that is sturdy without feeling bulky.
That said, I often cut my binding at 2.25 inches for a slightly narrower finish. This width still gives a clean, durable edge and uses a bit less fabric. Both options work beautifully—this is one of those places where personal preference really shines.
How Many Binding Strips to Cut
Before cutting your binding strips, take a moment to calculate how many you’ll need.
Measure the perimeter of your quilt: (width × 2) + (height × 2)
Add 10–12 inches to allow for joining seams and turning corners.
Next, divide that number by 42 inches, which is the standard usable width of quilting cotton.
276 ÷ 42 = 6.57 Round up, and you’ll need to cut 7 binding strips.
Cut and Join the Binding Strips
Lay your binding fabric on the cutting mat and square up one edge. Using a rotary cutter and ruler, cut the required number of binding strips parallel to the selvage (straight-grain strips).
Once all your strips are cut, you’re ready to join them into one long continuous strip.
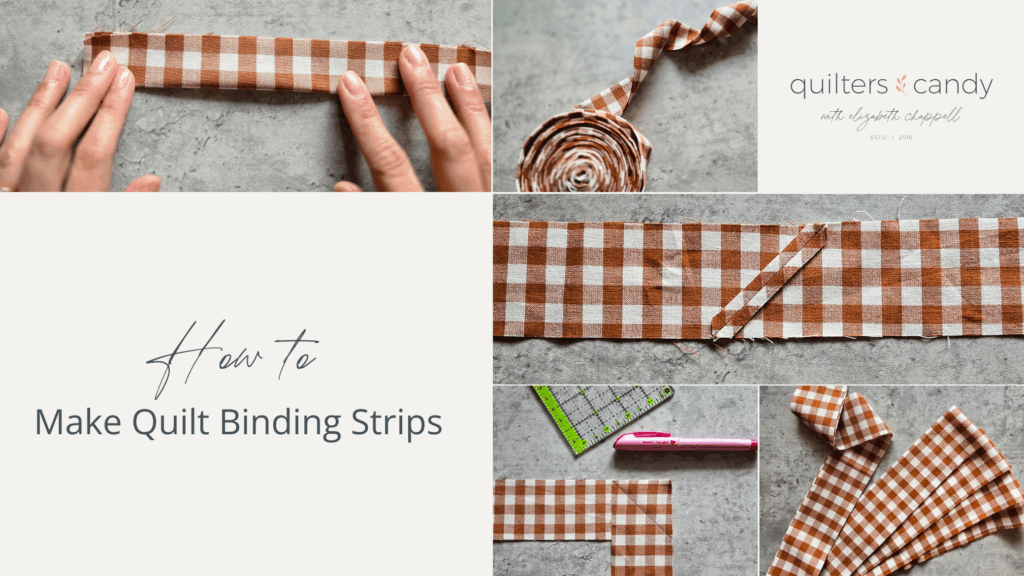
Join the Binding Strips with Diagonal Seams
Diagonal seams reduce bulk and help the binding lie smoothly around the quilt.
Place the first binding strip horizontally and the second strip vertically, right sides together, forming an upside-down L shape.
Using a ruler or marking pen, draw a diagonal line from the top left corner to the bottom right corner.
Sew directly on the drawn line.
Trim the excess fabric, leaving a ¼″ seam allowance.
Press the seam open, not to the side and repeat until all bindings strips are joined.
Press the Binding in Half
Once all the strips are joined, press the entire binding strip in half lengthwise, wrong sides together.
Take your time here. A well-pressed binding makes the rest of the process easier and gives you a cleaner finish.
I usually roll my freshly pressed binding into a loose coil to keep it tidy and minimize handling along the raw edges.
If I’m making binding ahead of time, I’ll wrap it around binding holders so everything stays organized until I’m ready to sew.
Final Thoughts
Binding can feel intimidating at first, but once you understand the process, it quickly becomes second nature. Taking a few extra minutes to cut accurately, sew clean seams, and press carefully makes a noticeable difference in the final look of your quilt.
If you try this method, I’d love to see your finished quilt—be sure to tag me so I can cheer you on. 💛
MORE POSTS LIKE THIS
If you enjoyed this blog post tutorial, you’re going to love these other popular tips and tutorials: