Quilters Candy

How to Sew a Scrappy Chicken Pin Cushion – A Fun Spring Quilting Project

Spring has officially sprung, and I’ve got the perfect little sewing project to help you welcome the warmer weather! 🐣 Hi! I’m Sterling LaBosky, longarm quilter and pattern designer for ten years now (someone pinch me! 😉) from Sterling Quilt Co, and I’m so excited to share this chicken pin cushion tutorial with you. Let’s make some Scrappy Happy Hens together!

pin cushion supplies

✂️ What You’ll Need:

  • (8) 2.5” squares for the body

  • (1) 2.5” square for the tail

  • (1) 1.5” square for the comb (top of the head)

  • (1) 1.5” square for the beak

  • (2) 4.5” batting squares

  • Lizard litter (aka crushed walnut shells) for stuffing

  • Needle and thread for hand-sewing the bottom closed (not pictured)

TIP: This project is perfect for mini charm squares or scraps! I used a mini charm pack called Farmer’s Daughter by Lella Boutique for Moda Fabrics. You can find crushed walnut shells (aka “lizard litter”) at most major pet stores.

🧵 Prep Your Pieces:

  • Comb: Fold your 1.5” comb square in half horizontally and press.

  • Beak & Tail: Create prairie points by folding each square diagonally in half, then folding again to form a triangle.

  • Body: Sew the (8) 2.5” body squares into (2) four-patch blocks. Place each block on a 4.5” batting square and quilt as desired.

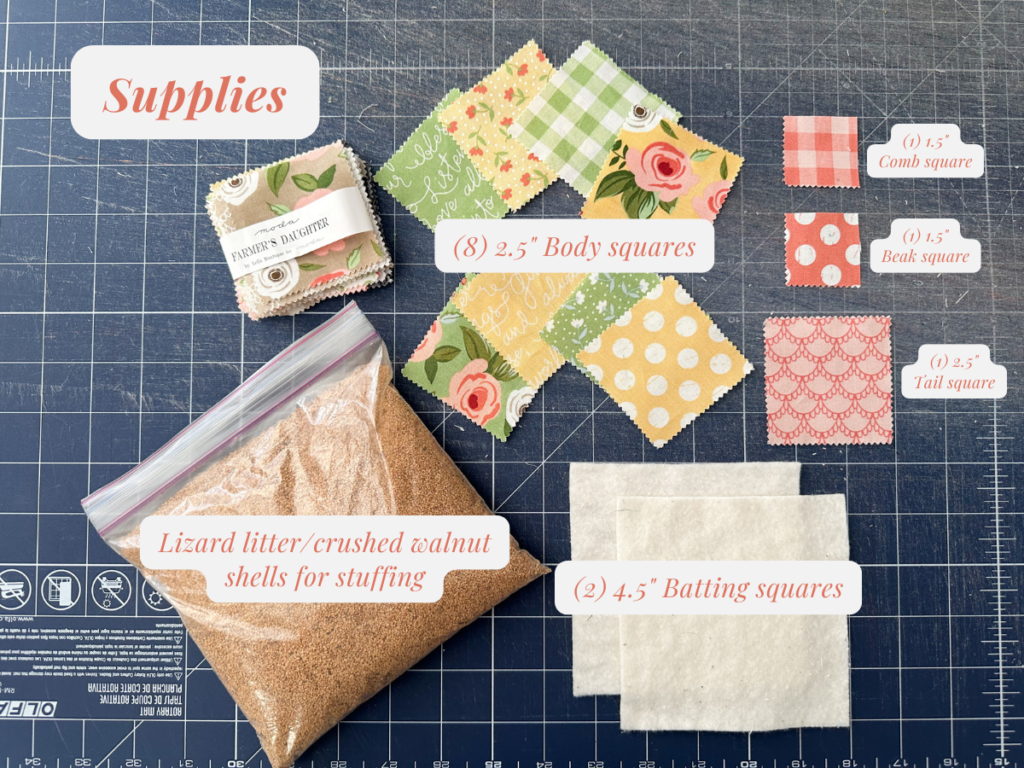
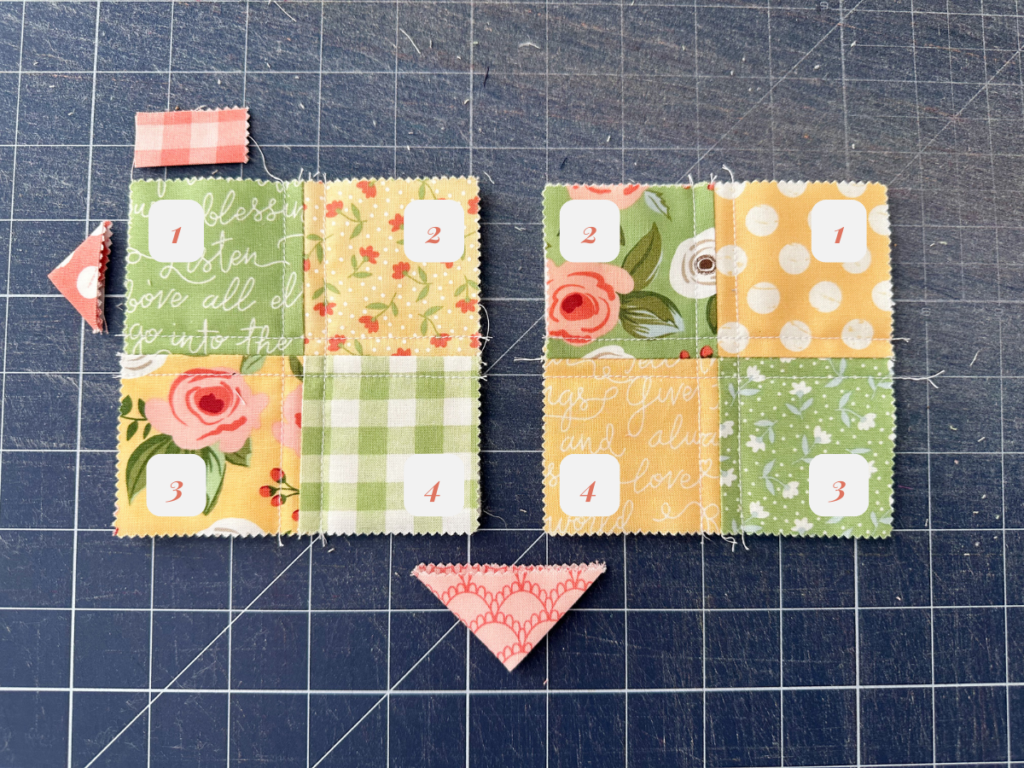
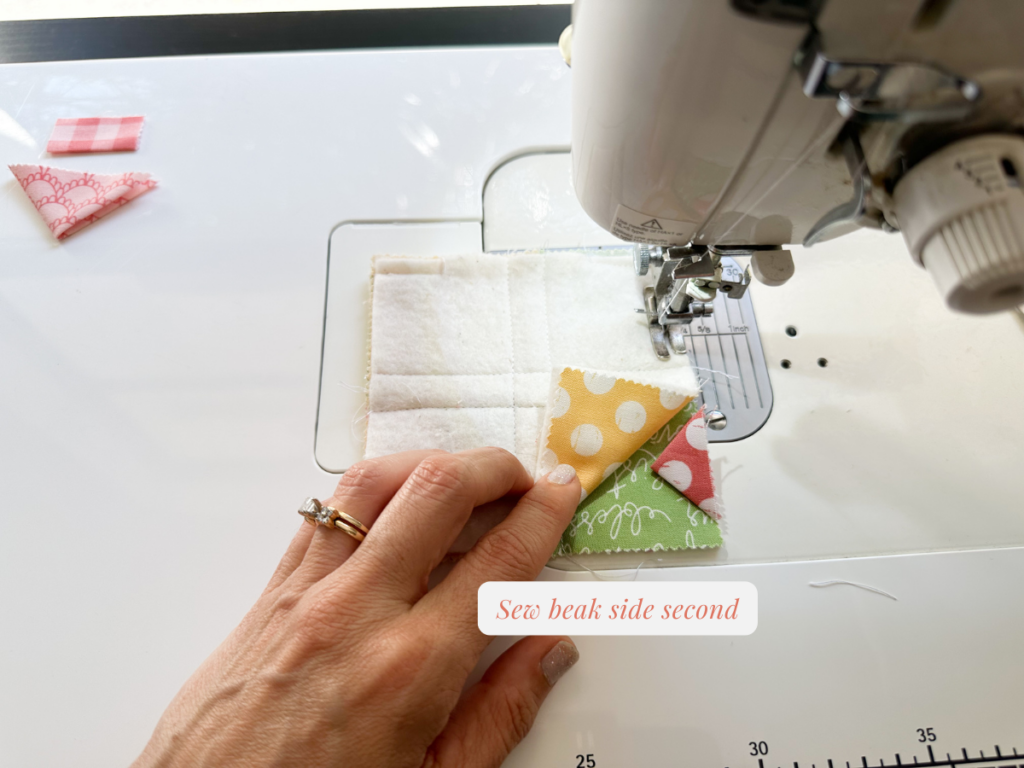
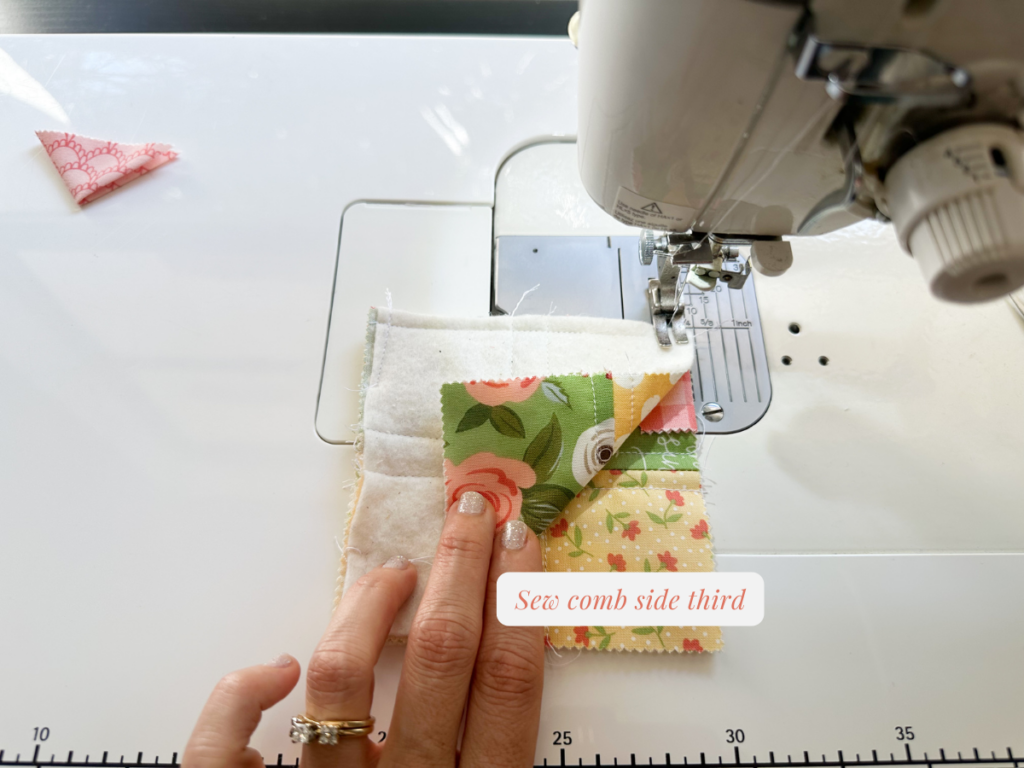
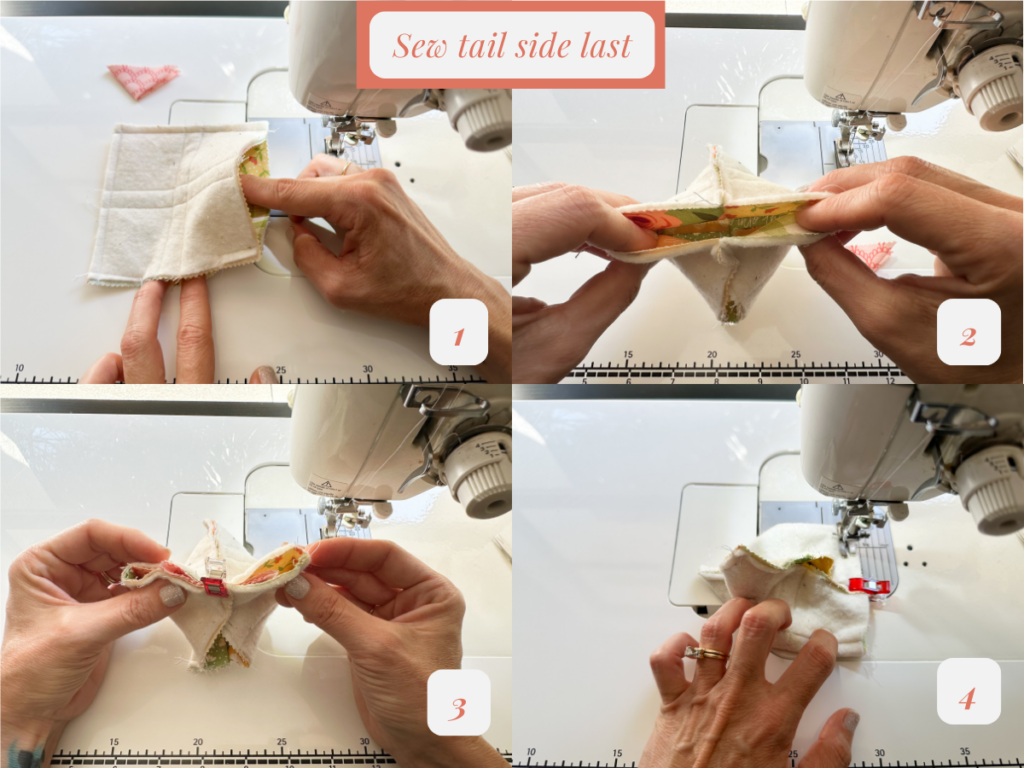
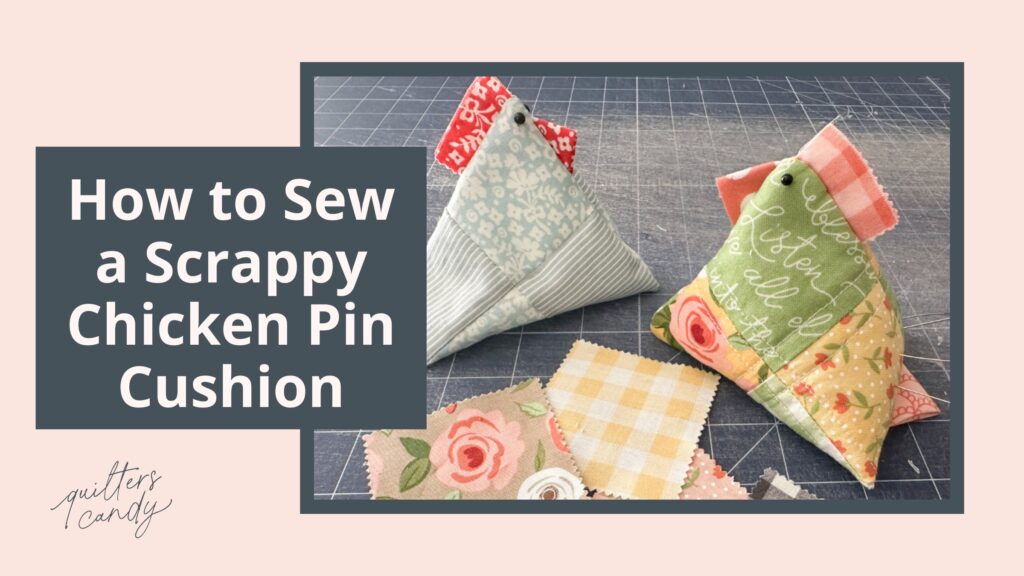
Placement Tip: To avoid matching prints touching in the finished chicken, follow the number placement guide in the tutorial photo (not shown here). Each corresponding number in the left and right blocks will meet in the finished piece (1 to 1, 2 to 2, etc.).

🐔 Time to Assemble:

  1. Sew the Bottom: Place your quilted four-patch blocks right sides together. Sew along the bottom edge, leaving a 1.5” gap in the middle for turning. Backstitch at the start and stop.

  2. Sew the Beak Side: Insert your beak about ¼” down from the top, with the flat edge aligned and the folded point facing inward. Sew along this side.

  3. Sew the Top (Comb Side): Tuck the comb into the top seam with the folded edge lined up with the outer edge and raw edges facing in. Sew along the top.

  4. Sew the Tail Side: Open up the chicken, place the tail inside with the point facing in, and raw edges aligned. Pin and sew along the final edge.

🧷 Finish Your Pin Cushion:

  • Clip the corners.

  • Turn your chicken right side out.

  • Use a funnel (a rolled piece of paper works great!) to fill it with crushed walnut shells. Give it a few shakes to settle the filling into every corner.

  • Hand-sew the bottom opening closed.

  • Add black pins for eyes, and you’re done!

I hope you loved making your Scrappy Happy Hen as much as I loved sharing this springy little project with you! 🌷

Find even more quilting fun at sterlingquiltco.com — including a FREE quilt pattern with a quick and easy video tutorial! I’d love to see your hens, so come hang out with me on Instagram @SterlingQuiltCompany. Happy sewing! 💛

MORE BLOG POSTS LIKE THIS

If you enjoyed this blog post, you will love these tutorials!

Exit mobile version