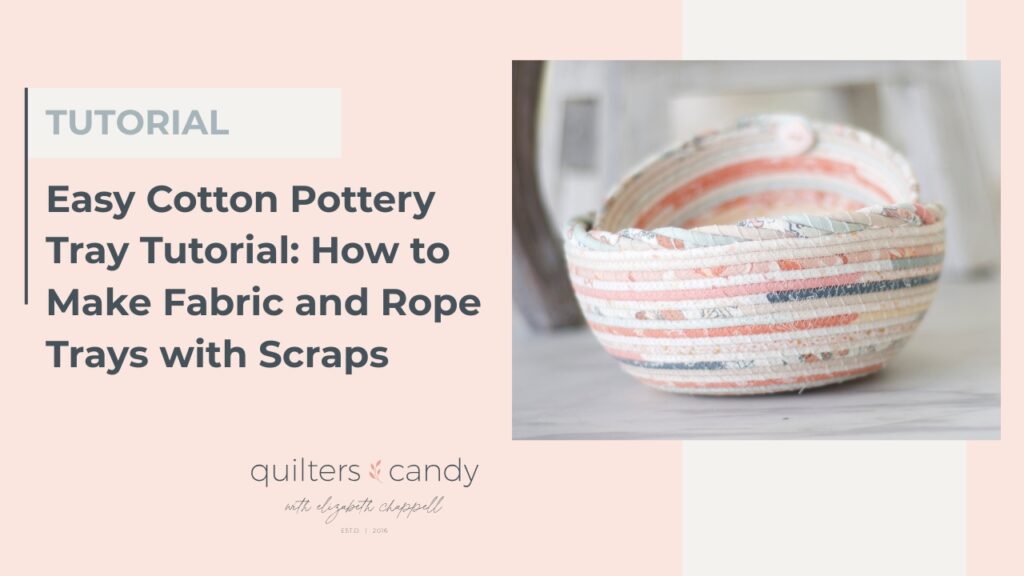
Easy Cotton Pottery Tray Tutorial: How to Make Fabric and Rope Trays with Scraps
Elizabeth Chappell
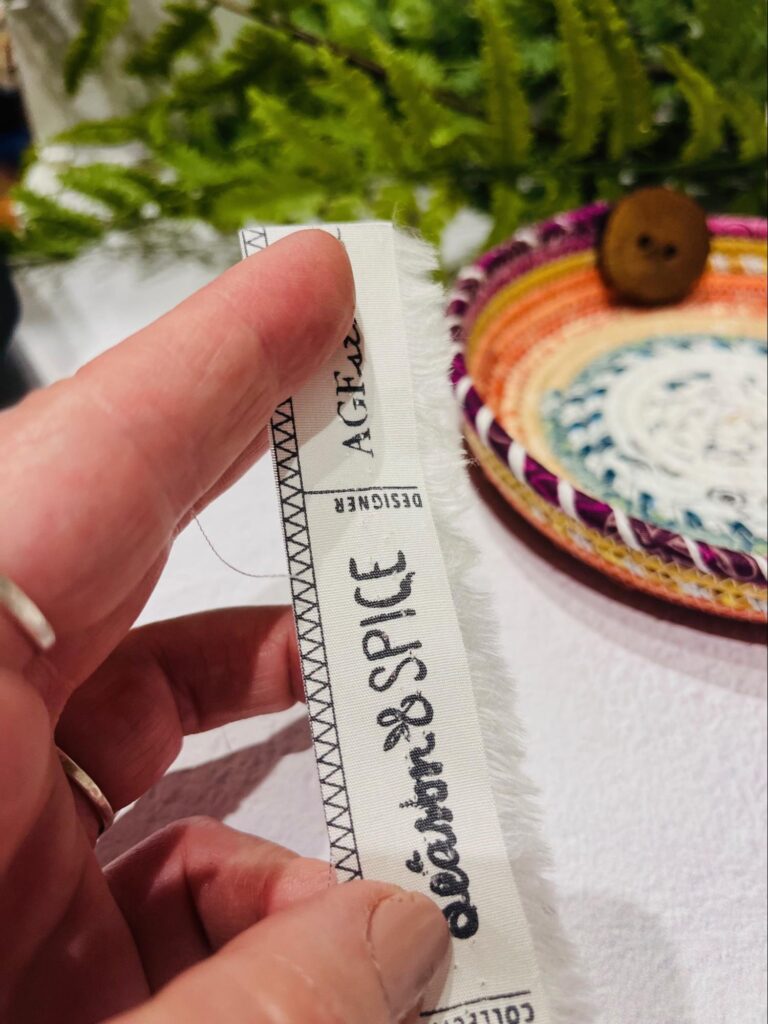
Got fabric scraps piling up? Turn them into something beautiful and functional with this easy Cotton Pottery Tray tutorial! I’m Cindy Hilfiger, a lifelong quilter, pattern designer, and longarm quilter—and when I’m not quilting, you’ll find me creating these colorful fabric-and-rope trays in my cozy barn loft studio. In this step-by-step beginner tutorial, I’ll show you exactly how to make your own Cotton Pottery Tray using fabric scraps, selvages, or fat quarters. It’s a fun, fast, and creative way to use leftover fabric and add a handmade touch to your home décor.
TOOLS AND SUPPLIES
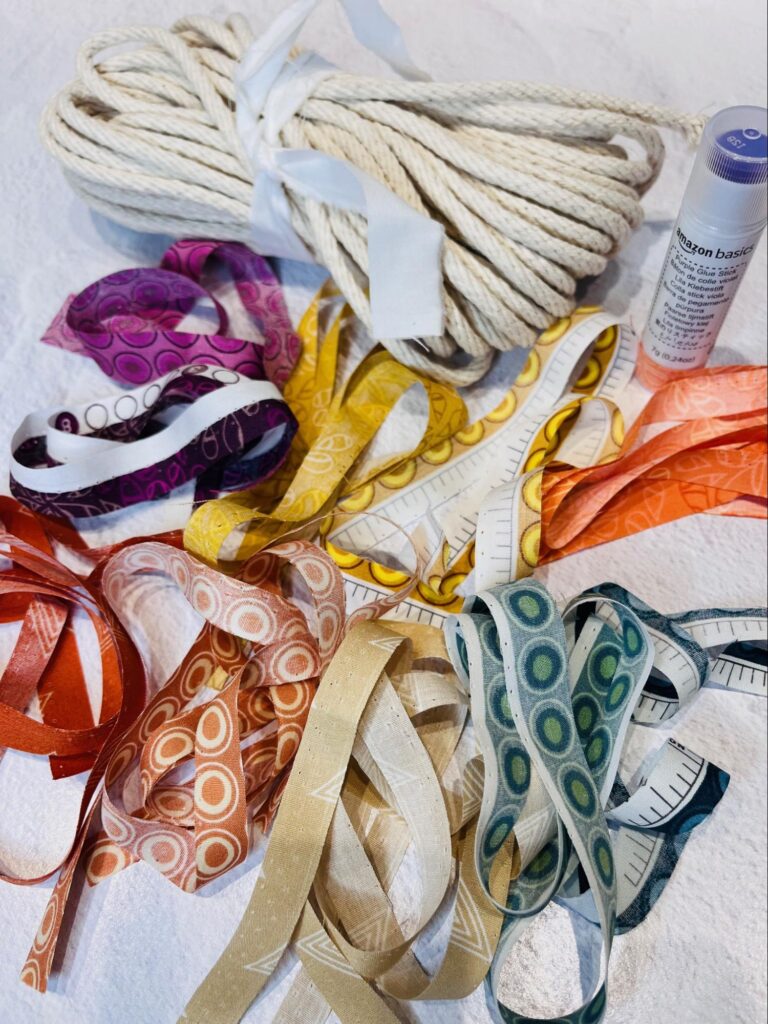
Before you start making your Cotton Pottery Tray, let’s gather everything you’ll need. This beginner-friendly project requires only a few basic sewing tools and materials—most of which you probably already have in your sewing space. Using fabric scraps, cotton rope, and a simple zigzag stitch, you can turn leftover pieces into a beautiful, functional tray in no time.
Here’s what you’ll need:
Fabric Options (cut into ½” wide strips)
Fat Quarters: 16–17 strips, each ½” x 21″
Yardage: 8–9 strips, each ½” x WOF
Scraps: a handful
Selvages: trim off fuzzy edges, then cut into ½” strips
Other Supplies
5 yards of 3/16″ cotton rope
Glue stick (Elmer’s is perfect)
Binding clip or clothespin
Sewing machine with zigzag stitch + open toe foot
Matching thread
Scissors, scrap paper, pins
Note: Fabric amounts vary depending on how tightly you wrap. Keep extra strips handy just in case!
Once you’ve gathered your materials, clear a little workspace and get ready to create—your Cotton Pottery Tray will come together faster than you think!
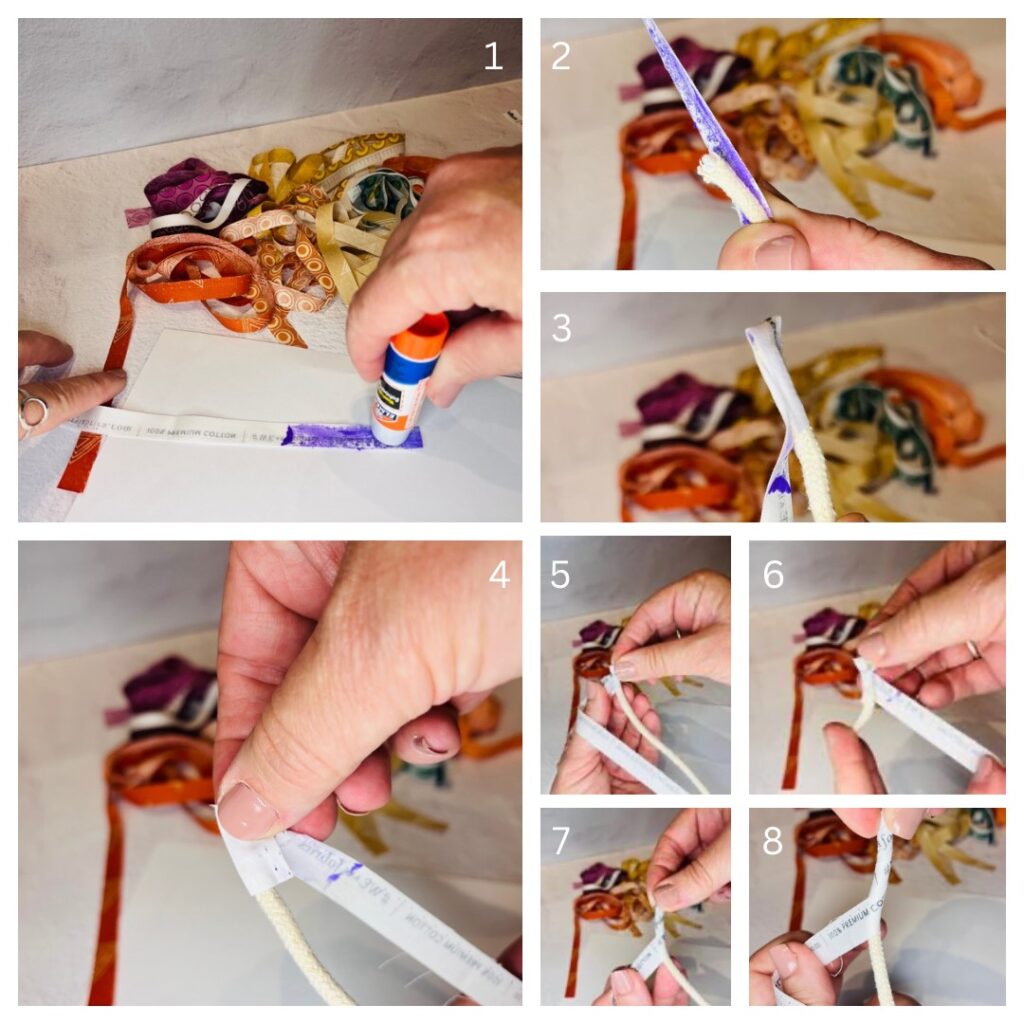
Step 1: Wrap the Rope
To start your Cotton Pottery Tray, you’ll first prepare the rope. This step gives your tray its signature fabric-wrapped look.
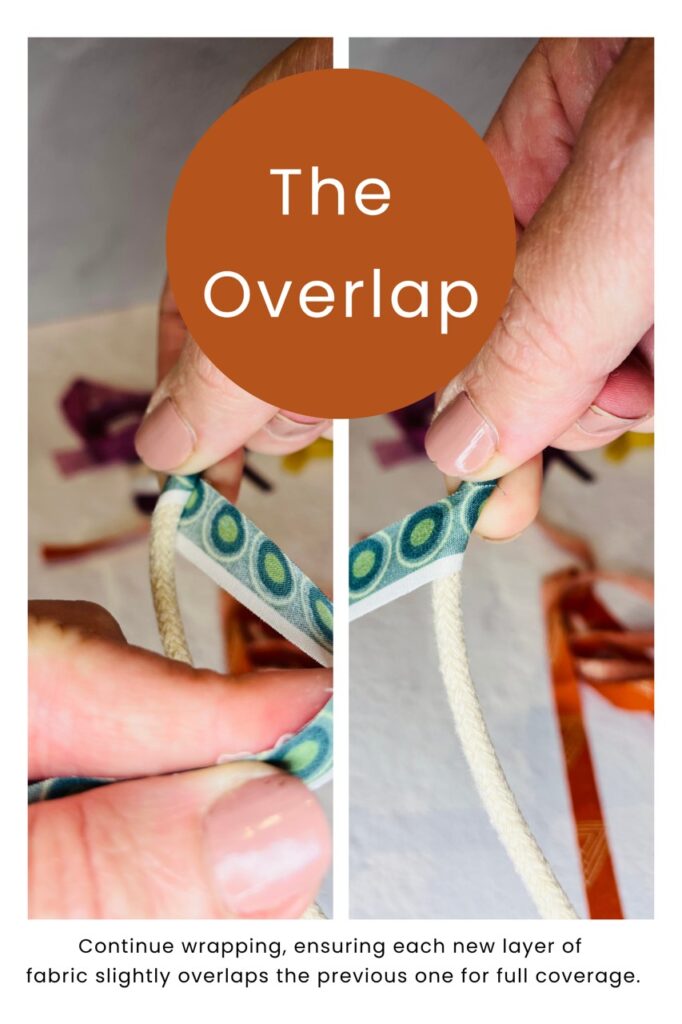
Begin with your first fabric strip and apply glue to about 3″ on the wrong side. Fold the strip over one end of the rope, wrapping the tail around to cover the raw edge. Use a binding clip or clothespin to hold it in place while the glue sets.
Keep wrapping the fabric snugly around the rope, smoothing as you go. Before adding a new strip, glue the last 2″ of the previous one to secure it, then overlap slightly with the next strip for a seamless transition.
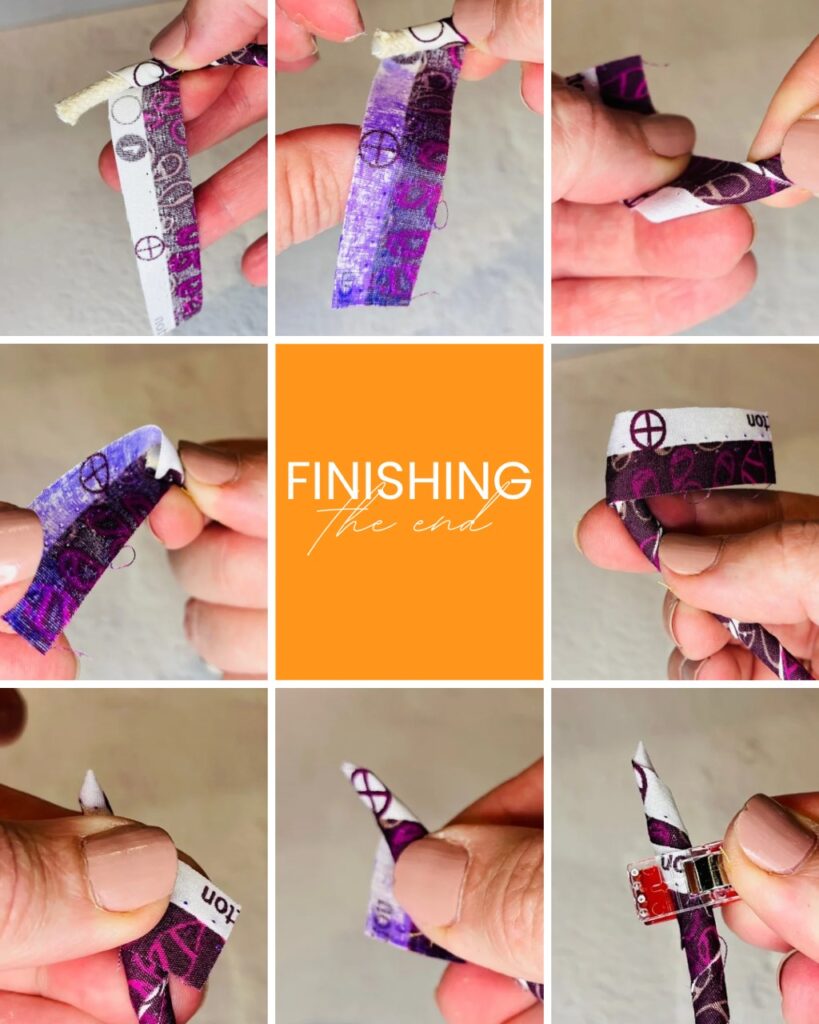
Continue wrapping until all 5 yards of cotton rope are covered in fabric. To finish, taper the final strip by trimming it at an angle and securing it neatly so the end blends in smoothly.
Step 2: Make the Fiddlehead (Center of Your Cotton Pottery Tray)
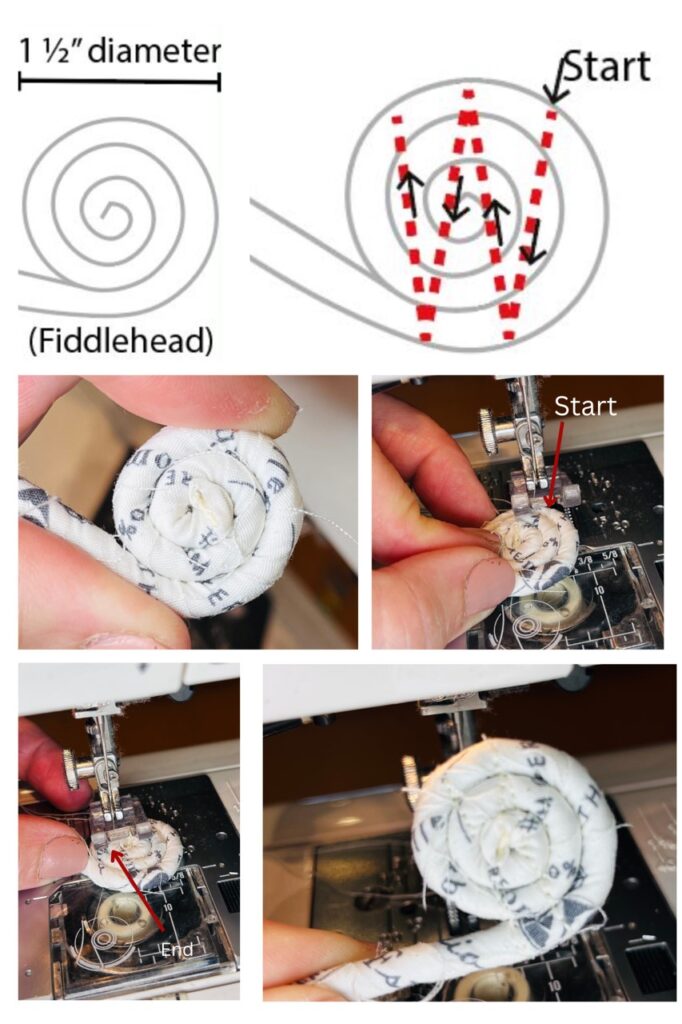
Now it’s time to create the fiddlehead, or the small spiral center that forms the base of your Cotton Pottery Tray.
Start by curling one end of your wrapped rope into a tight, flat spiral about 1″ to 1½” wide. Think of it like the center of a cinnamon roll—smooth and snug, with no gaps. Use clips or pins to hold the spiral in place as you work.
Next, move to your sewing machine and stitch a small “W” shape across the spiral using a straight stitch. This anchors the center securely so it doesn’t shift as you begin coiling and stitching the rest of your tray.
Step 3: Build the Base of Your Cotton Pottery Tray
With your fiddlehead center secure, it’s time to build the base of your Cotton Pottery Tray. Switch your sewing machine to a zigzag stitch—set the width to about 4.0 and the length to around 2.0.
Continue coiling the rope around the center, keeping the edges of each round snug against the last. Stitch as you go, letting the zigzag stitch catch both sides of the rope to connect them neatly. Keep your tray flat as you sew to prevent curling.
When your base measures about 5 inches wide, stop and backstitch to secure the end. This flat circle forms the foundation of your Cotton Pottery Tray, and you’ll start shaping the sides next.
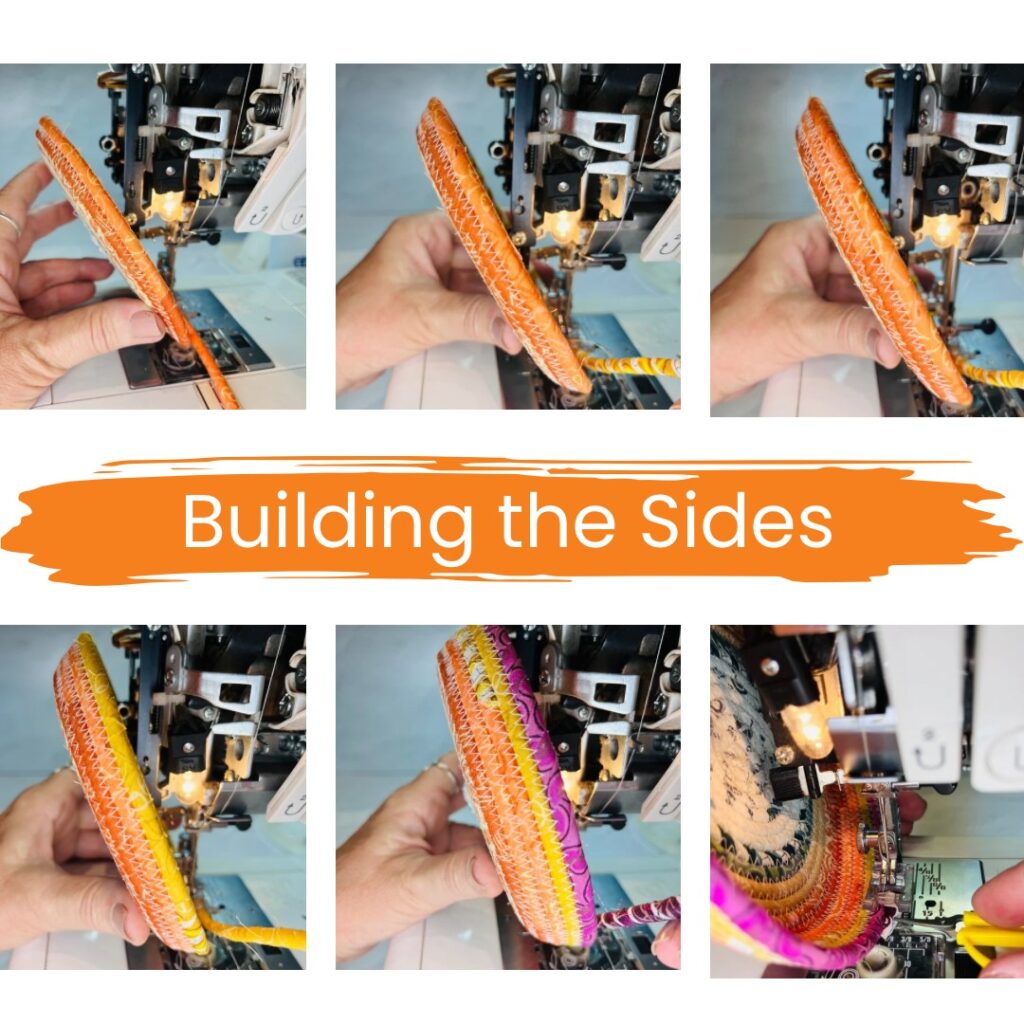
Step 4: Add the Sides to Your Cotton Pottery Tray
Now that your base is complete, it’s time to form the sides of your Cotton Pottery Tray. Gently tilt the flat base upward as you continue coiling and stitching—this creates the angled wall shape that gives your tray its depth.
Keep sewing in this tilted position, using the same zigzag stitch to join the edges as you work your way around. Continue until you reach the end of the rope, then backstitch to secure the final seam.
Tip: When making Cotton Pottery, it’s not necessary to remove the head cap from your sewing machine, but doing so can make it easier to guide the tray under the needle and create a deeper V-shaped bowl—just like the one shown in this tutorial.
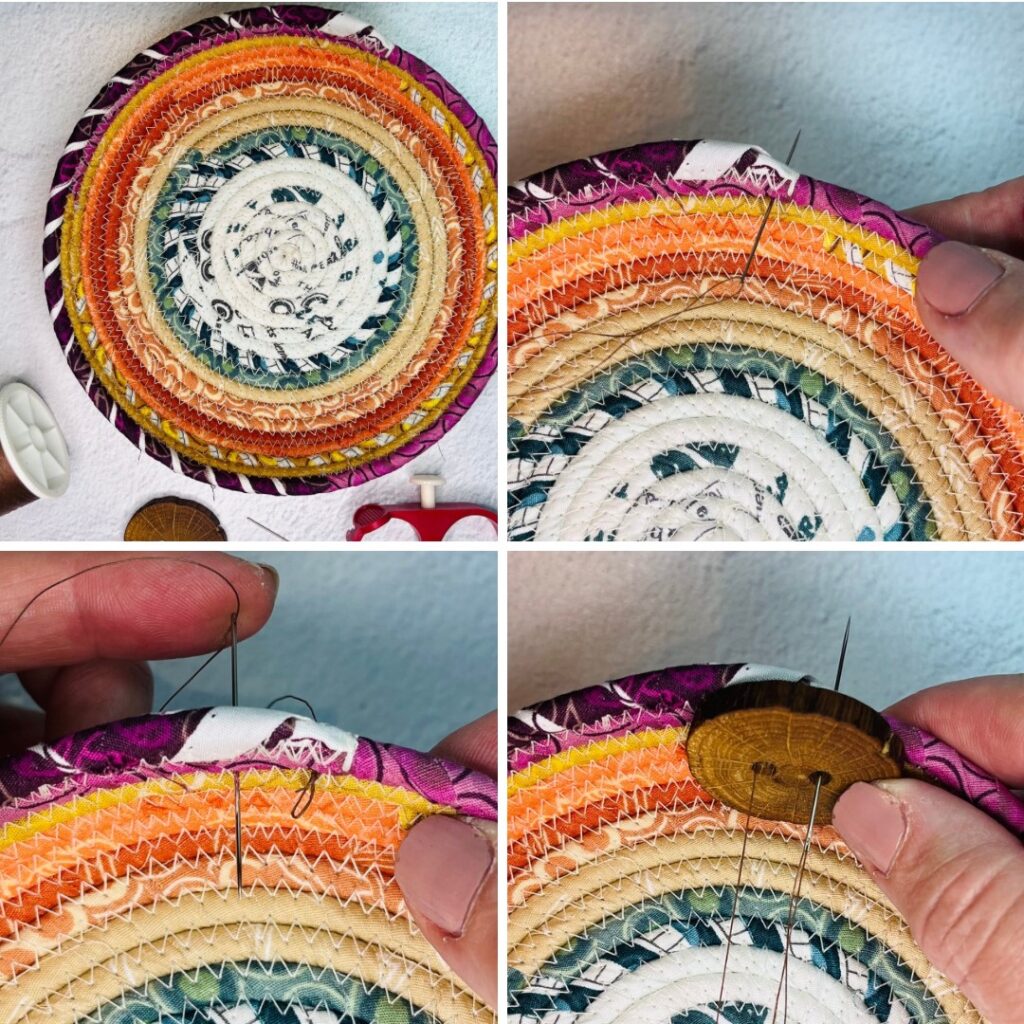
Step 5: Add a Button for a Finishing Touch
(Optional but Adorable!)
For a polished and personalized look, finish your Cotton Pottery Tray by adding a button where the rope ends. Choose a button that complements your fabric colors—it’s a simple detail that makes your handmade tray look extra special.
Hand-sew the button securely through the end of the rope, making sure it sits flat. To keep your project neat, hide any thread tails by weaving them back into the wrapped rope using a hand needle. This small step gives your Cotton Pottery Tray a clean, professional finish.
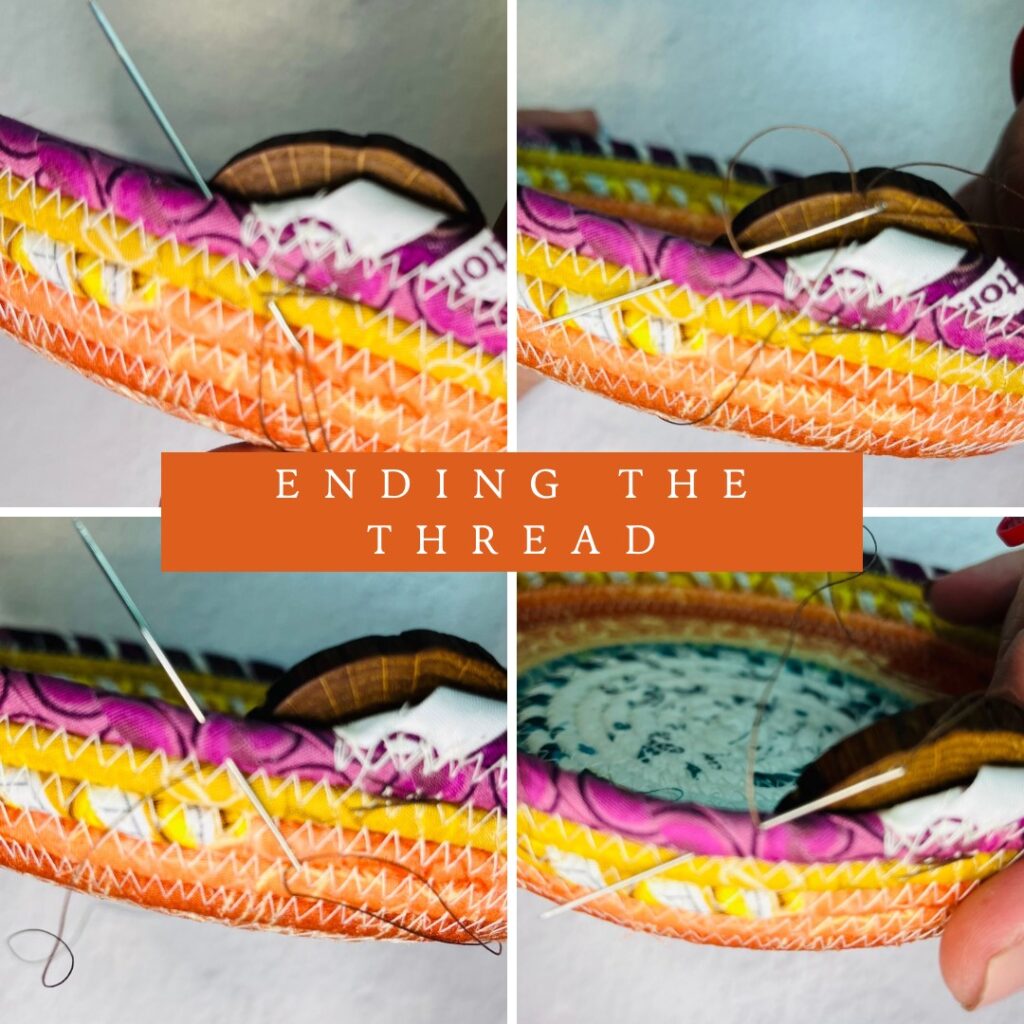
How to Finish Off Your Thread for a Clean Look
To give your Cotton Pottery Tray a professional finish, you’ll want to secure and hide your thread tails neatly.
After sewing on the button, insert your needle right where the thread exits. Slide the needle under the fabric and into the wrapped rope, guiding it through for a short distance. Pull the thread through, then insert the needle back into the rope at the new exit point.
Repeat this process about four times, taking a small stitch between each pass to lock the thread in place. On the final pass, pull the thread snugly and trim it close to the surface. The tail will disappear seamlessly into the rope—leaving your Cotton Pottery project clean, secure, and beautifully finished.
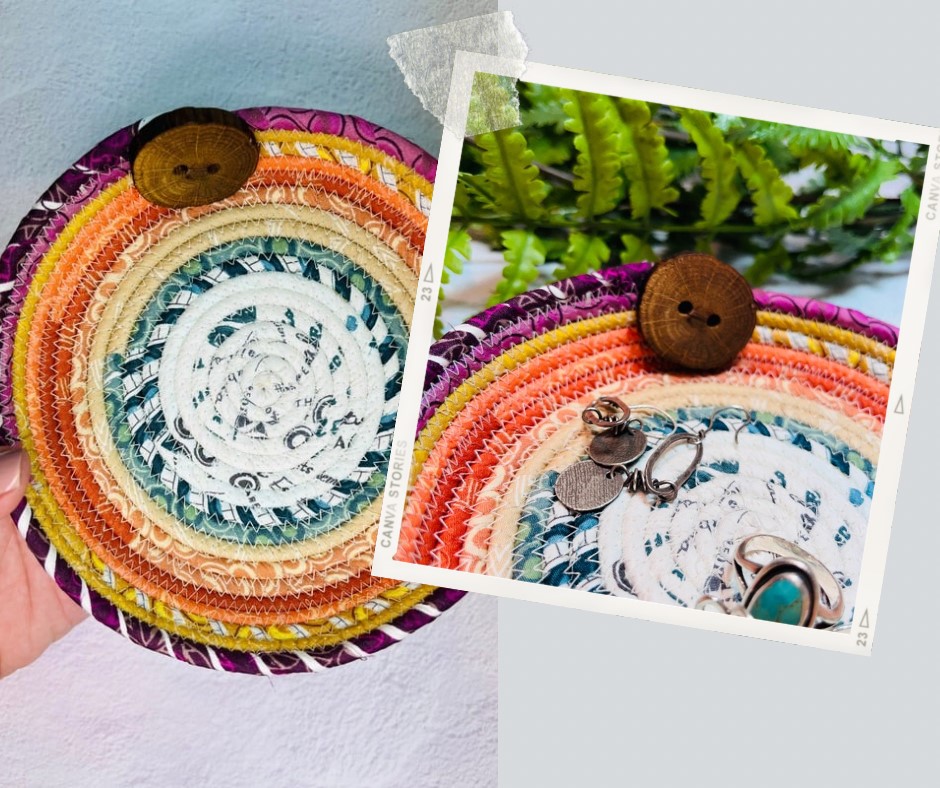
Your Cotton Pottery Tray Is Ready!
Give your new tray a quick trim to remove any stray threads, and just like that—you’ve finished your very own Cotton Pottery Tray! This handmade fabric-and-rope project is as practical as it is pretty, and it’s the perfect way to use up your favorite fabric scraps.
Here are a few fun ways to use your finished tray:
Keep sewing notions handy by your machine
Hold jewelry by the sink or bedside table
Store keys in your entryway
Organize hair ties or makeup in the bathroom
Tidy up your desk with paper clips and sticky notes
Create sweet handmade gifts filled with small goodies
Thank you so much to Elizabeth for inviting me to share this Cotton Pottery Tray tutorial here! If you make one, I’d love to see your creation—tag me @longarm.quilter and use #cottonpotterytray so we can cheer each other on.
And if you’re ready for more creative fun, join my Cotton Pottery Membership—you’ll get a new project and skill each month to keep your creativity flowing.